Localhost joomla administrator index php
Прежде чем мы начнём установку Joomla 2.5 на Денвер, нам нужно создать папку для нашего сайта. Для этого есть два варианта:
Первый вариант — это создать папку в каталоге локального сервера.
C:\WebServers\home
Затем в папке \home нужно создать папку нашего сайта, например ‘joomla’ >> далее в папке ‘joomla’ нужно создать папку ‘www’, в этой папке будут находится файлы сайта. Тем самым, адрес, который мы будем набирать в браузере для доступа к сайту, будет:
http://joomla
Второй вариант — это создать папку в каталоге локального сервера.
C:\WebServers\home\localhost\www
Для этого в папке ‘www’ нужно создать папку для сайта, например ‘joomla’ >> и в эту папку нужно будет распаковать архив с Joomla
При этом адрес который мы будем набирать в браузере будет:
http://localhost/joomla
Лично мне больше нравится второй вариант, но вы можете использовать любой из них, разницы особо нет никакой, это только для удобства.
Итак, давайте создадим папку ‘joomla’ в каталоге:
C:\WebServers\home\localhost\www
и у нас получится
C:\WebServers\home\localhost\www\joomla
Теперь нужно распаковать в эту папку (‘joomla’) архив с Joomla, для этого скачайте Joomla и распакуйте скачанный архив в папку ‘jooma’.
Примечание:
Для удобства Вы можете заходить в папку Вашего сайта через виртуальный диск (Z), который создался при установке Денвера. Более короткий путь в ту же самую папку будет:
Z:\home\localhost\www\joomla
‘joomla’ >> Папка файлов сайта (сюда распаковать архив с Joomla ).
Теперь нужно запустить Denwer (если он не запущен), затем набрать в браузере:
http://localhost/joomla и нажать кнопку ‘Enter’.
В окне браузера откроется страница установки Joomla

На этой странице предлагается выбрать язык установки Joomla, выбираем русский язык и нажимаем кнопку ‘Далее’ в верхнем правом углу, тем самым мы переходим к следующему шагу установки.

На втором шаге установки Joomla проходит проверка на совместимость с сервером, в нашем случае это локальный сервер (Denwer).
Как видно на рисунке проверка прошла успешно и сервер полностью соответствует нашей версии Joomla, поэтому переходим к третьему шагу установки Джумла на локальный сервер, и нажимаем кнопку ‘Далее’.
На третьем шаге нам предлагается согласиться с лицензией GNU/GPL.
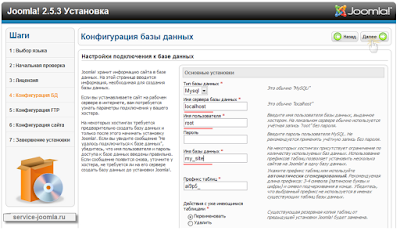
На четвертом шаге мы видим страницу с настройками подключения к базе данных. Так как мы устанавливаем Joomla на Денвер, нам необязательно заранее создавать базу данных и, все что нам нужно сделать, это вести в соответствующие поля формы данные для создания базы данных, это:
Тип базы данных: ‘MySQL’.
Имя сервера базы данных: ‘localhost’.
Имя пользователя: ‘root’ — по умолчанию в конфигурации Денвера уже создан привилегированный пользователь ‘root’ для которого не задан пароль.
Пароль: оставляем это поле пустым.
Имя базы данных: ‘my_site’ можно ввести любое имя базы данных и она будет создана автоматически.
Префикс таблиц: оставляем это поле как есть.
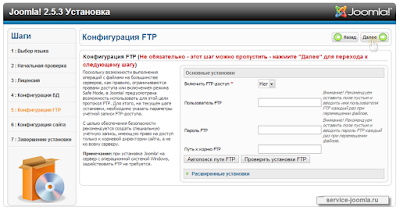
На пятом шаге установки Joomla нам предстоит ввести параметры Конфигурация FTP. Обычно этот пункт всегда пропускается, тем более, что мы устанавливаем Joomla на локальный сервер.
Нажмите на кнопку далее, чтобы пропустить этот шаг.
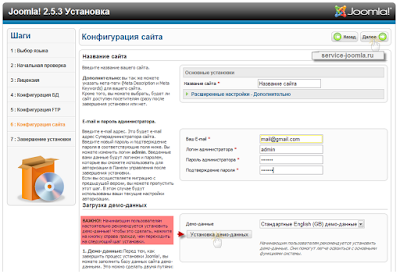
На шестом шаге мы видим страницу, конфигурации сайта, где нужно ввести название и описание будущего сайта.
Здесь каждый заполняет как считает нужным, однако, если вы никогда не работали с Joomla, советую установить демо-данные, с ними вам намного проще будет разобраться с Joomla.
Седьмой шаг завершает установку Joomla и, установка не будет завершена, пока Вы не удалите директорию INSTALLATION, для удаления директории просто нажмите на кнопку удалить. Для входа в администраторскую зону (панель управления) по умолчанию логин admin, если вы его конечно не изменили в ходе установки на шестом шаге.

Для входа в панель управления наберите в Вашем браузере:
Joomla — Installation
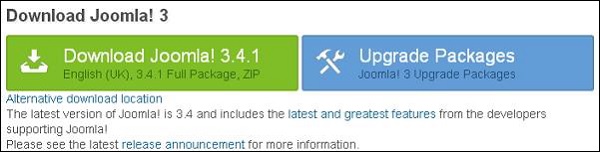
Download the Joomla zip file from the official site or if you want to update the files of your previous version, then click on Upgrade Package option.
Create Store Database
- Joomla requires MySQL database. So create a new empty database and user/password (for e.g. User as «root» and password as «root» or else you can set as per your convenience) for Joomla.
- After following the above step, you can continue with the installation process.
SetUp Wizard
It’s very easy to set up Joomla into your system. The following steps describe how to setup Joomla locally on your system.
Step 1 − Extract the downloaded Joomla folder and upload it on your web server or localhost.
Step 2 − Open your browser and navigate to your Joomla file path, then you will get the first screen of the Joomla installer as shown in the following screen. In our case the path is localhost/ .
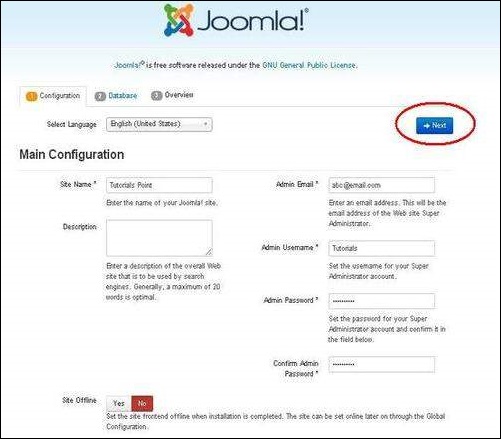
It contains the following fields −
- Site Name − Enter the name of the site which you are going to create in Joomla.
- Description − Add a small description about your site.
- Admin Email − Enter your email address which helps to recover our password or any update.
- Admin Username − Enter the username as per your choice while logging into Joomla.
- Admin Password − Enter password to protect your site.
- Site Offline − It specifies whether your site should be offline or online after completion of installation by clicking on Yes/No.
After filling all the information, click on the Next button.
Step 3 − Here, you have to enter the information about the MYSQL database as seen in the screen below.
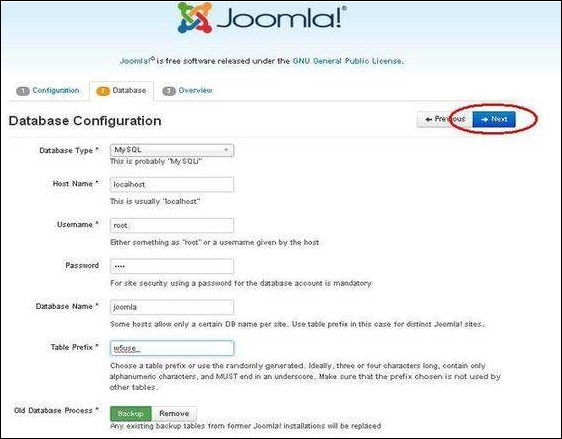
- Database Type − Select your database type. By default it will be MySQLi.
- Host Name − Write the host name by default it will be localhost.
- Username − Enter the user name of your MySQL database.
- Password − Enter the password which you had set for MySQL Database.
- Database Name − Enter the database name which you have created in MySQL database for Joomla.
- Table Prefix − It is used to add prefix in the database tables which helps to run multiple sites on the same database. It takes the default value.
- Old Database Process − It gives two options Backup or Remove. If you had already created a database then you can either remove it or select the backup option to create a backup of your whole database information.
After filling all information, click on Next button.
Step 4 − In this step, you will be on last page of the installation process.
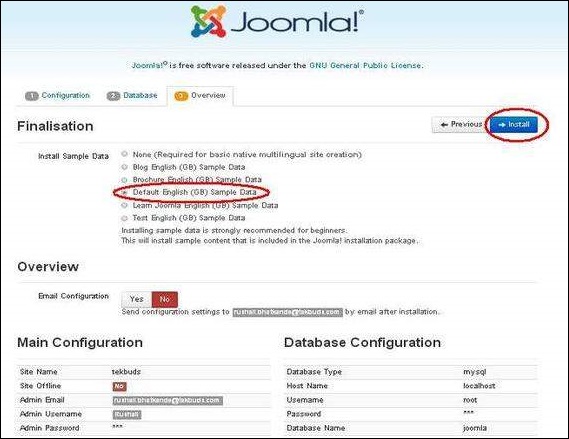
Here you can view all the information added to Joomla.
Choose Default English (GB) Sample Data as an example to build your website and click on Install button.
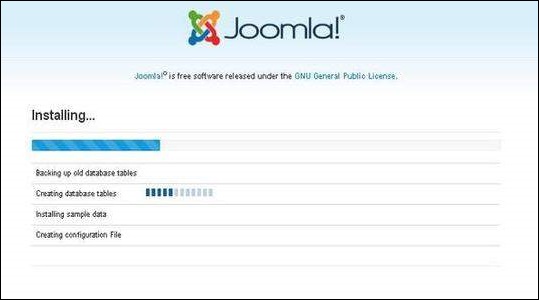
Step 5 − Next, you can see that Joomla starts the installation process on your machine.
Step 6 − After a few minutes, after installation is successful and you will get a screen of the Joomla web installer as shown below.
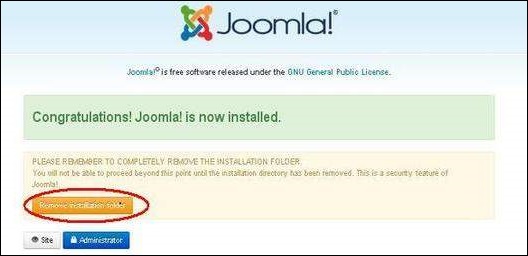
Next, click on the «Remove installation folder» button which will help you to protect your site, so that no other person can re-install your site.
Note − If your installation gets stuck and does not get completed for more than an hour, then do some changes as shown below.
Go to Joomla folder → installation → sql folder → mysql folder Open joomla.sql file and find the following term: «ENGINE = InnoDB». Replace this term with «ENGINE = MyIsam» and save the file.
Before MySQL 5.5.5, MyISAM is the default storage engine. (The default was changed to InnoDB in MySQL 5.5.5.)
Then your installation will begin.
Admin Panel
After installing Joomla you are able to login to your Joomla Admin Panel as described below −
Step 1 − To access Joomla administrative panel, open the browser and type the URL as http://localhost/ < Your_joomla_folder >/administrator/index.php, then you will get the screen as shown below −
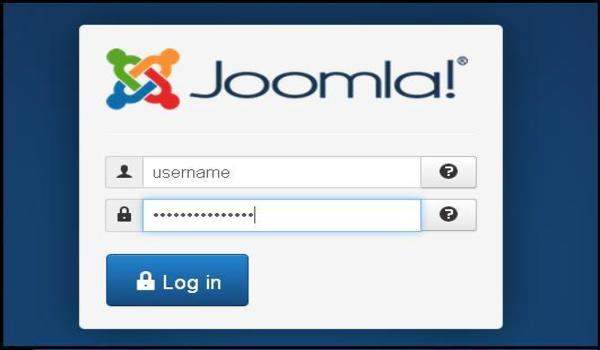
Step 2 − Enter the username and password which you had mentioned during installation as shown in the step 3 of Set Up Wizard section and click on the login button.