Like button HTML
Lyket can be easily embedded on any website or app by using a simple HTML + Javascript snippet.
Just by adding a few lines of code you will see beautiful like, clap or like/dislike buttons! Something like this:
This is very powerful because it works, not only in a HTML website, but also on any platform or framework that supports custom HTML/Javascript injections, like WordPress, Webflow, Notion and more!
We have more framework-specific guides for:
How the like buttons work in HTML
First, an introduction on what happens when you add the Javascript snippet and the HTML tag containing the like button’s attributes, and how you can get the best out of Lyket. If you prefer to see a few examples on how to integrate our HTML like buttons in your website, simply scroll down.
All Lyket like buttons share these basic behaviors and features:
- As soon as your page is loaded, a request is made to retrieve info on the button that identifies with the combination of the «data-lyket-id», «data-lyket-namespace» and «data-lyket-type» that you provided. If no button is found, a new one will be created using that type/namespace/ID identifier.
- Every time a user interacts with your button, the button counter will update and Lyket will flag that that user has voted. To do that, Lyket uses a unique random ID associated with the user’s browser. This makes possible to recognise a user with no need to signup or to use any third party service. To disable the session ID, and therefore use only the IP address to identify a user, set the disableSessionId prop to true in the Provider component.
- Lyket enforces a maximum number of browser sessions IDs per IP address, to avoid receiving too many requests or DDoS attacks. The default is 3 sessions per IP. You can change this number by logging into your private area and edit the user settings.
- In the user settings you can also specify from which domains Lyket should accept requests using your personal public API key. If left empty Lyket will accept requests coming from all domains.
How to add like buttons to your HTML site or website builder
Adding Lyket like buttons is really simple, but you have to have a basic knowledge of HTML to do that. In your HTML or your site builder (WordPress, Webflow or else) add the script you find below in the or in the , then start creating buttons just by adding a element with a data-lyket-type and data-lyket-id.
If you are using a site builder, look on the documentation for how to add a custom HTML block and use the same HTML code to create a button.
Important: Lyket needs to verify your identity when creating and storing button counters. To do that it requires that you provide in a top-level script an unique alpha-numeric value, the public API key, that you can get by registering to Lyket.
Replace «[YOUR-API-KEY]» in the code with your personal public API key.
Optional parameters
You can provide additional parameters to the script:
- disableSessionId — If added to the script, Lyket WON’T store a unique browser session ID for your visitors making them anonymous. Lyket will then discriminate visitors (to tell if they already liked a button or not) only based on the IP address. Disabling the session ID can be useful if you don’t want Lyket to result in your cookie detection software.
All Lyket’s HTML like buttons
There are four different button types that have their own behaviours and properties. Each one of them can be used indifferent contexts and to achieve different results!
Like button in HTML
Like buttons behave like Twitter buttons. Users can only like once, and a subsequent call from the same user will remove the user’s like.
Use the data-lyket-type=»like» to create a like button.
Like or dislike html
Learn Latest Tutorials


Preparation


Trending Technologies


B.Tech / MCA


Javatpoint Services
JavaTpoint offers too many high quality services. Mail us on h[email protected], to get more information about given services.
- Website Designing
- Website Development
- Java Development
- PHP Development
- WordPress
- Graphic Designing
- Logo
- Digital Marketing
- On Page and Off Page SEO
- PPC
- Content Development
- Corporate Training
- Classroom and Online Training
- Data Entry
Training For College Campus
JavaTpoint offers college campus training on Core Java, Advance Java, .Net, Android, Hadoop, PHP, Web Technology and Python. Please mail your requirement at [email protected].
Duration: 1 week to 2 week
Like/Subscribe us for latest updates or newsletter 


Create Like Button Animation using HTML and CSS
Hello Coder! Welcome to the Codewithrandom Blog. In this article, We create a Like Button Animation using HTML and CSS. We create an animation when we click on the like button and give a like animation in a heart shape.
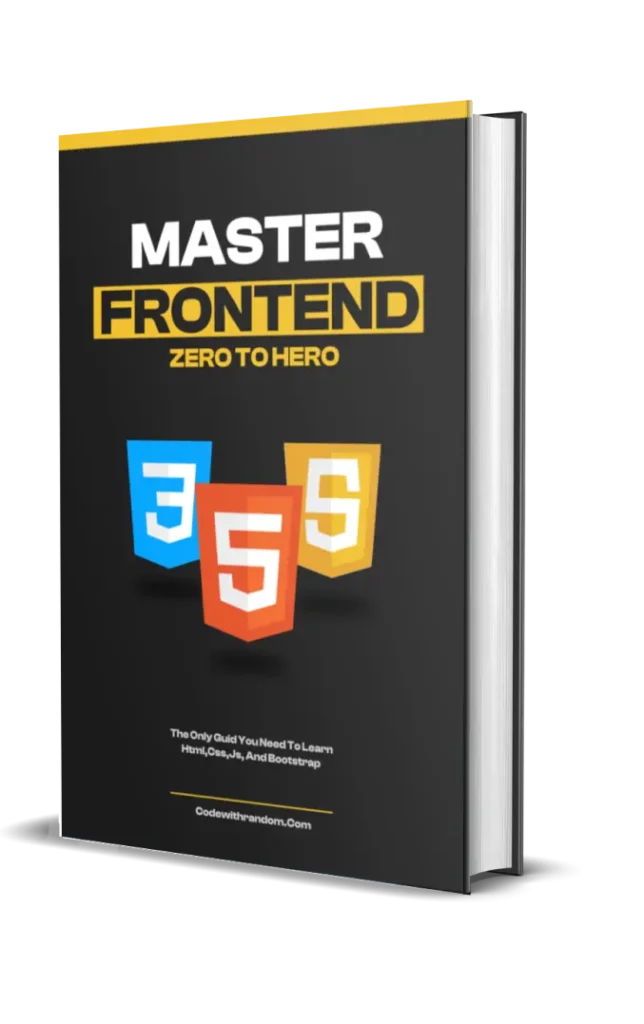
Do you want to learn HTML to JavaScript? 🔥
If yes, then here is our Master Frontend: Zero to Hero eBook! 📚 In this eBook, you’ll learn complete HTML, CSS, Bootstrap, and JavaScript from beginner to advance level. 💪 It includes 450 Projects with source code.
This is very small code for creating a Like button. We create a div with the class button. Then we create a checkbox with help of an input tag.
So that’s it for only Html coding, you can below👇 output with Html Coding.
Html Output

Let’s Write Css Code For Styling Like button and add animation in like button.
Css Code For Like Button
/*#ff3c41*/ /*#444857*/ :root < --u: 1.5vmin; --clr: #777; --bg: #444857; >body < margin: 0; width: 100vw; height: 100vh; overflow: hidden; display: flex; align-items: center; justify-content: center; background-color: #131417; background-image: linear-gradient(315deg, #131417 0%, #1e1f26 74%); >.button < position: relative; width: calc(var(--u) * 10); height: calc(var(--u) * 10); >input < display: none; >label < background: var(--bg); width: 100%; height: 100%; position: absolute; border-radius: calc(var(--u) * 1.5); cursor: pointer; display: flex; align-items: center; justify-content: center; >label:before < content: "49"; position: absolute; min-width: 50%; left: 25%; text-align: center; top: 0; bottom: 0; background: var(--bg); border-radius: calc(var(--u) * 2); font-size: calc(var(--u) * 2); font-family: Arial, Helvetica, serif; padding: calc(var(--u) * 0.5); box-sizing: border-box; color: var(--clr); line-height: calc(var(--u) * 2.25); z-index: -1; transition: all 0.5s ease 0s; animation: counter-bot 1s ease 0s; >input:checked + label:before < content: "50"; color: #fff; background: #ff3c41; bottom: inherit; transition: all 0.5s ease 0s; animation: counter-top 1s ease 0s; >@keyframes counter-top < 70% < top: calc(var(--u) * -4.75); >> @keyframes counter-bot < 70% < top: inherit; bottom: calc(var(--u) * -5); >> label:after < content: ""; width: calc(var(--u) * 8); height: calc(var(--u) * 8); position: absolute; border-radius: 100%; box-sizing: border-box; z-index: -2; animation: disc-gray 1s ease 0s, spin-gray 0.65s ease-in-out 0.25s; transform: rotate(0deg); --pos: 95%; background: radial-gradient(circle at 50% 50%, #fff0 0 62%, var(--bg) 63% 65%, #fff0 66% 100%), radial-gradient(circle at 50% var(--pos), var(--bg) 0 4%, #fff0 4.5% 100%); >@keyframes spin-gray < 100% < transform: rotate(-360deg); >> @keyframes spin-red < 100% < transform: rotate(360deg); >> @keyframes disc-gray < 70% < width: calc(var(--u) * 19); height: calc(var(--u) * 19); >> @keyframes disc-red < 70% < width: calc(var(--u) * 19); height: calc(var(--u) * 19); >> input:checked + label:after < --bg: #ff3c41; --pos: 5%; animation: disc-red 1s ease 0s, spin-red 0.65s ease-in-out 0.25s; >label span < position: absolute; width: 100%; height: 100%; animation: dislike 0.5s ease 0s; >/* label span:before < content: ""; width: 2px; height: 2px; position: absolute; border-radius: calc(var(--u) * 5); transform: translate(calc(var(--u) * 2.235), calc(var(--u) * 4.5)); border: calc(var(--u) * 2.71) solid transparent; border-top: calc(var(--u) * 2.9) solid var(--clr); >label span:after < content: ""; background: radial-gradient(circle at 40% 45%, var(--clr) 0 calc(var(--u) * 1.25), #fff0 calc(var(--u) * 1.325) 100%), radial-gradient(circle at 60% 45%, var(--clr) 0 calc(var(--u) * 1.25), #fff0 calc(var(--u) * 1.325) 100%); width: 100%; height: 100%; position: absolute; >*/ label span:before < content: ""; position: absolute; border-radius: 0.25vmin; border: 3.6vmin solid #fff0; border-top: 4vmin solid var(--clr); margin-top: 7.65vmin; margin-left: 4vmin; >label span:after < content: ""; position: absolute; background: var(--clr); width: 5vmin; height: 5vmin; border-radius: 100%; margin-left: 3.35vmin; margin-top: 3.5vmin; box-shadow: 3.5vmin 0 0 0 var(--clr); >input:checked + label span < --clr: #ff3c41; animation: like 0.5s ease 0s; >@keyframes like < 75% < transform: scale(1.25); >> @keyframes dislike < 75% < transform: scale(0.75); >> .button:hover label span:before, .button:hover label span:after < --clr: #9d4958; >.button:hover input:checked + label span:before, .button:hover input:checked + label span:after
We Write Css Code for the liking button. We use variables in Css coding in the root tag. Then styling body tag with basic Css tag. Then style button with Css calc function.
Then styling label because all depends on lable we use before tag and checked tag so when we use click on the button means we checked on input hope you get it.
Then we use animation with a Css keyframe tag. Then we use lable after tag also because of what happened after clicking on a label, so before and after working similar javascript function type.
Then we create more animation in our like button using Html Css.
Below👇 you can see some screenshots of our project and a video preview is also available.
Like button and Dislike button using jQuery, HTML and PHP

In this web development tutorial, you will learn how to develop a like button and dislike button using jQuery, HTML and PHP. You can also create a single button for like/dislike and even use two separate button’s for each functionality. Before developing you must download jQuery Library or use CDN files.
Steps to create Like button and Dislike button

In this tutorial I am using XAMPP and then created folder with name “like” inside htdocs folder. You can change and edit code according to your requirement.
Create a file index.php inside your root directory and then follow the steps below
Creating HTML Buttons
Copy and paste above code in your file that you create then save it. I have assign id to both like and dislike button.
Adding jQuery Library
Add above script tag below HTML buttons and then save your file again.
Creating Like Functionality using jQuery and PHP
Add above code below jQuery library and then save your file. In above code, we use click event for triggering like button. When user click like button, it first check if button has class “liked” or not. If button has class “liked” then function will first remove “liked” class from button then post userid, postid and like parameter with value 0. When parameter’s are post then in callback if response is equal to 1 then it shows success message otherwise error will show. User like will remove.
If button does not have “liked” class then function first add class “liked” in button. After that function will post userid, postid and like parameter with value 1. When parameter’s are post then in callback if response is equal to 1 then it shows success message otherwise error will show. User like added.
Add and remove like from database using PHP
Copy and Paste above code before button tags. When you click button then for remove like from database, function post parameter like which is set to 0. So, in php first we check if like parameter is post then check like value. If value is equal to 0 then we echo 1, here add your delete query for removing like. Similarly if value is equal to 1 then first it will check if any dislike insert in database and then remove dislike and add like.
Whole above PHP and jQuery code is for like button. If you need only single like button then do not follow below steps.
Creating Dislike functionality using jQuery and PHP
Dislike functionality is all similar to like button only you need to change parameter name “like” to “dislike” and click event id. Copy and Paste Below code after like button jQuery function as shown below
Similarly for php copy and paste below code after like button php as shown below
else < //Removing DisLike Mysql Query //Adding Like Mysql Query will be here if error then echo 0 otherwise echo 1; echo 1; >die(); > if(isset($_POST['dislike'])) < $dislike = $_POST['dislike']; //Removing Like if($dislike == 0) < //Delete DisLike Mysql Query will be here if error then echo 0 otherwise echo 1; echo 1; >else < //Removing Like Mysql Query //Adding DisLike Mysql Query will be here if error then echo 0 otherwise echo 1; echo 1; >die(); > ?>
Database Table Structure
We will use one table for both like and dislike values. Columns in database are as shown below
- Id (Auto Increment Unique Id)
- UserId (User Id for providing unique likes and dislikes)
- Post Id
- Like
- Dislike
When user click like button then Insert query will work and save userid, postid, like and dislike also. In first insert query like will be 1 and dislike will be 0. When you want to remove like then delete whole row.
If user has dislike first and then click on like button then again delete whole row and insert again. For dislike insert query dislike will be 1 and like will be 0.
For any type question and queries Download my official app or comment down below