I modified your Code into the following example: Solution 2: I would suggest using div instead of img tag. something like that might work for you: Solution 3: Yes, for img tag use a background: linear-gradient on a parent div, that worked for me: Solution 1: You can’t use the gradient and background image at the same time on the same element, since both are a . Solution 1: You can add a pseudo-element with CSS that overlays the images and get shown on hover/focus which also has the gradient effect on it.
How to add gradient overlay to the <img> element with css?
You can add a pseudo-element with CSS that overlays the images and get shown on hover/focus which also has the gradient effect on it.
Background image with gradient overlay in CSS, Background images with overlay are very common UI feature. It will be seen more on Hero, Cards components. There are several ways to achieve
How to add CSS Gradient Color Overlay on an Image background
Learn how to add a css gradient color overlay on an image background using background Duration: 6:57
How to add gradient overlays to your images with CSS
Learn how to add a gradient overlay to your images to create a nice modern effect. Duration: 2:10
Tailwind Tutorial | How to Handle Background Images, Gradients
In this Tailwind tutorial, we will look at how you can use Tailwind CSS utility classes to handle Duration: 10:24
How can I add a transparent to black gradient over a div / image?
You can’t use the gradient and background image at the same time on the same element, since both are a background-image . But you can assign the gradient to a pseudo element of .bItem , so you won’t have to include an additional element for it. Also, you can just use transparent and black instead of rgba()
TITLE
Additional text here.
Do not apply the gradient to the anchor tag. Create another class to apply the linear gradient to the background container with one line as such:
This will allow the gradient to be applied only to the background image while allowing the text to remain unaffected. You may then style the text and anchor tags independently.
An anchor tag is inline. You can only apply a background to a block. So you can change the display type to «block.» This might cause other problems, but start there.
CSS | Combine background image with gradient overlay, CSS gradients allow us to display smooth transitions between two or more colours. They can be added on top of the background image by simply
CSS — gradient over a cover image?
Use rgba with transparency and double background-image .
Header Content
Section Content
You can define multiple backgrounds and then set background-blend-mode to multiply . Something like this
Header Content
Section Content
You could put an overlay on the :before or :after elements
CSS Masking — The mask-image Property, With CSS masking you create a mask layer to place over an element to partially or fully hide portions of the element.
CSS: background image with gradient «overlay»
It is better to set the different properties one by one, it’s easier to check what you are doing.
And the order is the opposite, the elelemnt that you want to overlay must be the first background-image
The first background-size is the one of the gradient, and the second one (30 px) is the size of the repeating pattern. You can adjust it to whatever you want.
What if you were to have multiple background images. The bottom background image is your repeating pattern, the top is a transparent PNG (PNG-24) with a pre-rendered overlay. This would fade from black 100% to black 0% in the center.
This would mean that you have more control over the gradient, as well as it being slightly less dependent on CSS support. To further increase your browser compatibility, you could have two elements stacked on each other rather than depending on CSS multiple backgrounds, ie:
Repeating-linear-gradient() — CSS: Cascading Style Sheets, 6 days ago · The repeating-linear-gradient() CSS function creates an image consisting of repeating linear gradients. It is similar to linear-gradient()
CSS Image Overlay Two ways to create an image with a colour overlay in CSS
Using an image with a dark overlay is one of the quickest ways to make a beautiful hero header for a blog, landing page or portfolio. It’s a trick I use constantly.
Why should you add an overlay to your image?
An overlay on an image not only improves aesthetics but it makes text much more readable. Consider this hero header I’ve mocked up. It’s not great, is it? The text here is readable. But only just, and it’s because I’ve used H1 and H2 headers. Yet, it’s not very accessible for people with reduced vision, and it’s also really busy to look at. Overlays vastly improve readability, along with making your design much more sleek. In this post, I’ll be showing you a couple of ways to code them up. There are, of course, many ways you can get to your end goal here. These are the two methods I find easiest to remember. Which method you choose will depends on the purpose of the image. If you’re only after a pretty background, you can go about this any way you like. Alternatively, if your image isn’t just decorative and you want people to notice it, you should use an image tag with an alt description for accessibility.
Using an image tag and a section background.
Again, this is your best option if your image isn’t just decorative. This might not be in a header; it might be in an image aside or as part of an article. First, place an img tag in a section.
Ellen Macpherson
Just another tech blog.
I’ve purposely avoided a div here. If you’re creating a header, make sure you’re using semantic HTML to define it as such. This will help with both accessibility and SEO considerations. For more on why you should use semantic HTML elements, see this helpful blog post. Now for the CSS. Make sure the image fills the header, either by using height: 100%, width: 100%, or by using object-fit: cover. Set the background to your desired colour. In this case, i’ve just kept it black, but you could also make clever use of a linear gradient to really make things pop (see the next section for details). Set the opacity of the image somewhere between 0.3 — 0.5.
And viola! You’ve got a much nicer looking background that draws the eye immediately to the text and call-to-action button. Pros: Allows you to set alt text for the image. Browser-friendly. Cons: Involves more HTML and styling than other methods.
Using a linear gradient
This is my preferred method. There’s less styling and thinking involved around the layout. Often, you won’t be using these images for descriptive purposes, so it seems more intuitive to handle the background in CSS. In this case, you don’t need to reference the image in the HTML at all, so the code only involves the header (or whichever tag you want to style) and any text or buttons on top:
Ellen Macpherson
Just another tech blog.
Remember, you can’t set alt tags without HTML, so make sure the image you’re using is purely decorative. Although CSS linear gradients is well-supported now, I’m going to use a fallback colour along with the webkit prefix to make sure I cover all browser possibilities. This also gives you a fallback if, for any reason, the background image is slow to load. Remember the C in CSS; everything cascades. Therefore, your foolproof fallback colour and alternative webkit prefixed styles should always come before the least-supported solution. In this case, that’s linear-gradient().
Here we are with a more colourful interpretation of an overlay: In this example, I’ve used the RGBA colour format to make the gradient transparent and set the opacity to 0.8 for a bold finish. However, colour gradients will never look the same on different images. Play around with the opacity to make sure it works well with your design. For more impact, make the image underneath grayscale and alter its contrast. Pros: Uses fewer lines of code. Easier to implement. Cons: Issues around browser support mean you’ll have to remember to set a fallback image or colour for your background. That’s it! If you have any other great ways to implement an overlay, let me know in the comments. Let me know your favourite gradients, too 👇
Creating a Layered Image Effect using HTML and CSS Tutorial
This tutorial will help you to learn how to Create a Layered Image Effect using HTML and CSS. The purpose of this tutorial is to provide the students and beginners with a reference to enhance their knowledge and skills in terms of developing a website with a creative user interface. Here, snippets and scripts of a sample web page that demonstrate the said 3D effect of an image are provided. I have also provided the complete source code files that I created for this tutorial.
What is Layered Image Effect?
A Layered Image Effect is a type of three-dimensional (3D) effect in a website of the web application. It is composed of multiple image layers of the same image which has different CSS designs such as opacity/transparency and position.
How to create a Layered Image Effect?
The Layered Image Effect is not that complicated or hard to create using HTML and CSS. Using the available pseudo-elements and properties of CSS, we can easily achieve this kind of 3D effect.
Here’s the list of HTML elements, CSS pseudo-elements, and properties that are useful to achieve the Layered Image Effect:
HTML DIV Element
HTML Image Element
CSS Hover pseudo-element::hover
CSS nth-child selector:nth-child(n)
CSS Transform property[value: matrix/matrix3D]
CSS Opacity property
CSS Rotate property
CSS Transition property
and some other common CSS properties
Steps of Creating a Layered Image Effect
Here are the steps that you must follow for creating the Layered Image Effect.
Create the Image container and add the multiple image tag with the same image in it.
Customize the design of the images and hide the other layers by default
Add the Layered Images Effect styles using the :hover selector.
Example
Here are the scripts that demonstrate the layered image effect in a simple web page
Interface
The below script is the HTML code that contains the image container and layers.
Here’s the default custom stylesheet of the web page.
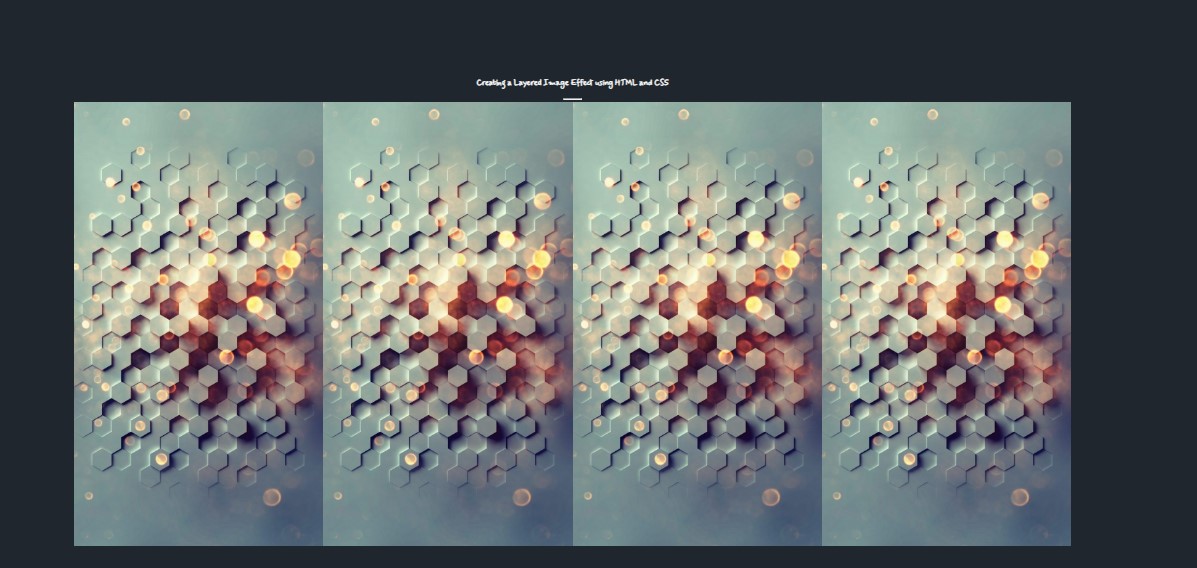
Using only the script above will result in something like the following image:
Customize the Images Layers
Next, let’s customize the design or the style of the image on how it looks by default. Also, we’ll hide the other layers.
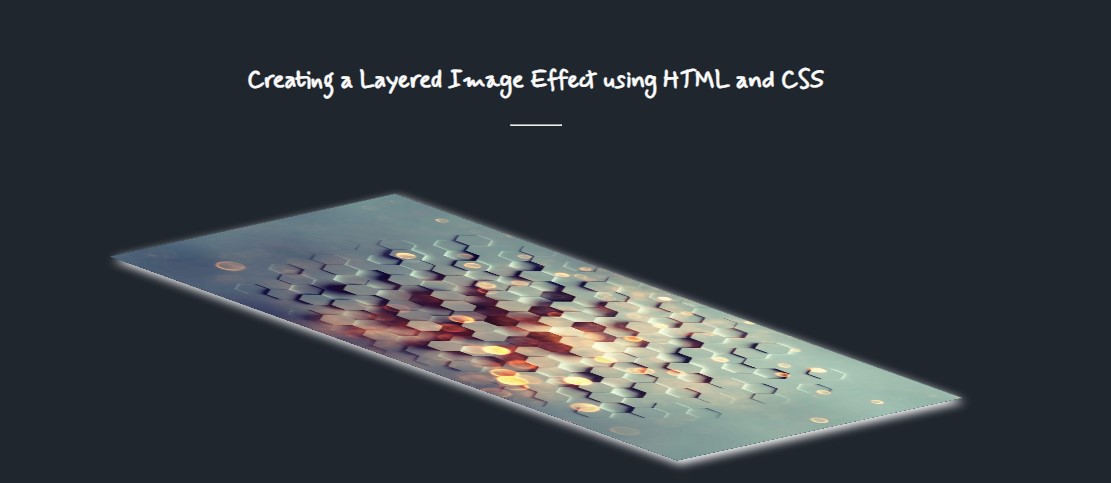
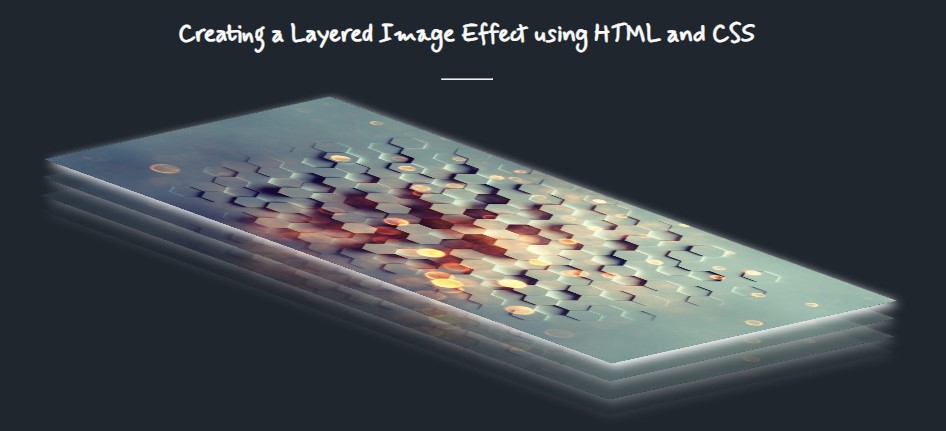
Add the Layered Image Effect
Then, let’s add the styles for the design transition of the 3D effect we wanted to achieve which is the layered image effect.
There you go! You can now browse the script on your end to your preferred browser and check if it works and achieve the requirement that we wanted to achieve. The 3D effect will be only triggered when you hover over the image container.
I have also provided the complete source code zip file that I created for this tutorial on this site. It is free to download. The download button is located below this tutorial’s content. Feel free to download and modify it the way you desire to meet your own requirements.
That’s it! I hope this Creating a Layered Image Effect using HTML and CSS Tutorial will help you with what you are looking for and will be useful for your current and future website development.
Explore more on this website for more Tutorials and Free Source Codes.