- Checkbox CSS Styling a checkbox with only CSS
- The goals
- The results
- The strategy
- How to get there
- The CSS selectors used
- Important CSS styles used
- Starting out: the HTML
- First step: hide the unstyleable checkbox
- Second step: make our own checkbox
- Last step: make our checkbox change when checked
- Bonus points: extend this to radio buttons
- Wrapping up and side notes
- Стилизация флажков и переключателей с использованием CSS3
- Стилизация Checkbox
- Метод «Checkbox Hack»
- Пример №1
- HTML-разметка:
- Фокус по клавише Tab:
- CSS-стили:
- Результат:
- Пример №2
Checkbox CSS Styling a checkbox with only CSS
This seems like an obvious statement; styling should be done with CSS. But unfortunately in the case of checkboxes, there’s basically no support for directly styling the checkbox. Because of that, I’ve seen several JavaScript implementations to change between displaying an unchecked box and a checked box based on state in order to fake a styled checkbox. But let’s not go so quickly to JS to solve a fundamentally styling problem! It can be done with just CSS, we just need to shift our thinking a little.
The goals
- Style the checkbox
- Style the label
- Require no additional DOM nodes or configuration (including icons/images)
- Require 0 JavaScript
The results
The strategy
Since we cannot style the checkbox input directly with something like checkbox-style: awesome; , we’ll need to take a different approach:
- Hide the actual checkbox input
- Show a styled element that looks like an empty checkbox when the input is unchecked
- Show a styled element that looks like a checked checkbox when the input is checked
How to get there
The CSS selectors used
- Type selector type — selects all elements of the given type (e.g. input will select all nodes)
- Attribute selector [attribute=»value»] — selects an element with attribute where its value is exactly value
- Psuedo-class :checked — selects checkbox/radio input types or option s in a select that are selected/checked/on/active
- Psuedo-element ::before — styleable element that doesn’t actually exist in the DOM; considered the first child of the selected element
- Universal selector * — selects anything/everything
- Child combinator > — combines two selectors; narrowing the selection on the right-hand side to only those elements that are direct descendants of elements selected by the left-hand side.
- Adjacent sibling combinator + — combines two selectors; narrowing the selection on the right-hand side to only those elements that are the siblings immediately after the elements on the left-hand side
Important CSS styles used
- content — used in the ::before psuedo-element to set its content
- display — specifically none to hide elements and inline-block to make our otherwise inline checkbox able to have a consistent width and height
- width / height — does what you think: sets width and height of the element
- color — sets the color of the text
- text-align / vertical-align — used for adjusting the position of our check/checkbox to its label
- border styles — How we’ll form and color the checkbox
- background — sets the background color (used to fill in the checkbox when it is checked)
Starting out: the HTML
Let’s set up our checkbox as a child of its label element with a sibling of a span of the label text:
type="checkbox" name="key" value="value" /> I am a checkbox This structure allows clicking on the label text ( I am a checkbox ) to toggle the checkbox without needing for or unique id attributes. Placing the text in a span directly after the input will allow us to select it in CSS.
First step: hide the unstyleable checkbox
Going back to our strategy: since we can’t do anything with the native checkbox, we’ll have to hide it and do our own thing.
label > input[type="checkbox"] display: none; > We’ll select the checkbox ( input[type=»checkbox»] ) and make sure it’s labelled the way we need it to be ( label > ). Then just display: none to get it off our screens.
Second step: make our own checkbox
Making an empty square is easy with CSS, just put a border around an element with no content and set its width and height. Let’s also put it on the ::before psuedo-element to avoid adding unnecessary HTML.
label > input[type="checkbox"] + *::before content: ""; display: inline-block; vertical-align: bottom; width: 1rem; height: 1rem; border-radius: 10%; border-style: solid; border-width: 0.1rem; border-color: gray; > Building from the selection in the previous section; we add + * to select any element as long as it is the direct subsequent sibling to the checkbox of interest and then ::before to select the said psuedo-element for making the box.
Last step: make our checkbox change when checked
So far, even though the checkbox has been working, it doesn’t look like it’s working. Let’s change that by making the checkbox checked when it is :checked . Also, for the proof-of-concept, let’s change styles on the label text itself (while I’ll only change the text color, you can imagine changing any style to build any sort of check/uncheck select/unselect interface).
label > input[type="checkbox"]:checked + *::before content: "✓"; color: white; text-align: center; background: teal; border-color: teal; > label > input[type="checkbox"]:checked + * color: teal; > The important part here being :checked is placed after the input[type=»checkbox»] (since that is the element that is checked or not). And fortunately for us, there’s a checkmark character that we can set as the content of our checkbox: ✓ .
Bonus points: extend this to radio buttons
As a challenge to you, reader, this same strategy applies to making a styled radio button. Using this as a guide, are you able to transform this for the type=»radio» input? (or just follow me as that will be the next installment in this series)
Wrapping up and side notes
Thanks for reading! I like sharing and finding things like this where common web design patterns can be done without a massive JavaScript library or framework bogging the page down. Give me some suggestions below on patterns you’d like to see me break-down in CSS/HTML-only for this series.
While this example had «no unnecessary DOM»; it is also perfectly valid to include an additional span (or two) to hold svg/font-awesome icons for more precise/exotic checkbox designs. Then :checked should be used to alternatively display: none and display: inline-block the icons and + will need to become ~ to select all the siblings.
Стилизация флажков и переключателей с использованием CSS3
При создании CSS стилей для HTML форм, разработчики часто сталкиваются с невозможностью непосредственно менять внешний вид элементов флажков (checkboxes) и переключателей (radio buttons). Рассмотрим как можно обойти это ограничение при помощи инструментария CSS3 и без использования какого-либо кода JavaScript.
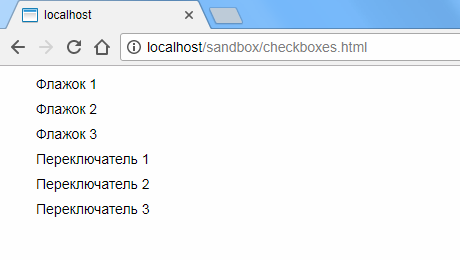
Итак, для начала добавим несколько обычных флажков и переключателей на форму:
/* Мои флажки */ /* Мои переключатели */ 
Перенесем стандартное отображение элементов за область видимости и добавим отступы к соседствующим меткам:
input[type="checkbox"]:checked, input[type="checkbox"]:not(:checked), input[type="radio"]:checked, input[type="radio"]:not(:checked) < position: absolute; left: -9999px; >input[type="checkbox"]:checked + label, input[type="checkbox"]:not(:checked) + label, input[type="radio"]:checked + label, input[type="radio"]:not(:checked) + label
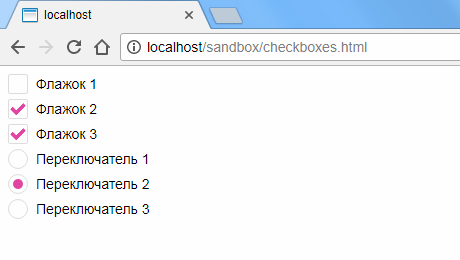
Перед метками добавим стилизованные контейнеры для наших пользовательских элементов. Для флажков это будут квадраты с немного закругленными для красоты краями, а для переключателей — просто небольшие круги:
input[type="checkbox"]:checked + label:before, input[type="checkbox"]:not(:checked) + label:before, input[type="radio"]:checked + label:before, input[type="radio"]:not(:checked) + label:before < content: ""; position: absolute; left: 0px; top: 0px; width: 18px; height: 18px; border: 1px solid #dddddd; background-color: #ffffff; >input[type="checkbox"]:checked + label:before, input[type="checkbox"]:not(:checked) + label:before < border-radius: 2px; >input[type="radio"]:checked + label:before, input[type="radio"]:not(:checked) + label:before

Теперь добавим индикаторы выбора. Для флажков это будут галки, для переключателей — заполненные цветом круги меньшего размера, чем сам контейнер. Для большего эффекта зададим также небольшую анимацию:
input[type="checkbox"]:checked + label:after, input[type="checkbox"]:not(:checked) + label:after, input[type="radio"]:checked + label:after, input[type="radio"]:not(:checked) + label:after < content: ""; position: absolute; -webkit-transition: all 0.2s ease; -moz-transition: all 0.2s ease; -o-transition: all 0.2s ease; transition: all 0.2s ease; >input[type="checkbox"]:checked + label:after, input[type="checkbox"]:not(:checked) + label:after < left: 3px; top: 4px; width: 10px; height: 5px; border-radius: 1px; border-left: 4px solid #e145a3; border-bottom: 4px solid #e145a3; -webkit-transform: rotate(-45deg); -moz-transform: rotate(-45deg); -o-transform: rotate(-45deg); -ms-transform: rotate(-45deg); transform: rotate(-45deg); >input[type="radio"]:checked + label:after, input[type="radio"]:not(:checked) + label:after

Чтобы изобразить знак галки, мы поворачиваем небольшой прямоугольник, две стороны которого окрашены в цвет, на 45 градусов против часовой стрелки.
Обратите внимание, что селекторы :before и :after позволяют добавлять содержание непосредственно до и после содержимого самой метки. Так как для меток мы задали относительное позиционирование (position: relative), то можем задавать контекстное абсолютное позиционирование для их содержимого.
Осталось скрыть индикаторы выбора, когда элемент не выбран, и, соответственно, отображать их, когда элемент находится в выбранном состоянии:
input[type="checkbox"]:not(:checked) + label:after, input[type="radio"]:not(:checked) + label:after < opacity: 0; >input[type="checkbox"]:checked + label:after, input[type="radio"]:checked + label:after
Добавим, что описанное здесь решение работает во всех современных версиях браузеров Chrome, Firefox, Safari, Opera, а также, начиная с версии 9, и в Internet Explorer.
Полностью CSS определения можно загрузить здесь.
Стилизация Checkbox
Несколько примеров как изменить внешний вид чекбоксов с помощью CSS, изображений и немного JS.
Метод «Checkbox Hack»
Основан на связи
Стоит заменить что в некоторых старых браузерах (например Safari) такой приём не работает и требует добавление атрибутов for у и id у чекбокса.
В зависимости от состояния чекбокса :checked , :disabled и :focus , следующему за ним элементу, например , можно задавать стили с помощью селектора « + ».
/* Dafault */ label input[type=checkbox] + span < . >/* Focus */ label input[type=checkbox]:focus + span < . >/* Checked */ label input[type=checkbox]:checked + span < . >/* Disabled */ label input[type=checkbox]:disabled + span < . >label input[type=checkbox]:disabled:checked + span
Сам чекбокс скрывается, но без использования display: none , что бы оставить функциональность фокуса.
По умолчанию, фокус появляется при клике на элемент, что не очень и нужно. Оставить выделение при фокусе только при нажатии клавиши Tab можно с помощью JQuery, добавляя класс focused родительскому элементу.
$(window).keyup(function(e) < var target = $('label input[type=checkbox]:focus'); if (e.keyCode == 9 && $(target).length)< $(target).parent().addClass('focused'); >>); $('label input[type=checkbox]').focusout(function()< $(this).parent().removeClass('focused'); >);Пример №1
В первом примере понадобятся два изображения (обычный и отмеченный), для ускорения прорисовки можно использовать спрайты, но тогда не сделать плавную смену при переключении ( transition background ).


HTML-разметка:
Фокус по клавише Tab:
$(window).keyup(function(e) < var target = $('.checkbox-other input:focus'); if (e.keyCode == 9 && $(target).length)< $(target).parent().addClass('focused'); >>); $('.checkbox-other input').focusout(function()< $(this).parent().removeClass('focused'); >);CSS-стили:
.checkbox-other < display: block; margin: 0 0 10px 0; cursor: pointer; user-select: none; position: relative; >.checkbox-other input[type=checkbox] < position: absolute; z-index: -1; opacity: 0; display: block; width: 0; height: 0; >.checkbox-other span < display: inline-block; position: relative; padding: 0 0 0 35px; line-height: 22px; >.checkbox-other span:before < content: ""; display: inline-block; width: 22px; height: 22px; position: absolute; left: 0; top: 0; transition: background 0.3s ease; background: url(/checkbox-1.png) 0 0 no-repeat; >/* Checked */ .checkbox-other input[type=checkbox]:checked + span:before < background-image: url(/checkbox-2.png); >/* Focus */ .focused span:before < box-shadow: 0 0 0 0.2rem rgba(0,123,255,.25); >/* Hover */ .checkbox-other span:hover:before < filter: brightness(110%); >/* Active */ .checkbox-other span:active:before < filter: brightness(80%); >/* Disabled */ .checkbox-other input[type=checkbox]:disabled + span < color: #666; cursor: default; >.checkbox-other input[type=checkbox]:disabled + span:before
Результат:
Пример №2
Подходит для случаев, когда галка выходит за края элемента. HTML-разметка и JS-код остается прежними.


.checkbox-other < display: block; margin: 0 0 10px 0; cursor: pointer; user-select: none; position: relative; >.checkbox-other input[type=checkbox] < position: absolute; z-index: -1; opacity: 0; display: block; width: 0; height: 0; >.checkbox-other span < display: inline-block; position: relative; padding: 0 0 0 35px; line-height: 22px; >.checkbox-other span:before < content: ""; display: inline-block; width: 22px; height: 22px; position: absolute; left: 0; top: 0; background: url(/checkbox-3.png) 0 0 no-repeat; >/* Checked */ .checkbox-other input[type=checkbox] + span:after < content: ""; opacity: 0; transition: opacity 0.3s ease; >.checkbox-other input[type=checkbox]:checked + span:after < display: inline-block; width: 22px; height: 22px; position: absolute; left: 4px; top: -5px; background: url(/checkbox-4.png) 0 0 no-repeat; opacity: 1; >/* Focus */ .focused span:before < box-shadow: 0 0 0 0.2rem rgba(0,123,255,.25); >/* Hover */ .checkbox-other span:hover:after < filter: brightness(110%); >/* Active */ .checkbox-other span:active:before, .checkbox-other span:active:after < filter: brightness(80%); >/* Disabled */ .checkbox-other input[type=checkbox]:disabled + span < color: #666; cursor: default; >.checkbox-other input[type=checkbox]:disabled + span:before, .checkbox-other input[type=checkbox]:disabled + span:after