- Html input button text and value
- Button without a value
- Using buttons
- A simple button
- Adding keyboard shortcuts to buttons
- Disabling and enabling a button
- Setting the disabled attribute
- Inheriting the disabled state
- Validation
- Examples
- Technical summary
- Specifications
- Кнопки
- Как сделать кнопку в HTML
- А как же input?
- Как сделать кнопку с иконкой
- С помощью тега
- Добавить инлайн SVG в разметку
- Вставить фоном в CSS
- Материалы по теме
Html input button text and value
An elements’ value attribute contains a string that is used as the button’s label.
input type="button" value="Click Me" /> Button without a value
If you don’t specify a value , you get an empty button:
Using buttons
A simple button
We’ll begin by creating a simple button with a click event handler that starts our machine (well, it toggles the value of the button and the text content of the following paragraph):
form> input type="button" value="Start machine" /> form> p>The machine is stopped.p>
const button = document.querySelector("input"); const paragraph = document.querySelector("p"); button.addEventListener("click", updateButton); function updateButton() if (button.value === "Start machine") button.value = "Stop machine"; paragraph.textContent = "The machine has started!"; > else button.value = "Start machine"; paragraph.textContent = "The machine is stopped."; > >
The script gets a reference to the HTMLInputElement object representing the in the DOM, saving this reference in the variable button . addEventListener() is then used to establish a function that will be run when click events occur on the button.
Adding keyboard shortcuts to buttons
Keyboard shortcuts, also known as access keys and keyboard equivalents, let the user trigger a button using a key or combination of keys on the keyboard. To add a keyboard shortcut to a button — just as you would with any for which it makes sense — you use the accesskey global attribute.
In this example, s is specified as the access key (you’ll need to press s plus the particular modifier keys for your browser/OS combination; see accesskey for a useful list of those).
form> input type="button" value="Start machine" accesskey="s" /> form> p>The machine is stopped.p>
const button = document.querySelector("input"); const paragraph = document.querySelector("p"); button.addEventListener("click", updateButton); function updateButton() if (button.value === "Start machine") button.value = "Stop machine"; paragraph.textContent = "The machine has started!"; > else button.value = "Start machine"; paragraph.textContent = "The machine is stopped."; > >
Note: The problem with the above example of course is that the user will not know what the access key is! In a real site, you’d have to provide this information in a way that doesn’t interfere with the site design (for example by providing an easily accessible link that points to information on what the site accesskeys are).
Disabling and enabling a button
To disable a button, specify the disabled global attribute on it, like so:
input type="button" value="Disable me" disabled /> Setting the disabled attribute
You can enable and disable buttons at run time by setting disabled to true or false . In this example our button starts off enabled, but if you press it, it is disabled using button.disabled = true . A setTimeout() function is then used to reset the button back to its enabled state after two seconds.
input type="button" value="Enabled" /> const button = document.querySelector("input"); button.addEventListener("click", disableButton); function disableButton() button.disabled = true; button.value = "Disabled"; setTimeout(() => button.disabled = false; button.value = "Enabled"; >, 2000); >
Inheriting the disabled state
If the disabled attribute isn’t specified, the button inherits its disabled state from its parent element. This makes it possible to enable and disable groups of elements all at once by enclosing them in a container such as a element, and then setting disabled on the container.
The example below shows this in action. This is very similar to the previous example, except that the disabled attribute is set on the when the first button is pressed — this causes all three buttons to be disabled until the two second timeout has passed.
fieldset> legend>Button grouplegend> input type="button" value="Button 1" /> input type="button" value="Button 2" /> input type="button" value="Button 3" /> fieldset>
const button = document.querySelector("input"); const fieldset = document.querySelector("fieldset"); button.addEventListener("click", disableButton); function disableButton() fieldset.disabled = true; setTimeout(() => fieldset.disabled = false; >, 2000); >
Note: Firefox will, unlike other browsers, by default, persist the dynamic disabled state of a across page loads. Use the autocomplete attribute to control this feature.
Validation
Buttons don’t participate in constraint validation; they have no real value to be constrained.
Examples
div class="toolbar"> input type="color" aria-label="select pen color" /> input type="range" min="2" max="50" value="30" aria-label="select pen size" />span class="output">30span> input type="button" value="Clear canvas" /> div> canvas class="myCanvas"> p>Add suitable fallback here.p> canvas>
body background: #ccc; margin: 0; overflow: hidden; > .toolbar background: #ccc; width: 150px; height: 75px; padding: 5px; > input[type="color"], input[type="button"] width: 90%; margin: 0 auto; display: block; > input[type="range"] width: 70%; > span position: relative; bottom: 5px; > const canvas = document.querySelector(".myCanvas"); const width = (canvas.width = window.innerWidth); const height = (canvas.height = window.innerHeight - 85); const ctx = canvas.getContext("2d"); ctx.fillStyle = "rgb(0,0,0)"; ctx.fillRect(0, 0, width, height); const colorPicker = document.querySelector('input[type="color"]'); const sizePicker = document.querySelector('input[type="range"]'); const output = document.querySelector(".output"); const clearBtn = document.querySelector('input[type="button"]'); // covert degrees to radians function degToRad(degrees) return (degrees * Math.PI) / 180; > // update sizepicker output value sizePicker.oninput = () => output.textContent = sizePicker.value; >; // store mouse pointer coordinates, and whether the button is pressed let curX; let curY; let pressed = false; // update mouse pointer coordinates document.onmousemove = (e) => curX = e.pageX; curY = e.pageY; >; canvas.onmousedown = () => pressed = true; >; canvas.onmouseup = () => pressed = false; >; clearBtn.onclick = () => ctx.fillStyle = "rgb(0,0,0)"; ctx.fillRect(0, 0, width, height); >; function draw() if (pressed) ctx.fillStyle = colorPicker.value; ctx.beginPath(); ctx.arc( curX, curY - 85, sizePicker.value, degToRad(0), degToRad(360), false, ); ctx.fill(); > requestAnimationFrame(draw); > draw();
Technical summary
Specifications
Кнопки
Кнопки являются одним из самых понятных и интуитивных элементов интерфейса. По их виду сразу становится понятно, что единственное действие, которое с ними можно производить — это нажимать на них. За счёт этой особенности кнопки часто применяются в формах, особенно при их отправке и очистке.
Кнопку на веб-странице можно создать двумя способами — с помощью тега и тега .
Рассмотрим вначале добавление кнопки через и его синтаксис.
Атрибуты кнопки перечислены в табл. 1.
| Атрибут | Описание |
|---|---|
| name | Имя кнопки, предназначено для того, чтобы обработчик формы мог его идентифицировать. |
| value | Значение кнопки и одновременно надпись на ней. |
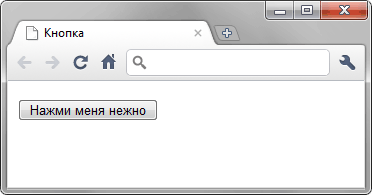
Создание кнопки показано в примере 1.
Пример 1. Добавление кнопки
Пробелы в надписи на кнопке, в отличие от текста HTML, учитываются, поэтому можно ставить любое количество пробелов, которые в итоге влияют на ширину кнопки. Результат примера показан на рис. 1.
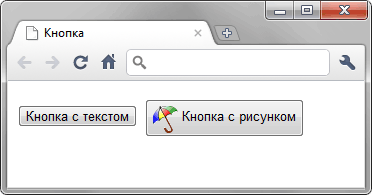
Второй способ создания кнопки основан на использовании тега . Он по своему действию напоминает результат, получаемый с помощью тега . Но в отличие от него предлагает расширенные возможности по созданию кнопок. Например, на подобной кнопке можно размещать любые элементы HTML включая изображения и таблицы. На рис. 2 показаны разные виды кнопок, полученные с помощью .
Как сделать кнопку в HTML
Для создания кнопок используется тег . Внутри него размещается текст или изображение, которые будут отображаться на кнопке. Например:
Чтобы задать кнопке имя, тип или состояние, нужно добавить атрибуты: name , disabled и type .
Атрибут name задаёт имя кнопки. Может использоваться для идентификации элемента в скриптах.
Атрибут disabled блокирует доступ к кнопке.
Атрибут type определяет тип кнопки. Ему задают одно из трёх значений:
button — значение по умолчанию. Означает, что элемент — обычная кнопка. Она может добавлять товары в корзину или избранное, переключать слайдеры или закрывать всплывающие окна.
submit задаётся кнопкам для отправки формы. Когда пользователь нажимает на кнопку с таким типом, браузер отправляет данные формы на сервер.
reset добавляется кнопкам сброса формы. Когда пользователь нажимает на такую кнопку, браузер возвращает значения всех полей формы к изначальным.
А как же input?
Создать кнопку можно и с помощью тега , если указать ему тип button :
Это рабочий способ. О нём надо знать, ведь вы можете встретить его в проектах. Но самим так делать не стоит. У кнопок, созданных на инпуте, есть ограничения: сложно управлять размерами и положением изображений, а также нет псевдоэлементов. Поэтому оставьте для создания элементов формы, таких как текстовые поля, радиокнопки или чекбоксы. А кнопки верстайте с помощью .
Как сделать кнопку с иконкой
Посмотрим три способа создания кнопки с иконкой.
С помощью тега
Способ подойдёт для контентных изображений.

Так вы можете добавлять кнопки с эмодзи, лайками, дизлайками или чем-то ещё. Иконке нужно обязательно задавать размеры, чтобы кнопка зарезервировала место и не прыгала, когда загрузится иконка.
Добавить инлайн SVG в разметку
Способ подойдёт, если изображение меняет состояния, как здесь:

Код простой: пишем тег и добавляем в него код SVG-изображения.
Вставить фоном в CSS
Способ подойдёт, если иконка играет декоративную роль и не меняется при наведении или клике на кнопку. Например, в таких случаях:

Как добавить иконку в кнопку:
Какой способ выбрать — зависит от ваших задач и особенностей проекта. Вы также можете использовать разные методы в рамках одного проекта. Например, часть кнопок сделать со встроенным в разметку SVG, а часть — с фоновым изображением.
Материалы по теме
«Доктайп» — журнал о фронтенде. Читайте, слушайте и учитесь с нами.