- Пишем калькулятор на JavaScript
- Простой калькулятор на JavaScript
- Что делаем
- Логика работы
- Размещаем кнопки и поля ввода на странице
- Обрабатываем нажатия на кнопки математических действий
- Create a simple calculator using HTML, CSS and Javascript
- Video Tutorial
- HTML
- CSS
- Javascript
- Where you can learn more from me?
Пишем калькулятор на JavaScript
В этой статье мы с вами, как следует из названия, напишем простой калькулятор на JavaScript.
Желание написать калькулятор возникло у меня после просмотра одного туториала, посвященного созданию «simple calculator», который оказался далеко не симпл и толком ничего не умел делать.
Наш калькулятор будет true simple (42 строки кода, включая пробелы между блоками), но при этом полнофункциональным и масштабируемым.
Без дальнейших предисловий, приступаем к делу.
Наша разметка выглядит так:
Здесь мы подключаем библиотеку, создаем контейнер для калькулятора и поле для вводимых символов и результата.
* < margin: 0; padding: 0; box-sizing: border-box; >body < height: 100vh; background: radial-gradient(circle, skyblue, steelblue); display: flex; justify-content: center; align-items: center; >.calculator < width: 320px; height: 480px; background: #eee; border-radius: 5px; box-shadow: 2px 2px 3px rgba(0, 0, 0, 0.2), -2px -2px 3px rgba(0, 0, 0, 0.2); >output < display: flex; justify-content: center; align-items: center; width: 300px; height: 40px; background: #fff; margin: 10px auto; border-radius: 5px; font-size: 1.4em; font-weight: bold; box-shadow: inset 1px 1px 1px rgba(0, 0, 0, 0.3), inset -1px -1px 1px rgba(0, 0, 0, 0.3); >.keyboard < height: 440px; display: flex; flex-wrap: wrap; justify-content: space-evenly; align-items: flex-start; >button
Вот что мы имеем на данный момент:

Кнопки будут генерироваться программно.
Определяем поле для вывода результата и создаем контейнер для клавиатуры:
const output = document.querySelector('output') const div = document.createElement('div') div.classList.add('keyboard') document.querySelector('.calculator').appendChild(div) Наша строка с символами выглядит так:
'C CE % / 7 8 9 * 4 5 6 - 1 2 3 + 0 ( ) =' Преобразуем данную строку в массив и создаем кнопки:
// разделителем служит пустая строка // можно было бы обойтись без пробелов, если бы у нас не было "CE" 'C CE % / 7 8 9 * 4 5 6 - 1 2 3 + 0 ( ) ='.split(' ') // пробегаемся по массиву // для каждого символа // создаем кнопку с помощью строкового литерала // записываем значение символа в атрибут "value" кнопки .map(symbol => < div.insertAdjacentHTML('beforeend', `">$ `) >) Находим созданные кнопки и добавляем к ним обработчик события «клик»:
document.querySelectorAll('button').forEach(button => < button.addEventListener('click', function () < // по клику вызывается функция со значением кнопки в качестве параметра calc(this.value) >) >) Мы также хотим иметь возможность вводить символы с помощью клавиатуры. Для этого нам необходимо добавить обработчик события «нажатие клавиши» к объекту «Document» или «Window», затем отфильтровать ненужные значения свойства «ключ» клавиши, например, с помощью регулярного выражения:
document.addEventListener('keydown', event => < if ((event.key).match(/[0-9%\/*\-+\(\)=]|Backspace|Enter/)) calc(event.key) >) Метод «match» в данном случае играет роль фильтра: он не позволяет передавать функции «calc» аргумент, не соответствующий заданному в нем условию.
Само условие звучит так: если значением event.key является один из символов, указанных в квадратных скобках ([]; цифра от 0 до 9, знаки деления, умножения, сложения, вычитания, открывающая, закрывающая круглые скобки или знак равенства; обратная косая черта — экранирование) или (| — альтерация) Backspace, или Enter, то вызываем calc с event.key в качестве параметра, иначе ничего не делаем (Shift также успешно отбрасывается).
Наша главная (и единственная) функция «calc» выглядит следующим образом (код следует читать снизу вверх):
// функция принимает значение кнопки или ключ клавиши function calc(value) < // если нажат знак равенства или Enter if (value.match(/=|Enter/)) < // пробуем выполнить операцию try < // вычисляем значение строки // это возможно благодаря методу "evaluate" объекта "math" // Math.trunc используется для округления до целого числа output.textContent = Math.trunc(math.evaluate(output.textContent)) // если операцию выполнить невозможно >catch < // сохраняем значение поля let oldValue = output.textContent // создаем новую переменную let newValue = 'недопустимое выражение' // выводим значение новой переменной в поле output.textContent = newValue // через полторы секунды возвращаем полю старое значение setTimeout(() =>< output.textContent = oldValue >, 1500) > // если нажат символ "C" > else if (value === 'C') < // очищаем поле output.textContent = '' // если нажат символ "СЕ" или Backspace >else if (value.match(/CE|Backspace/)) < // уменьшаем строку на один символ output.textContent = output.textContent.substring(0, output.textContent.length - 1) // если нажата любая другая (отфильтрованная) кнопка или клавиша >else < // записываем ее значение в поле output.textContent += value >> В завершение, парочка слов о заявленной масштабируемости и полнофункциональности.
Метод «evaluate» (ранее «eval») и другие методы Math.js имеют очень большие возможности. Опираясь на эти возможности, мы можем легко расширить функционал нашего калькулятора, добавив в него новые символы и операторы, предусмотрев возможность работы с числами с плавающей точкой (регулируя количество знаков после запятой с помощью переключателя и метода «toFixed») и т.д.
Благодарю за внимание. Надеюсь, вы нашли для себя что-то полезное. Хороших выходных и счастливого кодинга.
Простой калькулятор на JavaScript
Сегодня сделаем простейший калькулятор на JavaScript, но не просто так, а с умыслом. Позднее мы представим, что мы тестировщики, и попробуем протестировать этот калькулятор. Вернее, не протестировать, а дико сломать.
Что делаем
На старте у нас будет самый простой калькулятор, который сможет только складывать, вычитать, умножать и делить два числа. Этого уже будет достаточно, чтобы потренироваться и в коде, и в дальнейшем тестировании.
Логика работы
Так как это простой калькулятор, то поступим так:
- Сделаем поле ввода для первого числа.
- Под ним разместим 4 кнопки с математическими действиями.
- Потом сделаем поле ввода для второго числа.
- И внизу будет кнопка «Посчитать».
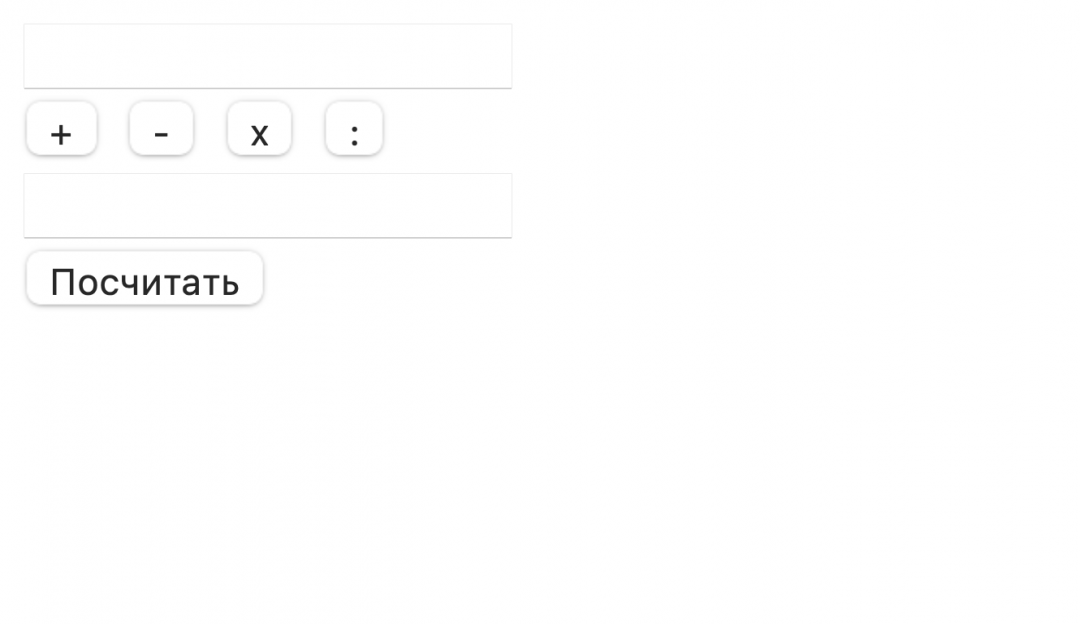
Размещаем кнопки и поля ввода на странице
Разместим кнопки с полями на странице, а потом будем писать скрипт.
+
Обрабатываем нажатия на кнопки математических действий
Сейчас у нас есть 4 кнопки, но нажимать их бесполезно — всё равно ничего не произойдёт, потому что нет обработчиков нажатий. Но что нам прописывать в обработчике?
Первый вариант — привязать к каждой кнопке свою функцию, а потом для каждой операции выполнять свои действия внутри этого обработчика. Но раз у нас есть кнопка «Посчитать», то нам придётся при нажатии на неё из этих четырёх функций вытаскивать действие и нужные команды, запоминать выбранное и как-то использовать в вычислениях. Сложно и громоздко.
Второй вариант — просто записывать в какую-то переменную, какая кнопка была нажата. А потом, при нажатии «Посчитать», просто смотреть в эту переменную и выполнять соответствующее действие. Так и поступим.
👉 Воспользуемся хитростью, про которые многие забывают: в обработчике onclick необязательно писать только функцию — туда можно отправить любую JS-команду. Главное, не забыть потом в скрипте предусмотреть эту переменную, которую мы используем.
Create a simple calculator using HTML, CSS and Javascript
In this tutorial we will create a fully working calculator using only HTML, CSS and vanilla Javascript. You’ll learn about event handling, and DOM manipulations throughout the project. In my opinion this is a really good beginner project for those who want to become web developers.
Video Tutorial
If you would watch a detailed step-by-step video instead you can check out the video I made covering this project on my Youtube Channel:
HTML
The html will be pretty simple for this project. We’ll start out with a standard HTML5 boilerplate. At the bottom of our body I included the index.js script that we will create later. This needs to be at the bottom, because this way, when our javascript runs, the html elements required for the calculator will be in the DOM.
In the body we have a section and inside that a div with a container class. We will use these wrappers to position our calculator on the page. Inside our container we have an empty div with the id of display , and this will be the display of our calculator. It is empty, because we will modify its content from Javascript. Then we have a div with the class of buttons which will represent the keypad of the calculator.
class="container"> id="display">