- Как программировать java приложения
- Trails Covering the Basics
- Creating Graphical User Interfaces
- Specialized Trails and Lessons
- Создание простейшего приложения на Java
- Как программировать java приложения
- Мне всё еще непонятно, с чего начинать путь в IT. Что посоветуете?
- Lesson: A Closer Look at the «Hello World!» Application
- Source Code Comments
- The HelloWorldApp Class Definition
- The main Method
Как программировать java приложения
The Java Tutorials have been written for JDK 8. Examples and practices described in this page don’t take advantage of improvements introduced in later releases and might use technology no longer available.
See Java Language Changes for a summary of updated language features in Java SE 9 and subsequent releases.
See JDK Release Notes for information about new features, enhancements, and removed or deprecated options for all JDK releases.
The Java Tutorials are practical guides for programmers who want to use the Java programming language to create applications. They include hundreds of complete, working examples, and dozens of lessons. Groups of related lessons are organized into «trails».
Trails Covering the Basics
- Getting Started — An introduction to Java technology and lessons on installing Java development software and using it to create a simple program.
- Learning the Java Language — Lessons describing the essential concepts and features of the Java Programming Language.
- Essential Java Classes — Lessons on exceptions, basic input/output, concurrency, regular expressions, and the platform environment.
- Collections — Lessons on using and extending the Java Collections Framework.
- Date-Time APIs — How to use the java.time pages to write date and time code.
- Deployment — How to package applications and applets using JAR files, and deploy them using Java Web Start and Java Plug-in.
- Preparation for Java Programming Language Certification — List of available training and tutorial resources.
Creating Graphical User Interfaces
- Creating a GUI with Swing — A comprehensive introduction to GUI creation on the Java platform.
- Creating a JavaFX GUI — A collection of JavaFX tutorials.
Specialized Trails and Lessons
These trails and lessons are only available as web pages.
- Custom Networking — An introduction to the Java platform’s powerful networking features.
- The Extension Mechanism — How to make custom APIs available to all applications running on the Java platform.
- Full-Screen Exclusive Mode API — How to write applications that more fully utilize the user’s graphics hardware.
- Generics — An enhancement to the type system that supports operations on objects of various types while providing compile-time type safety. Note that this lesson is for advanced users. The Java Language trail contains a Generics lesson that is suitable for beginners.
- Internationalization — An introduction to designing software so that it can be easily adapted (localized) to various languages and regions.
- JavaBeans — The Java platform’s component technology.
- JAXB — Introduces the Java architecture for XML Binding (JAXB) technology.
- JAXP — Introduces the Java API for XML Processing (JAXP) technology.
- JDBC Database Access — Introduces an API for connectivity between the Java applications and a wide range of databases and data sources.
- JMX— Java Management Extensions provides a standard way of managing resources such as applications, devices, and services.
- JNDI— Java Naming and Directory Interface enables accessing the Naming and Directory Service such as DNS and LDAP.
- Reflection — An API that represents («reflects») the classes, interfaces, and objects in the current Java Virtual Machine.
- RMI — The Remote Method Invocation API allows an object to invoke methods of an object running on another Java Virtual Machine.
- Security — Java platform features that help protect applications from malicious software.
- Sockets Direct Protocol — How to enable the Sockets Direct Protocol to take advantage of InfiniBand.
- Sound — An API for playing sound data from applications.
- 2D Graphics — How to display and print 2D graphics in applications.
Создание простейшего приложения на Java
В этой статье речь идет об организации простейшего приложения на Java для начинающих разработчиков, которые уже изучили концепции объектного подхода. Но для опытных возможно тоже будет интересно.
Зачастую начинающие разработчики задают вопроc: «С чего начать создание приложения», какие классы использовать и прочее.
Не стоит воспринимать статью как пример «Hello World» для начинающих изучать язык Java и объектно-ориентированный подход. Предполагается, что читатель уже знаком с языком Java, однако у него возникают вопросы указанные выше.
В этой статье мы даем ответ на эти вопросы.
Для того, чтобы строить приложение постепенно, используя концепции объектно-ориентированного подхода мы будем представлять все элементы нашего приложения в виде объектов соответствующих классов. Поэтому приложение тоже будет отдельным классом. Для запуска приложения будем создавать его экземпляр.
Сначала создается класс Application — он будет моделью всего приложения.
Далее создаем точку входа в приложение — метод main:
Этот метод выполняется при запуске Java с указанием основого класса (Application). В нем мы создаем экземпляр приложения и инициализируем его, а далее запускаем. Для этого будем использовать методы init и run:
public class Application < public void init() < >public void run() < >public static void main(String[] args) < Application application = new Application(); application.init(); application.run(); >> В методе init мы делаем необходимую инициализацию приложения. В методе run же распологается основной код хода приложения.
Метод init можно не использовать, однако мы исходим из того, что наше приложение проходит две стадии — инициализация и запуск.
Остальные элементы нашего приложения можно разбить на модельные классы и виды (окна, панели). Например, представим, что мы создаем простейший кредитный калькулятор. Тогда класс CreditCalculator — будет моделью калькулятора. В методе init будем инициализировать калькулятор, а в run вычислять:
public class Application < private CreditCalculator calculator; public void init() < calculator = new CreditCalculator(); >public void run() < calculator.setAmount(500000); calculator.setYears(3); calculator.calculate(); System.out.println("Месячный платеж: " + calculator.getMonthlyPayment()); >public static void main(String[] args) < Application application = new Application(); application.init(); application.run(); >> Таким образом, создание приложения можно начать с создания класса Application и далее добавлять необходимые модельные классы с которыми требуется работать.
Теперь о том, как запустить приложение
Мы будем исходить из того, что вы используете среду разработки Eclipse, Intellij IDEA или NetBeans. И класс Application создали именно в ней. В этих же средах для запуска нужно вызвать контекстное меню и нажать Run… или Run As Application в редакторе класса Application.
Но все же — запуск приложения из среды не был нашей целью, а целью было понять с каких классов можно начать создание приложения.
Крутых девелоперов просьба не ругать — вы и так все знаете! А лучше поругайте — тогда будет понятно что неправильно.
Просьба перед оценкой статьи оставить конструктивный комментарий.
Как программировать java приложения

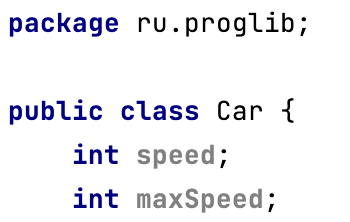
Здесь мы описали шаблон будущего объекта – класс. У него есть две переменные состояния – speed и maxSpeed, а также две функции, которые описывают поведение объекта.
Теперь приложение нужно запустить, для этого Java надо подсказать, где находится точка входа в него. Для этого существует особое соглашение – нужно добавить в описание любого объекта метод:
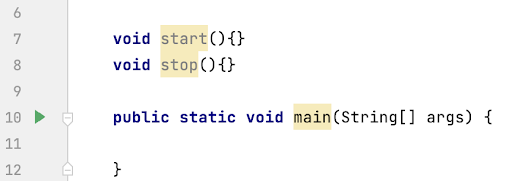
Наше приложение запустилось, но ничего не произошло, потому что мы не добавили никакой логики в метод. Добавим простой вывод на консоль текста:
Создатели предложили называть эти папки как доменные имена в интернете, чтобы точно разграничить их, но это не обязательно, вы можете называть их как захотите.
Это так же позволяет легко импортировать чужие классы в свой код:
Мне всё еще непонятно, с чего начинать путь в IT. Что посоветуете?
Стоит подумать, как построить свой путь в индустрию, чтобы получить качественные знания и устроиться на работу.
Онлайн-университет Skypro помогает новичкам в IT комфортно сменить сферу деятельности. Курс «Java-разработчик» построен так, чтобы дать полноценный взгляд на IT и базовые знания для работы младшим специалистом. Вы научитесь:
- писать код на языках Java и SQL;
- управлять схемами баз данных;
- собирать проекты на Maven и Spring;
- работать с кешем и потоками.
На протяжении всего обучения студентов поддерживают наставники и обучают топовые специалисты рынка. Если вы не устроитесь на работу в течение четырех месяцев после окончания обучения, Skypro вернет деньги — это прописано в договоре.
Lesson: A Closer Look at the «Hello World!» Application
Now that you’ve seen the «Hello World!» application (and perhaps even compiled and run it), you might be wondering how it works. Here again is its code:
The «Hello World!» application consists of three primary components: source code comments, the HelloWorldApp class definition, and the main method. The following explanation will provide you with a basic understanding of the code, but the deeper implications will only become apparent after you’ve finished reading the rest of the tutorial.
Source Code Comments
/** * The HelloWorldApp class implements an application that * simply prints "Hello World!" to standard output. */ class HelloWorldApp < public static void main(String[] args) < System.out.println("Hello World!"); // Display the string. > > Comments are ignored by the compiler but are useful to other programmers. The Java programming language supports three kinds of comments:
/* text */ The compiler ignores everything from /* to */ . /** documentation */ This indicates a documentation comment (doc comment, for short). The compiler ignores this kind of comment, just like it ignores comments that use /* and */ . The javadoc tool uses doc comments when preparing automatically generated documentation. For more information on javadoc , see the Javadoc™ tool documentation . // text The compiler ignores everything from // to the end of the line.
The HelloWorldApp Class Definition
/** * The HelloWorldApp class implements an application that * simply displays "Hello World!" to the standard output. */ class HelloWorldApp public static void main(String[] args) < System.out.println("Hello World!"); // Display the string. >> As shown above, the most basic form of a class definition is:
The keyword class begins the class definition for a class named name , and the code for each class appears between the opening and closing curly braces marked in bold above. Chapter 2 provides an overview of classes in general, and Chapter 4 discusses classes in detail. For now it is enough to know that every application begins with a class definition.
The main Method
/** * The HelloWorldApp class implements an application that * simply displays "Hello World!" to the standard output. */ class HelloWorldApp < public static void main(String[] args) System.out.println("Hello World!"); //Display the string. > > In the Java programming language, every application must contain a main method whose signature is:
public static void main(String[] args)
The modifiers public and static can be written in either order ( public static or static public ), but the convention is to use public static as shown above. You can name the argument anything you want, but most programmers choose «args» or «argv».
The main method is similar to the main function in C and C++; it’s the entry point for your application and will subsequently invoke all the other methods required by your program.
The main method accepts a single argument: an array of elements of type String .
public static void main(String[] args)
This array is the mechanism through which the runtime system passes information to your application. For example:
Each string in the array is called a command-line argument. Command-line arguments let users affect the operation of the application without recompiling it. For example, a sorting program might allow the user to specify that the data be sorted in descending order with this command-line argument:
The «Hello World!» application ignores its command-line arguments, but you should be aware of the fact that such arguments do exist.
System.out.println("Hello World!"); uses the System class from the core library to print the «Hello World!» message to standard output. Portions of this library (also known as the «Application Programming Interface», or «API») will be discussed throughout the remainder of the tutorial.