- Manipulating Elements
- link Getting and Setting Information About Elements
- link Moving, Copying, and Removing Elements
- link Cloning Elements
- link Removing Elements
- link Creating New Elements
- jQuery Create Element And Append To Webpage
- Create Element jQuery
- jQuery Create div
- Append Created Element To Webpage
- 1. append() Method
- 2. prepend() Method
- 3. before() Method
- 4. after() Method
- jQuery Create Element with Class
- jQuery Create Element with ID
- Conclusion
- Jquery создать html элементы
- Анимация набора текста на jQuery
- Временная шкала на jQuery
- Заметка: Перезагрузка и редирект на JavaScript
- Рисуем диаграмму Ганта
- AJAX и PHP: загрузка файла
- Stimed — стили в зависимости от времени суток
Manipulating Elements
For complete documentation of jQuery manipulation methods, visit the Manipulation documentation on api.jquery.com.
link Getting and Setting Information About Elements
There are many ways to change an existing element. Among the most common tasks is changing the inner HTML or attribute of an element. jQuery offers simple, cross-browser methods for these sorts of manipulations. You can also get information about elements using many of the same methods in their getter incarnations. For more information on getters and setters, see the Working with Selections section. Here are a few methods you can use to get and set information about elements:
- .html() – Get or set the HTML contents.
- .text() – Get or set the text contents; HTML will be stripped.
- .attr() – Get or set the value of the provided attribute.
- .width() – Get or set the width in pixels of the first element in the selection as an integer.
- .height() – Get or set the height in pixels of the first element in the selection as an integer.
- .position() – Get an object with position information for the first element in the selection, relative to its first positioned ancestor. This is a getter only.
- .val() – Get or set the value of form elements.
Changing things about elements is trivial, but remember that the change will affect all elements in the selection. If you just want to change one element, be sure to specify that in the selection before calling a setter method.
// Changing the HTML of an element.$( "#myDiv p:first" ).html( "New first paragraph!" );
link Moving, Copying, and Removing Elements
While there are a variety of ways to move elements around the DOM, there are generally two approaches:
- Place the selected element(s) relative to another element.
- Place an element relative to the selected element(s).
For example, jQuery provides .insertAfter() and .after() . The .insertAfter() method places the selected element(s) after the element provided as an argument. The .after() method places the element provided as an argument after the selected element. Several other methods follow this pattern: .insertBefore() and .before() , .appendTo() and .append() , and .prependTo() and .prepend() .
The method that makes the most sense will depend on what elements are selected, and whether you need to store a reference to the elements you’re adding to the page. If you need to store a reference, you will always want to take the first approach – placing the selected elements relative to another element – as it returns the element(s) you’re placing. In this case, .insertAfter() , .insertBefore() , .appendTo() , and .prependTo() should be the tools of choice.
// Moving elements using different approaches.// Make the first list item the last list item:var li = $( "#myList li:first" ).appendTo( "#myList" );// Another approach to the same problem:$( "#myList" ).append( $( "#myList li:first" ) );// Note that there's no way to access the list item// that we moved, as this returns the list itself.
link Cloning Elements
Methods such as .appendTo() move the element, but sometimes a copy of the element is needed instead. In this case, use .clone() first:
// Making a copy of an element.// Copy the first list item to the end of the list:$( "#myList li:first" ).clone().appendTo( "#myList" );
If you need to copy related data and events, be sure to pass true as an argument to .clone() .
link Removing Elements
There are two ways to remove elements from the page: .remove() and .detach() . Use .remove() when you want to permanently remove the selection from the page. While .remove() does return the removed element(s), those elements will not have their associated data and events attached to them if you return them to the page.
Use .detach() if you need the data and events to persist. Like .remove() , it returns the selection, but it also maintains the data and events associated with the selection, so you can restore the selection to the page at a later time.
The .detach() method is extremely valuable if you are doing heavy manipulation on an element. In that case, it’s beneficial to .detach() the element from the page, work on it in your code, then restore it to the page when you’re done. This limits expensive «DOM touches» while maintaining the element’s data and events.
If you want to leave the element on the page but remove its contents, you can use .empty() to dispose of the element’s inner HTML.
link Creating New Elements
jQuery offers a trivial and elegant way to create new elements using the same $() method used to make selections:
// Creating a new element with an attribute object.$( "",html: "This is a new link","class": "new",href: "foo.html">);
Note that the attributes object in the second argument above, the property name class is quoted, although the property names html and href are not. Property names generally do not need to be quoted unless they are reserved words (as class is in this case).
When you create a new element, it is not immediately added to the page. There are several ways to add an element to the page once it's been created.
// Getting a new element on to the page.var myNewElement = $( "New element
" );myNewElement.appendTo( "#content" );myNewElement.insertAfter( "ul:last" ); // This will remove the p from #content!$( "ul" ).last().after( myNewElement.clone() ); // Clone the p so now we have two.
The created element doesn't need to be stored in a variable – you can call the method to add the element to the page directly after the $() . However, most of the time you'll want a reference to the element you added so you won't have to select it later.
You can also create an element as you're adding it to the page, but note that in this case you don't get a reference to the newly created element:
The syntax for adding new elements to the page is easy, so it's tempting to forget that there's a huge performance cost for adding to the DOM repeatedly. If you're adding many elements to the same container, you'll want to concatenate all the HTML into a single string, and then append that string to the container instead of appending the elements one at a time. Use an array to gather all the pieces together, then join them into a single string for appending:
jQuery Create Element And Append To Webpage
In this tutorial, you will learn how jQuery create element with classes and id and then append it to the webpage. You will learn how to create elements with class, id, and attributes with different methods.
Creating elements dynamically is the most common task in web development. You need to create and attach different attributes to the element like id, class, attributes, styles, events, etc.
With jQuery , it becomes quite easy to perform these tasks sometimes with just one line of code. Let's see how it works.
Dynamically creating elements in the webpage can make your webpage more engaging and attractive.
Table of content - jQuery Create Element
Create Element jQuery
To create HTML element using jQuery, use $() function. A string is passed as an argument to the function.
jQuery checks if the passed string is a CSS selector then it selects the element from the webpage, and if the string looks like an HTML (i.e ) then it creates the element and returns it.
Note : The jQuery() function can be written as $() .
Let's create a paragraph element using jQuery.
// creating a paragraph $(""); // creating a paragraph with text $("
Hello World!
"); // storing the element in a variable var p = $("Hello World!
");After creating the element jQuery also returns the reference to the element which you can store in a variable and use later.
jQuery Create div
String passed in the $() function is case sensitive when you try to select an element using CSS selector (like $("p.box") and $("p.Box") are different) but when you create element then string is non case sensitive (like $("") and $("") are same).
To create a div element, you can use $() function and pass , , , etc as argument.
Append Created Element To Webpage
Just creating the element will not show it on the webpage. To show the element on the webpage, you need to append it to the desired location.
To append an element to the webpage using jQuery, you can use the following methods.
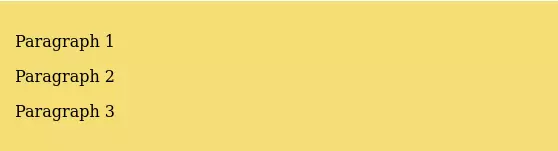
1. append() Method
The append() method appends the element as the last child to the parent element (on which it is called).
For example, if we have 2 paragraphs in a div element and we append the 3rd paragraph to the div element by using the append() method then it will become the last child (3rd paragraph) of the div element.
Paragraph 1 Paragraph 2
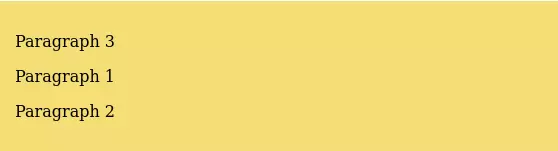
2. prepend() Method
The prepend() method appends the element as the first child to the parent element (on which it is called).
If a parent element already has 2 elements and a new element is added to it using prepend() method then the new element will become the first child of the parent element.
Paragraph 1 Paragraph 2
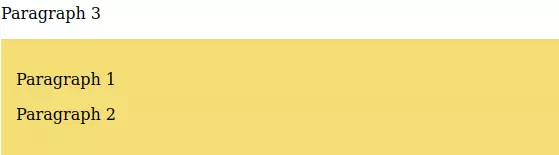
3. before() Method
The before() method inserts the element before the element on which it is called and makes it the previous sibling of the element.
Paragraph 1 Paragraph 2
4. after() Method
The after() method inserts the element after the element on which it is called and makes it the next sibling of the element.
Paragraph 1 Paragraph 2

jQuery Create Element with Class
To add a class to an element, use the addClass() method.
Pass the class name as a string parameter to the method. You can pass multiple class names separated by a space.
var newDiv = $(""); // add a class newDiv.addClass("box"); // add to body $("body").append(newDiv);jQuery Create Element with ID
To add an ID to an element, use the attr() method.
The attr() method accepts two parameters: the name of the attribute and the value of the attribute.
Pass 2 parameters to the method: the name of the attribute "id" and the value of the attribute (here "box" in the example).
var newDiv = $(""); // add an id newDiv.attr("id", "box"); // add to body $("body").append(newDiv);You can also use the attr() method to add other attributes also to the element just pass the attribute name and the value as a string.
Conclusion
This is the end of the tutorial on how jQuery create element with class and id and append the element at various locations on the page. You can do a lot of things using this like creating a to-do list app using jQuery.
Jquery создать html элементы


Частная коллекция качественных материалов для тех, кто делает сайты

- Creativo.one2000+ уроков по фотошопу
- Фото-монстр300+ уроков для фотографов
- Видео-смайл200+ уроков по видеообработке
- Жизнь в стиле «Кайдзен» Техники и приемы для гармоничной и сбалансированной жизни
В этой рубрике Вы найдете уроки по Javascript библиотеке jQuery.

Анимация набора текста на jQuery
Сегодня мы бы хотели вам рассказать о библиотеке TypeIt — бесплатном jQuery плагине. С её помощью можно имитировать набор текста. Если всё настроить правильно, то можно добиться очень реалистичного эффекта.

Временная шкала на jQuery

Заметка: Перезагрузка и редирект на JavaScript
Быстрая заметка, где вы сможете найти парочку JS сниппетов для перезагрузки и перенаправления пользователей через JavaScript.

Рисуем диаграмму Ганта

AJAX и PHP: загрузка файла

Stimed — стили в зависимости от времени суток
Интересная библиотека с помощью которой можно задать определённым элементам страницы особые стили в зависимости от времени суток.