При клике на кнопку отправляется AJAX-запрос на скрипт ajax.php с GET-параметром page=2 (при следующим клике – page=3 и т.д.), скрипт возвращает следующие три записи, далее они вставляются в конец списка товаров методом jquery append() . Когда все записи показаны, кнопка скрывается.
Код ajax.php
prepare("SELECT * FROM `prods` LIMIT , "); $sth->execute(); $items = $sth->fetchAll(PDO::FETCH_ASSOC); foreach ($items as $row) < ?>
Во втором примере, AJAX-запрос отправляется сам на себя. Скрипт выводит записи в зависимости от значения переменной $_GET[‘page’] , которое содержит номер страницы (скрипт основан на пагинаторе).
Стоит отметить, что данный пример избавляет от дублирования кода, но работает медленнее, т.к. через AJAX идет полный HTML-код страницы.
prepare("SELECT SQL_CALC_FOUND_ROWS * FROM `prods` LIMIT , "); $sth->execute(); $items = $sth->fetchAll(PDO::FETCH_ASSOC); // Узнаем сколько всего записей в БД $sth = $dbh->prepare("SELECT FOUND_ROWS()"); $sth->execute(); $total = $sth->fetch(PDO::FETCH_COLUMN); $amt = ceil($total / $limit); ?>
Показать еще
Результат:
Комментарии 2
Здравствуйте!Очень благодарен за Ваш пост!Я использую второй вариант Вашего кода. Архитектура моего приложения — MVC, работа с базой данных через ORM RedBeans. Кнопка Показать еще пропадает при полном выводе данных из таблицы. Но есть вопрос: подгруженные данные приклике не выводятся в виде. Т.е. они выводятся, курсор их видит и при клике на их место происходит переход по их ссылке (в данном случае на страницу карточки товара).Я не сильно какой кодер. Всю голову сломал, но так и не понял причину.Запрос к DB — $products = \R::find(‘product’, «LIMIT $start, $perpage»);Если нетрудно поделитесь соображениями по этому поводу.Спасибо!Виталий.
Авторизуйтесь, чтобы добавить комментарий.
Другие публикации
В статье приведены основные примеры работы с расширением PHP PDO. Такие как подключение к БД, получение, изменение и.
AJAX позволяет отправить и получить данные без перезагрузки страницы. Например, делать проверку форм, подгружать контент и т.д. А функции JQuery значительно упрощают работу.
В больших формах, с несколькими кнопками «Отправить/сохранить» есть одна проблема – после ее отправки браузер обновит.
How to Implement a “Load More” Button With Vanilla JavaScript
Jemima Abu Last updated Jul 29, 2022
We’ve covered Pagination and Infinite Scrolling in previous tutorials. On this occasion, we’ll be looking at another method of controlling how content is displayed on a page: using a “Load More” button.
A “Load More” button adds more content to a page when clicked by a user. This is a common approach for blogs as it allows the user to decide how and when information is displayed.
Here’s a look at the final product we’ll work on today—scroll to the bottom of the pen and click the button to add more content to the page:
1. Card Container and Button HTML
We’ll start by placing the container for our cards on the page. We’ll be adding the cards to the container using JavaScript so the div will be empty.
Our implementation includes a “load more” button and also displays the current number of cards being shown and the total number of cards available. We’ll include these features in a card-actions div. The content in card-count and card-total will be added with JavaScript.
2. Styling the Cards and Button
The cards we’ll be adding to the card-container div will have a classname of “card”.
transition:all200msease-in-out;
box-shadow:04px10pxrgba(0,0,0,0.2);
We’ll style our load-more button in a similar manner to the cards and add a disabled pseudo-selector to show when the end of the cards have been reached.
justify-content:space-between;
transition:all200msease-in-out;
box-shadow:01px9pxrgba(0,0,0,0.2);
background-color:#eaeaea!important;
3. Adding Functionality With JavaScript
This is what the functional implementation for the load more button will look like:
Define a number of cards to be added to the page each time the user clicks the button.
Detect when the total number of cards have been added and disable the button.
Defining Constants
First, get all the elements we’ll need from our DOM:
We’ll need a value for the max number of cards to be added to the page. If you’re getting your data from a server, this value is the length of the response from the server. Let’s initialise a card limit of 99.
The cardTotalElem is the element for displaying the max number of cards on the page so we can set the innerHTML to the cardLimit value;
cardTotalElem.innerHTML=cardLimit;
Then we’ll define a variable for how many cards we want to increase the page by:
Much like with our infinite scrolling tutorial, we’ll want to know how many “pages” we’ll have i.e. how many times can we increase the content till we reach the max limit. For example, with our defined cardLimit and cardIncrease variables, we can increase the content 10 times (assuming we’ve already loaded the first 9 elements) until we reach the limit. We’ll do this by dividing the cardLimit by the cardIncrease .
constpageCount=Math.ceil(cardLimit/cardIncrease);
Then we’ll define a value to determine which page we’re on:
Creating a New Card
Now we have all our constants, let’s make a function to add a new card to the card container. We’ll set the innerHTML of our cards to the index value so we can keep track of the number of cards we’re adding.
A fun feature in this demo is that each card has a randomly generated background color.
consth=Math.floor(Math.random()*360);
constcard=document.createElement("div");
card.style.backgroundColor=getRandomColor();
cardContainer.appendChild(card);
We can also apply this function to our load-more button on page load to give it a random background color as well:
We’ll add our cards to our container using a similar functionality to what we used in the Infinite Scrolling tutorial.
First, determine the range of cards to be added to the page. The addCards function will accept a pageIndex parameter, which will update the global currentPage value. If we’re on page 1, we’ll add cards 1 to 9. If we’re on page 2, we’ll add cards 10 to 18 and so on.
We can define that mathematically as:
constaddCards=(pageIndex)=>
conststartRange=(pageIndex-1)*cardIncrease;
constendRange=pageIndex*cardIncrease;
for(leti=startRange+1;iendRange;i++)
In this function, our start range will always be one less than the value we’re trying to get (i.e. on page 1, the start range is 0, on page 2, the start range is 9) so we’ll account for that by setting the value of our for loop index to startRange + 1 .
Detecting When Card Limit is Reached
A limit we’ll have to look out for is the endRange number. If we’re on the last page, we’ll want our end range to be the same as the cardLimit . For instance, if we have a cardLimit of 75 and a cardIncrease of 10 and we’re on page 8, our startRange will be 70 and our endRange value should be 75.
We’ll modify our addCards function to account for this:
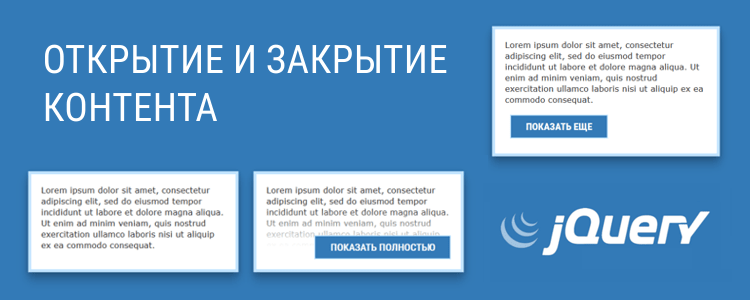
По своей сути «показать полностью» и «показать еще» это одно и тоже, но для каждого варианта в этой заметке используются разные решения.
В интернете масса различных примеров, как показать и скрыть контент, нажав на кнопку, но все они, как правило, реализованы для одного конкретного блока. В данной теме оба примера можно применять к неограниченному их числу.
Скрипты используемые в этих примерах сделаны для библиотеки jQuery
Кнопка «показать еще»
В этом примере часть контента с классом hide-content скрывается и показывается нажатием на кнопку или любой другой элемент с классом show-more
Каждая кнопка и скрытый текст должны находиться в контейнере content-block
Lorem ipsum dolor sit amet, consectetur adipiscing elit, sed do eiusmod tempor incididunt ut labore et dolore magna aliqua. Ut enim ad minim veniam, quis nostrud exercitation ullamco laboris nisi ut aliquip ex ea commodo consequat.
Duis aute irure dolor in reprehenderit in voluptate velit esse cillum dolore eu fugiat nulla pariatur. Excepteur sint occaecat cupidatat non proident, sunt in culpa qui officia deserunt mollit anim id est laborum.
Duis aute irure dolor in reprehenderit in voluptate velit esse cillum dolore eu fugiat nulla pariatur. Excepteur sint occaecat cupidatat non proident, sunt in culpa qui officia deserunt mollit anim id est laborum.
CSS в этом примере не выкладываю, т.к. оформление тут индивидуальное, но если кому нравится эта кнопка, ее код представлен ниже.
Есть блок с отзывами, по нажатию на кнопку «Показать еще» нужно сделать чтобы появлялись следующих два отзыва и так до последнего отзыва, после этого кнопка скрывалась. Библиотеки не советовать.
Простой 2 комментария
Пробуйте что-то сделать. Мы не знаем в каком виде у вас данные, в каком виде разметка. Что не получается, спрашивайте. Это нужно писать, за вас никто не сделает.
Что вы хотите услышать? Напишите код, который подгружает по аяксу два отзыва, если нет больше ответа — скрывайте кнопку
1) Грузим первые N записей и получаем признак есть ли ещё записи после них 2) Запоминаем id последней загруженной и признак есть ли ещё 3) Если есть ещё, показываем кнопку «Загрузить ещё», на нет и суда нет, return; 4) При нажатии кнопки «Загрузить ещё» передаём сохранённый id, чтобы бэкенд грузил следующие с id меньше, чем мы передали Повторить пока не юзер не загрузит все оставшиеся записи
Войдите, чтобы написать ответ
Браузерное расширение перестает работать после перезагрузки страницы?