- Проверка формы на JavaScript
- Javascript форма обязательное заполнение
- # Table of Contents
- # Set the «required» Attribute using JavaScript
- # Setting the «required» attribute on multiple elements
- # Remove the «required» Attribute using JavaScript
- # Removing the «required» attribute from multiple elements
- # Additional Resources
Проверка формы на JavaScript
В этой статье мы начнём разбираться с более сложными и функционально-законченными скриптами. Пройдём по шагам через все стадии — начиная с постановки задачи и заканчивая универсальным скриптом, готовым к употреблению. И начнём с проверки формы перед отсылкой на сервер.
Общие соображения и html-код формы
Проверка формы, пожалуй, одна из наиболее часто применяемых функций. Редкий сайт обходится без какой-либо её вариации, будь то простая отсылка сообщения на e-mail или форма сложного заказа в интернет-магазине. Польза скрипта очевидна — проверить, что пользователь заполнил все нужные поля перед отправкой и тем самым избежать проблемы получения пустых писем или отсутствия контактной информации отправителя.
Предположим, что форма у нас уже есть и состоит из следующих 4-х полей: имя, электронный адрес, тема сообщения и непосредственно само сообщение. Соответствующий html-код для такой формы будет выглядеть примерно так:
Ваше имя: *
Электронный адрес: *
Тема сообщения:
Сообщение:
* — необходимые для заполнения поля
Заметьте, что в отличие от обычной формы непосредственно в теге мы отслеживаем событие onsubmit и при его наступлении вызываем функцию проверки формы sendform().
Почему выбран именно такой способ вызова функции? Ведь можно было применить, например, событие onclick? Ответ простой — при использовании события onclick кнопку «submit» придётся заменить обычной кнопкой. И, в случае, если в броузере отключена поддержка javascript, мы не сможем отправить форму (!). Отслеживание же события onsubmit лишено этого недостатка, т.к. даже при отключенной поддержке скриптов форма будет отправлена.
Будем считать, что необходимых для заполнения полей у нас всего два: имя посетителя и его электронный адрес.
Если Вы внимательно присмотритесь к html-коду нашей формы, то заметите, что рядом с этими полями я поставил звёздочку, а в конце формы разместил сноску. Сделано это, разумеется, для удобства и элементарного уважения к пользователю.
Функция проверки формы перед отправкой
А теперь перейдём к главному — к написанию той самой функции, что будет непосредственно осуществлять проверку формы. Давайте подумаем, что нам от неё требуется? Ну, во-первых, проверить, что нужные поля заполнены, а во-вторых — отослать форму. В случае же, если несколько из обязательных полей пусты, нам нужно сформировать об этом сообщение пользователю и переместить курсор на соответствующий элемент.
Для начала напишем общую обвязку функции:
Применённый нами способ вызова функции через событие onsubmit в качестве результата работы функции требует возврата одного из логических значений: true или false. И, в зависимости от этого значения, форма либо будет отправлена, либо нет.
Теперь попробуем написать проверочную функцию, привязанную к данной конкретной форме. Как Вы помните, необходимых для заполнения полей у нас всего два: имя посетителя и его электронный адрес. Самое простое — это проверить содержимое каждого из обязательных полей на отсутствие текста:
if (document.forms[0].email.value == "") < alert('Пожалуйста, введите электронный адрес'); document.mailform.email.focus(); return false >return true; > //--> Как видите, функция проверки состоит из двух идентичных блоков, различающихся только именем проверяемого поля. Давайте прокомментируем каждую строчку в этих блоках:
сначала проверяем, что данное поле является пустым. И если это так, то
выводим сообщение об ошибке при помощи встроенной функции alert(). После того, как пользователь закроет окошко, мы
воспользуемся методом focus() и переместим курсор на ошибочное поле. И, наконец,
выйдем из функции, установив флажок успешности выполнения в false.
В случае же, если проверяемое поле не было пустым, то соответствующий блок просто пропускается. При пропуске всех проверочных блоков функция в качестве результата возвращает true, что свидетельствует об успешной проверке.
Универсальная функция проверки
Если нам необходимо проверить всего два или три поля, то с таким методом проверки «по-одиночке» ещё можно смириться, но что, если их несколько десятков? А ведь такое не редкость — особенно в сложных анкетах. Поэтому мы немного модифицируем нашу функцию, чтобы она не зависела от количества проверяемых полей.
Первым делом мы создадим массив, где перечислим имена всех полей, которые требуют проверки:
required = new array(«name», «email»);
Такой подход позволит нам очень легко добавлять и модифицировать список обязательных полей без непосредственного изменения кода самой функции.
Дополнительно к вышеописанному массиву мы добавим ещё один, который будет содержать текст ошибки для конкретного поля:
required_show = new array(«Ваше имя», «электронный адрес»);
Это позволит нам свободно варьировать текст об ошибках и правильно пользоваться русским языком, а не удовольствоваться неудобоваримыми фразами типа «name не введён».
Имея массив обязательных для заполнения полей, всю проверку можно осуществлять в цикле. Вот как будет выглядеть модифицированная функция проверки:
В цикле происходит проверка всех полей формы на совпадение с «обязательными». В случае, если совпадение произошло, проверка осуществляется аналогично тому, как это было описано выше, но с одним нюансом — введение массива с сообщениями об ошибках потребовало небольшой модификации функции alert(), так что теперь текст ошибки напрямую зависит от имени поля.
Вот, в общем-то, и всё. Данная функция вполне универсальна и с минимальными корректировками (в сущности — содержимое двух массивов) может быть адаптирована к любой форме.
Javascript форма обязательное заполнение
Last updated: Jan 11, 2023
Reading time · 4 min
# Table of Contents
# Set the «required» Attribute using JavaScript
To set the required attribute:
- Select the element.
- Use the setAttribute() method to set the required attribute.
- The setAttribute method will add the required attribute to the element.
Here is the HTML for the examples.
Copied!DOCTYPE html> html lang="en"> head> title>bobbyhadz.comtitle> meta charset="UTF-8" /> head> body> input type="text" id="first_name" /> script src="index.js"> script> body> html>
And here is the related JavaScript code.
Copied!const input = document.getElementById('first_name'); // ✅ Set required attribute input.setAttribute('required', ''); // ✅ Remove required attribute // input.removeAttribute('required');
We selected the input field using the document.getElementById method.
We then used the setAttribute method to add the required attribute to the input.
The method takes the following 2 parameters:
- name — the name of the attribute to be set.
- value — the value to assign to the attribute.
If the attribute already exists on the element, its value is updated, otherwise, a new attribute with the specified name and value is added to the element.
It’s a best practice to set boolean attributes, such as required , to an empty string.
If a boolean attribute is not present, the value of the attribute is considered to be false .
If you need to remove an attribute, use the removeAttribute method.
Copied!const input = document.getElementById('first_name'); // ✅ Set required attribute input.setAttribute('required', ''); // ✅ Remove required attribute input.removeAttribute('required');
The required attribute can be set to any value and as long as it is present on the element, it does the job.
# Setting the «required» attribute on multiple elements
Note that you can only call the setAttribute method on DOM elements. If you need to set the required attribute on a collection of elements, you have to iterate over the collection and call the method on each individual element.
Here is the HTML for the next example.
Copied!DOCTYPE html> html lang="en"> head> title>bobbyhadz.comtitle> meta charset="UTF-8" /> head> body> input type="text" id="first_name" class="field" /> input type="text" id="last_name" class="field" /> input type="text" id="country" class="field" /> script src="index.js"> script> body> html>
And here is the related JavaScript code.
Copied!const inputs = document.querySelectorAll('.field'); for (const input of inputs) input.setAttribute('required', ''); >
We used the document.querySelectorAll method to select all elements with a class of field .
We used the for. of loop to iterate over the collection and set the required attribute on each element.
# Remove the «required» Attribute using JavaScript
To remove the required attribute, select the element and call the removeAttribute() method on it, passing it required as a parameter.
The removeAttribute method will remove the required attribute from the element.
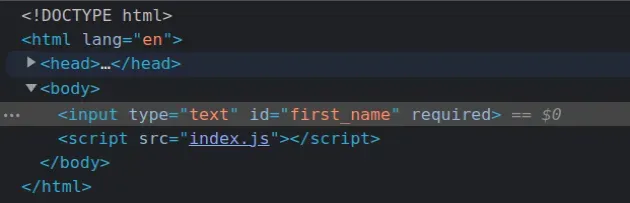
Here is the HTML for the examples.
Copied!DOCTYPE html> html lang="en"> head> title>bobbyhadz.comtitle> meta charset="UTF-8" /> head> body> input type="text" id="first_name" required /> script src="index.js"> script> body> html>
And here is the related JavaScript code.
Copied!const input = document.getElementById('first_name'); // ✅ Remove the required attribute input.removeAttribute('required'); // ✅ Set the required attribute // input.setAttribute('required', '');
We selected the input element using the document.getElementById() method.
We then used the removeAttribute method to remove the required attribute from the element.
The method takes the attribute to remove as a parameter.
If the attribute does not exist on the element, the removeAttribute() method does not throw an error, it ignores the call.
When setting the value of a boolean attribute, such as required , we can specify any value for the attribute and it will work.
If the attribute is present at all, regardless of the value, its value is considered to be true .
If a boolean attribute, such as required , is not present, the value of the attribute is considered to be false .
If you need to add an attribute, you can use the setAttribute method.
Copied!const input = document.getElementById('first_name'); // ✅ Remove required attribute input.removeAttribute('required'); // ✅ Set required attribute input.setAttribute('required', '');
The method takes the attribute name as the first parameter and the value that should be assigned to the attribute as the second.
When setting boolean attributes, such as required , it’s a best practice to set them to an empty value. That’s why we passed an empty string as the value in the example.
The required attribute can be set to any value and as long as it is present on the element, it does the job.
# Removing the «required» attribute from multiple elements
Note that you should only call the removeAttribute() method on DOM elements.
If you need to remove the required attribute from a collection of elements, you have to iterate over the collection and call the method on each individual element.
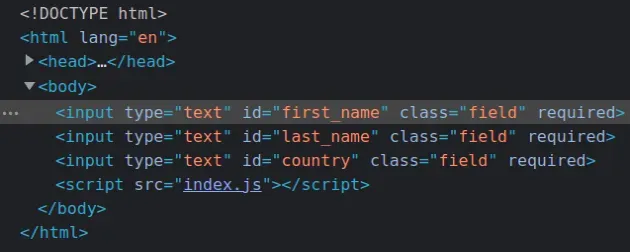
Here is the HTML for the next example.
Copied!DOCTYPE html> html lang="en"> head> title>bobbyhadz.comtitle> meta charset="UTF-8" /> head> body> input type="text" id="first_name" class="field" required /> input type="text" id="last_name" class="field" required /> input type="text" id="country" class="field" required /> script src="index.js"> script> body> html>
And here is the related JavaScript code.
Copied!const inputs = document.querySelectorAll('.field'); for (const input of inputs) // ✅ Remove required attribute input.removeAttribute('required'); >
We used the document.querySelectorAll method to select all elements with a class of field .
We used the for. of loop to iterate over the collection and remove the required attribute from each element.
# Additional Resources
You can learn more about the related topics by checking out the following tutorials:
I wrote a book in which I share everything I know about how to become a better, more efficient programmer.