- How to Convert Canvas to an Image using JavaScript
- Syntax
- encoderOptions (optional)
- Return value
- Example 1
- Different image quality with jpegs format type
- How to save HTML Canvas as an Image
- Downloading a Canvas as an Image
- How toDataURL() works
- Saving images from canvas as other formats
- Conclusion
- More Tips and Tricks for HTML
- Vanilla JavaScript save canvas as an image
- Live Code example in Codepen permalink
- 1. Canvas to Image with Right-click to save permalink
- 2. Download the button to save an image from the canvas permalink
- Browser Support permalink
- Thank you for reading, and let’s connect! permalink
- Downloading and saving an HTML canvas as an image using Javascript
- Retrieving and downloading image data from a canvas using Javascript
- Downloading and saving an HTML canvas as an image example
How to Convert Canvas to an Image using JavaScript
The HTMLCanvasElement has special method toDataURL() which returns a encoded data URI representing the image in the specified format(defaults to PNG).
- If the canvas height or width is 0 or larger than the canvas maximum size, then the string containing «data:» is returned.
- If the requested type is not image/png , but the returned value starts with data:image/png , then the requested type is not supported.
- Chrome also supports the WEBP( image/webp ) type.
Syntax
- It indicates the type of image format.
- It will have the value of string type and is an optional parameter with default format type value image/png .
encoderOptions (optional)
- It indicates the type of image format.
- It will have the value of number type and is an optional parameter with default value 0.92.
- The value ranges from 0 to 1 indicating the quality of an image to use for formats that use lossy compression such as image/jpeg and image/webp .
- Invalid value is ignored and default value is considered instead of it.
Return value
It returns a DOMString containing the requested data URI.
Example 1
This code will append image element into your browser document.
Different image quality with jpegs format type
Hope you learn something new. If this article was helpful, share it.
Keep helping and happy 😄 coding
Vishnu Damwala
A web geek, an industry experienced web developer & tutor/instructor residing in India 🇮🇳
How to save HTML Canvas as an Image
Canvas gives us a lot of flexibility to create great, code generated graphics, and sometimes we need to download them as images. Fortunately, this is quite easy with HTML canvas. Here is an example, where clicking the button downloads the canvas as an image:
Let’s look at how this works.
Downloading a Canvas as an Image
In the example above, we’ve created a canvas image and a button you can click to download it. This button uses toDataURL() to convert our canvas to an image URL data string. When we click on it we get our original canvas, and then create an anchor to download it immediately:
let canvas = document.getElementById('canvas'); let ctx = canvas.getContext('2d'); // Canvas code goes here // . document.getElementById('download').addEventListener('click', function(e) // Convert our canvas to a data URL let canvasUrl = canvas.toDataURL(); // Create an anchor, and set the href value to our data URL const createEl = document.createElement('a'); createEl.href = canvasUrl; // This is the name of our downloaded file createEl.download = "download-this-canvas"; // Click the download button, causing a download, and then remove it createEl.click(); createEl.remove(); >);
Javascript struggles a bit with native downloads, so we are emulating a link click instead. We do that by creating the anchor using createElement , and then using click() to click on it. This achieves the same outcome.
The key thing to remember is to use toDataURL , which encodes our image data as a string that is easily downloaded.
How toDataURL() works
toDataURL() converts a canvas element to a long image encoding string. Let’s look at our example:
// Convert our canvas to a data URL let canvasUrl = canvas.toDataURL(); console.log(canvasUrl); // Outputs // "data:image/png;base64,iVBORw0KGgoAAAANSUhEUgAABRQAAANSCAYAAAAUN0KjAAAAAXNSR0IArs4c6QAAIABJREFUeF7sfVuSJLeOrNrsaP/7GM227pmZVehaZTxIgni. By default, toDataURL() creates a png image. But fortunately it has options to let us change that if we want.
Saving images from canvas as other formats
toDataURL(type, encoderOptions) has two arguments which lets us change the way the canvas is encoded. This lets us save files as other formats, such as jpg.
Those two arguments can be defined as follows:
- type , which is a filetype, in the format image/png .
- encoderOptions , which is a number between 0 and 1, defining the image quality. This is only supported by file formats that have lossy compression, like webp or jpg.
For example, if we wanted to save our image as a .jpg with a quality of 59% , we could write the following:
// Convert our canvas to a data URL let canvasUrl = canvas.toDataURL("image/jpeg", 0.5); console.log(canvasUrl); // Outputs // "data:image/jpeg;base64,/9j/4AAQSkZJRgABAQAAAQABAAD/4gIoSUNDX1BST0ZJTEUAAQEAAAIYAAAAAAQwAABtbnRyUkdCIFhZWiAAAAAAAAAAAAAAAABhY3NwAAAAAA. By default, all browsers support image/png . Other formats, like image/jpeg and image/webp are widely supported. Support on image/webp can be found here.
Conclusion
Saving canvas elements as images is straightforward and only relies on toDataURL . If you want to learn about saving canvas images in a real world setting on the backend, you can read my tutorial on that here.
More Tips and Tricks for HTML
Vanilla JavaScript save canvas as an image
Guide explaining how exporting our Canvas drawing as an image to download. Try the Codepen to see yourself.
Yesterday, we started our introductory canvas course.
In this JavaScript tutorial, we will learn how to save the canvas as an image and download it.
So how do we convert the canvas to export it as an image?
There are two ways of doing this. And we will explore both.
Live Code example in Codepen permalink
1. Canvas to Image with Right-click to save permalink
Everyone knows this option, but we can right-click on the canvas to save it as an image.
This will only work in specific browsers. That’s why it’s not the correct way of saving the image.

Note: Keep in mind the canvas has no background!
2. Download the button to save an image from the canvas permalink
The second solution is to add a download button to our page. The button will then export the canvas content and open the base64 image in another tab. And from there, you can download the image.
canvas id="canvas" height="200">canvas> br /> button id="download">Downloadbutton>Now let’s add the button variable to our JavaScript code:
const download = document.getElementById('download');Awesome. We need to add an eventListener to it and listen to the click command.
download.addEventListener('click', function (e) const link = document.createElement('a'); link.download = 'download.png'; link.href = canvas.toDataURL(); link.click(); link.delete; >);We create a temporary link href on which we will place the canvas’s data URL and then click it.
We are using the toDataURL function, which returns a base64 image string that looks something like this:
// "data:image/png;base64,iVBORw0KGgoAAAANSUhEUgAAAAUAAAAFCAYAAACNby // blAAAADElEQVQImWNgoBMAAABpAAFEI8ARAAAAAElFTkSuQmCC"Browser Support permalink
The canvas element is well supported these days and is defiantly a good option if you want to draw vectors on screen.

Thank you for reading, and let’s connect! permalink
Thank you for reading my blog. Feel free to subscribe to my email newsletter and connect on Facebook or Twitter
Downloading and saving an HTML canvas as an image using Javascript
Learn how to allow users to download and save the contents of an HTML canvas in the form of an image.
HTML canvases can be used for a wide variety of applications such as drawing images,
, animation and much more. A particularly useful feature that you can make use of in Javascript is the ability to capture a canvas as an image (formatted to your choice) and allow users to download this image all in one click.
Retrieving and downloading image data from a canvas using Javascript
There are 2 steps involved in allowing users to download an HTML canvas as an image.
First, you must retrieve the image data from the canvas element itself, this can be accomplished using the
function which can be used like so:
var imageData = canvas.toDataURL( type, encoderOptions )
The two arguments are both optional. The type arguments specifies the image format, by default this is set to image/png. The encoderOptions argument specifies the quality of the image which by default is set to 0.92.
Next, you would need to create a temporary link using the data retrieved from the toDataURL() function and automatically activate it so that each step can be incorporated into a single function.
This can be done by assigning the returned value of toDataURL() to the href attribute of an anchor element that you manually create in your Javascript function, this can then be automatically activated using the click() function.
Some browsers will only allow an anchor element to be activated if it resides within the body of your HTML document, to get around this you can temporarily add it to the document, activate the link, then immediately remove it. This will not be visible to the user as it happens almost instantly.
// create temporary link var tmpLink = document.createElement( 'a' ); tmpLink.download = 'image.png'; // set the name of the download file tmpLink.href = imageData; // temporarily add link to body and initiate the download document.body.appendChild( tmpLink ); tmpLink.click(); document.body.removeChild( tmpLink );
This will initiate a download for the canvas image.
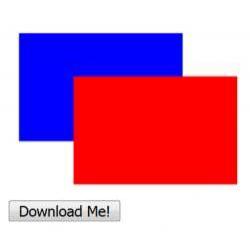
Downloading and saving an HTML canvas as an image example
As a quick example for downloading an HTML canvas as an image, we’ll create a new canvas, draw some shapes on it and then use the above code to initiate a download of the canvas image.
Create the HTML canvas and download button:
canvas id="download_canvas" width="210" height="160">canvas>br> button onclick="downloadCanvas()">Download Me! button>
Initialize the canvas with some basic shapes:
var canvas = document.getElementById( 'download_canvas' ); window.onload = function()< init(); >; function init()< var context = canvas.getContext( '2d' ); context.beginPath(); // draw a blue rectangle context.fillStyle = 'blue'; context.fillRect( 10, 10, 150, 100 ); // draw a red rectangle context.fillStyle = 'red'; context.fillRect( 60, 50, 150, 100 ); >
Create the function to download the image when the download button is clicked:
function downloadCanvas()< // get canvas data var image = canvas.toDataURL(); // create temporary link var tmpLink = document.createElement( 'a' ); tmpLink.download = 'image.png'; // set the name of the download file tmpLink.href = image; // temporarily add link to body and initiate the download document.body.appendChild( tmpLink ); tmpLink.click(); document.body.removeChild( tmpLink ); >
When the download button is clicked, the user should be prompted to download the canvas image:
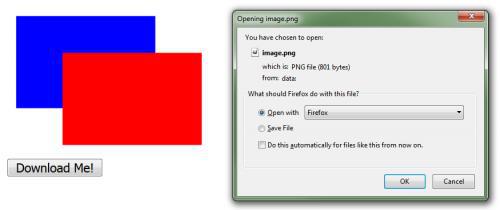
If you’re having any trouble with the above code or have any general questions feel free to ask them in the comments below!

Christopher Thornton @Instructobit 5 years ago