Java Tools and Resources
Early access versions of future releases of JDK and JRE are available for testing. These early access releases include future updates and major releases. These releases are licensed only for testing, not for use in production.
Discover, monitor, and manage your Java environment with this new Oracle Cloud service, wherever your Java is running, on-premises or in the cloud. Know which Java versions are installed and which are being used—all in a single pane of glass. Included with Java SE Subscription.
![]()
Protect your investment—and more
Java SE subscribers get support for JDK 17, receive updates until at least October 2029, are entitled to GraalVM Enterprise, Java Management Service, and bundled patch releases (BPRs) with fixes not yet available to nonsubscribers, and more.
Additional resources
Java Advanced Management Console
The Java Advanced Management Console (AMC) offers system administrators greater and easier control in managing Java version compatibility and security updates for desktops within their enterprise and for ISVs with Java-based applications and solutions.
JDK Mission Control
JDK Mission Control (JMC) is an advanced set of tools for managing, monitoring, profiling, and troubleshooting Java applications. JMC enables efficient and detailed data analysis for areas such as code performance, memory, and latency without introducing the performance overhead normally associated with profiling and monitoring tools.
Java Time Zone Updater Tool
Java Time Zone Updater Tool (TZUpdater) enables an Oracle JDK or JRE user to patch their installation with the most recent time zone data. Learn more.
SDKs
A Software Development Kit , or an SDK , is a collection of tools that you need to develop an application for a specific software framework. For example, to develop applications in Java, you need a Java SDK (JDK). SDKs contain binaries, source code for the binaries, and documentation for the source code. JDK builds also contain annotations.
Generally, SDKs are global. It means that one SDK can be used in multiple projects and modules. After you create a new project and define an SDK for it, you can configure modules in this project to inherit its SDK. You can also specify an SDK for each module individually. For more information, refer to Change module SDK.
Supported SDKs
Configure SDKs
To define an SDK means to let IntelliJ IDEA know in which folder on your computer the necessary SDK version is installed. This folder is called an SDK home directory .
Global SDK
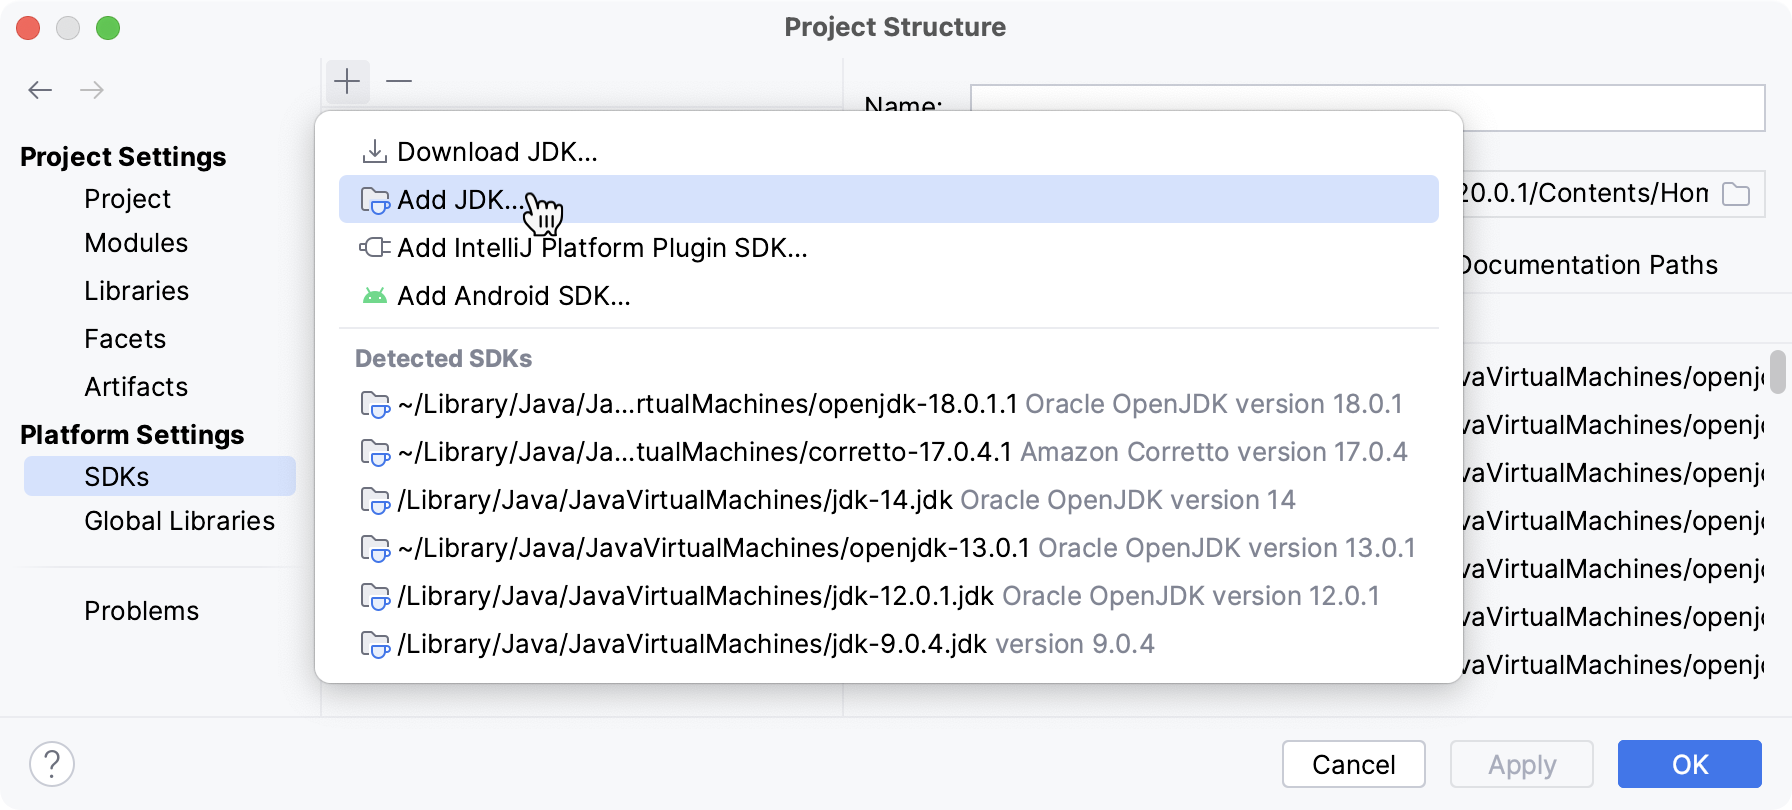
- From the main menu, select File | Project Structure | Platform Settings | SDKs .
- To add an SDK, click , select the necessary SDK and specify its home directory in the dialog that opens. Only for JDKs: if you don’t have the necessary JDK on your computer, select Download JDK . In the next dialog, specify the JDK vendor, version, change the installation path if required, and click Download .
Project SDK
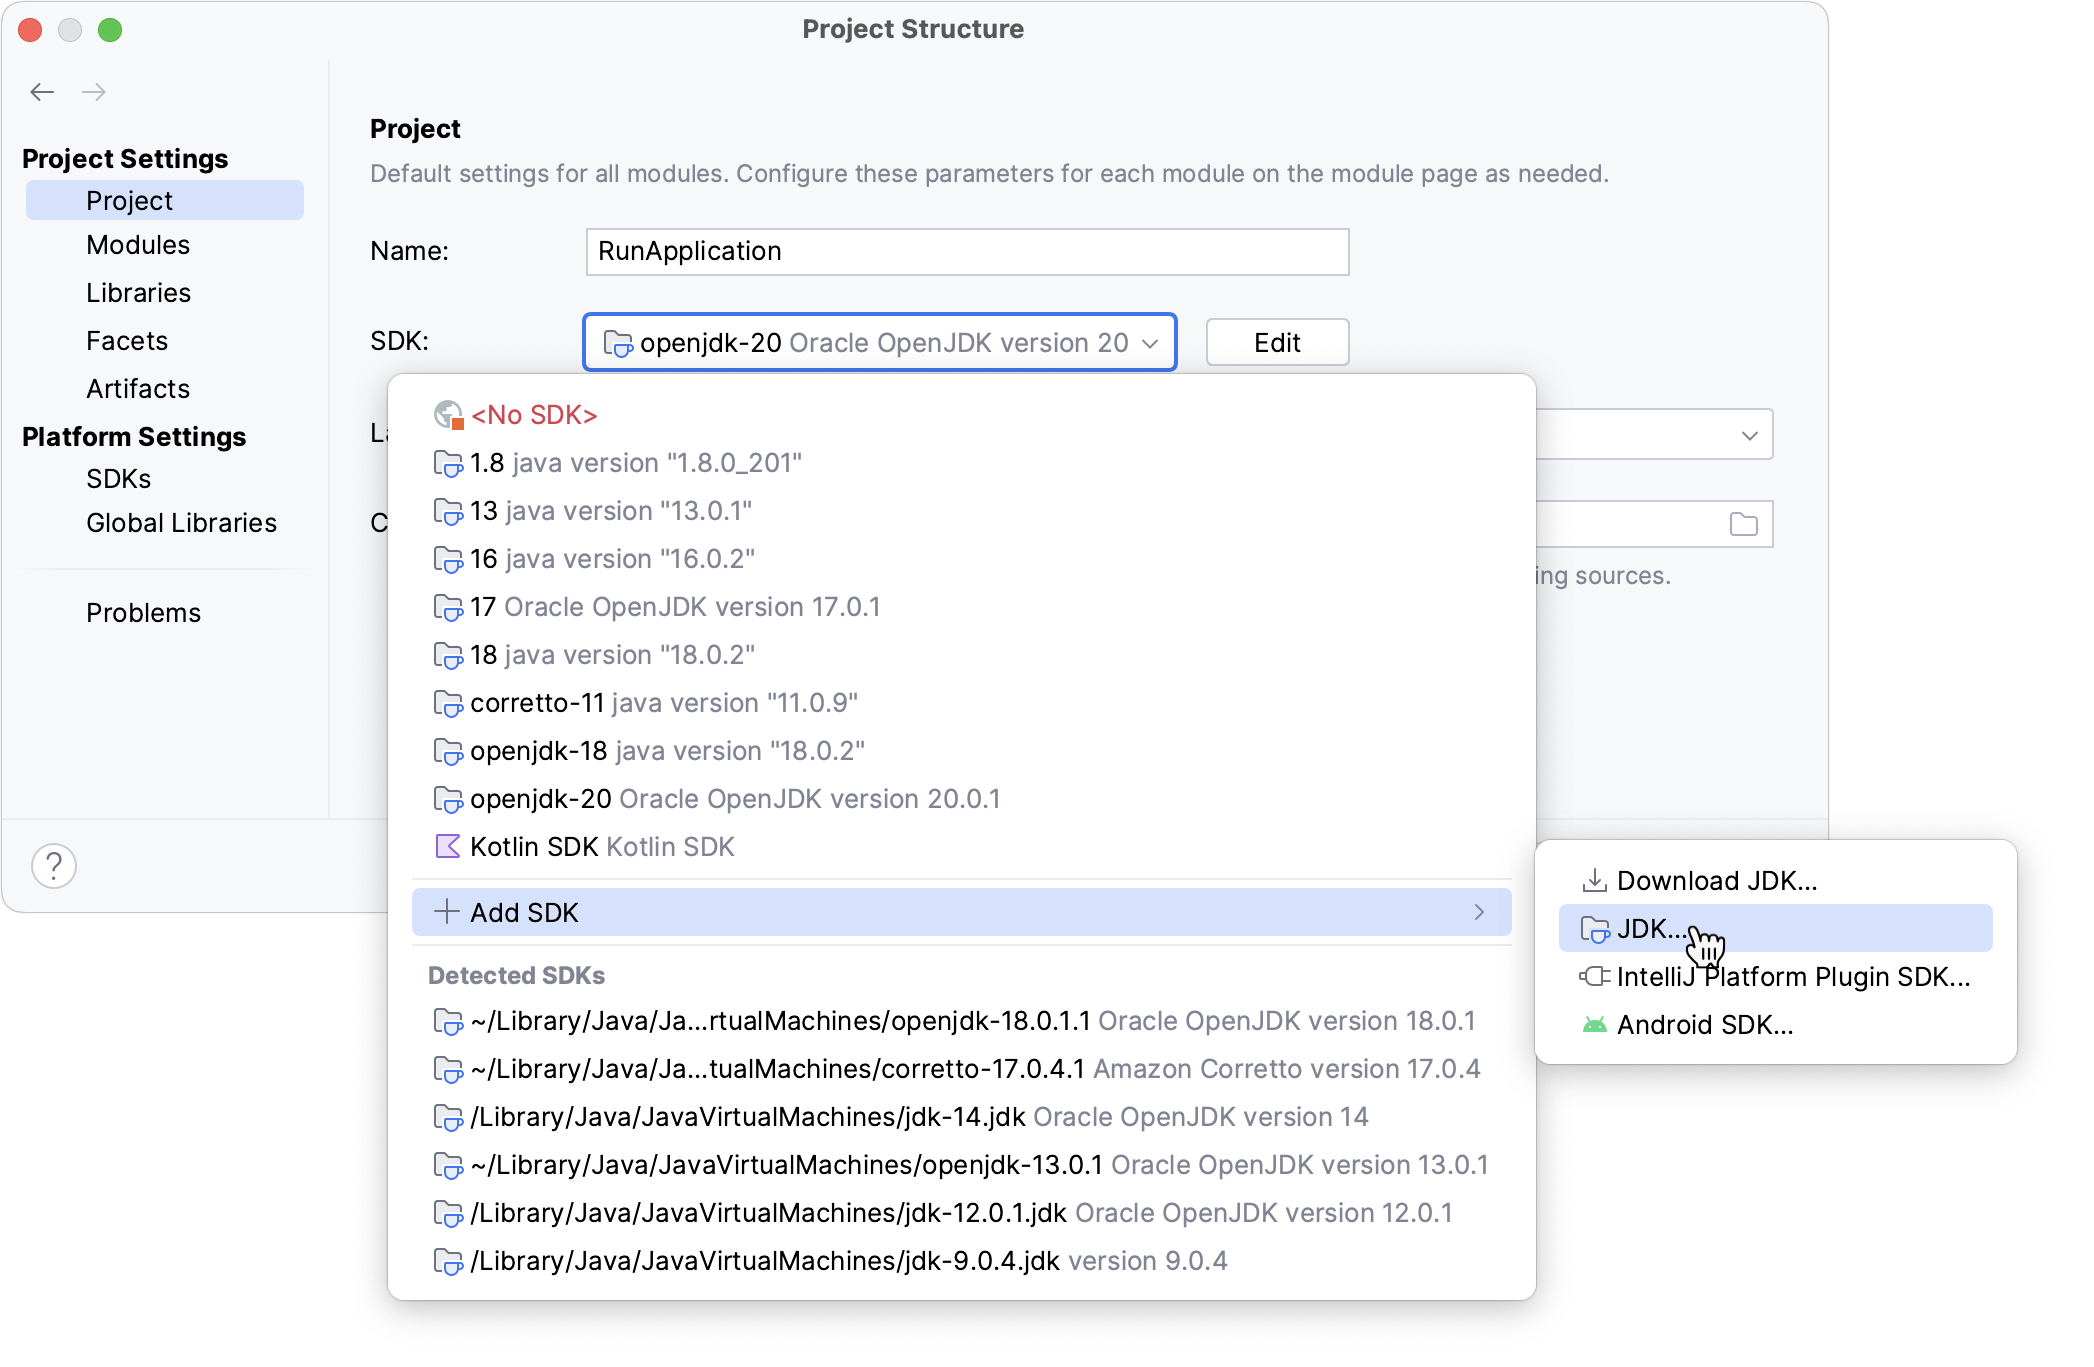
- From the main menu, select File | Project Structure | Project Settings | Project .
- If the necessary SDK is already defined in IntelliJ IDEA, select it from the SDK list. If the SDK is installed on your computer, but not defined in the IDE, select Add SDK | ‘SDK name’ , and specify the path to the SDK home directory. Only for JDKs: If you don’t have the necessary JDK on your computer, select Add SDK | Download JDK . In the next dialog, specify the JDK vendor, version, change the installation path if required, and click Download .
Module SDK
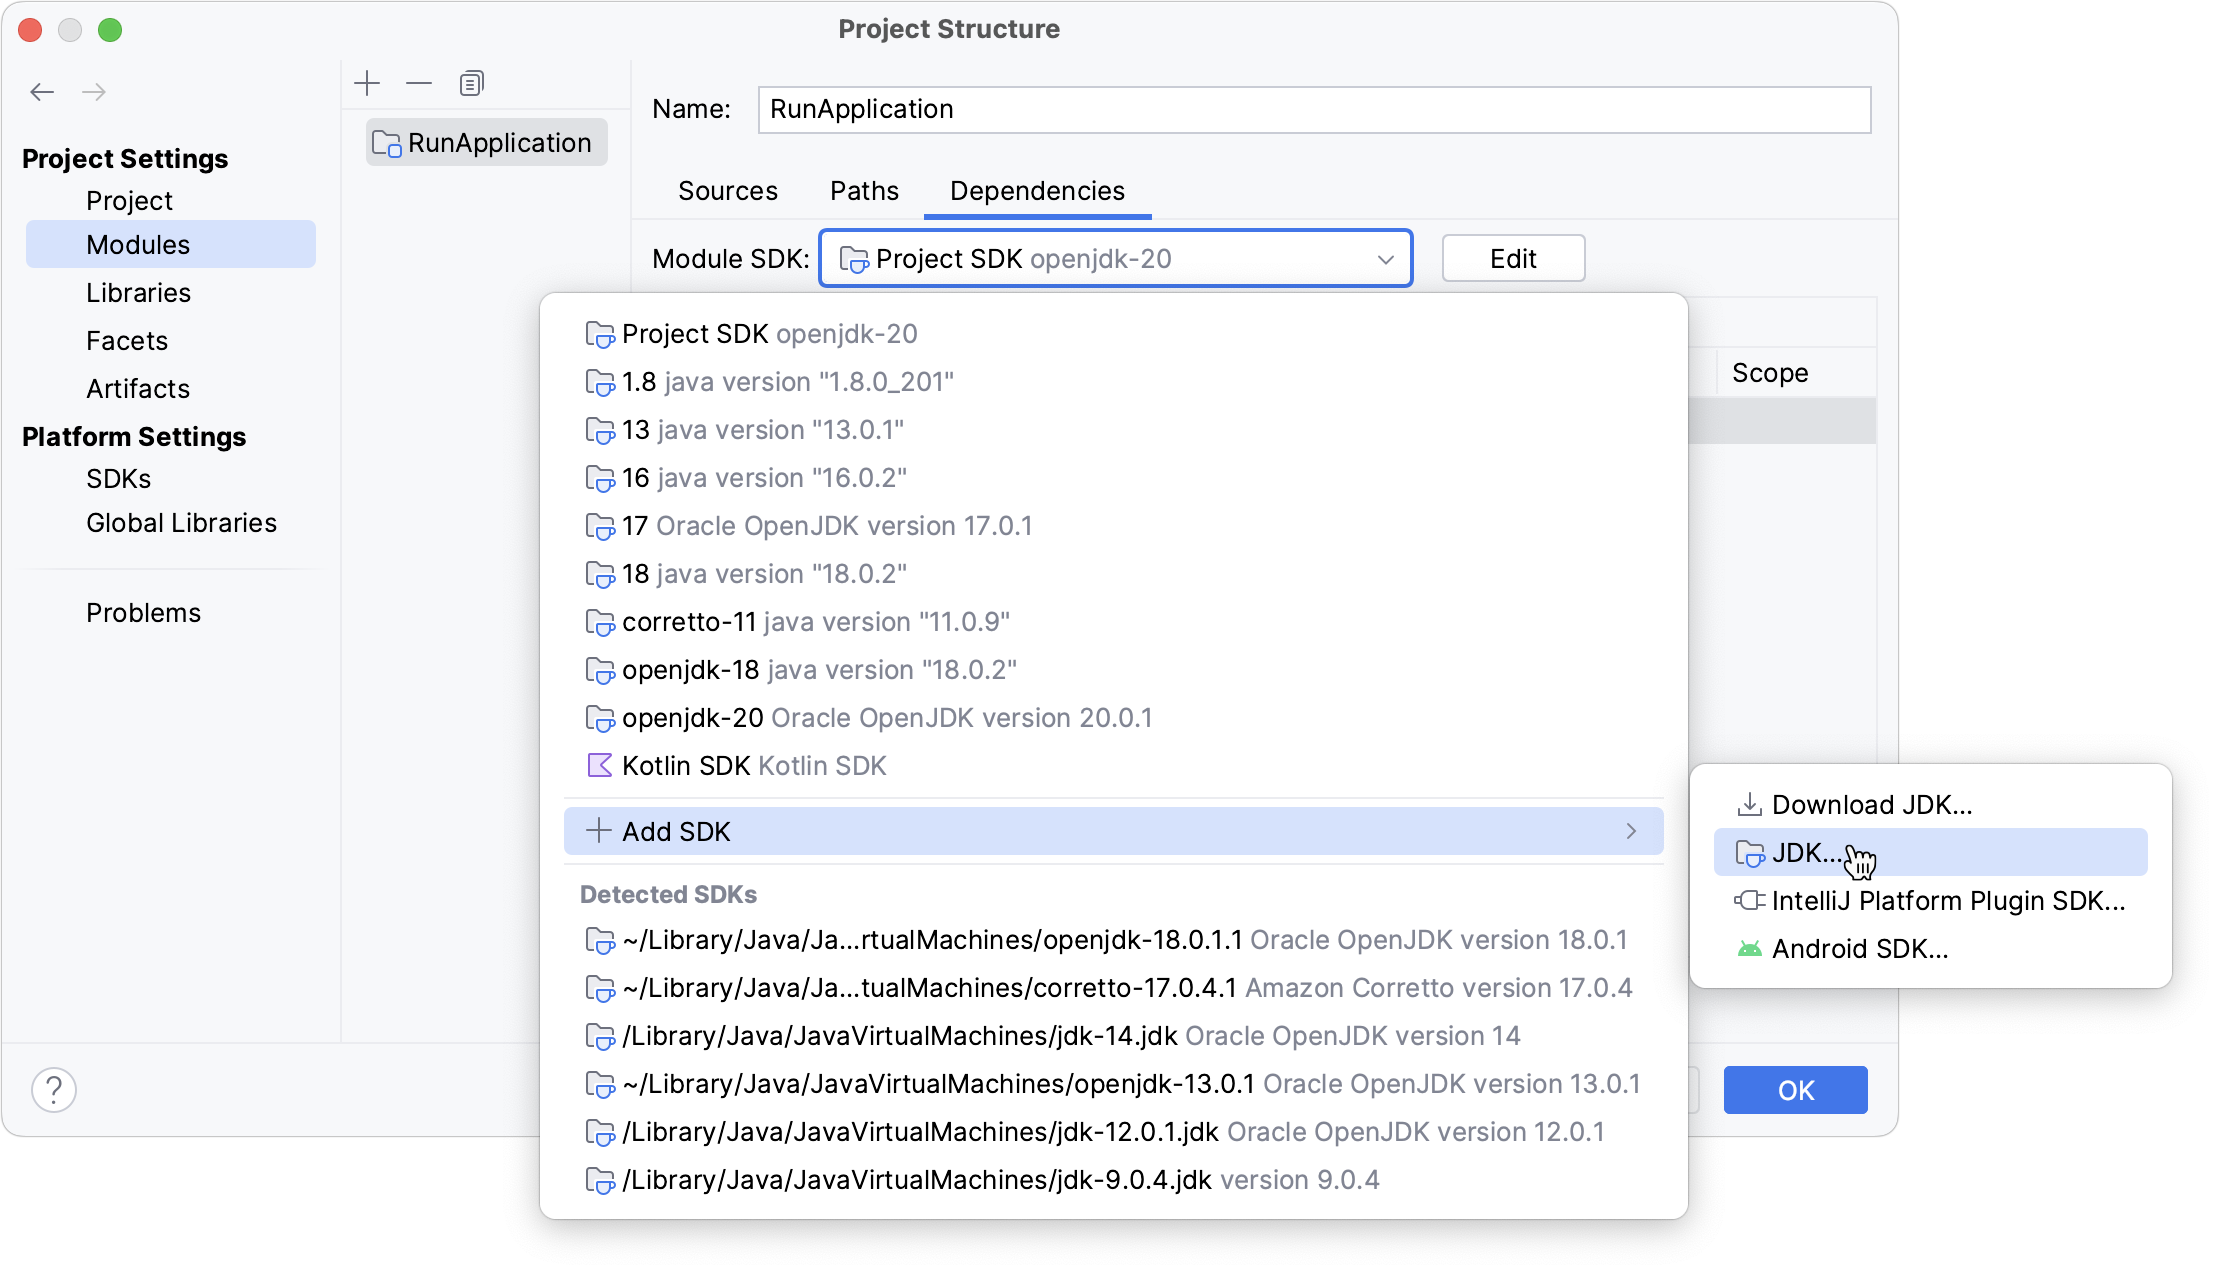
- From the main menu, select File | Project Structure | Project Settings | Modules .
- Select the module for which you want to set an SDK and click Dependencies .
- If the necessary SDK is already defined in IntelliJ IDEA, select it from the Module SDK list. If the SDK is installed on your computer, but not defined in the IDE, select Add SDK | ‘SDK name’ , and specify the path to the SDK home directory. Only for JDKs: If you don’t have the necessary JDK on your computer, select Add SDK | Download JDK . In the next dialog, specify the JDK vendor, version, change the installation path if required, and click Download .
If you want a module to inherit a project SDK, select the Project SDK option from the Module SDK list.
Java Development Kit (JDK)
To develop applications in IntelliJ IDEA, you need a Java SDK (JDK). A JDK is a software package that contains libraries, tools for developing and testing Java applications (development tools), and tools for running applications on the Java platform (Java Runtime Environment – JRE).
The JRE can be obtained separately from the JDK, but it is not suitable for application development, as it doesn’t have essential components such as compilers and debuggers.
- The bundled JRE is used for running the IDE itself, and it is not sufficient for developing Java applications. Before you start developing in Java, download and install a standalone JDK build.
- Due to the changes in the Oracle Java License, you might not have the rights to use Oracle’s Java SE for free. We recommend that you use one of the OpenJDK builds to avoid potential compliance failures.
In IntelliJ IDEA, you can download a JDK package right from the IDE, or you can manually download the necessary JDK distribution and define it in the IDE.
For a manual download, use any available distribution that you like, for example:
If you don’t know which distribution to choose, and you don’t have specific requirements that instruct you to use one of the existing distributions, use Oracle OpenJDK.
Set up the project JDK
- From the main menu, select File | Project Structure | Project Settings | Project .
- If the necessary JDK is already defined in IntelliJ IDEA, select it from the SDK list. If the JDK is installed on your computer, but not defined in the IDE, select Add SDK | JDK , and specify the path to the JDK home directory (for example, /Library/Java/JavaVirtualMachines/jdk-12.0.1.jdk ).
 If you don’t have the necessary JDK on your computer, select Add SDK | Download JDK . In the next dialog, specify the JDK vendor, version, change the installation path if required, and click Download .
 - Apply the changes and close the dialog.


If you build your project with Maven or Gradle, refer to Change the JDK version in a Maven project and Gradle JVM selection respectively for more information on how to work with JDKs.
Configure SDK documentation
You can add SDK documentation to IntelliJ IDEA so that you can get information about symbols and method signatures right from the editor in the Quick Documentation popup.
You can also configure external documentation by specifying the path to the reference information online. External documentation opens the necessary information in a browser so that you can navigate to related symbols and keep the information for further reference at the same time.
Specify SDK documentation paths
To view external SDK documentation, configure the documentation URL first.

- In the Project Structure dialog Control+Alt+Shift+S , select SDKs .
- Select the necessary SDK version if you have several SDKs configured, and open the Documentation Path tab on the right.
- Click the icon, enter the external documentation URL, and click OK . For example, for Java 20, type https://docs.oracle.com/en/java/javase/20/docs/api/ .
- Apply the changes and close the dialog.
Access SDK documentation offline
If you work offline, you can view external documentation locally.
- Download the documentation package of the necessary version. The documentation package is normally distributed in a ZIP archive that you need to unpack once it is downloaded. For example, you can download the official Java SE Development Kit 20 Documentation and unzip it.
- In the Project Structure dialog Control+Alt+Shift+S , select SDKs .
- Select the necessary JDK version if you have several JDKs configured, and open the Documentation Path tab on the right.
- Click the icon and specify the directory with the downloaded documentation package (for example, C:\Users\jetbrains\Desktop\docs\api ).
- Apply the changes and close the dialog.
When the documentation is configured, you can open it in the editor.