Получение данных из LDAP с помощью JNDI

- Устанавливаем ApacheDS
- Коннект с админскими правами к ApacheDS
- Терминология LDAP
- Добавляем свою LDAP схему для сервера
- Добавление нового поддерева (суффикса или partion-a).
- Добавляем данные на LDAP сервер c помощью Apache Directory Studio
- Добавляем данные в LDAP с помощью Java JNDI
- ApacheDS бекап и восстановление базы
- Получение данных из LDAP с помощью JNDI
- Коннект к LDAP с помощью JNDI поддержкой SSL
- Лучший SDK для работы с LDAP из Java
Предположим есть некая база с настройками для модулей, реализующих разнообразные веб-сервисы. Каждый веб-сервис может обслуживаться несколькими модулями. Для каждого модуля в LDAP будут сохраняться свои настройки. Нам нужно производить поиск данных в LDAP с помощью JNDI. Для каждого сервиса и модуля в LDAP хранятся несколько настроек. Для сервиса я создал тип demoService c атрибутами demoServiceId, demoServiceName и demoServiceDescription. Для модуля тип demoServiceModele с атрибутами: demoModuleId, demoModuleName, demoModuleType. Я для данного примера создал такую схему в формате OpenLDAP и установил её на свой ApacheDS сервер. Как это сделать описано здесь
attributetype ( 1.3.6.1.4.1.18060.0.4.3.3.10.1 NAME 'demoServiceId' DESC 'Demo service identifier' EQUALITY caseIgnoreMatch SUBSTR caseIgnoreSubstringsMatch SYNTAX 1.3.6.1.4.1.1466.115.121.1.15 SINGLE-VALUE ) attributetype ( 1.3.6.1.4.1.18060.0.4.3.3.10.2 NAME 'demoServiceName' DESC 'Demo service Name' EQUALITY caseIgnoreMatch SUBSTR caseIgnoreSubstringsMatch SYNTAX 1.3.6.1.4.1.1466.115.121.1.15 SINGLE-VALUE ) attributetype ( 1.3.6.1.4.1.18060.0.4.3.3.10.3 NAME 'demoModuleId' DESC 'Demo module identifier' EQUALITY caseIgnoreMatch SUBSTR caseIgnoreSubstringsMatch SYNTAX 1.3.6.1.4.1.1466.115.121.1.15 SINGLE-VALUE ) attributetype ( 1.3.6.1.4.1.18060.0.4.3.3.10.4 NAME 'demoModuleType' DESC 'The module type integer' EQUALITY integerMatch SYNTAX 1.3.6.1.4.1.1466.115.121.1.27 SINGLE-VALUE ) attributetype ( 1.3.6.1.4.1.18060.0.4.3.3.10.5 NAME 'demoModuleName' DESC 'Demo module name' EQUALITY caseIgnoreMatch SUBSTR caseIgnoreSubstringsMatch SYNTAX 1.3.6.1.4.1.1466.115.121.1.15 SINGLE-VALUE ) attributetype ( 1.3.6.1.4.1.18060.0.4.3.3.10.6 NAME 'demoServiceDescription' DESC 'Demo service description' EQUALITY caseIgnoreMatch SUBSTR caseIgnoreSubstringsMatch SYNTAX 1.3.6.1.4.1.1466.115.121.1.15 SINGLE-VALUE ) objectclass ( 1.3.6.1.4.1.18060.0.4.3.3.10.0.1 NAME 'demoService' DESC 'The service object' SUP top STRUCTURAL MUST demoServiceId MAY ( demoServiceName $ demoServiceDescription ) ) objectclass ( 1.3.6.1.4.1.18060.0.4.3.3.10.0.2 NAME 'demoModule' DESC 'The module object' SUP top STRUCTURAL MUST ( demoModuleId $ demoModuleType ) MAY demoModuleName )
Далее, я добавил в свой ApacheDS новый суффикс dc=demo. Как добавить суффикс смотрите здесь Потом добавил корневой элемент в дерево импортированием следующего ldif-файла:
version: 1 dn: dc=demo objectClass: domain objectClass: top dc: demo

После этого с помощью Apache Directory Studio, добавил данные в итоге получил нижеприведенное дерево для экспериментов: У меня есть demoService c demoServiceId = 1 и два, входящих в него модуля с demoModuleId = 1 и 2. Ниже пример на базе JNDI, получающий данные из LDAP по приведенным модулям.
import java.util.Hashtable; import java.util.Properties; import javax.naming.Context; import javax.naming.NamingEnumeration; import javax.naming.directory.Attribute; import javax.naming.directory.Attributes; import javax.naming.directory.DirContext; import javax.naming.directory.InitialDirContext; import javax.naming.directory.SearchControls; import javax.naming.directory.SearchResult; public class LdapSearchTest < public static void main(String[] args) throws Exception < Properties env = new Properties(); env.setProperty(Context.INITIAL_CONTEXT_FACTORY, "com.sun.jndi.ldap.LdapCtxFactory"); env.setProperty(Context.PROVIDER_URL, "ldap://localhost:10389"); env.setProperty(Context.SECURITY_PRINCIPAL, "uid=admin,ou=system"); env.setProperty(Context.SECURITY_CREDENTIALS, "secret"); DirContext dirContext = new InitialDirContext(env); try < String base = "demoServiceId=1,dc=demo"; SearchControls sc = new SearchControls(); String[] attributeFilter = < "demoServiceId", "demoServiceName", "demoServiceDescription" >; sc.setReturningAttributes(attributeFilter); sc.setSearchScope(SearchControls.OBJECT_SCOPE); NamingEnumeration results = dirContext.search(base, "(objectClass=demoService)", sc); while (results.hasMore()) < SearchResult sr = (SearchResult) results.next(); Attributes attrs = sr.getAttributes(); NamingEnumerationres = sr.getAttributes().getIDs(); while(res.hasMore()) < String attrName = res.next(); String value = attrs.get(attrName).get().toString(); System.out.println(attrName + ": " + value); >> > finally < dirContext.close(); >> >
Получаем output:
demoServiceDescription: book sale service
demoServiceId: 1
demoServiceName: bookSale Комментарии к коду Сначала устанавливается соединение.
Properties env = new Properties(); env.setProperty(Context.INITIAL_CONTEXT_FACTORY, "com.sun.jndi.ldap.LdapCtxFactory"); env.setProperty(Context.PROVIDER_URL, "ldap://localhost:10389"); env.setProperty(Context.SECURITY_PRINCIPAL, "uid=admin,ou=system"); env.setProperty(Context.SECURITY_CREDENTIALS, "secret"); DirContext dirContext = new InitialDirContext(env);
String base = "demoServiceId=1,dc=demo"; SearchControls sc = new SearchControls(); String[] attributeFilter = < "demoServiceId", "demoServiceName", "demoServiceDescription" >; sc.setReturningAttributes(attributeFilter); sc.setSearchScope(SearchControls.OBJECT_SCOPE); NamingEnumeration results = dirContext.search(base, "(objectClass=demoService)", sc);
- В качестве base указывается DN (Distinguished Name) записи, относительно которой производится поиск. DN в нашем случае выглядит: demoServiceId=1,dc=demo
- В качестве фильтра указывается условие поиска. Например (objectClass=demoService). В условии можно указывать любые атрибуты объекта. Если требуются логические операции «И» или «ИЛИ», тогда они записываются перед списком условий: (&(objectClass=demoService) (demoServiceName=bookSale)). Такое условие означает, что искаться будет объект demoService с атрибутом demoServiceName=bookSale. Про search фильтры можно посмотреть здесь и здесь
- Атрибут SearchControls задает список имен атрибутов, которые должны быть возвращены в результате, а также область поиска. Область поиска может быть одним из трех значений:
- SearchControls.OBJECT_SCOPE — искать внутри объекта заданного базовым DN
- SearchControls.ONELEVEL_SCOPE — искать внутри дочерних объектов относительно объекта заданного DN
- SearchControls.SUBTREE_SCOPE — искать внутри поддерева объектов
demoServiceDescription: book sale service demoServiceId: 1 demoServiceName: bookSale
DN=»demoServiceId=1,dc=demo», filter=»(| (objectClass=demoService) (objectClass=demoModule))», SearchControls.ONELEVEL_SCOPE
Output:demoModuleName: bookList demoModuleId: 1 demoModuleType: 1 demoModuleName: bookPay demoModuleId: 2 demoModuleType: 1
DN=»demoServiceId=1,dc=demo», filter=»(| (objectClass=demoService) (objectClass=demoModule))», SearchControls.SUBTREE_SCOPE
Output:demoServiceDescription: book sale service demoServiceId: 1 demoServiceName: bookSale demoModuleName: bookList demoModuleId: 1 demoModuleType: 1 demoModuleName: bookPay demoModuleId: 2 demoModuleType: 1
Querying Active Directory using Java
I had written a blog post about Querying Active Directory using C# it’s simple and easy to understand then I thought to provide similar approach/article Querying Active Directory using Java. This article is all about how to achieve Querying Active Directory using Java.
I will take you through below elements in detail-
- Retrieve User Details or an Object from AD based on Username – sAMAccountName
- Retrieve User Details or an Object from AD based on user Email ID – mail
To know more about filters, attributes/properties you can use for active directory query.
Required Details
- LDAP address (For e.g.: myjeeva.com or IP of the Domain Controller/Global Catalog[GC])
- Port # (For e.g.: 3289 or 389) where would you to like search user details?
- Domain Username
- Domain Password
Important Reference: will introduce you to the classes needed for querying Active Directory using Java. Have a look and know more about it.
How to do – Step by Step explaination
For an easy understanding perspective; I will be following line by line approach. ActiveDirectory Class file and example of how to use that ActiveDirectory class file in java program. Downloads of these files you will find below.
Step 1
Compose LDAP address and supply following parameters username, password, ldap address as a domain into ActiveDirectory constructor.
Invoke searchUser method with parameters of searchTerm, choice and searchBase.
JNDI Example-Accessing LDAP in Java
We have discussed the fundamentals of JNDI and a naming example in the previous sections.In this chapter we are looking into how the accessing LDAP in Java.JNDI plays the key role in looking up the directory objects in the LDAP server.Let us start with a quick overview on LDAP. The example shows how JNDI is using to access directory objects.
Overview to LDAP
The name LDAP stands for Light weight Directory Access protocol . LDAP is a protocol for maintaining distributed directory information services over internet.Directory services provides organized set of records in a hierarchical order(Example : Telephone directory) . In this chapter we are discussing how to access the directory attributes from an LDAP server using a Java program which uses JNDI.
Accessing LDAP using JNDI
Before proceeding to the example we should have an accessible LDAP server running . We are running an LDAP server in our local machine.When the server is ready we need to create a directory object and we need to add few attributes to the object . After those things completed , we can write the Java code to access the attribute values of directory object we created .We are using Apache Directory Studio for creating and managing LDAP server. (Alternately we can use eclipse for managing LDAP. For that we need to update eclipse with the URL :http://directory.apache.org/studio/update/2.x ). Here we are using Apache Directory Studio for managing LDAP.
Let us start our example from scratch.We need to setup the LDAP server and directory objects using Apache Directory Studio first. Then we need to write the Java code for accessing the LDAP. LDAP support is existing with JDK itself.So ,no third party API is needed.We are discussing all the procedures to access LDAP from Java in steps.
Step 1)If JDK is not installed ,please download and install.
Step2)If eclipse indigo (or any other eclipse distribution) is not installed , please download and extract to any folder and open it by clicking on the icon.
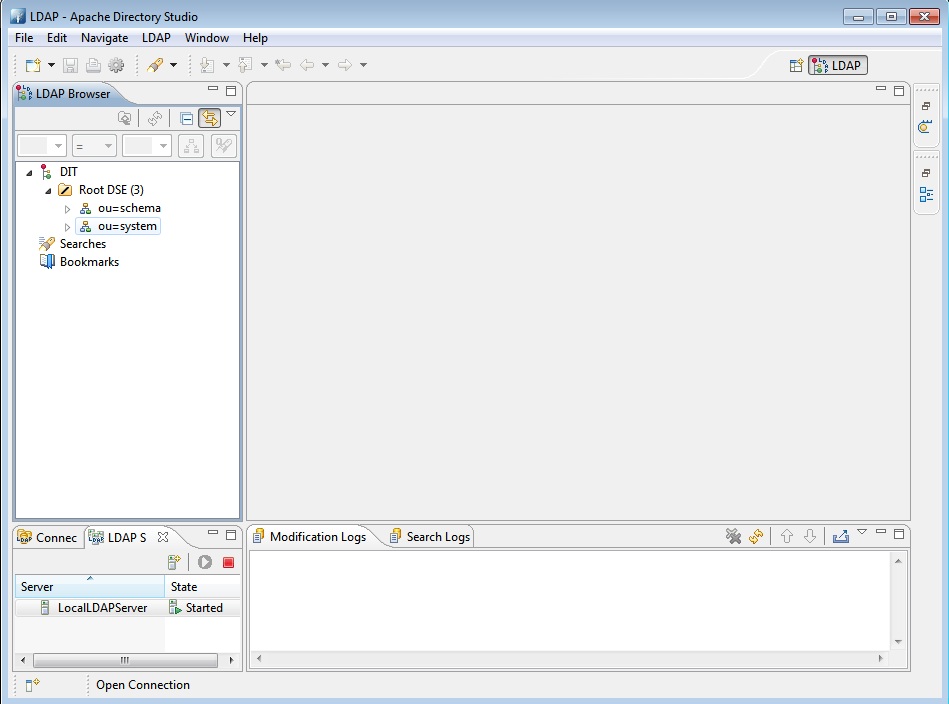
Step4)Open Apache Directory Studio.
Step5)Right click on the server console of directory studio.Select New–>New server
Step6)Create a new server with suitable name(In our example it is LocalLDAPServer)
Step7)Run the server by right clicking on the server instance.
Step 8)When the server is started , right click on the server instance and select create connection option.
Step 9)Once the connection is established , the LDAP browser will show the directory Tree. Click on the DIT .Expand the ou=system.

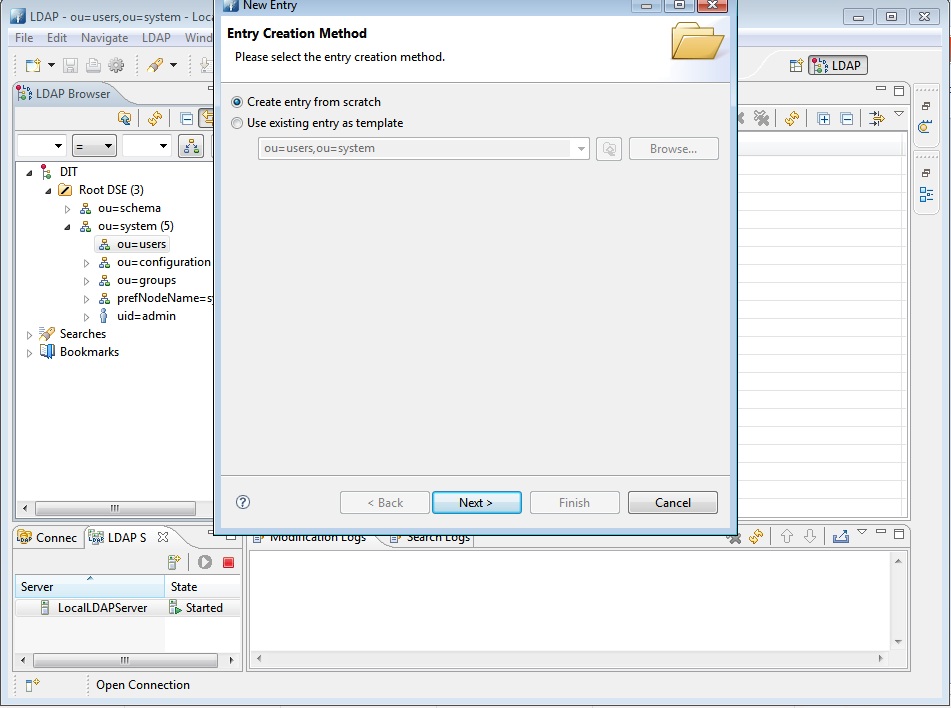
Step 10)Right click on ou=users . Then New –>New Entry. Select create entry from scratch option. Then click next.

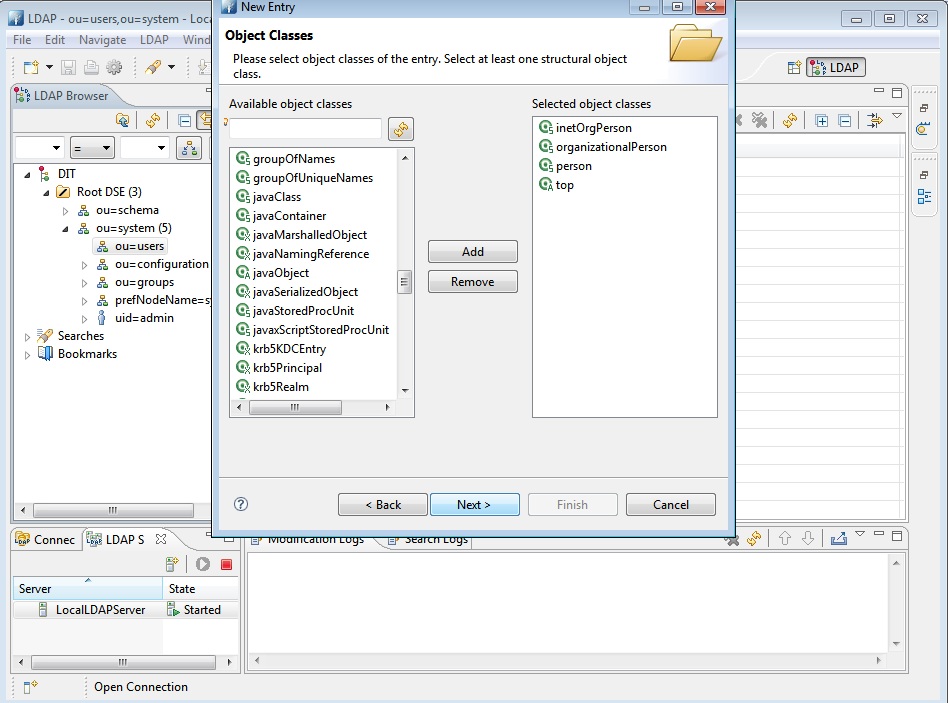
Step 11)Select inetOrgPerson as object class and click on add button.

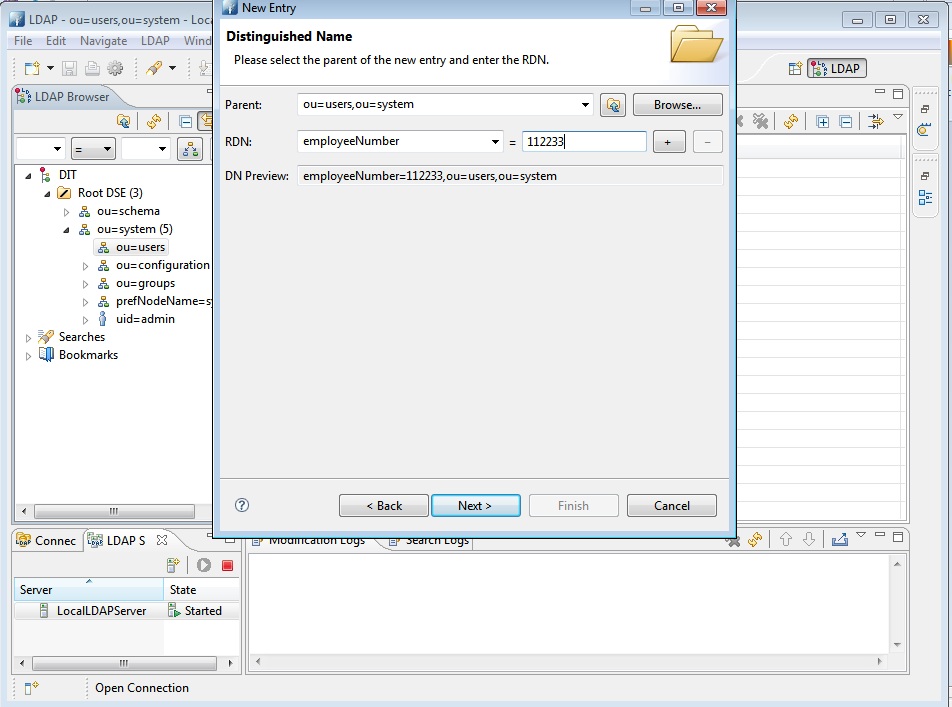
Step 12)Select employeeNumber as RDN and give any value as shown here.Then click next.

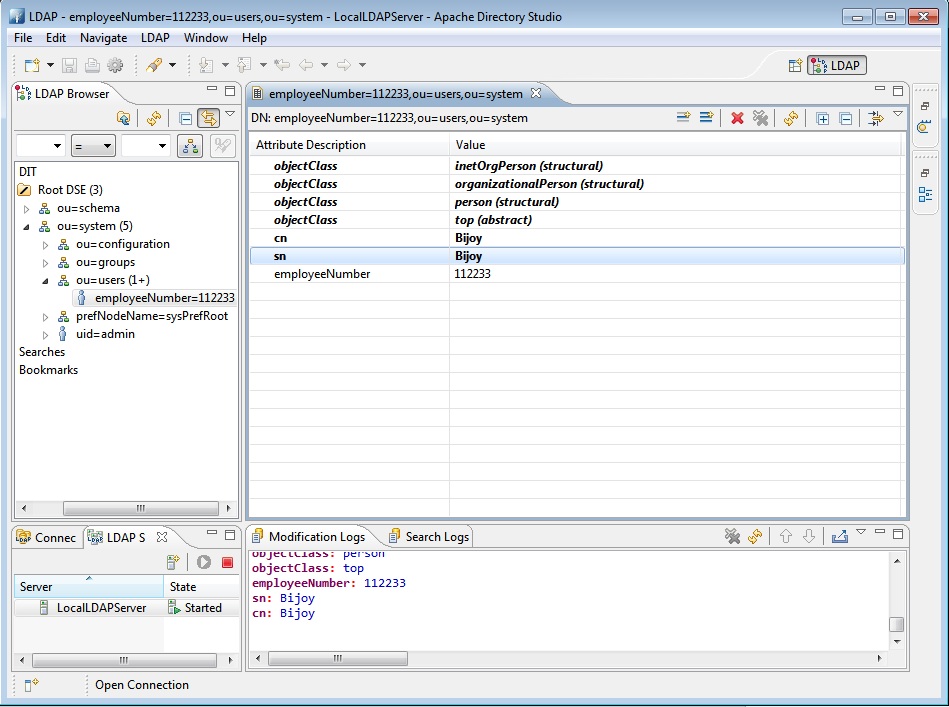
Step13)Finish the directory object creation(Give suitable cn and sn .cn is the common name and sn is the surname of user). Following screen will be displayed.

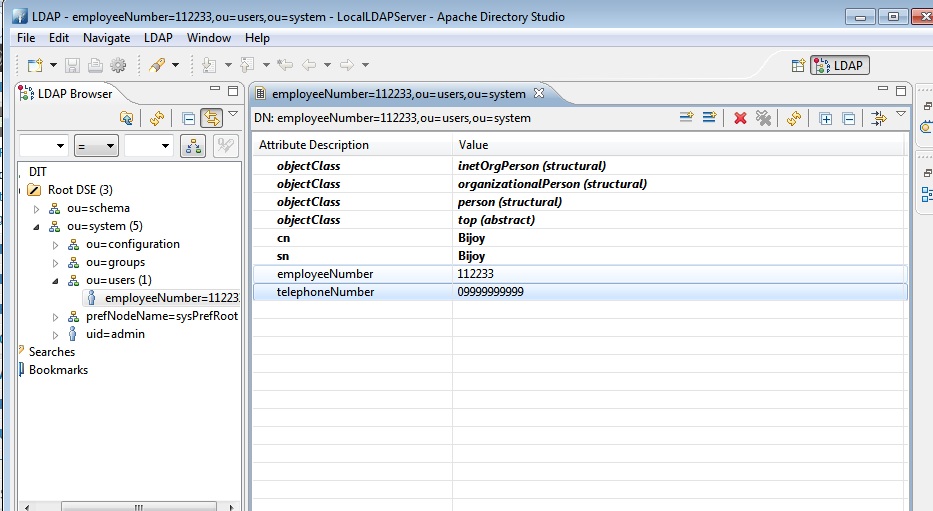
Step14)Right click on the object explorer and select New Attribute option .Select telephoneNumber from the list. Press Finish button.Now give suitable telephone number as value to the attribute.

Step 15)Now the details will be displayed in the directory studio console.User attributes will be displayed.Look for a url like ldap://localhost:10389 . This URL we need to use with our Java code while initializing the context.
Step 16)Create a Java application in eclipse and create a class DirectorySample.java in it. The class is shown below. It simply fetches the user we created now. We are doing search in the LDAP based on few attribute values(employeeNumber). Then fetching other attribute values like cn , sn and telephoneNumber of the directory object.
DirectorySample.java
import java.util.Properties;
import javax.naming.Context;
import javax.naming.NamingException;
import javax.naming.directory.Attributes;
import javax.naming.directory.DirContext;
import javax.naming.directory.InitialDirContext;public class DirectorySample public DirectorySample()
public void doLookup() Properties properties = new Properties();
properties.put(Context.INITIAL_CONTEXT_FACTORY,
«com.sun.jndi.ldap.LdapCtxFactory»);
properties.put(Context.PROVIDER_URL, «ldap://localhost:10389»);
try DirContext context = new InitialDirContext(properties);
Attributes attrs = context
.getAttributes(«employeeNumber=112233,ou=users,ou=system»);
System.out.println(«Surname: » + attrs.get(«sn»).get());
System.out.println(«Common name : » + attrs.get(«cn»).get());
System.out.println(«telephone number : »
+ attrs.get(«telephoneNumber»).get());
> catch (NamingException e) e.printStackTrace();
>
>
public static void main(String[] args) DirectorySample sample = new DirectorySample();
sample.doLookup();
>Step 17)Compile and run the above application. Make sure the correct Context.PROVIDER_URL is provided as discussed in the step 15.
Output
Surname: Bijoy
Common name : Bijoy
telephone number : 09999999999