- How to download and install Java plugin in a browser
- 2. Enable Java support in browsers
- 2.1. Internet Explorer
- 2.2. Google Chrome
- 2.3. Mozilla Firefox
- 2.4. Safari
- 3. Java Plugin Example
- 3.1. Java plugin lifecycle
- 3.2. Example program
- 3.3. Serving Java Plugins
- 4. Download Source Code
- Как включить Java в Chrome
- Включение плагина Java в Google Chrome
How to download and install Java plugin in a browser
Java applets (Plugins) were introduced in the first version of Java. From early 2010 major browsers started avoiding Java applets because of security constraints and difficulty with the underlying platforms. Java Applets are deprecated in Java 9 and are completely removed from Java 11.
Applets are usually written in Java. However, they can even be written with any other language run on JVM like Jython, Scala, Pascal, JRuby and so on.
Some advantages of Java Applets are as below,
- They can run much faster compared Javascript
- Since they run as a separate process on JVM, they get access to all the system resources including hardware
- Till the canvas support came into existence applets were the favorite to render 3D graphics
- Cross-platform, once created can be run on any platform
It is important to note that, in modern browsers, Java support has to be enabled manually as Java isn’t enabled by default.
2. Enable Java support in browsers
In this section, we will see how Java can be enabled in various browsers on the Windows platform.
2.1. Internet Explorer
- Click on Tools menu and click on Internet Options
- Go to Security tab and click on Custom Levels
- In the new popup scroll to Scripting section and enable/disable Java by going to the section Scripting of Java Applets
2.2. Google Chrome
- Click on the wrench icon on the far right of the address bar
- On the menu click on Settings
- Click on Advanced settings at the end of the Settings menu
- Click on Content Settings
- Scroll down to Plug-ins and look for Java and click on Disable link to turn on/off the Java plugins
2.3. Mozilla Firefox
- Click on the little hamburger icon (Tools menu) on the far right next to address bar and choose Add-Ons menu
- Click on Plugins from the left side menu and scroll down to the bottom
- Click on Java Applet Plugins to enable/disable Java plugins
2.4. Safari
- Go to Preferences
- Click on Security
- Scroll down to Enable Java. Enable or Disable by clicking on the checkbox
3. Java Plugin Example
In this section, I will show how to write a sample Java Plugin. I am using the IntelliJ Idea editor and in the end, I have attached the complete source code.
3.1. Java plugin lifecycle
- Init – init() method is to group initialization logic. This method runs first when the applet is run.
- Start – the start() method runs after the init method and it contains the actual code to run. This method runs each time when the plugin is restored or tabs are switched.
- Paint – paint() method is used to redraw the applet. This method is invoked after the start method and whenever the browser is refreshed and resized.
- Stop – this method is automatically called whenever the user moves off the page where the plugin sits. Stop method is called whenver the plugin window is minimized and even when the browser tabs are switched.
- Destroy – this method is automatically called whenever the browser is shut down normally. This method removes the plugin object from the memory.
3.2. Example program
In this section, I am going to show a basic plugin program that shows the applet lifecycle methods.
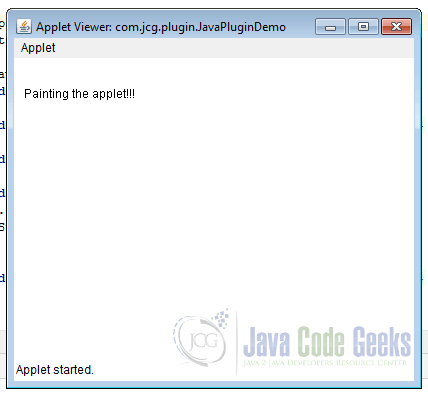
package com.jcg.plugin; import java.applet.Applet; import java.awt.*; public class JavaPluginDemo extends Applet < //init method is called only once, when the plugin class is initially loaded public void init() < System.out.println("Plugin initialized"); >//executed immediately after init method. It gets executed each time when the plugin //is reloaded, resized and refreshed public void start() < System.out.println("Plugin execution started"); >//executed whenever the plugin is minimized and user moved to another tab public void stop() < System.out.println("Plugin execution stopped"); >//redraws the output on the plugin. executed immediately after the start method. //executed whenever applet is resized and refreshed public void paint(Graphics g) < System.out.println("Painting the plugin"); g.drawString("Painting the applet. ", 10, 40); >//executed only once like init method. executed when the applet is closed public void destroy() < System.out.println("Plugin is bing removed"); >> Right-click on the program and click run. This launches the applet viewer. Output in the applet viewer is as in the below image,
Output from the plugin lifecycle methods is as follows,
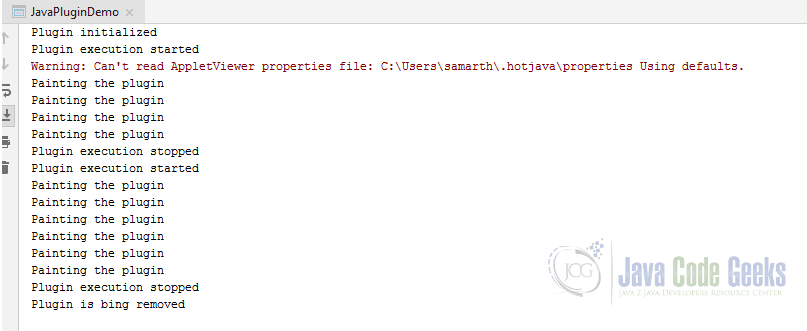
In the above output, you can notice that start, paint and stop methods are called multiple times. Whereas, init and destroy are called only once.
3.3. Serving Java Plugins
Plugins can be locally viewed in Applet Viewer. When it has to be served to a remote computer, it has to be served via HTML. Below is the sample HTML snippet to serve Java Plugin,
tag is used to serve the applets.
4. Download Source Code
Download
You can download the full source code of this example here: How to download and install Java plugin in a browser
Как включить Java в Chrome

Плагин Java не поддерживается в последних версиях Google Chrome, равно как и некоторые другие плагины, например, Microsoft Silverlight. Однако, контента с использованием Java в Интернете предостаточно, а потому необходимость включить Java в Chrome может возникнуть у многих пользователей, особенно если нет большого желания переходить на использование другого браузера.
Связано это с тем, что начиная с апреля 2015 года, в Chrome по умолчанию отключена поддержка архитектуры NPAPI для плагинов (на которую и опирается Java). Однако, на данный момент времени, возможность включить поддержку этих плагинов все еще имеется, что и показано ниже.
Включение плагина Java в Google Chrome
Для того, чтобы включить Java, потребуется разрешить использование NPAPI плагинов в Google Chrome, к которым и относится требуемый.
Делается это элементарно, буквально в два шага.

- В адресной строке введите chrome://flags/#enable-npapi
- В пункте «Включить NPAPI» нажмите «Включить».
- Внизу окна Chrome появится уведомление о том, что необходимо перезапустить браузер. Сделайте это.
После перезапуска, проверьте, работает ли Java теперь. Если нет, убедитесь, что плагин включен на странице chrome://plugins/.

Если при входе на страницу с Java в правой части адресной строки Google Chrome вы увидите иконку заблокированного плагина, то вы можете, по нажатии на нее, разрешить плагины для этой страницы. Также, вы можете установить отметку «Запускать всегда» для Java на указанной в предыдущем абзаце странице настроек, чтобы плагин не блокировался.
Еще две причины, по которым Java может не работать в Chrome после того, как все описанное выше уже было выполнено:

- Установлена устаревшая версия Java (скачайте и установите с официального сайта java.com)
- Плагин вообще не установлен. В этом случае Chrome сообщит о том, что его нужно установить.
Обратите внимание, что рядом с настройкой включения NPAPI имеется уведомление о том, что Google Chrome начиная с версии 45 полностью перестанет поддерживать такие плагины (а значит запуск Java станет невозможен).
Есть некоторые надежды, что этого не произойдет (связанные с тем, что решения, связанные с отключением работы плагинов несколько затягиваются у Google), но, тем не менее, следует быть к этому готовыми.
А вдруг и это будет интересно:
- Лучшие бесплатные программы для Windows
- DNS PROBE FINISHED BAD CONFIG — как исправить?
- Как изменить MTU в Windows
- ERR QUIC PROTOCOL ERROR — как исправить?
- Ваше подключение не является закрытым в Microsoft Edge — причины и варианты решения
- ERR ADDRESS UNREACHABLE в Google Chrome и других браузерах — как исправить?
- Windows 11
- Windows 10
- Android
- Загрузочная флешка
- Лечение вирусов
- Восстановление данных
- Установка с флешки
- Настройка роутера
- Всё про Windows
- В контакте
- Одноклассники