- Java application with eclipse
- How to create Java Application with Eclipse
- Step1 — Create new Java Project
- Step2 — Adding a dependency
- Step3 — Write a Java class
- Step4 — Run the program from Eclipse
- Step5 — Run the program from command line
- Conclusions
- References
- How to create, build and run a Java Hello World program with Eclipse
- 1. Download and Install Eclipse IDE
- 2. Choose a Workspace Directory
- 3. Change Perspective
- 4. Create a Java Project
- 5. Write Your First Java Program
- 6. Compile, Build and Run Your First Java Program
- Related Java Hello World Tutorials:
- Other Eclipse Tutorials:
- About the Author:
Java application with eclipse

Еще одной очень популярной средой для разработки приложений под Java является Eclipse . IDE Eclipse первоначально была создана и развивалась компанией IBM, но впоследствии разработка была выделена в отдельный проект Eclipse Foundation. Eclipse является бесплатной средой, которая к тому же обладает большими возможностями, позволяя создавать на Java самые разные приложения.
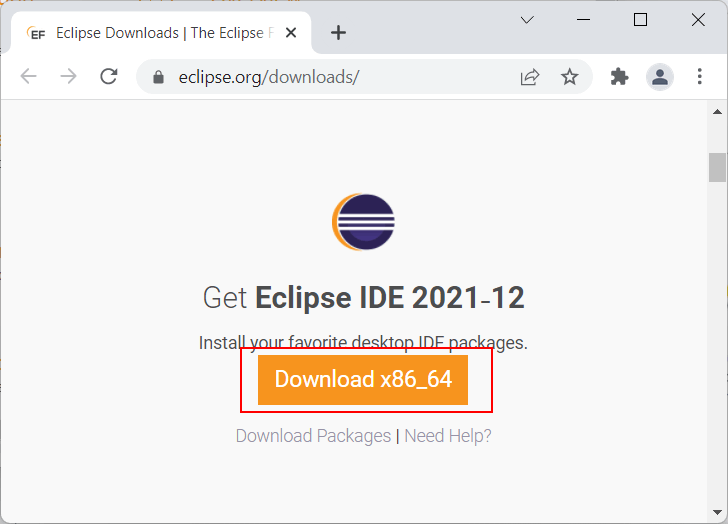
Для начала установим последнюю версию Eclipse, которую можно найти по адресу https://www.eclipse.org/downloads/. На странице загрузок найдем рядом с названием текущей версии Eclipse (на момент написания статьи это версия Oxygen) кнопку «Download» и нажмем на нее.
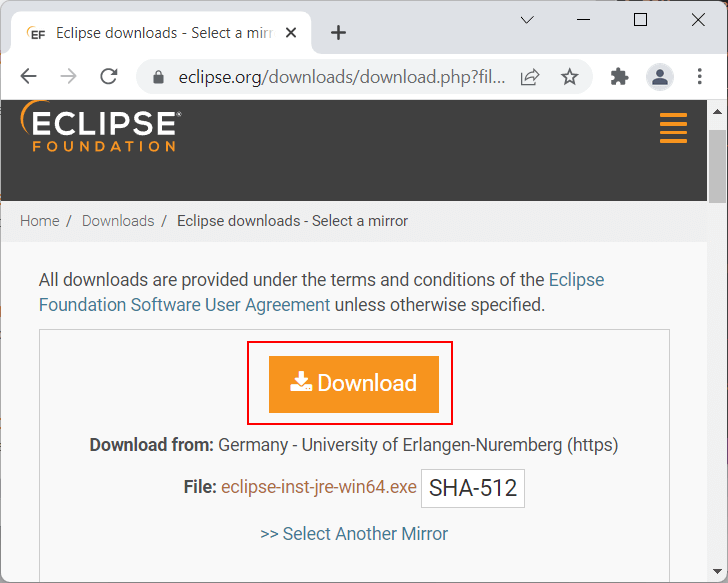
После нажатия на кнопку нас перенаправит собственно на страницу загрузки, где необходимо будет нажать на кнопку «Download» для загруки установочного пакета:
После загрузки установочного пакета запустим его:
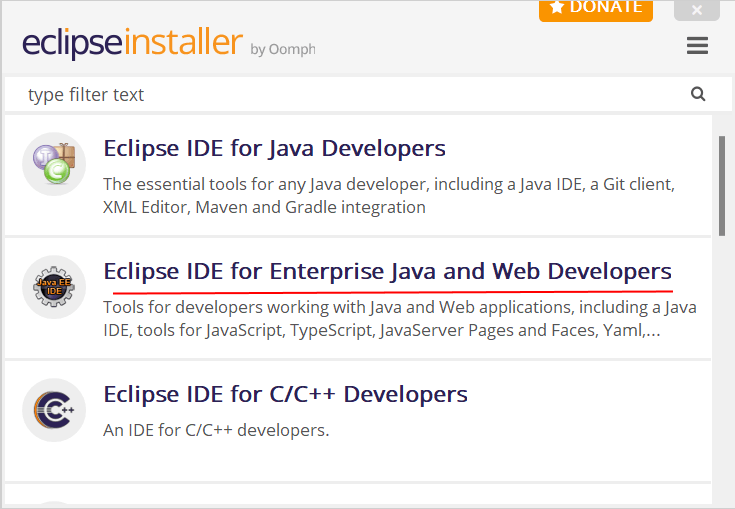
По факту Eclipse — это целый набор сред для разных ситуаций и языков программирования. И программа установки предлагает нам выбрать одну из опций для инсталляции. Поскольку мы собираемся работать с Java, то нас будут интересовать в данном случае прежде всего две опции:
- Eclipse IDE for Java Developers
- Eclipse IDE for Enterprise Java and Web Developers
Первая опция предоставляет базовые возможности для работы с Java, а вторая позволяет также создавать веб-приложения и сервисы. По сути вторая опция включает и первую опцию. Поэтому выберем Eclipse IDE for Enterprise Java and Web Developers . Далее надо будет указать папку для установки (или оставить выбранную папку по умолчанию), а также указать путь к JDK и нажать на кнопку Install: 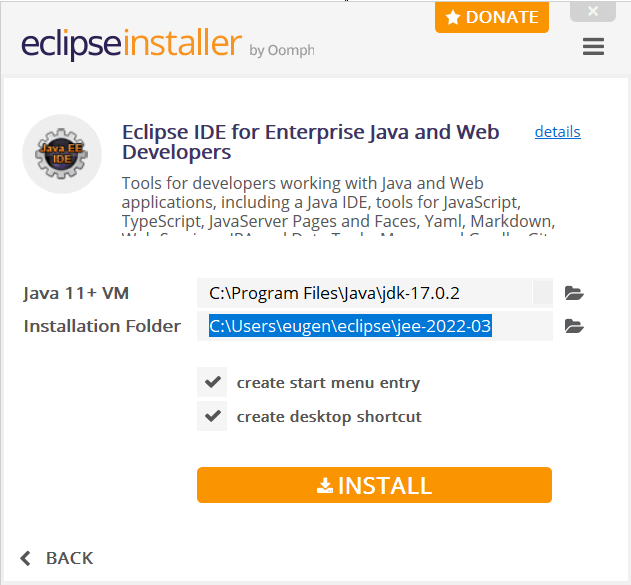 Далее надо будет принять лицензионное соглашение:
 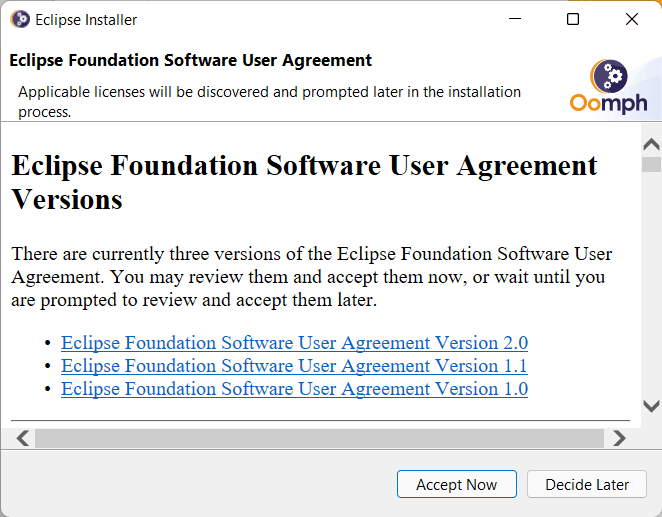 И затем собственно начнется установка. После установки запустим Eclipse. Вначале будет предложено установить каталог для проектов. Оставим значение по умолчанию и нажмем на кнорку Launch:
  Далее перейдем к пункту меню File -> New -> Project :
 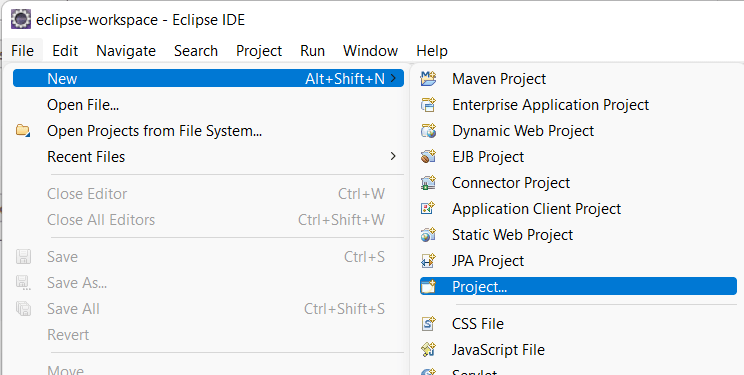 Далее нам откроется окно выбора шаблона проекта. Выберем Java Project и нажмем на кнопку Next:
 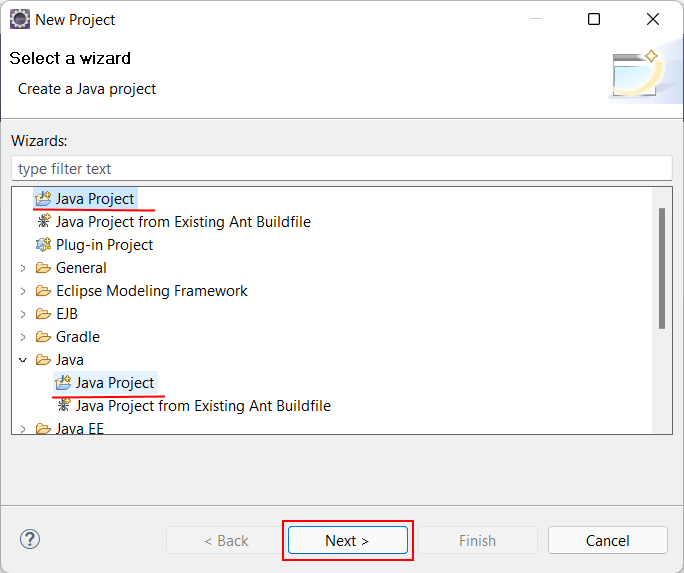 Затем будет предложено установить настройки проекта. В частности, в поле Project Name необходимо задать имя проекта. Допустим, оно будет helloapp:
 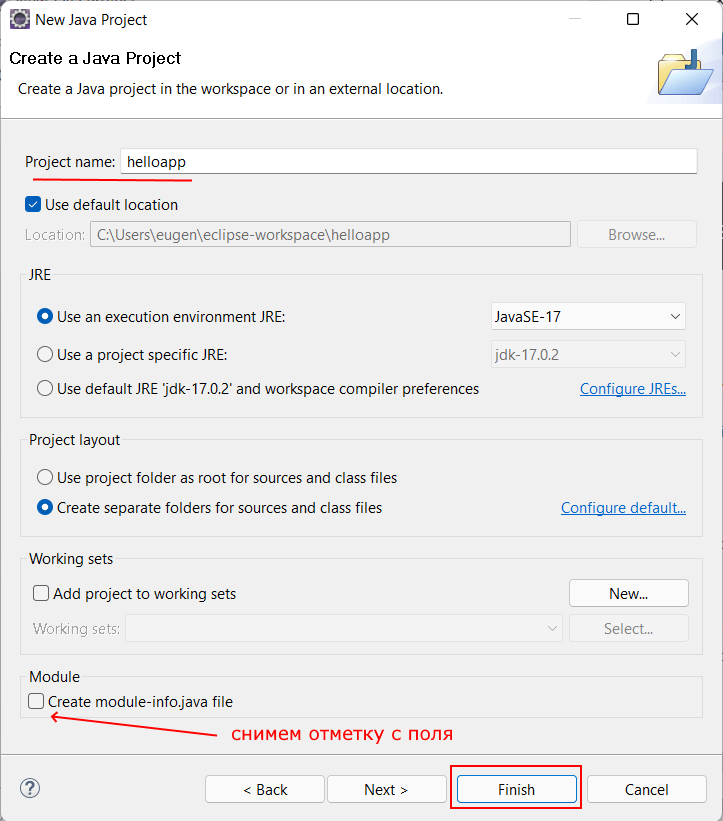 Также обращаю внимание на поле JRE , которое задает используемую версию Java. Здесь можно использовать версию по умолчанию или изменить ее в зависимости от того, какую версию JDK/JRE мы хотим использовать. Кроме того, в самом низу окна есть поле Create module-info.java file . Пока эта опция не принципиальна, поэтому чтобы не создавать лишние файлы в проекте, можно снять отметку с этого поля. Все остальные настройки можно оставить по умолчанию, и в конце нажмем на кнопку Finish для создания проекта. Следующее диалоговое окно спросит, надо ли открывать перспективу проекта:
 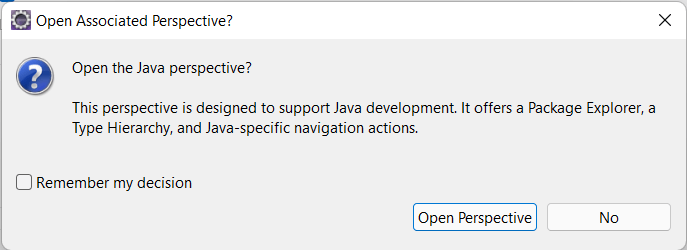 В данном случае эта возможность не имеет значения, но нажмем на кнопку Open Perspective . После создания проект будет открыт в Eclipse. Если среда не открывает по умолчанию проект, то необходимо нажать на кнопку Restore:
 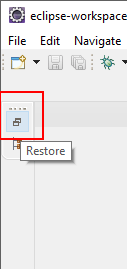 По умолчанию проект будет пуст.
 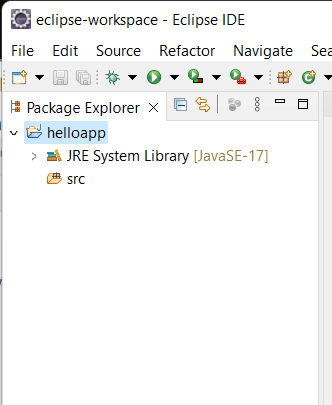 Все файлы с исходным кодом на Java в проекте помещаются в папку src . Нажмем на нее правой кнопкой мыши и в контекстном меню выберем New -> Class :
 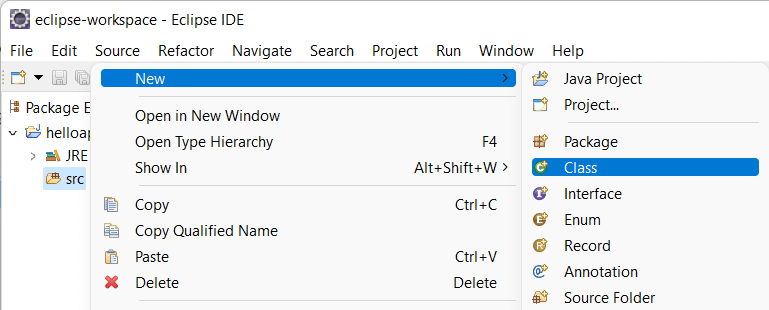 Затем откроется окно настройки класса. Здесь в поле Name необходимо задать название класса. Допустим, он будет называться Program. Все остальные настройки можно оставить по умолчанию:
 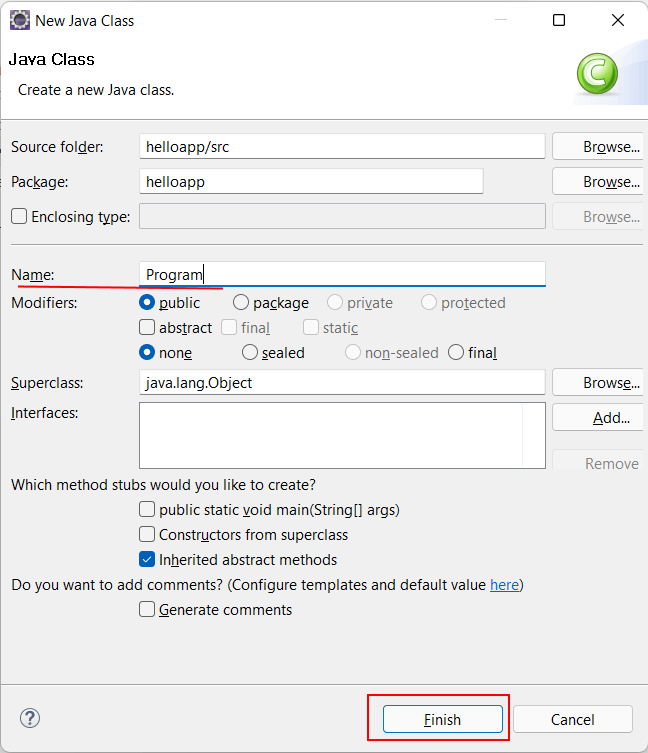 После этого в проект будет добавлен файл Program.java, а в центральной части Eclipse мы сможем увидеть его код. Изменим этот код на следующий:
package helloapp; public class Program < public static void main(String[] args) < System.out.println("Hello Eclipse!"); >> 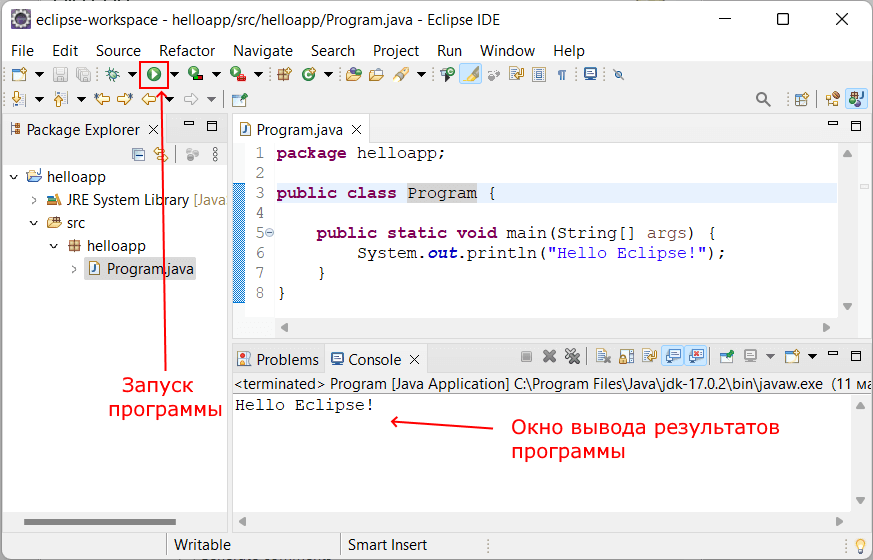
Для запуска проекта нажмем на панели инструментов на зеленую стрелочку, либо на пункт меню Run -> Run . И внизу среды в поле Console мы увидим результат работы программы (то есть фактически консольный вывод).
How to create Java Application with Eclipse
In this tutorial will create our first Java application using Eclipse. If you need help to properly configure your PC before start you can follow How to prepare a Windows Java development machine tutorial.
Note: This tutorial applies to Eclipse running on all operating systems: Windows, Linux, Mac Os.
Step1 — Create new Java Project
- From Eclipse select the menu item File > New > Java Project
- Choose the project name. e.g. JavaApp

Step2 — Adding a dependency
To add a dependency I will use as example MySQL JDBC Driver. Download the zip archive and unzip it in our project folder (I will use a lib folder).
- One is to right click on the files from package explorer ->Build Path ->Add to Build Path.

Right-click on the project name in Package Explorer->select Properties ->Java Build Path ->Libraries -> Add JARs -> Navigate to the library and click OK.
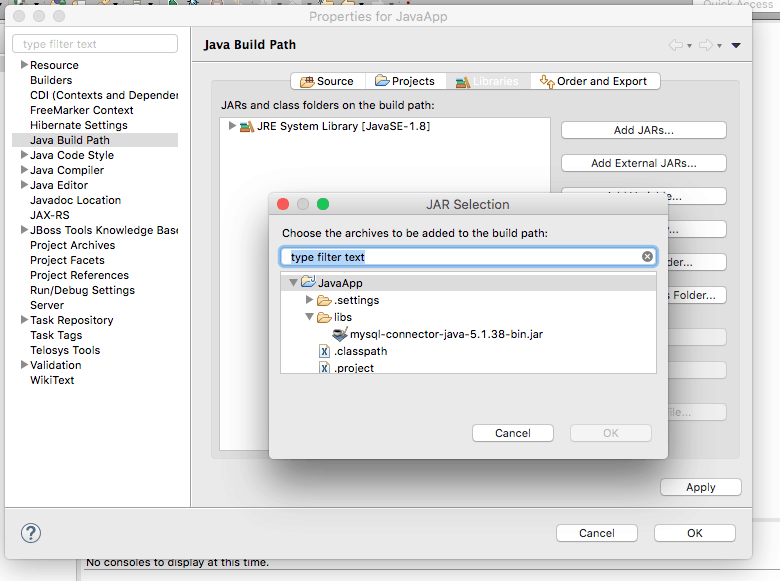
More advanced way (and the proper way) to add the dependency is first to create a variable and then to attach it to the project. Using this method the variable can be use to multiple projects, so you need to set up only once.

Step3 — Write a Java class
- Inside Eclipse select the menu item File > New > Class.
- Type the name and the package and click Finish.

I will edit the class to look like this.
It’s just a simple application to output a text.
Step4 — Run the program from Eclipse
- select from menu Run ->Run.
- from Run As window select Java Application and click Ok.
You can see in the console the text we are expecting.
- select JavaApp.java file and right-click on it;
- select Run As ->Java Application.
- from Run As window select Java Application and click Ok.
You can see the same result as first option. Note: the Run As windows will appear only once as the run configuration was is already created.
Step5 — Run the program from command line
To run the program from command line will use command prompt/terminal and navigate to the project root folder. if you need help on how to navigate you can check simple commands from Windows basics commands and tools tutorial. Cd commands applies to all operating systems.
Because Eclipse already compiled the Java code navigate to the project bin folder and run the command
and you can see our «Hello World. » message.
Conclusions
As you can see is not complicated to create your first application. Any comments and suggestions are welcome.
References
How to create, build and run a Java Hello World program with Eclipse
If you are new to Java programming and Eclipse IDE, this step-by-step tutorial helps you get started to be familiar with the most Java IDE by writing your first Java program using Eclipse. And you will be able to build and run your program inside Eclipse.
1. Download and Install Eclipse IDE
Eclipse is the most popular Integrated Development Environment (IDE) for developing Java applications. It is robust, feature-rich, easy-to-use and powerful IDE which is the #1 choice of almost Java programmers in the world. And it is totally FREE.
As of now (fall 2016), the latest release of Eclipse is Neon (version 4.6). Click the following link to download Eclipse:
You will see the download page like this:
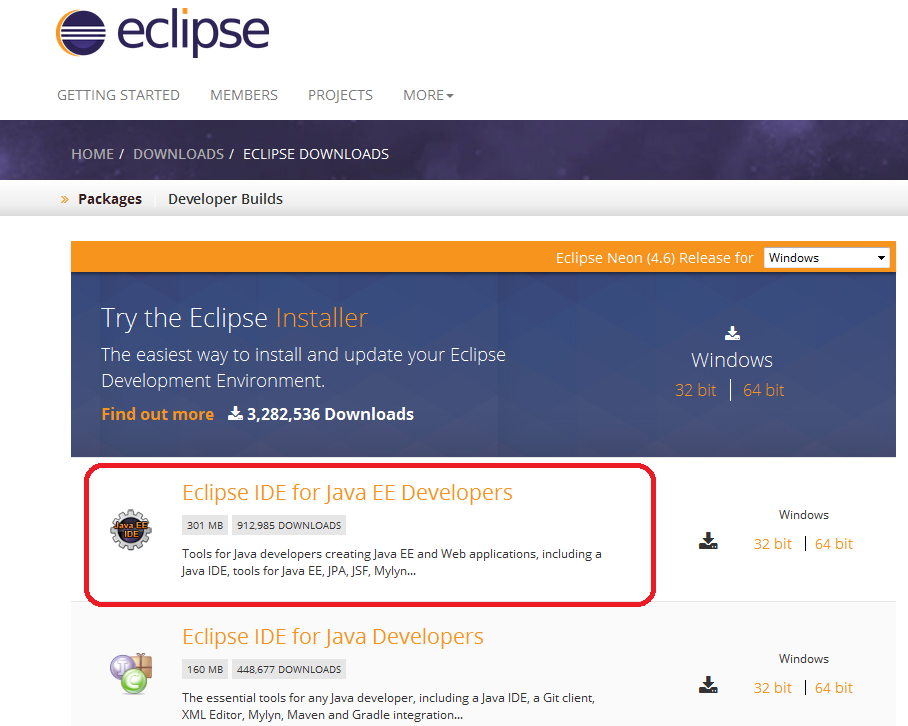
You can install Eclipse either by downloading the Eclipse Installer or package (zip file). I’d recommend you to download by package. Eclipse comes with various packages for different development purposes. For Java, there are two main packages listed as you see above:
- Eclipse IDE for Java EE Developers: This is for developing Java EE applications (web applications using Servlets & JSP).
- Eclipse IDE for Java Developers: This is for developing Java SE applications, a subset of the Java EE Developer package.
Click on the link 32-bit or 64-bit (depending on the bit version of your operating system) to start download the package.
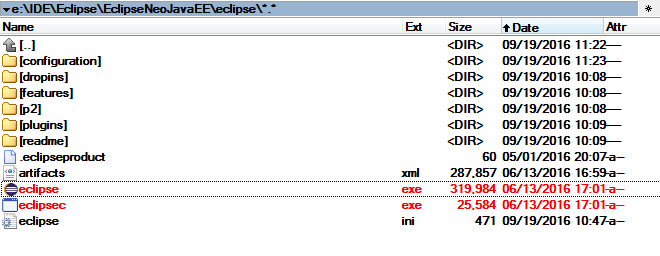
Extract this ZIP file into a directory on your computer. You will see a directory called eclipse containing Eclipse’s installed files:
Eclipse Neon requires Java 8 or newer so make sure you have JDK 8 already installed on your computer. If not, follow this tutorial to install JDK.
Click eclipse.exe file (Windows) to start the IDE. You will see the splash screen of Eclipse Neo:

That’s it! You have successfully installed Eclipse IDE. Next, let’s see how to create a workspace.
2. Choose a Workspace Directory
Eclipse organizes projects by workspaces. A workspace is a group of related projects and it is actually a directory on your computer. That’s why when you start Eclipse, it asks to choose a workspace location like this:
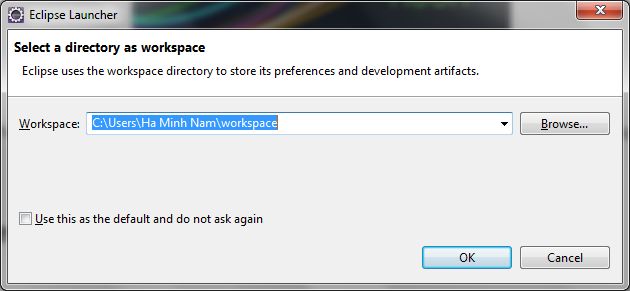
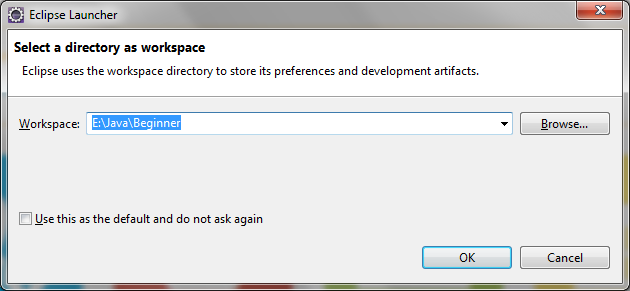
By default, Eclipse created a workspace directory at your USER_HOME\workspace. If you want to choose another directory, click Browse. Here I chose a different workspace:
Check Use this as the default and do not ask again if you don’t want to be asked whenever you start Eclipse. You can always change workspace when Eclipse is running.
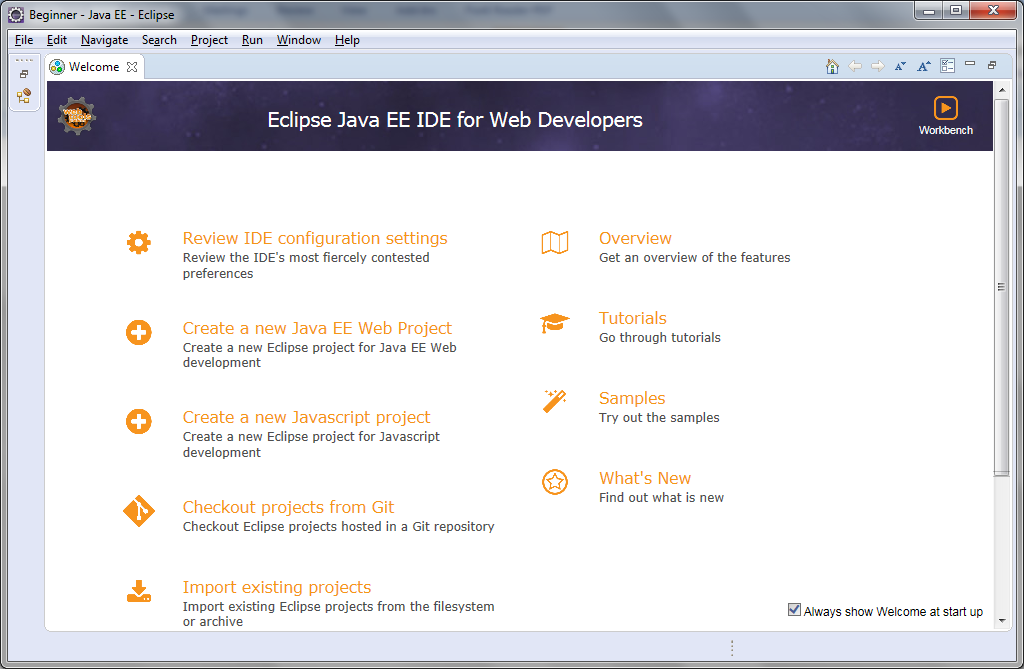
Click OK. You should see the welcome screen:
Now, we are ready to create a Java project.
3. Change Perspective
Before creating a new Java project, let familiarize yourself with Perspective. Imagine a perspective is a predefined configuration specialized for a specific aspect of development process such as Java, Java EE, Debug, Database Development, Web, etc. Depending on your need, you can switch back and forth among different perspectives during a development session.
Since we installed Eclipse IDE for Java EE Developers, the default perspective is Java EE. To change perspective, go to Window > Perspective > Open Perspective > Other… You will see a small dialog listing all available perspectives:

Here we choose Java perspective. Click OK. Here’s how the Java perspective would look like:
4. Create a Java Project
To create a new Java project in Eclipse, go to File > New > Java Project. The New Java Project wizard dialog appears let you specify configurations for the project:

Enter project name: HelloWorld. Leave the rest as it is, and click Finish.
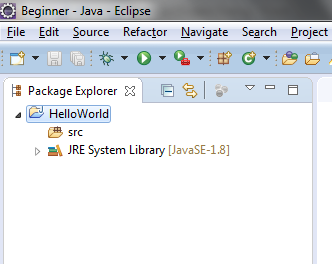
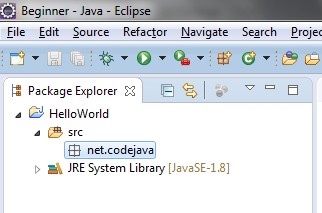
You should see the HelloWorld project is created in the Package Explorer view as following:
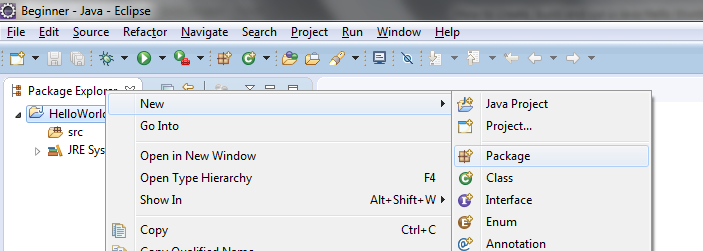
It’s recommended to create a package for your project. Right click on the project, and select New > Package from the context menu:
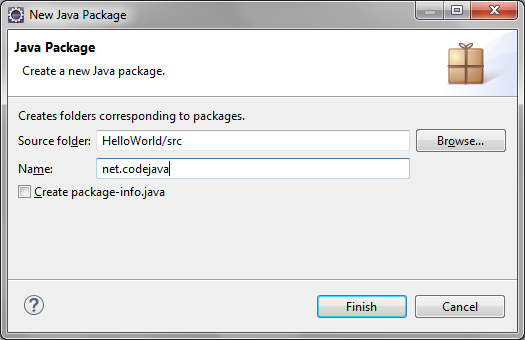
In the New Java Package dialog, enter the name your package. Here I enter net.codejava :
Click Finish. You should see the newly created package appears:
Now, it’s time to create a Java class for your hello world application.
5. Write Your First Java Program
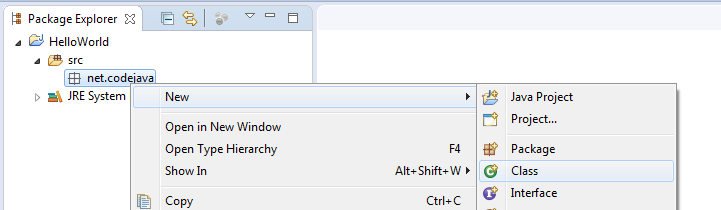
To create a new Java class under a specified package, right click on the package and select New > Class from the context menu:
The New Java Class dialog appears, type the name of class as HelloWorld and choose the option to generate the main() method:
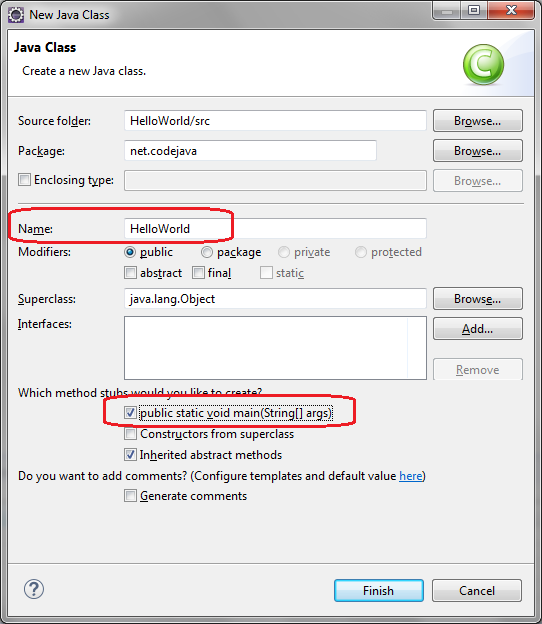
And click Finish. The HelloWorld class is generated like this:

Now, type some code in the main() method to print the message “Hello World” to the console:
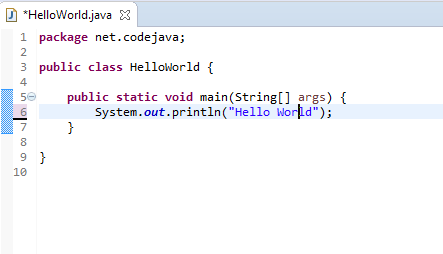
That’s it. We have created a Java hello world program using Eclipse IDE.
6. Compile, Build and Run Your First Java Program
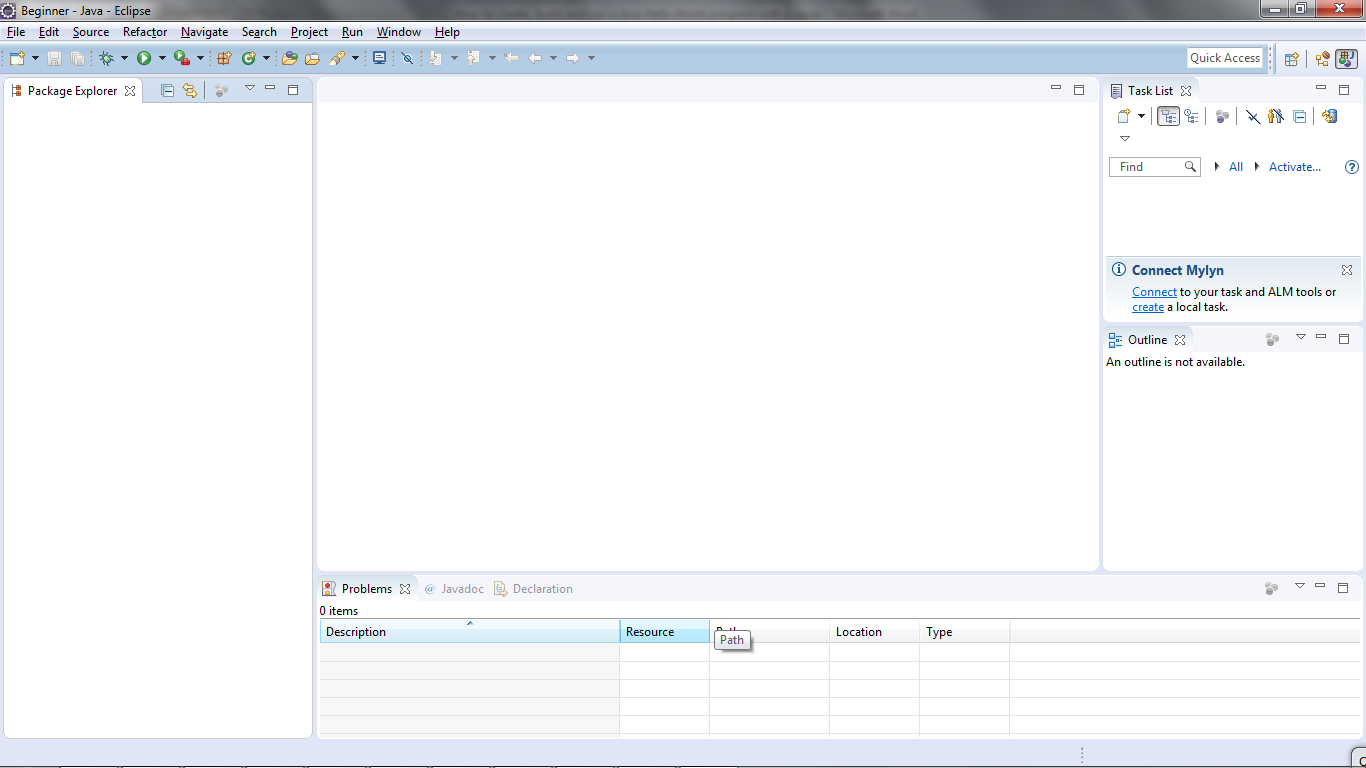
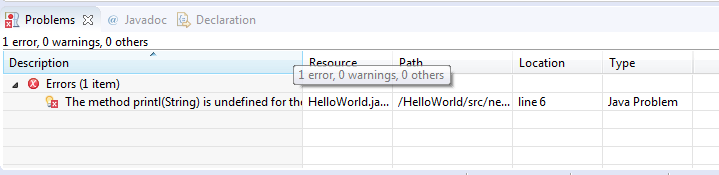
By default, Eclipse compiles the code automatically as you type. And it will report compile errors in the Problems view at the bottom like this:
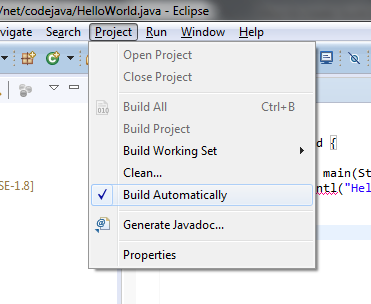
If you want to disable automatically build feature, click the menu Project and uncheck Build Automatically:
However, it’s strongly recommended to keep the auto build mode for it helps you detect errors instantly.
Now, let’s run the hello world application. Click menu Run > Run (or press Ctrl + F11), Eclipse will execute the application and show the output in the Console view:

That’s it! The HelloWorld program has run and printed the output “Hello World” and terminates.
We hope this tutorial help you get started with Eclipse and Java easily. Thank you for reading.
What’s next? I recommend you to continue with this article: Java OOP: Understand Classes and Objects
Watch this tutorial in video:
Related Java Hello World Tutorials:
Other Eclipse Tutorials:
About the Author:

Nam Ha Minh is certified Java programmer (SCJP and SCWCD). He started programming with Java in the time of Java 1.4 and has been falling in love with Java since then. Make friend with him on Facebook and watch his Java videos you YouTube.