- HTML Links
- HTML Links — Hyperlinks
- HTML Links — Syntax
- Example
- HTML Links — The target Attribute
- Example
- Absolute URLs vs. Relative URLs
- Example
- Absolute URLs
- Relative URLs
- HTML Links — Use an Image as a Link
- Example
- Link to an Email Address
- Example
- Button as a Link
- Example
- Link Titles
- Dealing with files
- Where should your website live on your computer?
- An aside on casing and spacing
- What structure should your website have?
- File paths
- What else should be done?
- Found a content problem with this page?
- HTML File Paths
- File Path Examples
- HTML File Paths
- Absolute File Paths
- Example
- Relative File Paths
- Example
- Example
- Example
- Best Practice
HTML Links
Links are found in nearly all web pages. Links allow users to click their way from page to page.
HTML Links — Hyperlinks
HTML links are hyperlinks.
You can click on a link and jump to another document.
When you move the mouse over a link, the mouse arrow will turn into a little hand.
Note: A link does not have to be text. A link can be an image or any other HTML element!
HTML Links — Syntax
The link text is the part that will be visible to the reader.
Clicking on the link text, will send the reader to the specified URL address.
Example
This example shows how to create a link to W3Schools.com:
By default, links will appear as follows in all browsers:
- An unvisited link is underlined and blue
- A visited link is underlined and purple
- An active link is underlined and red
Tip: Links can of course be styled with CSS, to get another look!
HTML Links — The target Attribute
By default, the linked page will be displayed in the current browser window. To change this, you must specify another target for the link.
The target attribute specifies where to open the linked document.
The target attribute can have one of the following values:
- _self — Default. Opens the document in the same window/tab as it was clicked
- _blank — Opens the document in a new window or tab
- _parent — Opens the document in the parent frame
- _top — Opens the document in the full body of the window
Example
Use target=»_blank» to open the linked document in a new browser window or tab:
Absolute URLs vs. Relative URLs
Both examples above are using an absolute URL (a full web address) in the href attribute.
A local link (a link to a page within the same website) is specified with a relative URL (without the «https://www» part):
Example
Absolute URLs
W3C
Relative URLs
HTML Images
CSS Tutorial
HTML Links — Use an Image as a Link
To use an image as a link, just put the tag inside the tag:
Example
Link to an Email Address
Use mailto: inside the href attribute to create a link that opens the user’s email program (to let them send a new email):
Example
Button as a Link
To use an HTML button as a link, you have to add some JavaScript code.
JavaScript allows you to specify what happens at certain events, such as a click of a button:
Example
Tip: Learn more about JavaScript in our JavaScript Tutorial.
Link Titles
The title attribute specifies extra information about an element. The information is most often shown as a tooltip text when the mouse moves over the element.
Dealing with files
A website consists of many files: text content, code, stylesheets, media content, and so on. When you’re building a website, you need to assemble these files into a sensible structure on your local computer, make sure they can talk to one another, and get all your content looking right before you eventually upload them to a server. Dealing with files discusses some issues you should be aware of so you can set up a sensible file structure for your website.
Where should your website live on your computer?
When you are working on a website locally on your computer, you should keep all the related files in a single folder that mirrors the published website’s file structure on the server. This folder can live anywhere you like, but you should put it somewhere where you can easily find it, maybe on your Desktop, in your Home folder, or at the root of your hard drive.
- Choose a place to store your website projects. Inside your chosen place, create a new folder called web-projects (or similar). This is where all your website projects will live.
- Inside this first folder, create another folder to store your first website in. Call it test-site (or something more imaginative).
An aside on casing and spacing
You’ll notice that throughout this article, we ask you to name folders and files completely in lowercase with no spaces. This is because:
- Many computers, particularly web servers, are case-sensitive. So for example, if you put an image on your website at test-site/MyImage.jpg and then in a different file you try to invoke the image as test-site/myimage.jpg , it may not work.
- Browsers, web servers, and programming languages do not handle spaces consistently. For example, if you use spaces in your filename, some systems may treat the filename as two filenames. Some servers will replace the areas in your filenames with «%20» (the character code for spaces in URLs), resulting in all your links being broken. It’s better to separate words with hyphens, rather than underscores: my-file.html vs. my_file.html .
The short answer is that you should use a hyphen for your file names. The Google search engine treats a hyphen as a word separator but does not regard an underscore that way. For these reasons, it is best to get into the habit of writing your folder and file names lowercase with no spaces and with words separated by hyphens, at least until you know what you’re doing. That way you’ll bump into fewer problems later down the road.
What structure should your website have?
Next, let’s look at what structure our test site should have. The most common things we’ll have on any website project we create are an index HTML file and folders to contain images, style files, and script files. Let’s create these now:
- index.html : This file will generally contain your homepage content, that is, the text and images that people see when they first go to your site. Using your text editor, create a new file called index.html and save it just inside your test-site folder.
- images folder: This folder will contain all the images that you use on your site. Create a folder called images , inside your test-site folder.
- styles folder: This folder will contain the CSS code used to style your content (for example, setting text and background colors). Create a folder called styles , inside your test-site folder.
- scripts folder: This folder will contain all the JavaScript code used to add interactive functionality to your site (e.g. buttons that load data when clicked). Create a folder called scripts , inside your test-site folder.
Note: On Windows computers, you might have trouble seeing the file names, because Windows has an option called Hide extensions for known file types turned on by default. Generally, you can turn this off by going to Windows Explorer, selecting the Folder options… option, unchecking the Hide extensions for known file types check box, then clicking OK. For more specific information covering your version of Windows, you can search on the web.
File paths
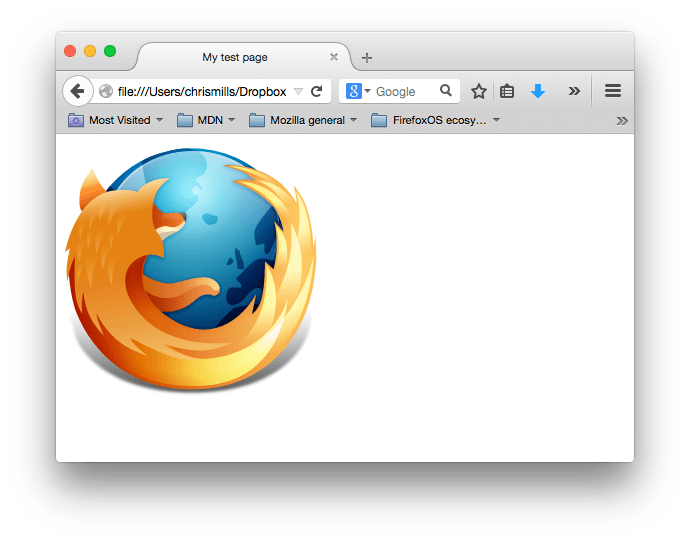
To make files talk to one another, you have to provide a file path between them — basically a route, so one file knows where another one is. To demonstrate this, we will insert a little bit of HTML into our index.html file, and make it display the image you chose in the article «What will your website look like?» Alternatively, you can choose an existing image at your disposal, on your computer or from the Web, and use it in the following steps:
- Copy the image you chose earlier into your images folder.
- Open up your index.html file, and insert the following code into the file exactly as shown. Don’t worry about what it all means for now — we’ll look at the structures in more detail later in the series.
doctype html> html lang="en-US"> head> meta charset="utf-8" /> meta name="viewport" content="width=device-width" /> title>My test pagetitle> head> body> img src="" alt="My test image" /> body> html>
Some general rules for file paths:
- To link to a target file in the same directory as the invoking HTML file, just use the filename, e.g. my-image.jpg .
- To reference a file in a subdirectory, write the directory name in front of the path, plus a forward slash, e.g. subdirectory/my-image.jpg .
- To link to a target file in the directory above the invoking HTML file, write two dots. So for example, if index.html was inside a subfolder of test-site and my-image.jpg was inside test-site , you could reference my-image.jpg from index.html using ../my-image.jpg .
- You can combine these as much as you like, for example ../subdirectory/another-subdirectory/my-image.jpg .
For now, this is about all you need to know.
Note: The Windows file system tends to use backslashes, not forward slashes, e.g. C:\Windows . This doesn’t matter in HTML — even if you are developing your website on Windows, you should still use forward slashes in your code.
What else should be done?
That is about it for now. Your folder structure should look something like this:

Found a content problem with this page?
This page was last modified on Jul 7, 2023 by MDN contributors.
Your blueprint for a better internet.
HTML File Paths
A file path describes the location of a file in a web site’s folder structure.
File Path Examples
| Path | Description |
|---|---|
| The «picture.jpg» file is located in the same folder as the current page | |
 | The «picture.jpg» file is located in the images folder in the current folder |
 | The «picture.jpg» file is located in the images folder at the root of the current web |
 | The «picture.jpg» file is located in the folder one level up from the current folder |
HTML File Paths
A file path describes the location of a file in a web site’s folder structure.
File paths are used when linking to external files, like:
Absolute File Paths
An absolute file path is the full URL to a file:
Example
The tag is explained in the chapter: HTML Images.
Relative File Paths
A relative file path points to a file relative to the current page.
In the following example, the file path points to a file in the images folder located at the root of the current web:
Example
In the following example, the file path points to a file in the images folder located in the current folder:
Example
In the following example, the file path points to a file in the images folder located in the folder one level up from the current folder:
Example
Best Practice
It is best practice to use relative file paths (if possible).
When using relative file paths, your web pages will not be bound to your current base URL. All links will work on your own computer (localhost) as well as on your current public domain and your future public domains.