- How to Resize Images Proportionally for Responsive Web Design With CSS
- Resize images with the HTML width and height attributes
- Example of resizing an image proportionally with the width and height attributes:
- Result
- Resize images with the CSS width and height properties
- Example of resizing an image proportionally with the width and height properties:
- Resize images with the CSS max-width property
- Example of adding a responsive resized image with the max-width property:
- Example of resizing an image proportionally using the max-width property:
- HTML img Scaling
- Method 1: Scaling an Image Using Percentage Values
- Method 2: Scaling an Image Using Pixel Values
- Conclusion
- About the author
- Hadia Atiq
- Современные решения старых CSS-задач (3 часть): Масштабирование изображений на CSS
- Использование background-size: cover
- Использование object-fit: cover
- Когда использовать каждое из решений
How to Resize Images Proportionally for Responsive Web Design With CSS
One of the main parts of responsive web design is resizing the image automatically to fit the width of its container. Since nowadays people use different kinds of desktops, our web pages must be appropriate for all types of screens.
So, let’s learn three ways of resizing images and making responsive images with only HTML and CSS.
Resize images with the HTML width and height attributes
Example of resizing an image proportionally with the width and height attributes:
html> html> head> title>Title of the document title> head> body> p>Resized image: p> img src="/uploads/media/default/0001/01/25acddb3da54207bc6beb5838f65f022feaa81d7.jpeg" alt="Aleq" width="160" height="145" /> p>Original image size: p> img src="/uploads/media/default/0001/01/25acddb3da54207bc6beb5838f65f022feaa81d7.jpeg" alt="Aleq" /> body> html>Result
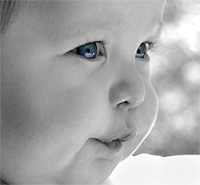
While resizing an image, the aspect ratio (the viewable area and display shape) should be preserved. Otherwise, the image can get distorted and lose its quality.
Resize images with the CSS width and height properties
Another way of resizing images is using the CSS width and height properties. Set the width property to a percentage value and the height to «auto». The image is going to be responsive (it will scale up and down).
Example of resizing an image proportionally with the width and height properties:
html> html> head> title>Responsive Resized Image title> style> img < width: 100%; height: auto; > style> head> body> h2>Responsive Resized Image h2> p>Resize the browser to see the responsive effect: p> img src="/uploads/media/default/0001/03/5bfad15a7fd24d448a48605baf52655a5bbe5a71.jpeg" alt="New York" /> body> html>Note that the image could be scaled more than the original size. In several cases, a better option is to use the max-width property alternatively.
Resize images with the CSS max-width property
There is a better way for resizing images responsively. If the max-width property is set to 100%, the image will scale down if it has to, but never scale up to be larger than its original size. The trick is to use height: auto; to override any already present height attribute on the image.
Example of adding a responsive resized image with the max-width property:
html> html> head> title>Responsive Resized Image with max-width title> style> img < max-width: 100%; height: auto; > style> head> body> h2>Responsive Resized Image with max-width h2> p>Resize the browser to see the responsive effect: p> img src="/uploads/media/default/0001/03/5bfad15a7fd24d448a48605baf52655a5bbe5a71.jpeg" alt="New York" /> body> html>Let’s see another live web page example with the same method.
Example of resizing an image proportionally using the max-width property:
html> html> head> title>Responsive Resized Image in a Web Page title> style> * < box-sizing: border-box; > html < font-family: "Lucida Sans", sans-serif; > img < width: 100%; height: auto; > .row:after < content: ""; clear: both; display: table; > .menu, .content < float: left; padding: 15px; width: 100%; > @media only screen and (min-width: 600px) < .menu < width: 25%; > .content < width: 75%; > > @media only screen and (min-width: 768px) < .menu < width: 20%; > .content < width: 79%; > > .header < background-color: #1c87c9; color: #ffffff; padding: 10px; text-align: center; > .menu ul < list-style-type: none; margin: 0; padding: 0; > .menu li < padding: 8px; margin-bottom: 7px; background-color: #666666; color: #ffffff; box-shadow: 0 1px 3px rgba(0, 0, 0, 0.12), 0 1px 2px rgba(0, 0, 0, 0.24); > .menu li:hover < background-color: #1c87c9; > .footer < background-color: #1c87c9; color: #ffffff; text-align: center; font-size: 12px; padding: 15px; > style> head> body> div class="header"> h1>W3DOCS h1> div> div class="row"> div class="menu"> ul> li>Books li> li>Snippets li> li>Quizzes li> li>Tools li> ul> div> div class="content"> h2>About Us h2> p> W3docs provides free learning materials for programming languages like HTML, CSS, Java Script, PHP etc. p> p> It was founded in 2012 and has been increasingly gaining popularity and spreading among both beginners and professionals who want to enhance their programming skills. p> img src="/uploads/media/default/0001/02/8070c999efd1a155ad843379a5508d16f544aeaf.jpeg" alt="Team Work" /> div> div> div class="footer"> p> Resize the browser window to see how the content respond to the resizing. p> div> body> html>HTML img Scaling
![]()
When an image is added to an HTML document, it needs to be properly adjusted to maintain a better visual representation of the interface. More specifically, HTML “img” scaling means adjusting the image with respect to different parameters like “height” and “width” to resize the image. Without resizing or scaling, the original size of the image will be displayed as its default size in the output. To scale the HTML images, the CSS “height” and “width” properties are used in different ways.
This post will cover the following approaches:
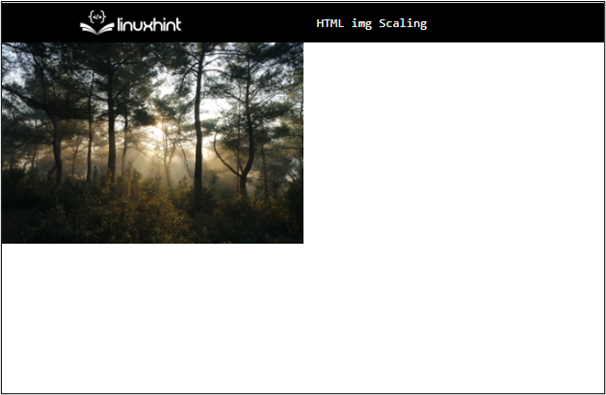
Method 1: Scaling an Image Using Percentage Values
The developers can apply the CSS “height” and “width” properties on the HTML “ ” element and define any number of percentages in the CSS style element to set the horizontal and vertical length of the image accordingly.
Example
Let’s check out an example of resizing or scaling the image using the CSS properties. Suppose, we have the following container, on which the CSS properties need to be applied:
In the above HTML code snippet:
- A “div” container element has been added with the class declared as “containerImage”.
- Inside the “div” tag, there is the “img” tag with the “id” declared as “myid” and the “src” attribute.
- The exact image address from the system has been added as the value of the “src” attribute. This will add the selected image from the system in the div container in the output.
Now, it is required to apply the CSS properties on the above HTML element to scale the added image:
In the above CSS style element:
- The “id” declared in the “img” element is added to refer to the “ ” element.
- Inside the div, the “width” property is defined as “50%”. This adjusts the width of the image on the screen to cover half of the horizontal area of the screen.
- After that, the “height” property has been set to “40%” to cover the “40%” area of the whole vertical screen in the output.
This will generate the following output interface:
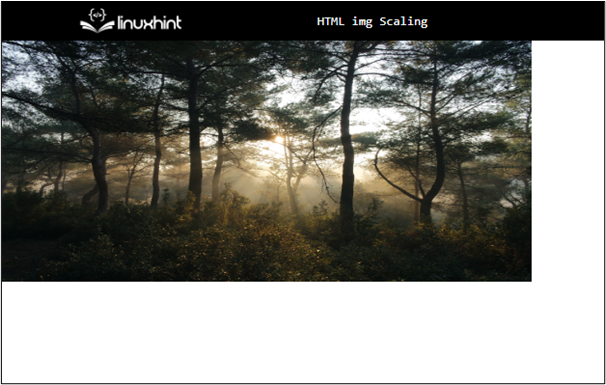
Method 2: Scaling an Image Using Pixel Values
When the CSS resizing properties, i.e., “height” and “width” are applied by defining values for them in pixels, it resizes the image in the output according to the exact pixel value rather than adjusting the size of the image according to the whole area of the screen.
Example
Let’s apply the CSS “height” and “width” properties by defining their values in “px” (pixels) to exactly the same HTML snippet added in the previous section of this post:
In the above CSS code snippet:
- The “height” property has been set to “250px”. This will set the height of the image to exactly 250 pixels.
- The “width” property has been set to “550px” to set the width to exactly 550 pixels in the output.
According to the above code, the added image will be scaled as follows:
That’s how to scale an image in HTML.
Conclusion
The images can be scaled or resized in an HTML document using the CSS “height” and “width” properties. To utilize them, declare an “id” or a “class” for the HTML “ ” element, add the respective selector in the CSS style element and define the CSS height and width properties for the “” element. The “height” and “width” can be defined by adding values in either the percentage or pixels. This blog discussed the approaches for scaling images in HTML.
About the author
Hadia Atiq
A Software Engineer and Technical Writer passionate about learning and spreading knowledge of the latest technology. I utilize my writing skills to help readers understand the importance and usage of modern technology.
Современные решения старых CSS-задач (3 часть): Масштабирование изображений на CSS
Это третья статья из серии, посвящённой ознакомлению с современными способами решения CSS-проблем, с которыми я сталкивалась на протяжении более 13 лет в роли фронтенд-разработчика.
В не очень далёком прошлом, когда JQuery ещё был «Царём горы», наиболее популярным инструментом для реализации отзывчивости фоновых изображений был JQuery-плагин Backstretch
Я использовала этот плагина где-то на 30 сайтах, пока приведённое ниже свойство не получило достаточную поддержку браузерами (а если точнее, пока существенно не снизилась доля использования IE ниже 9 версии). И свойство это:
Согласно данным caniuse.com, данное свойство и значение поддерживается современными браузерами уже более 9 лет. Но вебсайты, использующие упомянутый плагин Backstretch или собственное подобное решение, могли до сих пор не обновиться.
Альтернативный метод использует стандартный тег img и магию свойства
Давайте рассмотрим, как использовать каждое из решений и узнаем, в каких ситуациях следует отдавать предпочтение каждому из них.
Использование background-size: cover
В течение 10 лет я создавала глубоко настраиваемые темы и плагины для корпоративных сайтов, разработанных на WordPress. Рассмотрим сценарий использования свойства background-size: cover на примере карточки одного из тех шаблонов.
Начнём с примера, когда фоновое изображение элемента задаётся через background-image в HTML-атрибуте style . Рекомендуется использовать aria-label , который заменит атрибут alt , присутствующий в тегах img .
Whizzbang Widget SuperDeluxe
Liquorice candy macaroon soufflé jelly cake. Candy canes ice cream biscuit marzipan. Macaroon pie sesame snaps jelly-o.
Add to Cart Соответственно, CSS-стили могут быть следующими. Здесь используется трюк с padding-bottom , позволяющий задать соотношение сторон 16:9 для div-элемента, содержащего изображение:
Всё вместе это будет выглядеть следующим образом:
Использование object-fit: cover
Это новый способ, который, согласно данным caniuse, можно использовать без полифила, только если вам не нужна поддержка IE и Edge < 16
Это свойство применяется непосредственно к тегу img , поэтому мы обновляем HTML-нашей карточки на следующий, меняя тег div на img и атрибут aria-label на alt :

Whizzbang Widget SuperDeluxe
Liquorice candy macaroon soufflé jelly cake. Candy canes ice cream biscuit marzipan. Macaroon pie sesame snaps jelly-o.
Add to Cart Затем CSS-код дополняется свойством height , которое будет ограничивать изображение любого размера так, чтобы оно имело заданное соотношение сторон. Если собственный размер изображения больше заданных ограничений, срабатывает свойство object-fit , которое по умолчанию центрирует изображение внутри границ, созданных контейнером карточки и свойством height :
В результате получаем следующее:
Когда использовать каждое из решений
Если нужна поддержка старых версий IE, то если не подключать полифил, вы ограничены лишь решением background-size (мне грустно говорить это в 2020 году, но это всё ещё может быть актуально для корпоративного сектора и сферы образования).
Оба решения позволяют получить полноразмерное адаптивное изображение, основанное на контролируемом вами соотношении сторон.
Когда следует выбирать background-size :
- при использовании с контейнером, в котором предполагается размещать какое-то содержимое. Например, с шапкой сайта
- если необходимо применить дополнительные эффекты с помощью псевдоэлементов, которые нельзя использовать с тегом img
- если изображение носит декоративный характер и не потребности в семантике тега img
Когда следует выбирать object-fit :
- использование стандартного тега img лучше всего подходит для контекстных изображений, позволяя сохранить семантику