css float and border problem
demo But the div post-user is going outside the border.
How can i fix it ? (P.S. : Its something similar to layout of forums)
Both Andrew’s and Ben’s answers will work and both have their drawbacks. Neither is the win-all solution so make an educated decision here as to what path you want to take.
@benjamin ah its not that easy u have to wait a certain amount of time. I wasnt able to accept at that time.
3 Answers 3
http://jsfiddle.net/PGFTz/5/ I added a clear fix after post-user which allows it to stay within the box.
add overflow:hidden to your .main-box css
extensive explenation about how and why it works can be found here
A great guide for the working of float can be found here:
Sorry this answer works perfectly fine but i cant get scorllers if i want. So ill use clear. Thanks ill do +1 😀
You could change float:left to text-align:left
yes this works quite fine indeed :> sharp. I am so used to having most elements floating that I suggested the overflow:hidden fixed by default, but in this instance only the post-user is floating
@Benjamin: Ha, thanks man. I try to use text-align when I can just because it’s a bit easier (for me) to understand. I start to get confused when too many things are float ing haha.
Text is however aligned left by default, so not replacing the float but simply removing it, would also solve the issue. But the post-user will take the entire width instead of only the width it needs to hold the text
Good point! I end up using text-align:left alot because the sites I’ve inherited all have a built-in text-align:center that I can’t change. So, I often end up thinking center is default haha. +1 on your answer.
О практических применениях свойства float

Каждый хороший верстальщик скажет, что только безукоризненное знание собственной работы способно принести позитивные результаты. Собственные наблюдения привели меня к выводу, что не только начинающие верстальщики не совсем понимают сути применения свойства float. На Хабре просмотрел имеющиеся публикации на данную тематику. Появилось желание поделиться некоторыми замечаниями и практическими применениями данного свойства. Приведенные ниже разъяснения в большинстве своем могут стать полезными для начинающего верстальщика.
- Значения left, right определяют, по какой стороне будет выравниваться элемент;
- элементы, имеющие значения left, right, становятся блочными (имея больший приоритет над значениями свойства display);
- плавающий элемент обтекается следующим элементом (и другими вложенными в него элементами), следующими соседними элементами родителя, а также предыдущими соседними строчными элементами;
- плавающий элемент занимает ширину контента за исключением, если внутренние элементы неплавающие (это было обсуждено в статье Float’омагия: пробуем не «плавать» в спецификации, чтобы не утонуть в потоке);
- высота отца не зависит от высоты дочернего плавающего элемента, для следующих неплавающих элементов внешние отступы от плавающих элементов не будут действовать;
- элемент, для которого предыдущий соседний элемент — плавающий, будет обтекать его, если позволит ширина отца, в противном случае — обтекать предыдущий плавающий элемент;
- элементы не будут флоатиться, если это не позволит ширина отца;
- значения absolute и fixed свойства position отменяют действие свойства float.
Известно, что блочный элемент располагается на отдельной строке, но зафлоаченный элемент обтекают предыдущие соседние строчные элементы.
Пример:
Результат:
Как по мне, вышеуказанный пример не имеет практического применения. Но вывод можно сделать такой: не стоит размещать друг к другу строчные и блочные элементы. На том, как ведут себя зафлоаченные элементы между собой, особо останавливаться не буду, поскольку это хорошо было продемонстрировано в статье Подробно о свойстве float.
Но хотелось бы привести еще дополнительные практические применения
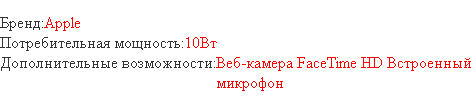
1. Какие стили написать для такой разметки
- Бренд:
- Apple
- Потребительная мощность:
- 10Вт
- Дополнительные возможности:
- Веб-камера FaceTime HD Встроенный микрофон

чтобы выглядело так:
A если размеры ограничены:
Результат:

микрофон упал под Дополнительные возможности:
В таком случае стоит лишь добавить
Результат:
В итоге получается небольшой код:
2. Как упомянуто выше, зафлоаченный элемент занимает ширину содержимого, и если нам нужно сверстать такое меню:
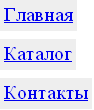
эта особенность нам поможет.
С условием, что цвет фона нужно задать элементу li:
float: left — нужен для того, чтобы ограничить ширину до содержимого.
Но не обязательно быть профессионалом верстки, чтобы заметить: если ширина ul позволяет элементам обтекать друг друга, то получится следующее:

Тогда в помощь нам приходит связка свойств float и clear. Стоит селектору ul > li прописать clear: left, и все станет на свои места.
Не все так просто со свойством clear — применение этого свойства из значением left или right приводит к очищению всего потока зафлоаченных элементов данного типа. Приведу наглядный пример:
Имеем следующую разметку:
lorem ispum lorem ispum
lorem ispum
lorem ispum .leftColumn < width: 200px; height: 200px; float: left; background: #f55; >.rightColumn < margin-left: 220px; background: #5ff; >.rightColumn .block1, .rightColumn .block2 < float: left; width: 200px; margin-right: 20px; background: #ebde05; >.rightColumn .block3
Заметка: за задумкой, элемент с классом block3(зеленый) должен расположиться после элементов с классами block1, block2 (желтые) и начинаться с нового рядка.
В результате:
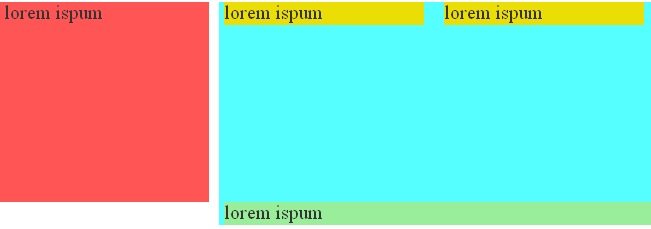
Что здесь произошло? Элемент с классом block3 (зеленый), действием правила clear: both; очистил поток, включая красный блок.
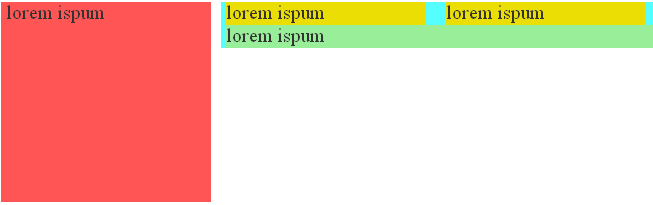
Выходов из этой ситуации много. Все зависит от поставленной задачи:
- задать элементу с классом rightColumn правило overflow: hidden;
результат: - задать элементу с классом rightColumn правило float: left; но тогда придется убрать margin-left: 220px; и теперь элемент с классом rightColumn не будет занимать остальную ширину окна браузера;
- обвернуть элементы с классами block1, block2 в элемент, задав ему overflow: hidden; или же display: table-cell; (для ie7 — zoom: 1;)
Знакомый метод очищения потока и определения высоты элементу под названием clearfix здесь не подходит.
4. Вооружившись знаниями свойства float и overflow, сверстаем такое меню:

Не будет проблемы, если использовать дополнительные селекторы. Но, к примеру, мы не знаем количества пунктов (для использования селектора соседних элементов), не имеем кроссбраузерную поддержку :first-child, :last-child, а использование каких либо выражений, тем более скриптов для IE — запрет;

В результате получаем:
Использовав отрицательные внутренние отступы для li и свойства float и overflow для ul, получаем дополнительные стили:

Как можно заметить, border-ы не на своем месте, осталось лишь поменять значения цветов левого и правого бордеров, получается такой код:

Конечно же, внутренние отступы уменьшились на 3px, поэтому надо их увеличить на 3px:
Получаем готовое меню:
Я не упомянул всего, что касается специфики и практических примеров свойства float, но приведу еще некоторые ссылки на полезные статьи:
Раздел блога ImageCMS “Совершенствуемся — CSS!” в статье учебные материалы об эффективной верстке веб-страниц.
В заключение хочу добавить, что применять свойство float надо там, где в этом есть необходимость. Известный фреймворк bootstrap использует специальные вспомогательные классы .pull-left и .pull-right. Я использую .f_l, .f_r, это позволяет не только сократить код css, но и дает большую гибкость в построении структуры.
Ко всем вышеуказанным важностям хочу добавить только одно: с Днем программиста, друзья и коллеги! Легкого кодинга, двойной оплаты в восьмой степени вам и нам!
CSS float
The CSS float property can make HTML elements float to the left or right inside their parent element. Content inside the same parent element will move up and wrap around the floating element. In this CSS float tutorial I will explain how the CSS float property works in more detail.
CSS Float Example
To illustrate how the CSS float property works, let us first look at an HTML example:
This is the first textThis is box 1This is box 2This is the last text
The HTML code contains a div element which has a text, two div elements and another text inside its body. When rendered, here is what that looks like:
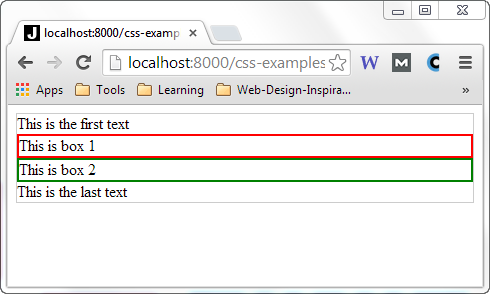
In the following sections I will show you how to make the two nested div elements float left and right inside their parent element using the CSS float property.
float : left
Now, let us try to make the first nested div element float left using the float CSS property. We do so by setting the CSS float property of the HTML element to the value left . Here an example showing a div element with the CSS float property set to left :
This is the first textThis is box 1This is box 2This is the last text
Here is what the example looks like with the left floating element when rendered in the browser:
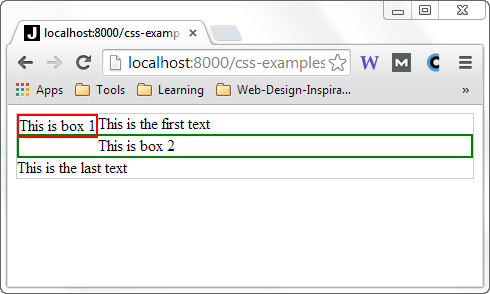
Notice how the first div element (with the red border) now floats to the left inside its parent element. The first text is now wrapping nicely around the first div element, to the right of it. The second div element is still positioned below the first div element, and the last text below that.
Now, let us try to make the second nested div float left too. Here is what the code looks like:
This is the first textThis is box 1This is box 2This is the last text
And here is what the code looks like when rendered in the browser:
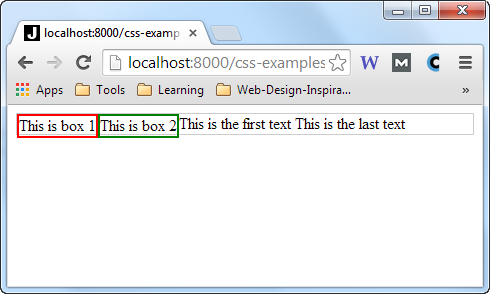
Now both the first and second nested div element is floating to the left inside their parent element. The text wraps nicely around the two floating elements.
float : right
Now let us try to make the second nested div float to the right instead. We do so by setting its float CSS property to right instead of left . Here is the code:
This is the first textThis is box 1This is box 2This is the last text
Here is what it looks like when rendered in the browser:
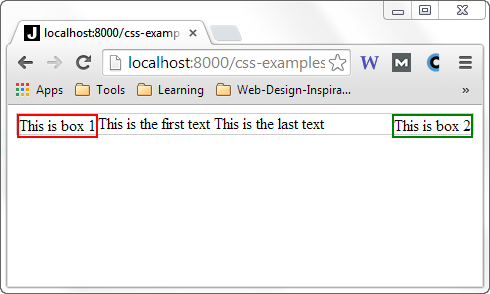
See how the two elements are now floating in each their direction inside their parent element. They are even located at the same vertical position (towards the top of the parent element). The text now wraps around the two div elements by being rendered between the div elements.
clear
Now, let us add a third div element which also floats left:
This is the first textThis is box 1This is box 2This is box 3This is the last text
This is what the code looks like now, when rendered in a browser:
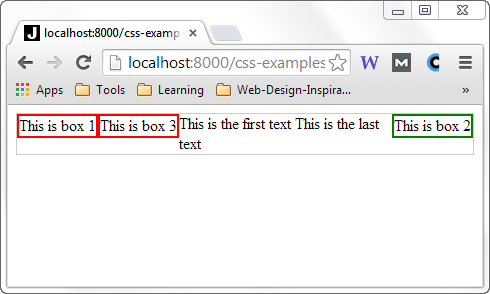
Notice how the two left floating elements are positioned at the same horizontal «line», after each other.
Imagine now that you want the two div elements with the red borders to float left, but under each other instead of next to each other. To do that, you need to set the clear CSS property.
The clear CSS property can take one of these values:
The left value means that the element should stay clear of all left floating elements. The right value means that the element should stay clear of all right floating elements. The both value means that the element should stay clear of both left and right floating elements. The none value means no clearing, which is the same as leaving out the clear CSS property.
Let us set the clear CSS property of the last div element to left . Then the last div element should still float left, but stay clear of the first left floating div element. Here is how the code looks:
This is the first textThis is box 1This is box 2This is box 3This is the last text
Here is what the code looks like when rendered in a browser:
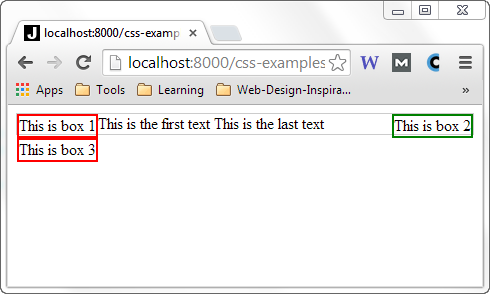
Notice how the last div element still floats left, but stays under (clear of) the first left floating div element.