- CSS Web Fonts
- Different Font Formats
- Browser Support for Font Formats
- Using The Font You Want
- Example
- Using Bold Text
- Example
- CSS Font Descriptors
- How to include a font in CSS
- Importing a font via HTML
- Importing a font via CSS
- Using the @import rule
- Defining a font (font in a folder)
- Подключение шрифтов в CSS
- Локальные шрифты
- Форматы шрифтов
- Разные начертания шрифтов
- Обычный:
- Как подключить ttf шрифт в css
CSS Web Fonts
Web fonts allow Web designers to use fonts that are not installed on the user’s computer.
When you have found/bought the font you wish to use, just include the font file on your web server, and it will be automatically downloaded to the user when needed.
Your «own» fonts are defined within the CSS @font-face rule.
Different Font Formats
TrueType Fonts (TTF)
TrueType is a font standard developed in the late 1980s, by Apple and Microsoft. TrueType is the most common font format for both the Mac OS and Microsoft Windows operating systems.
OpenType Fonts (OTF)
OpenType is a format for scalable computer fonts. It was built on TrueType, and is a registered trademark of Microsoft. OpenType fonts are used commonly today on the major computer platforms.
The Web Open Font Format (WOFF)
WOFF is a font format for use in web pages. It was developed in 2009, and is now a W3C Recommendation. WOFF is essentially OpenType or TrueType with compression and additional metadata. The goal is to support font distribution from a server to a client over a network with bandwidth constraints.
The Web Open Font Format (WOFF 2.0)
TrueType/OpenType font that provides better compression than WOFF 1.0.
SVG Fonts/Shapes
SVG fonts allow SVG to be used as glyphs when displaying text. The SVG 1.1 specification define a font module that allows the creation of fonts within an SVG document. You can also apply CSS to SVG documents, and the @font-face rule can be applied to text in SVG documents.
Embedded OpenType Fonts (EOT)
EOT fonts are a compact form of OpenType fonts designed by Microsoft for use as embedded fonts on web pages.
Browser Support for Font Formats
The numbers in the table specifies the first browser version that fully supports the font format.
| Font format | |||||
|---|---|---|---|---|---|
| TTF/OTF | 9.0* | 4.0 | 3.5 | 3.1 | 10.0 |
| WOFF | 9.0 | 5.0 | 3.6 | 5.1 | 11.1 |
| WOFF2 | 14.0 | 36.0 | 39.0 | 10.0 | 26.0 |
| SVG | Not supported | Not supported | Not supported | 3.2 | Not supported |
| EOT | 6.0 | Not supported | Not supported | Not supported | Not supported |
*IE: The font format only works when set to be «installable».
Using The Font You Want
In the @font-face rule; first define a name for the font (e.g. myFirstFont) and then point to the font file.
Tip: Always use lowercase letters for the font URL. Uppercase letters can give unexpected results in IE.
To use the font for an HTML element, refer to the name of the font (myFirstFont) through the font-family property:
Example
@font-face <
font-family: myFirstFont;
src: url(sansation_light.woff);
>
div font-family: myFirstFont;
>
Using Bold Text
You must add another @font-face rule containing descriptors for bold text:
Example
The file «sansation_bold.woff» is another font file, that contains the bold characters for the Sansation font.
Browsers will use this whenever a piece of text with the font-family «myFirstFont» should render as bold.
This way you can have many @font-face rules for the same font.
CSS Font Descriptors
The following table lists all the font descriptors that can be defined inside the @font-face rule:
| Descriptor | Values | Description |
|---|---|---|
| font-family | name | Required. Defines a name for the font |
| src | URL | Required. Defines the URL of the font file |
| font-stretch | normal condensed ultra-condensed extra-condensed semi-condensed expanded semi-expanded extra-expanded ultra-expanded | Optional. Defines how the font should be stretched. Default is «normal» |
| font-style | normal italic oblique | Optional. Defines how the font should be styled. Default is «normal» |
| font-weight | normal bold 100 200 300 400 500 600 700 800 900 | Optional. Defines the boldness of the font. Default is «normal» |
| unicode-range | unicode-range | Optional. Defines the range of UNICODE characters the font supports. Default is «U+0-10FFFF» |
How to include a font in CSS
Adding a font to a page can be done with both HTML and CSS. Depending on your requirements you can use any of the approaches.
In this article, I will guide you through both approaches in detail of including a font.
Importing a font via HTML
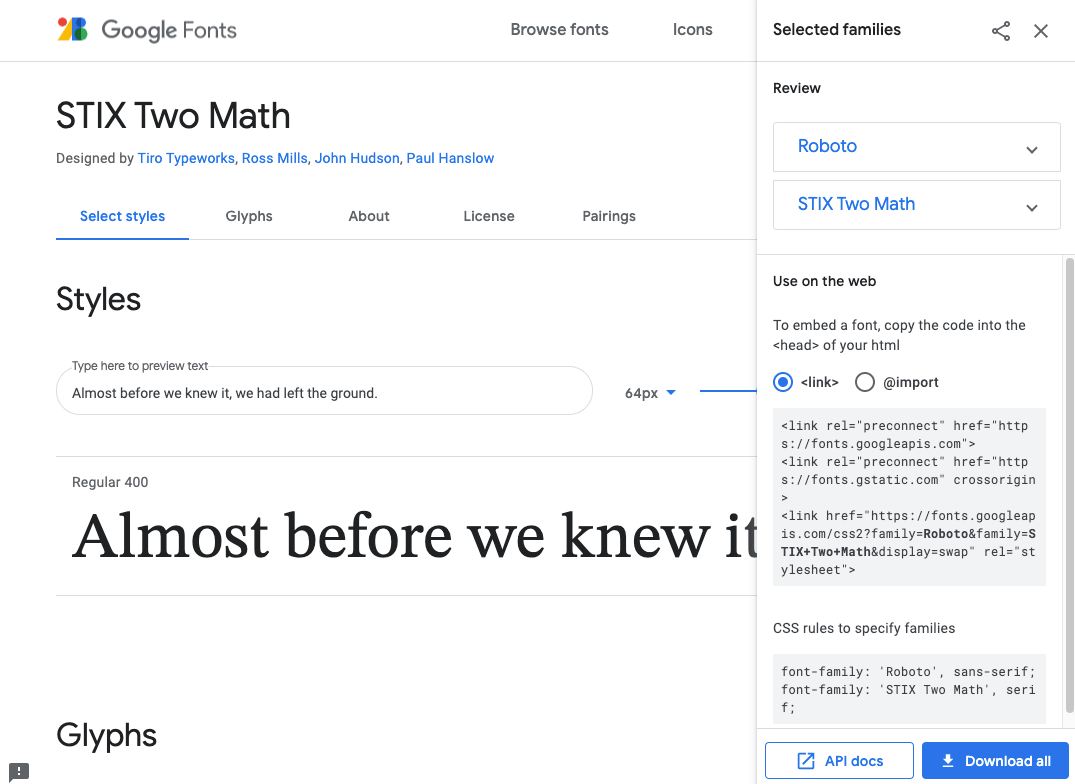
Including a font with HTML is useful when you need to include a Google Font or any other 3rd party font that is hosted on a remote server.
To do that you can use the element with the href attribute that is equal to the URL of the font in the of your page.
href="https://fonts.googleapis.com/css2?family=Roboto&display=swap" rel="stylesheet"> Google Fonts will offer you a ready code snippet that you can insert into your HTML code.
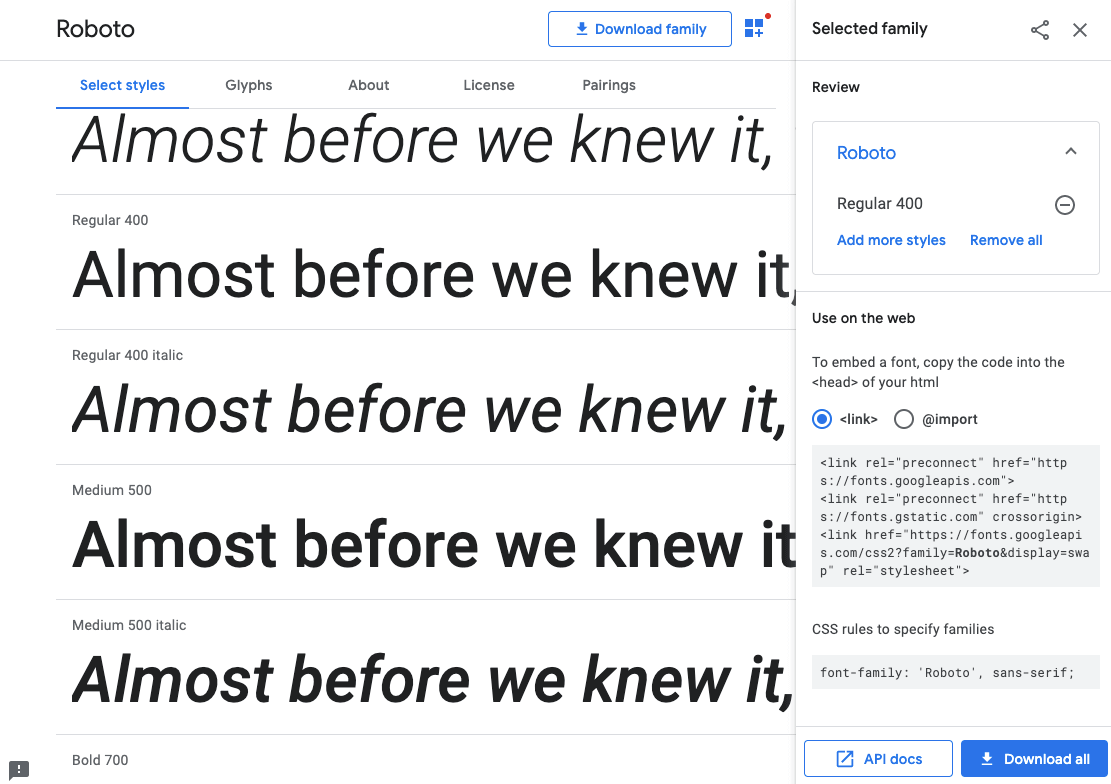
That way you can add multiple fonts to your page. For each font, you can specify a element with a unique URL. However, Google Fonts allows you to select multiple fonts and it will generate a single element with all the fonts included as a URL query.
To then apply an imported font to a text use the font-family property.
p font-family: 'Roboto', sans-serif; > Google Fonts is a fast and easy way to include multiple fonts on your page. However, there are some points you should consider when using this approach, such as:
- The request to the remote server may fail, which will result in a font not being loaded;
- The request response time may take longer than from a self-hosted font, which affects page loading time;
- There can be privacy issues with loading Google Fonts (see GDPR).
Importing a font via CSS
You can also include a font with CSS. This approach is quite handy when you don’t have access to the HTML of the page as well as it is more flexible and allows for more customization.
Using the @import rule
The first way to include a font is to use the @import rule. Inside your CSS file or inside the tag on your page define the @import rule with the specified URL of the font.
@import url('https://fonts.googleapis.com/css2?family=Roboto&display=swap'); If you’re importing Google Fonts, then like in the example above they provide you with code snippet for the @import .
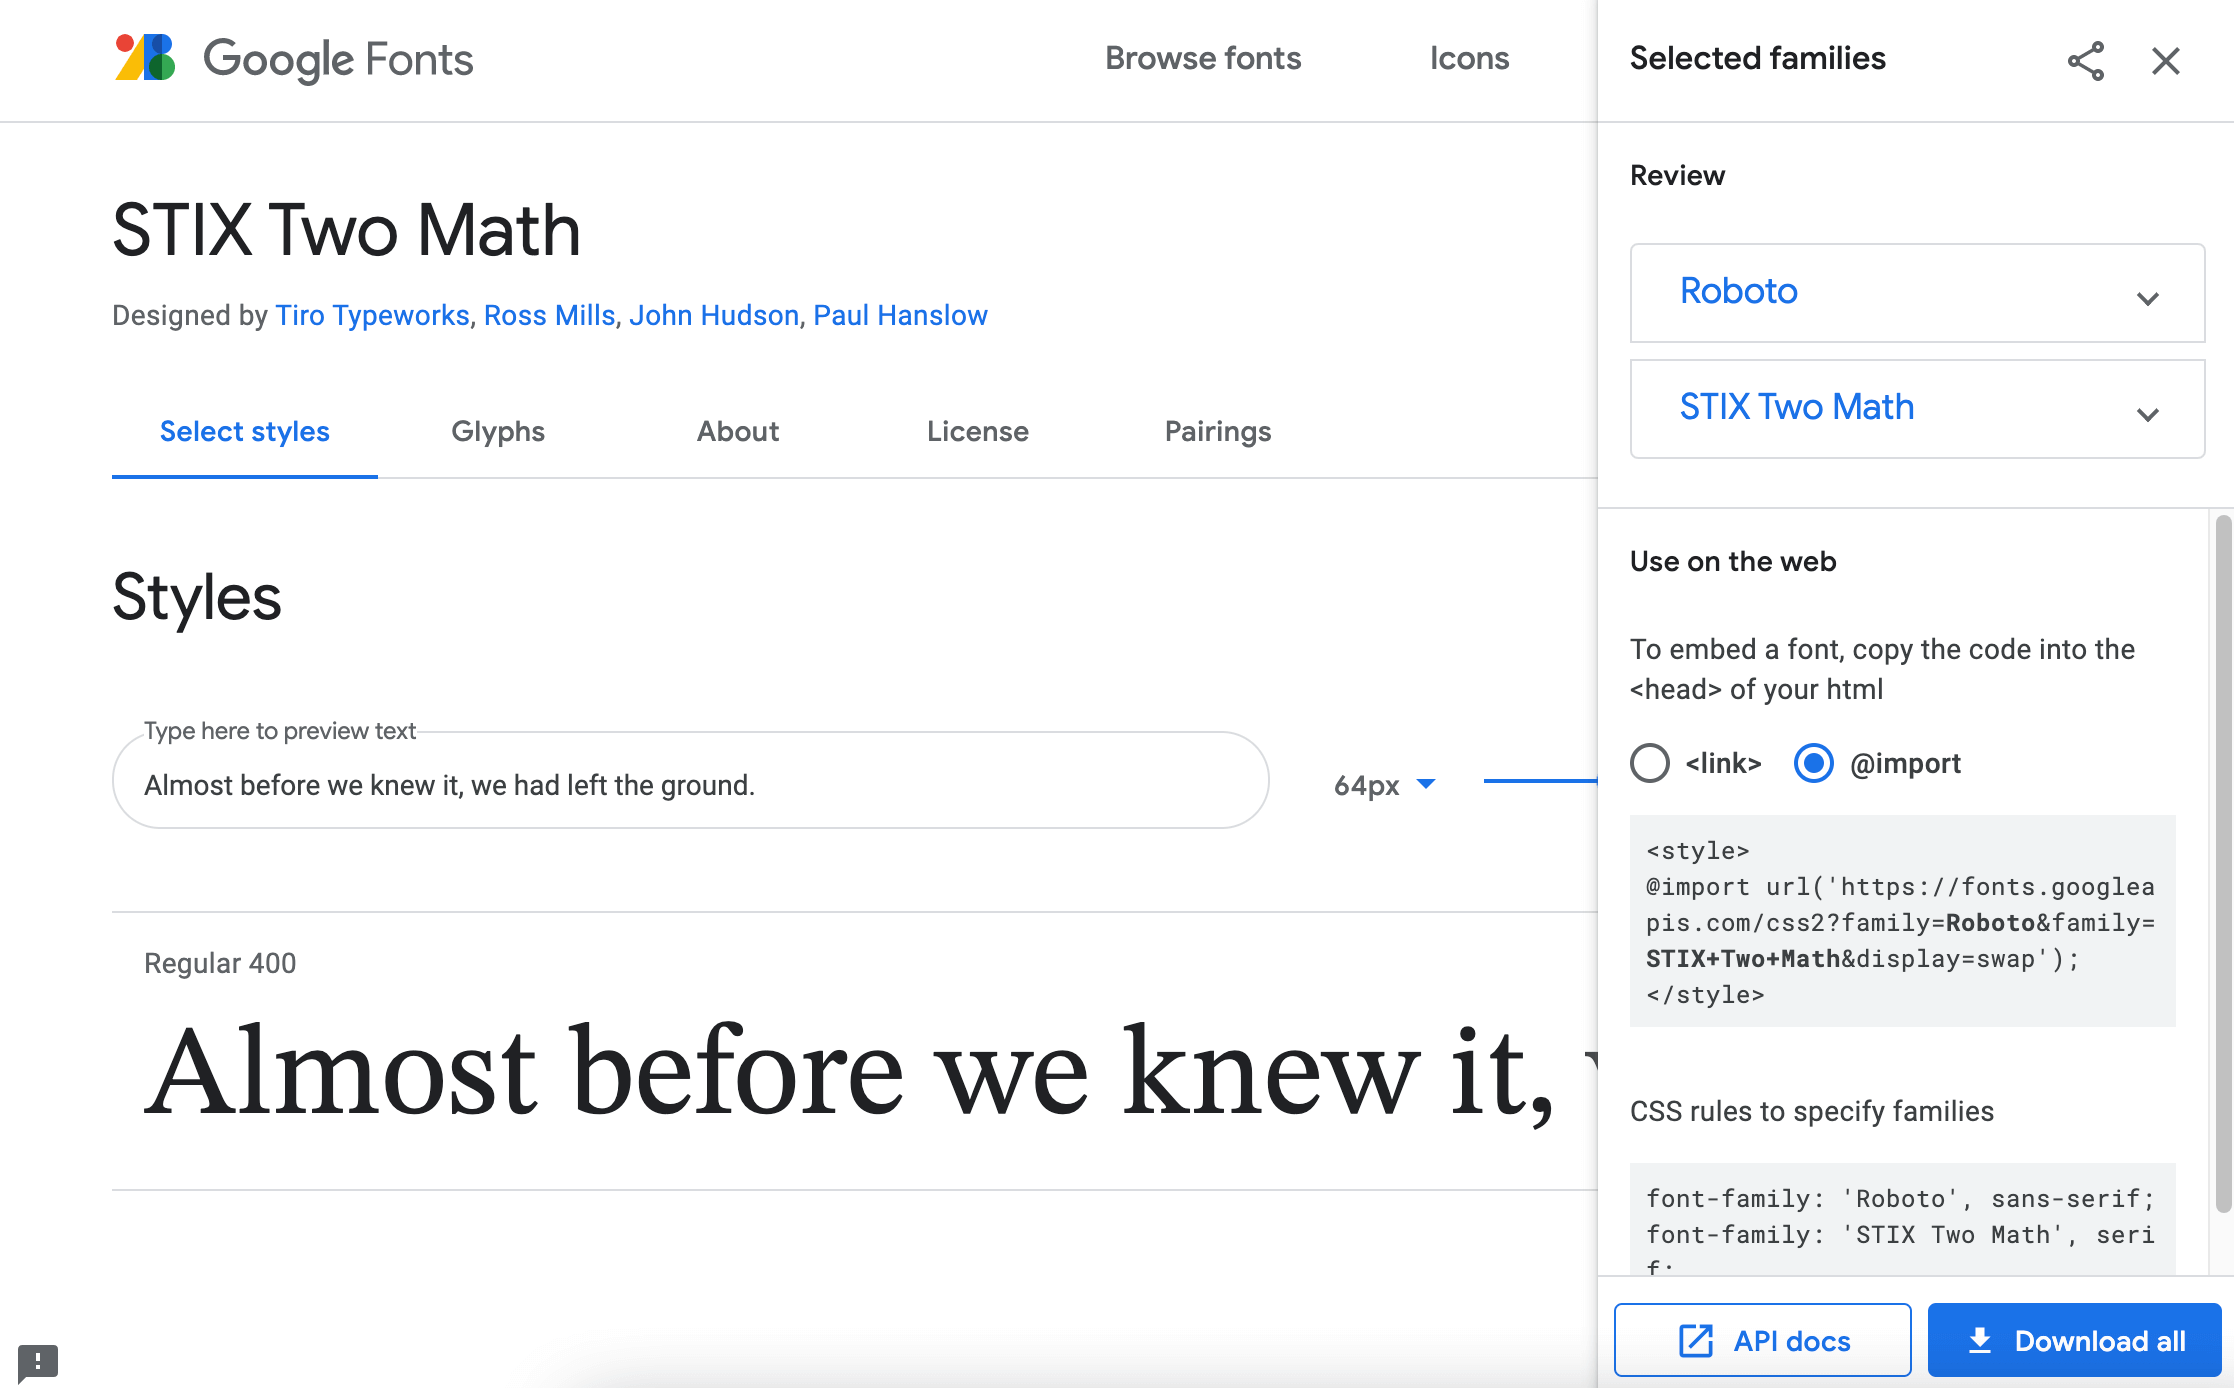
Use the font-family property the same way when applying the font to the text.
body font-family: 'Roboto', sans-serif; > Defining a font (font in a folder)
If you’re concerned about the page load time or the GDPR related issues, or if you have a custom font that’s not a Google Font, you can self-host a font.
In this case, you’ll need to have the font files stored in a separate folder of your project.
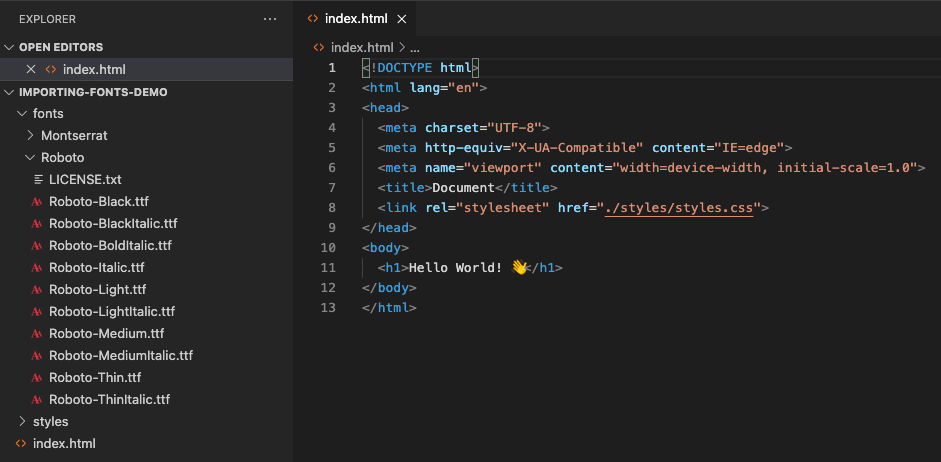
And then you’ll need to define your custom font in the CSS file using the @font-face rule by specifying the font name and providing the path to your font files.
@font-face font-family: "Roboto"; src: url("/fonts/Roboto-Medium.ttf") format("truetype"); font-weight: 400; > @font-face font-family: "Roboto"; src: url("/fonts/Roboto-Bold.ttf") format("truetype"); font-weight: 700; > To apply this font, again you’ll need to use font-family property:
body font-family: 'Roboto', sans-serif; font-weight: 400; > h1 font-family: inherit; font-weight: 700; > Подключение шрифтов в CSS
Если не вникать в подробности, по быстрому подключить шрифт можно так:
/* Обычный */ @font-face < font-family: 'FontName'; src: url(/fonts/font.ttf); >/* Жирный */ @font-face < font-family: 'FontName bold'; src: url(/fonts/font-bold.ttf); >.text-1 < font-family: 'FontName'; font-size: 20px; >.text-2
Такой метод вполне работает в большинстве браузеров, но неверен. В данном примере упущено:
- Нет названия шрифта в свойстве local .
- Подключен только один формат шрифта.
- Неправильно настроены начертания.
Локальные шрифты
Правило @font-face src позволяет задать название локального шрифта, т.е. если у пользователя на компьютере уже установлен нужный шрифт, то будет использоваться именно он, при этом существенно увеличится скорость загрузки и отрисовки страницы.
Можно указать несколько названий:
Форматы шрифтов
Сегодня используются четыре формата, рассмотрим их подробнее:
TTF/OTF – работают в большинстве браузеров, кроме IE.

EOT – создан Microsoft, представляет сжатую копию шрифта TTF, поддерживается только в IE.

WOFF – формат представляет собой сжатый шрифт в формате TTF/OTF.

WOFF2 – имеет улучшенное сжатие, по сравнению с первой версией.

Как видно нет единого формата, который поддерживается всеми браузерами, поэтому нужно делать подключение нескольких файлов, браузер сам выберет подходящий формат. Рекомендуется подключать файлы шрифтов по приоритету:
- WOFF2 для современных браузеров.
- WOFF для браузеров, которые не поддерживают WOFF2.
- TTF для устаревших браузерах
- EOT для поддержки IE.
Если в наборе есть не все форматы, их можно получить перекодировкой с помощью сервисов onlinefontconverter.com или convertio.co.
Разные начертания шрифтов
Пример подключения шрифта «Crimson Text» в разных начертаниях:
Обычный:
Как подключить ttf шрифт в css
Для подключения шрифтов в CSS используется правило @font-face . В нём обязательно используется два свойства:
- font-family — здесь указывается название шрифта, под которым он будет использоваться в проекте
- src — путь к шрифту. Обычно, в качестве значения, используется функция url() . Внутри функции указывается путь
@font-face font-family: "Roboto Regular"; src: url("../fonts/Roboto-Regular.ttf"); > Если начертаний шрифта несколько, например Regular , Bold , Medium и так далее, то их можно подключить под одним именем, а потом менять через свойство font-weight . Главное, что каждое начертание указывается внутри своего правила @font-face и имя шрифта должно совпадать. Так же, внутри каждого @font-face указывается своё значение font-weight :
@font-face font-weight: 400; /* Соответствует значению normal */ font-family: Roboto; src: url("../fonts/Roboto-Regular.ttf"); > @font-face font-weight: 700; /* Соответствует значению bold */ font-family: Roboto; src: url("../fonts/Roboto-Bold.ttf"); > @font-face font-weight: 300; font-family: Roboto; src: url("../fonts/Roboto-Light.ttf"); >