- How to record and play audio in JavaScript ?
- Работаем с аудио: прогресс и визуализация данных
- How to Play, Stop & Pause an Audio in HTML using JavaScript?
- What are the ways to play audio in HTML using JavaScript?
- Method 1: Using the onClick Attribute and JavaScript to play audio:
- Method 2: Using the JavaScript Click Event and HTML to play the audio:
- Method 3: Using HTML DOM Audio play() method to stop and play audio with play() and pause() methods:
How to record and play audio in JavaScript ?
JavaScript is a very flexible language and it provides many API support to do many useful things. Here one important thing is that record audio or video in web pages is also done using JavaScript. In this case, it will ask the user for microphone access to the browser and record the audio through the microphone and save the audio data chunks in form of binary value in an array and when we play the audio then retrieve chuck data and start playing. The same thing happens for video also, when we do video conferences then this actually happens in the server, only thing is that here we play the video at the same page, and in case of video conference the video will play at the other end.
This whole thing happens using an API, which is MediaRecorder API. This API provides functionality to record media such as audio or video. It is created using the MediaRecorder() constructor.
Here we use one property of JavaScript, which is mediaDevices property, which is used to get access to connected input media devices like microphones, webcams, etc. This property uses a method getUserMedia() to get permission for accessing the microphone, webcam etc. This method returns a promise to the navigator object.
The Promises are as follows:
- resolve : If all permissions are achieved and the microphone or camera are working fine, then it returns a MediaStream object. This is the main recorded data.
- NotAllowedError: If the user reject the permission for recording.
- NotFoundError: If there is no media track.
- NotReadableError: If the input devices are not found or the hardware is not working.
- OverconstrainedError: If constraint audio settings are preventing.
- AbortError: If generic unknown cause is found.
- TypeError: If audio: false stated in the Javascript code.
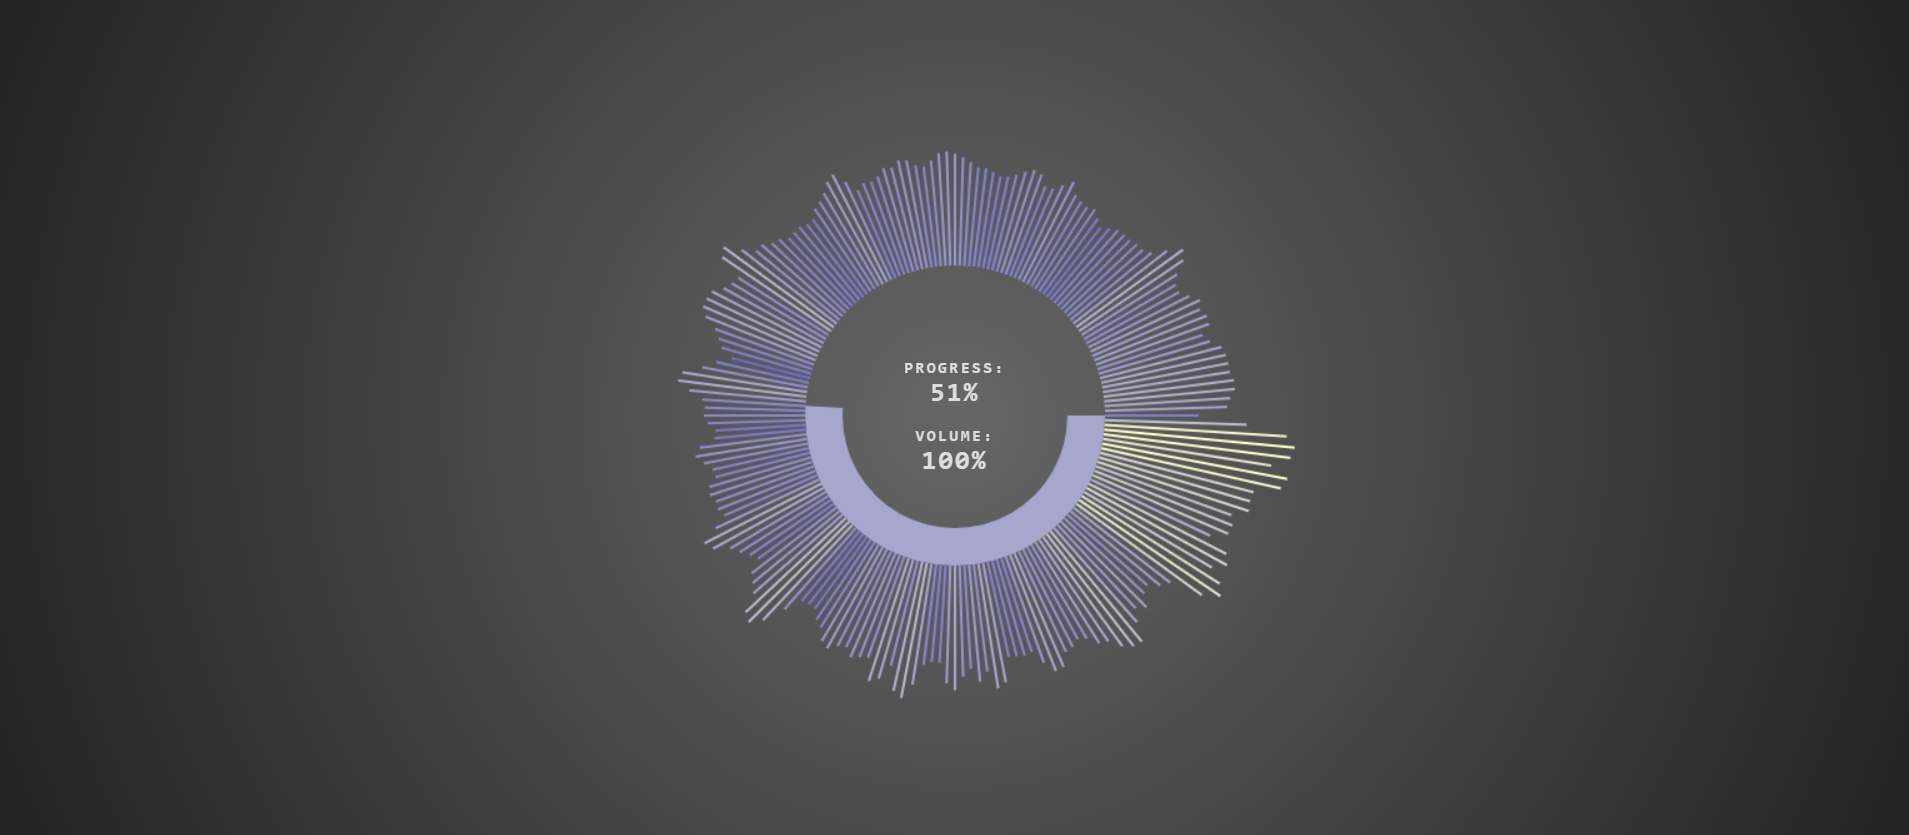
Работаем с аудио: прогресс и визуализация данных
Хочу поделиться опытом работы с аудио. Под «аудио» я подразумеваю HTMLAudioElement и Web Audio API.
Мы создадим нечто вроде плеера для одного трека (о полноценном проигрывателе — в одной из следующих статей).
- Возможность загрузки файла из любого места на жестком диске как по нажатию кнопки, так и перетаскиванием.
- Круговой графический и текстовый индикаторы прогресса.
- Текстовый индикатор громкости звука.
- Визуализация аудио данных.
- Управление плеером с помощью клавиатуры.
Без дальнейших предисловий…
Да, чуть не забыл: за основу «визуалайзера» взял работу одного из хабровчан. Не могу найти его по поиску. Буду признателен за ссылочку.
Вот как выглядит наша разметка:
click or drag


У нас есть подсказка (параграф), кнопка (картинка + «инпут» с атрибутом accept в контейнере с атрибутом dropzone)
и холст.
Как видим, ничего необычного.
В стилях также ничего сверхъестественного.
@font-face < font-family: "Nova Mono", monospace; src: url("https://thebestcode.ru/media/audioProgress&Visualizer/font.ttf"); >* < margin: 0; padding: 0; box-sizing: border-box; >body < height: 100vh; background: radial-gradient(circle, #666, #222); display: flex; justify-content: center; align-items: center; >p < position: absolute; top: 50%; left: 50%; transform: translate(-50%, -70px); color: #ddd; text-align: center; text-transform: uppercase; font-family: "Nova Mono", monospace; font-size: 0.8em; font-weight: bold; letter-spacing: 2px; user-select: none; >span < display: block; font-size: 1.6em; >div < width: 100px; height: 100px; display: flex; justify-content: center; align-items: center; border: 1px dashed #ddd; border-radius: 10%; cursor: pointer; >img < width: 70px; height: 70px; filter: invert(); >input < display: none; >canvas Объявляем основные переменные:
let dropZone = document.querySelector("div"), input = document.querySelector("input"), file, text, progress, volume, audio, // массив для частот frequencyArray; // "сбрасывание" элемента dropZone.ondrop = e => < // отключаем поведение браузера по умолчанию e.preventDefault(); // осуществляем проверку if (e.dataTransfer.items[0].kind == "file") < // получаем файл file = e.dataTransfer.items[0].getAsFile(); >else return; // передаем файл playTrack(file); >; // элемент над "зоной" dropZone.ondragover = e => < // отключаем поведение браузера по умолчанию e.preventDefault(); >; // клик по зоне dropZone.onclick = () => < // кликаем по инпуту input.click(); // при изменении инпута input.onchange = () =>< // получаем файл file = input.files[0]; // передаем файл playTrack(file); >; >; Объявляем переменные для холста:
let C = document.querySelector("canvas"), $ = C.getContext("2d"), W = (C.width = innerWidth), H = (C.height = innerHeight), centerX = W / 2, centerY = H / 2, radius, // эту переменную мы будем использовать для определения текущего прогресса piece, // количество колонок bars = 200, x, y, xEnd, yEnd, // ширина колонки barWidth = 2, // высота колонки barHeight, // цвет колонки lineColor; Приступаем к основной функции (весь наш дальнейший код будет находиться в этой функции):
Убираем зону (она нам больше не нужна), меняем текст параграфа, инициализируем переменные для звука и прогресса:
dropZone.style.display = "none"; text = document.querySelector("p"); text.style.transform = "translate(-50%,-50%)"; text.innerHTML = `progress:
volume: `; volume = document.querySelector(".volume"); progress = document.querySelector(".progress");
audio = new Audio(); // аудио контекст представляет собой объект, состоящий из аудио модулей // он управляет созданием узлов и выполняет обработку (декодирование) аудио данных context = new AudioContext(); // анализатор представляет собой узел, содержащий актуальную (т.е. постоянно обновляющуюся) информацию о частотах и времени воспроизведения // он используется для анализа и визуализации аудио данных analyser = context.createAnalyser(); // метод URL.createObjectURL() создает DOMString, содержащий URL с указанием на объект, заданный как параметр // он позволяет загружать файлы из любого места на жестком диске // время жизни URL - сессия браузера audio.src = URL.createObjectURL(file); // определяем источник звука source = context.createMediaElementSource(audio); // подключаем к источнику звука анализатор source.connect(analyser); // подключаем к анализатору "выход" звука - акустическая система устройства analyser.connect(context.destination); // получаем так называемый байтовый массив без знака на основе длины буфера // данный массив содержит информацию о частотах /*let bufferLength = analyser.frequencyBinCount; let frequencyArray = new Uint8Array(bufferLength);*/ frequencyArray = new Uint8Array(analyser.frequencyBinCount); // запускаем воспроизведение audio.play(); // включаем повтор воспроизведения audio.loop = true; Добавляем возможность управления плеером (у нас нет кнопок, поэтому управлять плеером можно только с помощью клавиатуры):
document.addEventListener("keydown", e => < // необходимость использования try/catch обусловлена странным поведением Chrome, связанным с вычислением громкости звука // попробуйте убрать try/catch и выводить в консоль громкость звука (console.log(audio.volume)) после каждого изменения // при приближении к 0 и 1 (согласно спецификации значение громкости звука варьируется от 0 до 1) получаем странные значения, которые нивелируют проверки типа if(audio.volume>0 && audio.volume <1) // использование в проверках "неточных" значений вроде 0.1 и 0.9 решает проблему исключений, но приводит к некорректному изменению громкости звука // исключения работе плеера не мешают, но раздражают try < // отключаем стандартный функционал клавиатуры e.preventDefault() // пробел if (e.keyCode == 32) < // пуск/пауза audio.paused ? audio.play() : audio.pause(); // enter >else if (e.keyCode == 13) < // стоп audio.load(); // стрелка вправо >else if (e.keyCode == 39) < // время воспроизведения + 10 секунд audio.currentTime += 10; // стрелка влево >else if (e.keyCode == 37) < // время воспроизведения - 10 секунд audio.currentTime -= 10; // стрелка вниз >else if (e.keyCode == 40) < // громкость звука - 10% audio.volume -= 0.1; // стрелка вверх >else if (e.keyCode == 38) < // громкость звука + 10% audio.volume += 0.1; >// скрываем исключения > catch < return; >>); // добавляем подсказку console.log( " Use Keyboard: \n Space to Play/Pause \n Enter to Stop \n Arrows to Change \n Time and Volume" ); Следующая часть — анимация. Вызываем соответствующую функцию:
Сама функция выглядит следующим образом:
function startAnimation() < // включаем холст C.style.display = "block"; // определяем текущий прогресс (текущее время воспроизведения / продолжительность трека) piece = audio.currentTime / audio.duration; // устанавливаем радиус круга // мы будем использовать два радиуса: один для прогресса, другой для визуализации частот radius = 105; // очищаем холст $.clearRect(0, 0, W, H); // рисуем круговой прогресс $.beginPath(); $.arc(centerX, centerY, radius, 0, Math.PI * (2 * piece)); $.lineWidth = 30; $.stroke(); // выводим значение громкости volume.innerText = Math.trunc(audio.volume * 100) + "%"; // выводим значение прогресса progress.innerText = Math.trunc(piece * 100) + "%"; // копируем данные о частотах в frequencyArray analyser.getByteFrequencyData(frequencyArray); // делаем итерацию по количеству колонок for (let i = 0; i < bars; i++) < // увеличиваем радиус radius = 120; // переводим количество колонок в радианы rads = Math.PI * 2 / bars; // определяем высоту колонок barHeight = frequencyArray[i] * 0.6; // двигаемся от 0 по часовой стрелке x = centerX + Math.cos(rads * i) * radius; y = centerY + Math.sin(rads * i) * radius; xEnd = centerX + Math.cos(rads * i) * (radius + barHeight); yEnd = centerY + Math.sin(rads * i) * (radius + barHeight); // рисуем колонки drawBar(x, y, xEnd, yEnd, barWidth, frequencyArray[i]); >// зацикливаем анимацию requestAnimationFrame(startAnimation); > И в завершение — рендеринг колонок:
// имена переменных можно было не менять, но очень хотелось function drawBar(x1, y1, x2, y2, width, frequency) < // цвет колонок меняется от светло-голубого до темно-синего lineColor = "rgb(" + frequency + ", " + frequency + ", " + 205 + ")"; // рисуем линии $.strokeStyle = lineColor; $.lineWidth = width; $.beginPath(); $.moveTo(x1, y1); $.lineTo(x2, y2); $.stroke(); >Результат можно посмотреть здесь.
How to Play, Stop & Pause an Audio in HTML using JavaScript?
Often programmers do not want to show the default controls of HTML audio in a document. They can use specific controls using some HTML tags and attributes that the browser will not display when the users play the audio.
There are different methods of adding and playing an audio file in HTML using JavaScript. This article will discuss all of these methods with the following code snippets.
What are the ways to play audio in HTML using JavaScript?
There are several methods to play audio in HTML using JavaScript. It includes calling a JavaScript function in the HTML document. Let us learn the methods using the following example of HTML and JavaScript codes:
Method 1: Using the onClick Attribute and JavaScript to play audio:
We use the HTML onCLick Attribute with the button tag to add and display an audio file in the document.
Code Snippet:
function MyAudio() Explanation:
Here in the code, we have used the HTML tag with the src attribute to add our local audio file. Then, we used the onClick Attribute of HTML to Play HTML Audio using JavaScript and HTML.
We need to create a function named MyAudio() . When we call this function, it will run the HTML onClick attribute.
Again, when we call the onClick attribute, we can run the JavaScript function. But before that, we need to add the required JS code inside that Function to play the audio file.
We used the JavaScript document.getElementById() and .play() Methods to use the properties added inside the onClick attribute of the tag. The JS document.getElementById() will set the Audio Tag’s property, i.e., the audio file and the JavaScript .play() method will play the desired elements file.
Method 2: Using the JavaScript Click Event and HTML to play the audio:
It is an alternative way to play an audio file in HTML using JavaScript. If programmers do not like to use the onClick attribute of the HTML to run a JavaScript function, then they can use JavaScript’s Event Listener to play the specific audio file on a button click.
Code Snippet:
Explanation:
In the code snippet, we used JavaScript’s addEventListener that activates any click on the desired HTML Element. When users click the specified HTML element, it will play the HTML audio file.
Method 3: Using HTML DOM Audio play() method to stop and play audio with play() and pause() methods:
It is another approach to stop and play an audio file in an HTML document. Programmers can use the HTML DOM Audio play() , which allows them to play the current audio file.
But they need to operate the controls property to display the audio controls like play, pause, volume, seeking, etc., associated with the file to use the Audio play() method.
Code Snippet:
The Audio File DOM Audio play() method
Click the "Play Audio" to play the Audio.
var a = document.getElementById("idAudio"); function playaudio() < a.play(); >function pauseaudio() < a.pause(); >function stopaudio() 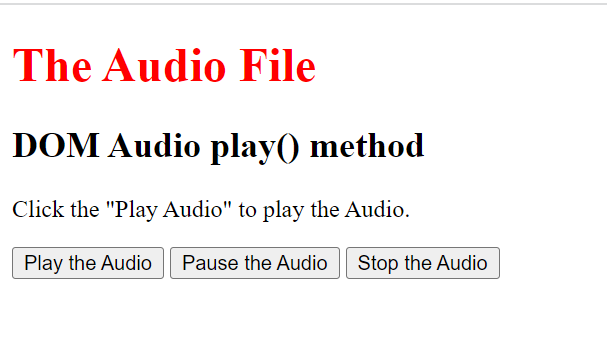
Explanation:
This is an example of play, pause and stop audio using HTML and JavaScript. We used the HTML onCLick Attribute to Play HTML Audio using JavaScript in the above HTML document. We need to create a function named playaudio() .
When we call this function, it will run the HTML onClick attribute. We have added an external audio file by copying the link on the HTML tag src attribute. Inside the function playaudio(), we have used the play() and pause() methods that create three buttons for play pause and stop.
There is no stop() function in JavaScript so we use pause() function and set “currentTime” to “0” to stop the audio.
In summary, we have discussed how to play an audio player in HTML using JavaScript. Programmers can follow any of these methods to create an HTML document that plays an audio file, either local or external links of the audio file.