- 5 Ways To Create & Save Files In Javascript (Simple Examples)
- TLDR – QUICK SLIDES
- TABLE OF CONTENTS
- SAVE FILES IN JAVASCRIPT
- METHOD 1) USE FILE SAVER
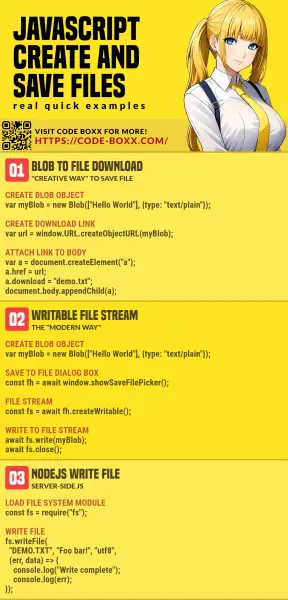
- METHOD 2) CREATE FILE FROM BLOB & FORCE DOWNLOAD
- METHOD 3) UPLOAD BLOB TO SERVER
- THE JAVASCRIPT
- THE PHP
- METHOD 4) WRITABLE FILE STREAM
- METHOD 5) WRITE TO FILE IN NODEJS
- DOWNLOAD & NOTES
- SUPPORT
- EXAMPLE CODE DOWNLOAD
- EXTRA BITS & LINKS
- COMPATIBILITY CHECKS
- LINKS & REFERENCES
- TUTORIAL VIDEO
- INFOGRAPHIC CHEAT SHEET
- THE END
- File: File() constructor
- Syntax
- Parameters
- Examples
- Specifications
- Browser compatibility
- See also
- Found a content problem with this page?
- MDN
- Support
- Our communities
- Developers
- How to Create and Save text file in JavaScript?
- Create a text file using custom text and save it to a local computer
- Syntax
- Algorithm
- Example
- Use the FileSaver JavaScript library to create and save the text file
- Syntax
- Parameters
- Example
- Save the content of the image in a text file using the FileSaver JavaScript library
- Syntax
- Example
5 Ways To Create & Save Files In Javascript (Simple Examples)
Welcome to a tutorial on how to create and save files in Javascript. Well, this will be kind of a complicated process for beginners. To keep things simple – Saving files on the server-side NodeJS is a breeze, but it is tricky to directly save files on the client side because of security restrictions. That said, there are many methods we can use.
The possible ways to create and save files in Javascript are:
- Use a library called FileSaver – saveAs(new File([«CONTENT»], «demo.txt», ));
- Create a blob object and offer a “save as”.
- var a = document.createElement(«a»);
- a.href = window.URL.createObjectURL(new Blob([«CONTENT»], ));
- a.download = «demo.txt»;
- a.click();
- Upload the data, save it on the server.
- var data = new FormData();
- data.append(«upfile», new Blob([«CONTENT»], ));
- fetch(«SERVER.SCRIPT», < method: "POST", body: data >);
- Create a writable file stream.
- const fileHandle = await window.showSaveFilePicker();
- const fileStream = await fileHandle.createWritable();
- await fileStream.write(new Blob([«CONTENT»], ));
- await fileStream.close();
- In NodeJS, simply use the file system module – require(«fs»).writeFile(«demo.txt», «Foo bar!»);
That covers the basics, but let us walk through detailed examples in this tutorial – Read on!
TLDR – QUICK SLIDES

TABLE OF CONTENTS
SAVE FILES IN JAVASCRIPT
All right, let us now get into the various ways to save files in Javascript.
METHOD 1) USE FILE SAVER
- Simply load FileSaver.js from the CDN.
- Create a new File() object and pop it into saveAs() .
METHOD 2) CREATE FILE FROM BLOB & FORCE DOWNLOAD
// (A) CREATE BLOB OBJECT var myBlob = new Blob(["CONTENT"], ); // (B) CREATE DOWNLOAD LINK var url = window.URL.createObjectURL(myBlob); var anchor = document.createElement("a"); anchor.href = url; anchor.download = "demo.txt"; // (C) "FORCE DOWNLOAD" // NOTE: MAY NOT ALWAYS WORK DUE TO BROWSER SECURITY // BETTER TO LET USERS CLICK ON THEIR OWN anchor.click(); window.URL.revokeObjectURL(url); document.removeChild(anchor);Due to security restrictions, client-side Javascript cannot directly access the file system. That is, no direct writing and loading of files on the user’s computer. But this is the roundabout way of doing things – Create a BLOB (binary) object to contain all the data, then set a download link to it.
METHOD 3) UPLOAD BLOB TO SERVER
THE JAVASCRIPT
THE PHP
This is an alternative to the above BLOB download – We upload the BLOB and save it on the server instead.
METHOD 4) WRITABLE FILE STREAM
Yes, the old grandmother’s age of the Internet is over. We can create a file handler and file stream on the user’s computer, use it to save a file. But this still opens a “save file as” dialog box, we cannot directly save without the user’s permission.
P.S. This will only work on Chrome, Edge, and Opera at the time of writing.
METHOD 5) WRITE TO FILE IN NODEJS
// (A) LOAD FILE SYSTEM MODULE // https://nodejs.org/api/fs.html const fs = require("fs"); // (B) WRITE TO FILE fs.writeFile("demo.txt", "CONTENT", "utf8", (error, data) => < console.log("Write complete"); console.log(error); console.log(data); >); /* (C) READ FROM FILE fs.readFile("demo.txt", "utf8", (error, data) => < console.log("Read complete"); console.log(error); console.log(data); >); */Yes, it’s that stupidly simple. Just load the file system module var fs = require(«fs») , and use the writeFile() function. To load files, we use the corresponding readFile() function.
DOWNLOAD & NOTES
Here is the download link to the example code, so you don’t have to copy-paste everything.
SUPPORT
600+ free tutorials & projects on Code Boxx and still growing. I insist on not turning Code Boxx into a «paid scripts and courses» business, so every little bit of support helps.
EXAMPLE CODE DOWNLOAD
Click here for the source code on GitHub gist, just click on “download zip” or do a git clone. I have released it under the MIT license, so feel free to build on top of it or use it in your own project.
EXTRA BITS & LINKS
That’s all for this tutorial, and here is a small section on some extras and links that may be useful to you.
COMPATIBILITY CHECKS
Not all browsers support the BLOB data type nor all the file writing features. So it is best to do some checks before you enable your ninja features – I will recommend using Modernizr to detect if the browser supports certain features.
LINKS & REFERENCES
- Javascript Blob – MDN
- MIME Types – SitePoint
- Create Object URL and Revoke Object URL – MDN
- Form Data – MDN
- Fetch API – MDN
- Write Files In NodeJS – Code Boxx
TUTORIAL VIDEO
INFOGRAPHIC CHEAT SHEET
THE END
Thank you for reading, and we have come to the end of this guide. I hope that it has helped you with your project, and if you want to share anything with this guide, please feel free to comment below. Good luck and happy coding!
File: File() constructor
The File() constructor creates a new File object instance.
Syntax
new File(bits, name) new File(bits, name, options)
Parameters
An iterable object such as an Array , having ArrayBuffer s, TypedArray s, DataView s, Blob s, strings, or a mix of any of such elements, that will be put inside the File . Note that strings here are encoded as UTF-8, unlike the usual JavaScript UTF-16 strings.
A string representing the file name or the path to the file.
An options object containing optional attributes for the file. Available options are as follows:
A string representing the MIME type of the content that will be put into the file. Defaults to a value of «» .
A number representing the number of milliseconds between the Unix time epoch and when the file was last modified. Defaults to a value of Date.now() .
Examples
const file = new File(["foo"], "foo.txt", type: "text/plain", >);
Specifications
Browser compatibility
BCD tables only load in the browser
See also
Found a content problem with this page?
This page was last modified on Apr 7, 2023 by MDN contributors.
Your blueprint for a better internet.
MDN
Support
Our communities
Developers
Visit Mozilla Corporation’s not-for-profit parent, the Mozilla Foundation.
Portions of this content are ©1998– 2023 by individual mozilla.org contributors. Content available under a Creative Commons license.
How to Create and Save text file in JavaScript?
In this tutorial, we will learn to create and save the text file in JavaScript. Sometimes, developers need to get texts or content from the user and allow users to store content in a text file and allow the file to download to the local computer.
Many JavaScript libraries are available to achieve our goal, but we have used the best two libraries in this tutorial to create and save the text file.
Create a text file using custom text and save it to a local computer
We will use normal JavaScript operations to create and save the text file on the user’s computer. Users can use the HTML tag to create a text file from the custom content and save it.
Developers should follow the below syntax to create a text file from the text input and save it.
Syntax
In the above syntax, we have taken the content from the users, converted it to blog object, and then saved it to the text file.
Algorithm
Users should follow the below steps to understand the above syntax.
Example
We have written the code in the example below by following the syntax and algorithm. We have created the HTML . Users can enter the content they want to add to the file and click on the ‘save file’ button to save the text file on the computer.
When a user clicks on the ‘save file’ button, it will call the ‘downloadFile()’ function, in which we have added the code to create and save the text files.
html> body> h2> Create a text file and save it to a local computer using JavaScript. /h2> p> Enter the file content:- /p> textarea> /textarea> br/> button onclick = "downloadFile()"> save File /button> script> const downloadFile = () => const link = document.createElement("a"); const content = document.querySelector("textarea").value; const file = new Blob([content], type: 'text/plain' >); link.href = URL.createObjectURL(file); link.download = "sample.txt"; link.click(); URL.revokeObjectURL(link.href); >; /script> /body> /html>
Use the FileSaver JavaScript library to create and save the text file
The ‘FileSaver’ is the JavaScript library that we can use to create a text file in vanilla JavaScript. Users can use the CDN of the library to use it with HTML and JavaScript.
Users should use the below syntax to use the FileSaver library.
Syntax
// Create blob object with file content var blob = new Blob(["This is a sample file content."], < type: "text/plain;charset=utf-8", >); // Create and save the file using the FileWriter library saveAs(Content, fileName);
In the above syntax, we have used some text to create the blob object of the ‘text’ type. Also, we have used the ‘saveAs()’ function of the FileWriter library to create and save the text file.
Parameters
The ‘saveAs’ function takes two parameters.
- Content − It is the content that needs to be stored in the file.
- filename − It is a default file name when a user downloads it.
Example
We have added the CDN of the ‘FileWriter’ library in the section of the below code. When a user clicks on the ‘create text file’ button, it will invoke the ‘CreateTextFile()’ function in JavaScript, which creates the blob object of the sentence ‘This is a simple file content’ and executes the ‘saveAs()’’function to save the text file.
html> head> script src = "https://cdnjs.cloudflare.com/ajax/libs/FileSaver.js/2.0.0/FileSaver.min.js" integrity="sha512-csNcFYJniKjJxRWRV1R7fvnXrycHP6qDR21mgz1ZP55xY5d+aHLfo9/FcGDQLfn2IfngbAHd8LdfsagcCqgTcQ= token operator">= "anonymous" referrerpolicy = "no-referrer"> /script> /head> body> h2>Create text file and save it to local computer using i> FileSaver /i> JavaScript Library./h2> button type = "button" onclick = "CreateTextFile();">Create Text File/button> script> function CreateTextFile() var blob = new Blob(["This is a sample file content."], type: "text/plain;charset=utf-8", >); saveAs(blob, "download.txt"); > /script> /body> /html>
Save the content of the image in a text file using the FileSaver JavaScript library
In this section, we have used the same library, ‘FileSaver’, but rather than storing the normal texts to the file, we string the image after converting the image to a blob object.
Users can follow the syntax below to store the image in the text file format and save it.
Syntax
// Access the file input by Id var element = document.getElementById("uploadedImage"); // Add onchange event to file input element.onchange = function (event) < // Convert image content to text var blob = new Blob[event.target.files[0]], < type: "text/plain;charset=utf-8", >); // Create text file using image’s content and save it saveAs(blob, "download.txt"); >; In the above syntax, we take the file the user uploads into the HTML and convert its content to a blob object. After that, we create the text file using the blob object and save the file to the local computer.
Example
We have used the ‘FileSaver’ JavaScript library in the example below, as shown in the above syntax. We have created the file input field, allowing users only to upload the image file.
In JavaScript, we have added the event listener to the file input, and as the user uploads a file, it will create a text file using the uploaded image file and save it to the user’s computer.
html> head> script src = "https://cdnjs.cloudflare.com/ajax/libs/FileSaver.js/2.0.0/FileSaver.min.js" integrity = "sha512-csNcFYJniKjJxRWRV1R7fvnXrycHP6qDR21mgz1ZP55xY5d+aHLfo9/FcGDQLfn2IfngbAHd8LdfsagcCqgTcQ= token operator">= "anonymous" referrerpolicy = "no-referrer"> /script> /head> body> h2>Upload image and add its content to text file and save it to computerusing i> FileSaver /i> JavaScript Library./h2> input type = "file" id = "uploadedImage" accept = "image/png, image/gif, image/jpeg"/> script> var element = document.getElementById("uploadedImage"); element.onchange = function (event) var blob = new Blob[event.target.files[0]], type: "text/plain;charset=utf-8", >); saveAs(blob, "download.txt"); >; /script> /body> /html>