- Как начать пользоваться Swing GUI-визардом IntelliJ IDEA. Подробная инструкция
- Создание Swing GUI форм средствами JetBrains IntelliJ IDEA 2016.1
- IntelliJ IDEA GUI Designer Tutorial
- 1. Introduction
- Thank you!
- Table Of Contents
- 2. Create New Project
- 3. Structure of the Packages
- 4. Configure Components of GUI Form
- 4.1 Component Tree
- 4.2 Properties Inspector
- 4.3 Components Palette
- 4.4 Form Workspace
- 5. Setup Bounded Java Class
- 6. Run the Project
- 7. Download the Complete Source Code
Как начать пользоваться Swing GUI-визардом IntelliJ IDEA. Подробная инструкция
Давно не писал настольных приложений на Java вообще и с использовании Swing в частности. Однако, возникла необходимость немного по GUIть. В качестве инструмента выбрал IntelliJ IDEA Community edition, 2016.1 версии.
Взялся ваять и, естественно, первое, на что налетел — хотя со времён Borland Java Builder 2006 воды утекло немало, экранные интерфейсы создавать проще не стало, скорее наоборот. А одной из причин выбора IDEA было как раз наличие Swing дизайнера «из коробки», однако как им пользоваться с ходу решительно непонятно — форма генерится, класс создаётся, создаются переменные контролов из дизайнера… но и только: при создании нашего класса форма на экране не появляется
Пошарил интернет, информации приблизительно ноль. Народ говорит, мол, «создавай и — вперёд!». Хм…
По результатам небольших мытарств на эту тему решил опубликовать инструкцию, так как мне с учётом былого опыта было искать намного легче, чем новичку, который вообще в первый раз ваяет форму на Swing.
Создание Swing GUI форм средствами JetBrains IntelliJ IDEA 2016.1
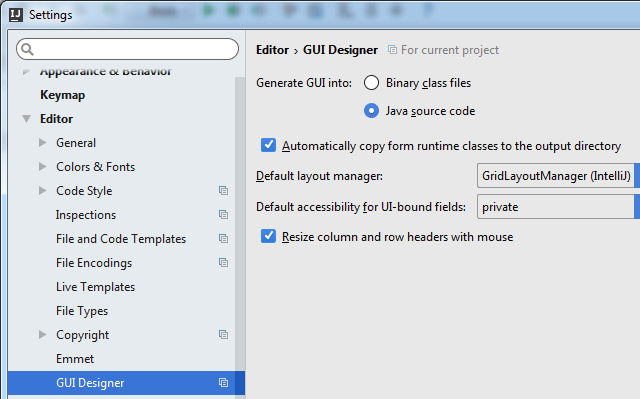
Во-первых, для понимания процесса лучше начать с того. что зайти в меню IDEA «File -> Settings» — там «Editor -> GUI Designer» и установить флажок Generate GUI Into: в Java source code. (это немного поможет пониманию процесса на первом этапе — потом можно будет убрать обратно).
Далее открываем дерево исходного кода своего проекта и кликаем правой кнопкой мыши на любую папку или файл исходного кода java и выбираем «New -> Dialog» — вводим имя класса для формы.

В итоге нам действительно сгенерили класс-наследник JDialog (который можно создать и использовать) и форма к нему.
Запускаем наш проект на выполнение и… о ужасчудо! при компиляции IDEA добавляет в конец нашего файла некоторый дополнительный код.
< // GUI initializer generated by IntelliJ IDEA GUI Designer // >>> IMPORTANT!! /** * Method generated by IntelliJ IDEA GUI Designer * >>> IMPORTANT!! /** * @noinspection ALL */ public JComponent $$$getRootComponent$$$()
Несложно догадаться, что вся наша Swing-овая форма конфигурируется в автогенерируемом методе $$$setupUI$$$.
Вспомните настройку, которую мы установили в самом начале — «GUI Into: -> Java source code». Если её не ставить, то этот метод просто будет появляться напрямую в _class_ файле, минуя java-файл (декомпилируйте его, если сомневаетесь — я это сделал). Соответственно, можете вернуть настройку «GUI Into:» к первоначальному виду, чтобы этот код (который всё равно редактировать настоятельно не рекомендуют) не мозолил глаза.
Теперь, когда мы поняли, как оно работает, перейдём к созданию прочих форм — необязательно диалогов.
Опять правой кнопкой мыши кликаем на папку или файл исходного кода, выбираем «New -> GUI Form» — вводим имя класса для формы.
Генерится класс и форма к нему. Накидываем на форму несколько контролов. В GUI дизайнере смотрим имя корневого элемента (обычно panel1, если IDEA не задала имя, а такое бывает, задайте принудительно — я для наглядности назвал rootPanel).

Переходим к исходному коду нашего класса.
Итак:
1. Добавляем для нашего класса наследование «extends JFrame»;
2. Добавляем конструктор класса со строками:
setContentPane(panel1); setVisible(true); public class GUIFrame extends JFrame < private JButton button1; private JPanel rootPanel; public GUIFrame() < setContentPane(rootPanel); setVisible(true); setDefaultCloseOperation(WindowConstants.EXIT_ON_CLOSE); >public static void main(String[] args) < new GUIFrame(); >> Всё. Форма готова к употреблению. Остальное смотрите в многочисленных инструкциях по Swing.
P.S. Как вариант, можно не наследовать наш класс от JFrame, а создать конструктор вида:
JFrame frame = new JFrame(); frame.setContentPane(panel1); frame.setVisible(true); IntelliJ IDEA GUI Designer Tutorial
In this post, we feature a comprehensive Tutorial on IntelliJ IDEA GUI Designer. We are going to take you through the process of creating a ‘Display Image’ application using a GUI. The following table shows an overview of the whole article:
1. Introduction
It uses special XML format with extension .form to design GUI component.
In order to help you master IntelliJ IDEA, we have compiled a kick-ass guide with all the basic features of the popular IDE! Besides studying them online you may download the eBook in PDF format!

Thank you!
Table Of Contents
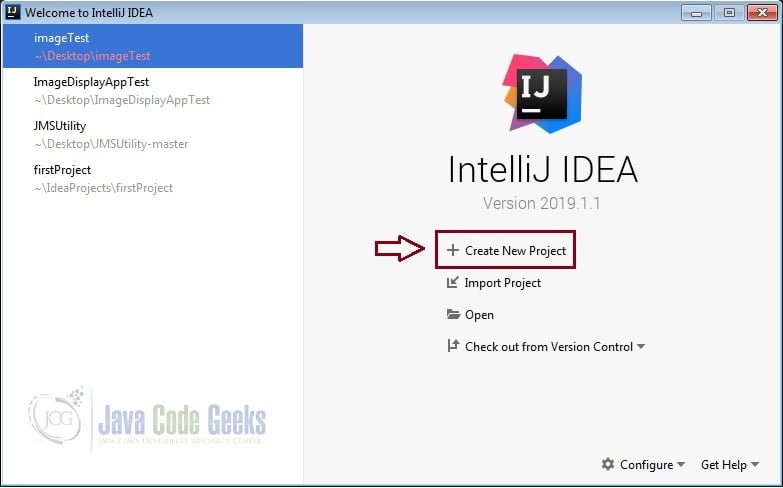
2. Create New Project
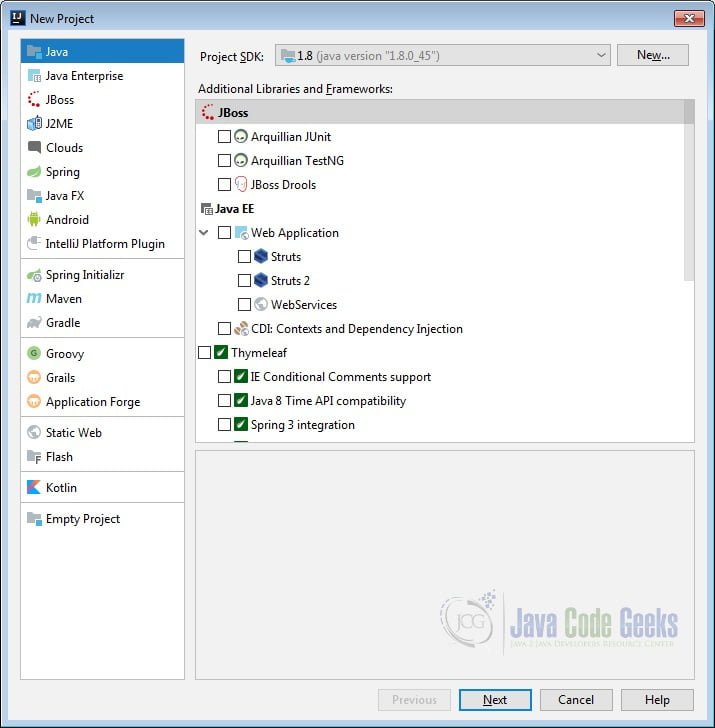
Start by creating a new Java Project in IntelliJ.
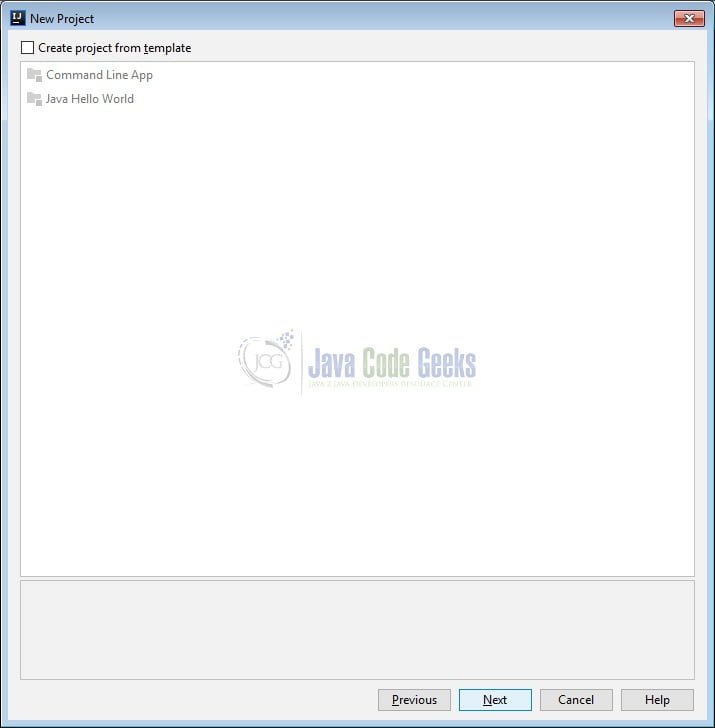
Make sure not to check the creating project from template:
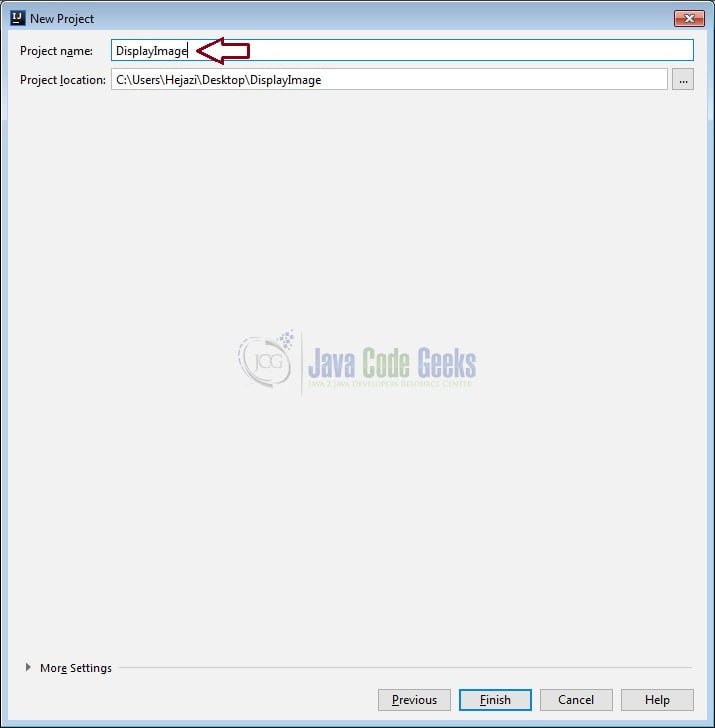
Now choose a name for the project:
3. Structure of the Packages
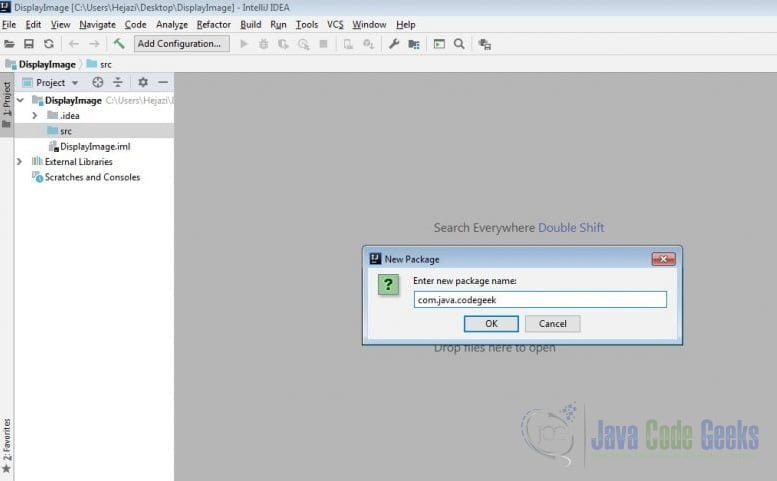
As you can see there will be a package named src . We now create a new package under it:
Now we choose a name for out package, for example: com.java.codegeek
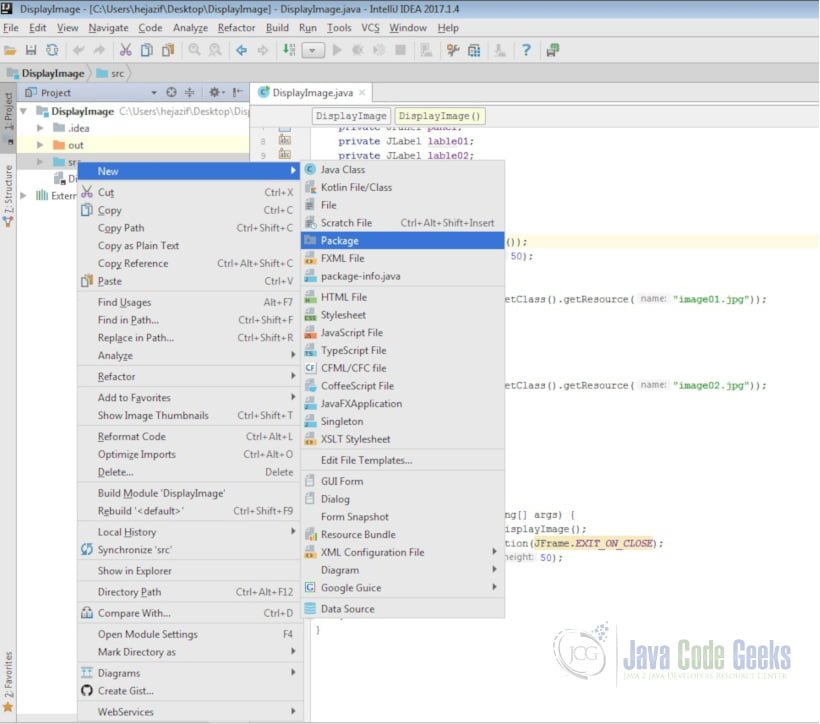
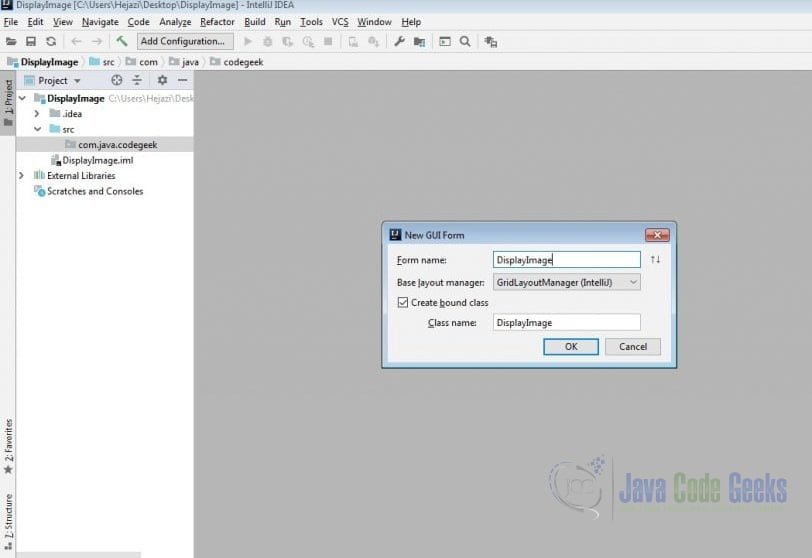
Creating new GUI form or Dialog can be done by right click on src → New → GUI Form or Dialog
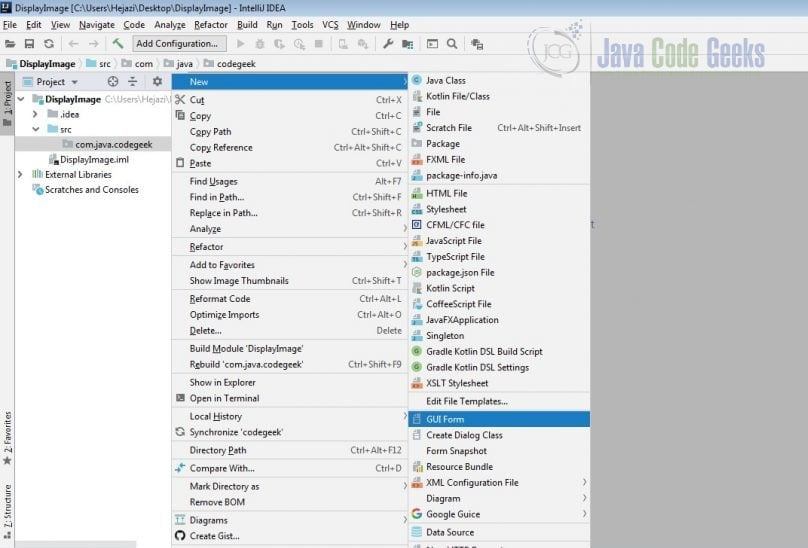
Name the form ‘DisplayImage’ and configure it as shown in the image below.
By default, IntelliJ IDEA automatically creates a Java class at the same time it creates a new GUI form. The new form automatically binds to the new class. When components are added to the design form, a field for each component is automatically inserted into the source file of the Form’s class (with some exceptions such as JPanels and JLabels which don’t automatically get field names when placed on a Form). (https://www.jetbrains.com/help/idea/bound-class.html)
- Components Treeview
- Properties Inspector
- Components Palette
- Form Workspace
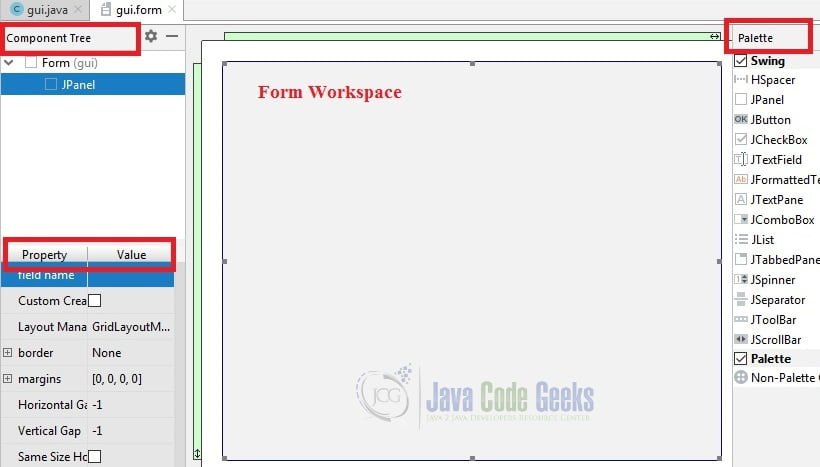
4. Configure Components of GUI Form
4.1 Component Tree
In the component tree you can see the JPanel. This treeview displays the components contained in the design form and enables you to navigate to and select one or more components.
When you create a new Form, a JPanel component is automatically added to the Form Workspace and it appears as a child of the Form in the Component Treeview. This JPanel is the top of the UI component hierarchy (in the Java sense) for the current Form.
4.2 Properties Inspector
The Property Inspector window shows properties for the component currently selected in the form workspace, or the form itself if no components exist or none are selected. https://www.jetbrains.com/help/idea/inspector.html
Several types of property editors appear in the Value column of the inspector:
- Text field: Type a value.
- Pick list: Pick a value from a drop-down list of valid choices.
- Checkbox: Set value for Boolean type properties.
- Dialog: Presents an ellipsis button which opens a dialog box.

If you switch to the DisplayImage.java file you can now see the jPanel as a variable in the DisplayImage class: DisplayImage.java
package com.java.codegeek; import javax.swing.*; import java.awt.*; public class DisplayImage extends JFrame
4.3 Components Palette
The component palette provides quick access to commonly used components (JavaBeans) available for adding to forms. It appears by default at the right side of the frame next to the Form Workspace.
You can add a new UI component to the form in following way:
Select a component in the palette move the cursor to the Form Workspace and click where you want to add the component.
- Swing: contains components from the Swing component library.
- Palette: contains a single component labeled Non-Palette component. When you select this component and add it to a Form, a dialog appears in which you can select any component class accessible to your project, or any other existing Form. This is useful in cases where you want to use a component without adding it to the Component Palette.
- (https://www.jetbrains.com/help/idea/palette.html )
4.4 Form Workspace
The Form Workspace occupies the center part of the frame. It is a gray rectangle which appears when you create a new Form.
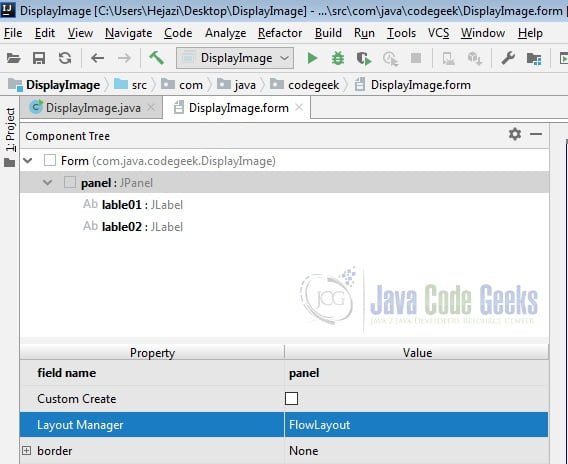
Back to the .form file, drag a JLabel onto the panel.
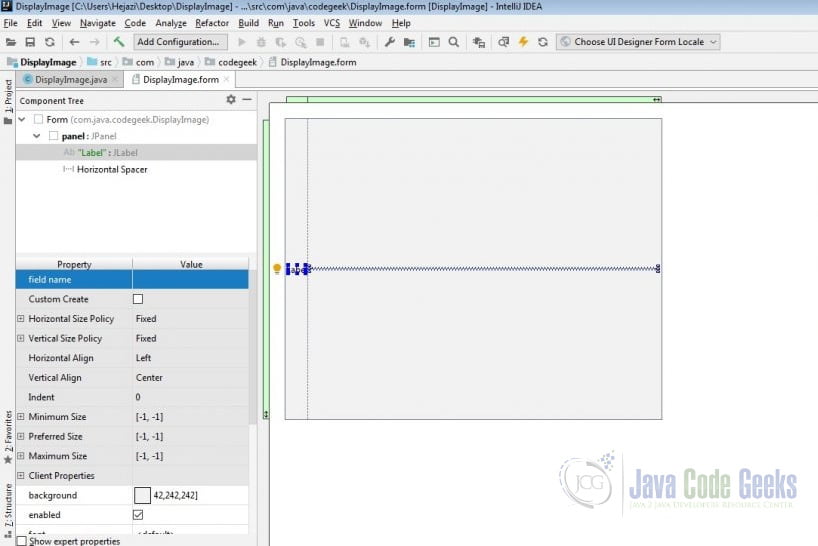
You can change the field name of the JLable in the Component tree (as you did with the JPanel) and set it ‘lable01’.
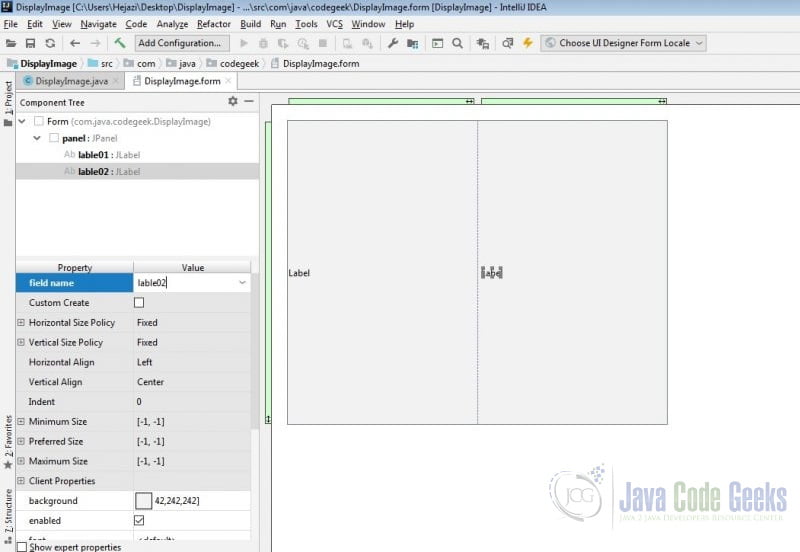
Add another JLable on the panel and name it ‘lable02’. As you see, all these lables are contained by panel.
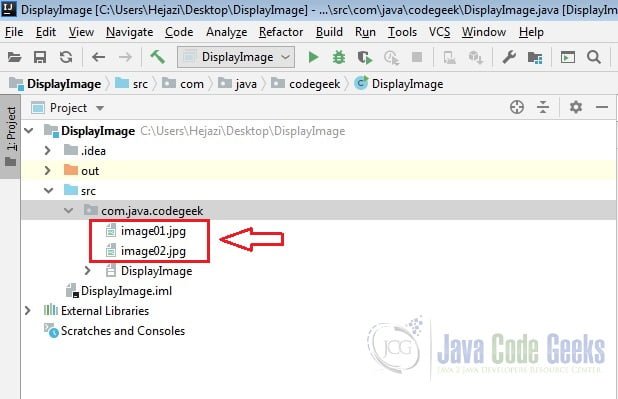
We want to display 2 images on these lables. So first you should copy your image files into the project folder:
Now we should set these images as ‘icon’ property value for the JLables.
![]()
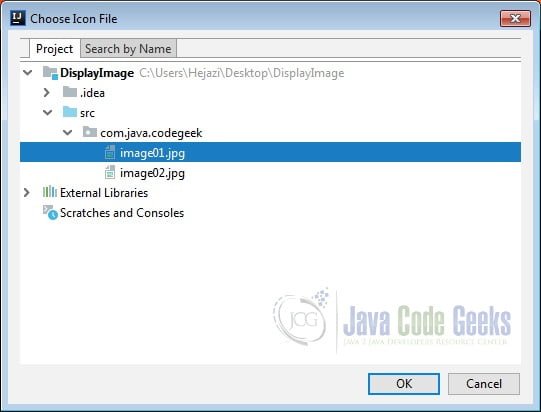
Repeat the same process for assigning image02 to icon property of lable02.
5. Setup Bounded Java Class
Add ‘ImageIcon’ variables to ‘DisplayImage.java’: DisplayImage.java
package com.java.codegeek; import javax.swing.*; import java.awt.*; public class DisplayImage extends JFrame
Now we should set the layout in java class, assign the images to the lables and add the panel : DisplayImage.java
We should also set the value of Layout Manager property for the panel, here we chose ‘FlowLayout’:
6. Run the Project
In order to run the application we need a main() method for our class: DisplayImage.java
public static void main(String[] args)
Now from the menu, Run -> Run ‘DisplayImage’:

7. Download the Complete Source Code
This was a tutorial of IntelliJ IDEA GUI Designer for displaying images.
Download
You can download the full source code of this example here: IntelliJ IDEA GUI Designer Tutorial