- Способы добавления стилей на страницу
- Связанные стили
- Глобальные стили
- Внутренние стили
- Импорт CSS
- Вопросы для проверки
- How To Style the Body of a Website With CSS
- Prerequisites
- Adding a Background Image To Your Website With CSS
- Changing the Color of Hyperlinked Text
- Conclusion
- Tutorial Series: How To Build a Website With CSS
Способы добавления стилей на страницу
Для добавления стилей на веб-страницу существует несколько способов, которые различаются своими возможностями и назначением. Далее рассмотрим их подробнее.
Связанные стили
При использовании связанных стилей описание селекторов и их значений располагается в отдельном файле, как правило, с расширением css, а для связывания документа с этим файлом применяется тег . Данный тег помещается в контейнер , как показано в примере 3.1.
Пример 3.1. Подключение связанных стилей
HTML5 CSS 2.1 IE Cr Op Sa Fx
Значение атрибута тега — rel остаётся неизменным независимо от кода, как приведено в данном примере. Значение href задаёт путь к CSS-файлу, он может быть задан как относительно, так и абсолютно. Заметьте, что таким образом можно подключать таблицу стилей, которая находится на другом сайте.
Содержимое файла mysite.css подключаемого посредством тега приведено в примере 3.2.
Как видно из данного примера, файл со стилем не хранит никаких данных, кроме синтаксиса CSS. В свою очередь и HTML-документ содержит только ссылку на файл со стилем, т. е. таким способом в полной мере реализуется принцип разделения кода и оформления сайта. Поэтому использование связанных стилей является наиболее универсальным и удобным методом добавления стиля на сайт. Ведь стили хранятся в одном файле, а в HTML-документах указывается только ссылка на него.
Глобальные стили
При использовании глобальных стилей свойства CSS описываются в самом документе и располагаются в заголовке веб-страницы. По своей гибкости и возможностям этот способ добавления стиля уступает предыдущему, но также позволяет хранить стили в одном месте, в данном случае прямо на той же странице с помощью контейнера , как показано в примере 3.3.
Пример 3.3. Использование глобального стиля
HTML5 CSS 2.1 IE Cr Op Sa Fx
H1 Hello, world!
В данном примере задан стиль тега , который затем можно повсеместно использовать на данной веб-странице (рис. 3.1).

Рис. 3.1. Вид заголовка, оформленного с помощью стилей
Внутренние стили
Внутренний или встроенный стиль является по существу расширением для одиночного тега используемого на текущей веб-странице. Для определения стиля используется атрибут style , а его значением выступает набор стилевых правил (пример 3.4).
Пример 3.4. Использование внутреннего стиля
HTML5 CSS 2.1 IE Cr Op Sa Fx
Пример текста
В данном примере стиль тега
задаётся с помощью атрибута style , в котором через точку с запятой перечисляются стилевые свойства (рис. 3.2).

Рис. 3.2. Использование внутренних стилей для изменения вида текста
Внутренние стили рекомендуется применять на сайте ограниченно или вообще отказаться от их использования. Дело в том, что добавление таких стилей увеличивает общий объём файлов, что ведет к повышению времени их загрузки в браузере, и усложняет редактирование документов для разработчиков.
Все описанные методы использования CSS могут применяться как самостоятельно, так и в сочетании друг с другом. В этом случае необходимо помнить об их иерархии. Первым имеет приоритет внутренний стиль, затем глобальный стиль и в последнюю очередь связанный стиль. В примере 3.5 применяется сразу два метода добавления стиля в документ.
Пример 3.5. Сочетание разных методов
HTML5 CSS 2.1 IE Cr Op Sa Fx
H1 Заголовок 1 Заголовок 2
В данном примере первый заголовок задаётся красным цветом размером 36 пикселов с помощью внутреннего стиля, а следующий — зелёным цветом через таблицу глобальных стилей (рис. 3.3).
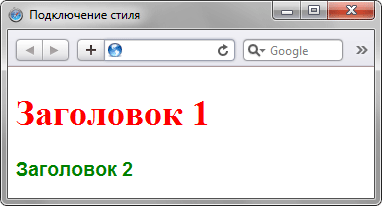
Рис. 3.3. Результат применения стилей
Импорт CSS
В текущую стилевую таблицу можно импортировать содержимое CSS-файла с помощью команды @import . Этот метод допускается использовать совместно со связанными или глобальными стилями, но никак не с внутренними стилями. Общий синтаксис следующий.
@import url("имя файла") типы носителей; @import "имя файла" типы носителей;После ключевого слова @import указывается путь к стилевому файлу одним из двух приведенных способов — с помощью url или без него. В примере 3.6 показано, как можно импортировать стиль из внешнего файла в таблицу глобальных стилей.
HTML5 CSS 2.1 IE Cr Op Sa Fx
@import url("style/header.css"); H1 Заголовок 1
Заголовок 2
В данном примере показано подключение файла header.css , который расположен в папке style.
Аналогично происходит импорт и в файле со стилем, который затем подключается к документу (пример 3.7).
Пример 3.7. Импорт в таблице связанных стилей
@import "/style/print.css"; @import "/style/palm.css"; BODY
В данном примере показано содержимое файла mysite.css , который добавляется к нужным документам способом, показанным в примере 3.1, а именно с помощью тега .
Вопросы для проверки
1. Сайт имеет более ста HTML-документов, имеющих одинаковое стилевое оформление. Какой способ подключения CSS подходит лучше всего?
- Связанные стили.
- Глобальные стили.
- Блочные стили.
- Внутренние стили.
- Экспорт стиля.
2. В данном примере, какой цвет будет у текста на веб-странице?
HTML < color: black; >BODY < color: red; >P Текст
3. Какой HTML-код применяется для подключения внешнего CSS-файла?
4. Какой атрибут используется для определения внутреннего стиля?
How To Style the Body of a Website With CSS
In this tutorial, you will style the body of a webpage with a CSS rule. You will use this rule to apply and style a background image and set the font family for the webpage. You will also create a style rule that changes the color of all hyperlinked text to a color that better matches the demonstration website’s color palette.
This exercise will be used to recreate the style of the demonstration site but you can apply and modify the same rules used here for other HTML/CSS website projects.
Prerequisites
To follow this tutorial, make sure you have set up the necessary files and folders as instructed in a previous tutorial in this series How To Set Up You CSS and HTML Practice Project.
For this tutorial, we suggest you use the background image from the demonstration site which you can download from this link. You may use another image as your background, but make that sure that the image is large enough to fill the screen.
Note: To download the background image of the demonstration site, visit this link and click CTRL + Left Click (on Macs) or Right Click (on Windows) on the image and select “Save Image As” and save it as background-image.jpeg to your «image’ folder.
Once you have selected an image, make sure it’s saved as “background-image.jpeg” in your images folder. You are now ready to proceed to the next step.
Adding a Background Image To Your Website With CSS
To declare style rules for the body of a webpage, you will need to create a CSS rule for the body tag selector. These rules will then be applied to all elements that are placed inside the opening and closing tags that you added to the index.html file in the earlier tutorial How To Set Up Your CSS and HTML Website Project.
To add a background image to your site, create a CSS rule using the tag selector. Erase everything in your styles.css file (if you have been following along with this series) and add the following ruleset:
/* General Website Style rules */ body font-family: "Helvetica", Sans-Serif; background-image: url("../images/background-image.jpeg"); > Take note of the highlighted file path, which tells the browser where to locate the background image. If you have changed the name or location of the image then you will need to adjust the file path here accordingly.
Let’s pause briefly to understand each of the declarations in this ruleset:
- /* General Website Style rules */ is a CSS comment, which is not displayed by the browser. Like HTML comments, CSS comments are useful for explaining and organizing your code for future reference. Notice that CSS comments open and close with /* and */ tags instead of tags used for HTML comments.
- The font-family: «Helvetica», Sans-Serif; declaration sets the font family (Helvetica) and generic font family (Sans-Serif) for all the text on the webpage. (Note that you can specify different font families for text content on the same webpage by adding CSS rules later on). The generic font family is given as a backup in case the first font family isn’t available and the browser needs to pick a back up font. You can explore other fonts by replacing “Helvetica” with other font names, such as Times , Courier , or Palatino .
- The background-image: url(» ../images/background-image.jpeg ;») declaration tells the browser to add a background image to the webpage using the file found with the specified file path. Note that you have prepended ../ to the file path name to tell the browser to locate the images folder in the directory above the directory that contains the file you are working in ( styles.css ).
Save your styles.css file and load the index.html page in your browser. For instructions on loading an HTML file, please visit our tutorial step How To View An Offline HTML File In Your Browser.
You should receive a page with no content except for the background image:

If you don’t receive an image, check to make sure your file path is correct and that there are no errors in your index.html file and styles.css file.
Changing the Color of Hyperlinked Text
Next, we’ll add a CSS rule that changes the color of all hyperlinked text to a color that better matches the website color palette.
At the bottom of your styles.css file, add the following ruleset:
Conclusion
You should now have a webpage with a large background image. In addition, you declared a font family that will be applied when you begin to add text content. Using rulesets like these allow you to change the font and background image of a webpage by creating a ruleset for the body tag selector. Finally, you created a style rule that specifies the color of any hyperlinked text you add to the page.
In the next tutorial, you’ll recreate the header section of the demonstration website.
Thanks for learning with the DigitalOcean Community. Check out our offerings for compute, storage, networking, and managed databases.
Tutorial Series: How To Build a Website With CSS
This tutorial is part of a series on creating and customizing this website with CSS, a stylesheet language used to control the presentation of websites. You may follow the entire series to recreate the demonstration website and gain familiarity with CSS or use the methods described here for other CSS website projects.
Before proceeding, we recommend that you have some knowledge of HTML, the standard markup language used to display documents in a web browser. If you don’t have familiarity with HTML, you can follow the first ten tutorials of our series How To Build a Website With HTML before starting this series.