- Android Image Gallery Example App using Glide Library
- Introduction to Glide Library
- Glide Performance
- Glide Caching
- Android Image Gallery Example App
- Create a new Android APP Project
- Gallery App Dependencies
- AndroidManifest.xml
- activity_main.xml
- image_layout.xml
- ImageUrl.java
- DataAdapter.java
- Android Image Gallery Main Activity
- Conclusion
- Comments on «Android Image Gallery Example App using Glide Library»
- Создаем приложение для Android — Галерея изображений с Glide
- 1. Что такое Glide?
- 2. Так зачем использовать Glide?
- 3. Создаём проект в Android Studio
- 2. Объявление зависимостей
- Android SDK: Продвинутая галерея для изображений
- Шаг 1: Создание проекта Android
Android Image Gallery Example App using Glide Library
In this article, you will learn to develop an Android image gallery App using Glide library. Glide will be used to load images in the Android App. The image gallery example App will load images directly from URLs using Glide.
Introduction to Glide Library
Glide is an open source image loading and caching library for Android APPs developed by bumptech. It is fast, efficient and widely used image loading library, primarily focused on smooth scrolling. It is used in many popular Android Apps and one the most popular library for image loading and caching.
Glide wraps memory and disk caching, resource pooling and media decoding into a simple and easy to use interface. Glide enables fetching, decoding, and displaying images and GIFs. Glide’s disk caching works like charm.
Though Glide is primarily used for images, it can also be used for loading variety of media files like videos, animated Gif files too. Glide provides flexibility in image loading by providing support for many sources like remote URLs, local file system etc.
Glide has its own implementation of HttpURLConnection which loads images from remote URLs over the network. The loading process is simple and efficient. It also provides feature to cache the loaded images.
Glide Performance
As stated in Glide documentation, the library focuses mainly on performance and the following two parameters,
Glide Caching
The library has an efficient caching mechanism. Before requesting for a new resource, it checks multiple layers like,
- Active resources
- Memory cache
- Resource existing decoding and transformation history
- Data disk cache
Lets build our example Android image gallery App using Glide library and see how it works.
Android Image Gallery Example App
This Android image gallery example application is made as simple as possible, so that it will help as a starter for your image based Apps. You can add and modify features easily as it is developed in a modular way with re-usability in mind.
Images are loaded from remote URL and displayed in a gallery view.
Create a new Android APP Project
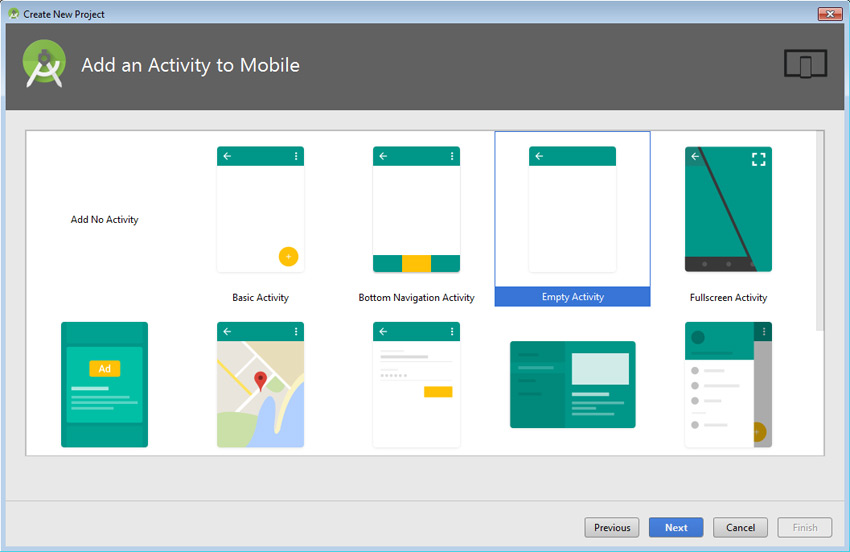
Before we start building our Android image gallery, we need to add libraries in build.gradle app module. We need recyclerview and glide, so i have added respective dependencies in the gradle app module.
Gallery App Dependencies
compile 'com.github.bumptech.glide:glide:3.7.0'
Including other dependencies also, we get:
compile 'com.github.bumptech.glide:glide:3.7.0' compile 'com.android.support:support-v4:28.0.0' compile 'com.android.support:recyclerview-v7:28.0.0' implementation 'com.android.support:appcompat-v7:28.0.0'
AndroidManifest.xml
Images for this Android image gallery app will be loaded from the network. Glide takes care of loading the images and caching it seamlessly. In this example App, we will load images from Internet directly and so this application needs internet access.
We should add internet permissions in the manifest. After adding internet permission manifest file will look like below.
Now lets create the main layout file for the Glide image gallery Android App. We will be using RecyclerView to display the image gallery and it will act as the container for all the images.
activity_main.xml
In activity main layout file we need to add recyclerView widgit.
We need to create another layout in which we will add imageview. This will be used to display the individual image item in the gallery.
image_layout.xml
This layout has imageview, in which we will load images from Url.
ImageUrl.java
Now we need a domain object that will hold the primary data which is the image url. This POJO will be used in the adapter class to set the individual image url. These URLs will be invoked by the Glide library on bind to display the images one by one in the image gallery.
package com.javapapers.android.imagegallery; public class ImageUrl < String imageUrl; public String getImageUrl() < return imageUrl; >public void setImageUrl(String imageUrl) < this.imageUrl = imageUrl; >>
DataAdapter.java
Adapter class is used to render and handle the data collection and bind it to the view. This is where the Glide library comes into the picture. All we will be doing is one line call to load and display the image in the gallery. Glide will take care of all the high complex backend manipulation for you.
The DataAdapter is an usual adapter class managing the domain part. You need to focus on onBindViewHolder method and that is where we make use of the Glide library to load the image. The library is passed with the image URL and it loads the image from the network efficiently.
package com.javapapers.android.imagegallery; import android.content.Context; import android.support.v7.widget.RecyclerView; import android.view.LayoutInflater; import android.view.View; import android.view.ViewGroup; import android.widget.ImageView; import com.bumptech.glide.Glide; import java.util.ArrayList; public class DataAdapter extends RecyclerView.Adapter < private ArrayListimageUrls; private Context context; public DataAdapter(Context context, ArrayList imageUrls) < this.context = context; this.imageUrls = imageUrls; >@Override public DataAdapter.ViewHolder onCreateViewHolder(ViewGroup viewGroup, int i) < View view = LayoutInflater.from(viewGroup.getContext()).inflate(R.layout.image_layout, viewGroup, false); return new ViewHolder(view); >/** * gets the image url from adapter and passes to Glide API to load the image * * @param viewHolder * @param i */ @Override public void onBindViewHolder(ViewHolder viewHolder, int i) < Glide.with(context).load(imageUrls.get(i).getImageUrl()).into(viewHolder.img); >@Override public int getItemCount() < return imageUrls.size(); >public class ViewHolder extends RecyclerView.ViewHolder < ImageView img; public ViewHolder(View view) < super(view); img = view.findViewById(R.id.imageView); >> >
Android Image Gallery Main Activity
Let us come to the Android main activity. Here I have used GridLayoutManager and RecyclerVeiw to display the image gallery. RecyclerView.LayoutManager implementation is to lay out items in the grid.
onCreate we do the standard initiations followed by preparing the image url list. We will create an ArrayList containing image URLs and that will be passed to the DataAdapter to bind with the UI.
Creating an Android image gallery becomes an easy task because the Glide library does all the heavy lifting behind the scenes. It abstracts all the complexity of loading and caching the images.
package com.javapapers.android.imagegallery; import android.os.Bundle; import android.support.v7.app.AppCompatActivity; import android.support.v7.widget.GridLayoutManager; import android.support.v7.widget.RecyclerView; import android.util.Log; import android.widget.ImageView; import java.util.ArrayList; public class MainActivity extends AppCompatActivity < private ImageView imageView; RecyclerView recyclerView; GridLayoutManager gridLayoutManager; @Override protected void onCreate(Bundle savedInstanceState) < super.onCreate(savedInstanceState); setContentView(R.layout.activity_main); imageView = (ImageView) findViewById(R.id.imageView); recyclerView = (RecyclerView) findViewById(R.id.recyclerView); gridLayoutManager = new GridLayoutManager(getApplicationContext(), 2); recyclerView.setLayoutManager(gridLayoutManager); ArrayList imageUrlList = prepareData(); DataAdapter dataAdapter = new DataAdapter(getApplicationContext(), imageUrlList); recyclerView.setAdapter(dataAdapter); >private ArrayList prepareData() < // here you should give your image URLs and that can be a link from the Internet String imageUrls[] = < "url1", "url2", "url3", "url4">; ArrayList imageUrlList = new ArrayList<>(); for (int i = 0; i < imageUrls.length; i++) < ImageUrl imageUrl = new ImageUrl(); imageUrl.setImageUrl(imageUrls[i]); imageUrlList.add(imageUrl); >Log.d("MainActivity", "List count: " + imageUrlList.size()); return imageUrlList; > > On Running the application, our app will look like this:-

Conclusion
In this tutorial, we have seen how to use Glide library to load and display a set of images in an image gallery. Images are loaded from the internet and we have given access for the App connect the internet. All the complex work of loading and handling the images are done by the Glide library and we have got very little to do in that aspect. In fact, we have written only one line of code in the data adapter to pass the image url and invoke the Glide API. Thus it is a simple task to create an Android image gallery using the Glide library.


Comments on «Android Image Gallery Example App using Glide Library»
This is why we want you to write more and more and more. I have downloaded the same android gallery example app from many tutorials site from Internet and found that none of them worked. Only a couple installed successfully but eventually crashed during execution. I have used many example projects for my teaching classes from your site earlier and found them to be good. With that experience, I downloaded this example too and it worked like a charm. Thank you Joe for your quality work. Please continue doing that. Thank you.
Thank you Joe. Can you please write a similar tutorial to develop an Android gallery app using Volley API?
Comments are closed for «Android Image Gallery Example App using Glide Library».
Создаем приложение для Android — Галерея изображений с Glide

Chike Mgbemena Last updated Feb 28, 2017

1. Что такое Glide?
Glide это популярная библиотека Android с открытым исходным кодом для загрузки изображений, видео и анимированных GIF. С Glide можно загружать и отображать медиа из разных источников, например удаленных серверов или из локальной файловой системы.
По умолчанию Glide использует пользовательскую реализацию HttpURLConnection для загрузки изображений через Интернет. Однако Glide также предоставляет плагины для других популярных сетевых библиотек, таких как Volley или OkHttp.
2. Так зачем использовать Glide?
Разработка своего собственного функционала для отображения и загрузки медиа на Java может оказаться настоящей головной болью: вам нужно будет позаботиться о кешировании, декодировании, управлении сетевых соединений, потоков, обработке исключений и о многом другом. Glide — это простая в использовании, хорошо спланированная, хорошо документированная и тщательно протестированная библиотека, которая поможет сохранить вам уйму времени — и избавить вас от головной боли.
В этом уроке, мы будем изучать Glide 3, создавая на нем простую галерею изображений. Изображения будут загружаться из интернета и отображаться миниатюрами в RecyclerView; пользователь нажимает на изображение и открывается детальная активити с изображением побольше.
3. Создаём проект в Android Studio
Запустите Android Studio и создайте новый проект с пустой активити под названием MainActivity .

2. Объявление зависимостей
После создания нового проекта, укажите следующие зависимости в build.gradle .
mavenCentral() // jcenter() works as well because it pulls from Maven Central
Android SDK: Продвинутая галерея для изображений

Sue Smith Last updated Jun 11, 2012
С помощью Android Intents и Gallery View, можно разрешить пользователю выбирать изображения на их устройстве. В этом уроке мы объединим выбор изображений с Gallery View, который мы немного улучшим создав интерактивную функцию для показа выбранных пользователем изображений. Если вы создавали хотя бы одно приложение для Android, вы вполне справитесь со всеми этапами урока.
Приложение, которое мы создадим в этом уроке будет отображать прокручиваемую ленту изображений, с помощью Android Gallery View. Пользователь сможет импортировать изображения нажав на объект в галерее, которые будут взяты из галереи по-умолчанию или с помощью файлового менеджера. Когда изображение выбрано, мы обработаем его до того как показать, поэтому мы не задействуем лишние ресурсы памяти. При нажатии на эскиз, приложение покажет выбранное изображение в увеличенном виде.
Шаг 1: Создание проекта Android
Запустите новый проект в Eclipse. В main Activity классе вашего приложения добавьте в начале следующие операторы импорта, это нужно сделать до объявления класса:
import android.app.Activity;
import android.content.Context;