Здравствуйте! Решаю задание на курсах по CSS. Никак не могу решить. Есть какое-то правило, каким образом формируется порядок расположения различных фонов?
body{background:url(../img/fr2.png)no-repeatrighttop;}.sativa{background-image:url(../img/sativa.png);background-repeat:repeat;}.menu ul{list-style-type:none;}.menu ul li {font-family: arial;color:rgb(176,231,10);font-size:40px;text-decoration:none;}.menu ul li a {font-family: arial;color:#02428e;font-size:40px;text-decoration:none;}.menu ul li a:hover{color:#ffa02f;}.url1:hover{color:#ffa02f;text-decoration:none;}.url2{color:rgb(80,81,77);font-family:"Arial Narrow";}
В общем, мне нужно, чтобы фон из селектора тэга body располагался поверх фона из класса sativa. Как это сделать? Добавление дополнительного контейнера div внутрь класса sativa и добавление туда желаемого фона результата не принесли. Перебрал несколько учебников, нигде не могу найти объяснение. Заранее огромное спасибо!
Often, we have background images that we put text on top of. An example could be a hero section, or the above-the-fold content on basically any marketing site these days. Some times, we need to improve the contrast between the text and the background image. Sure, we could just change the image itself — but some times that’s not an option.
The old and clunky way 👴
There are several ways to solve this, but this is how I learned to do it back in the days. I typically create the following HTML structure:
I would then make the image-box relatively positioned, all children absolutely positioned inside, and stack them in the order I would like.
What is this —syntax?
Note that we’re passing in the image url via something called CSS Custom properties. You might also know them as CSS variables. It’s a way to pass values between our HTML and CSS. You can read more about CSS Custom properties on MDN.
/* The container box is relative so we can position stuff inside of it */.image-boxposition:relative;>/* The background and overlay need to be absolutely positioned */.image-box__background,.image-box__overlayposition:absolute;left:0;top:0;right:0;bottom:0;>/* The background image div sizes and positions the background itself. It's also at the bottom-most position in our "div stack" (z-index 1) We set the image url via a CSS custom property, that's set via the style attribute in our HTML */.image-box__backgroundbackground:var(--image-url)centercenterno-repeat;background-size:cover;z-index:1>/* The overlay div is just a colored element with some opacity. It's above the background image in our stack, so it appears to darken the image */.image-box__overlaybackground:rgba(0,0,0,0.5);z-index:2;>/* The content div is at the top of our stack. We'd probably add some padding or flexbox properties here as well, to place the content appropriately */.image-box__contentposition:relative;z-index:3;/* Finally, style and place the content */color:white;min-height:100vh;display:flex;align-items:center;justify-content:center;>
The new cool way! 😎
That was a lot code. Turns out, it doesn’t have to be that way. Let’s change our HTML to look like this:
.image-box/* Here's the trick */background:linear-gradient(rgba(0,0,0,0.5),rgba(0,0,0,0.5)),var(--image-url)centercenter;background-size:cover;/* Here's the same styles we applied to our content-div earlier */color:white;min-height:50vh;display:flex;align-items:center;justify-content:center;>
The first background image is a linear gradient that goes from and to the same color. That color is a semi-transparent black, which works as an overlay for your second background. And that’s it really. If you’re feeling clever, you could also pass in the amount of darkening you’d want as a second css variable, for further customization. Or use an actual gradient to make your images pop a bit more.
Using box shadow to achieve the same
Turns out, CSS has several ways of layering «meta-content» on top of a background image. Another way to achieve the same is by using the box-shadow property with a huge spread value and the inset setting.
.image-box/* Here's the trick */box-shadow:inset000100vwrgba(0,0,0,0.5);/* Basic background styles */background:var(--image-url)centercenterno-repeat;background-size:cover;/* Here's the same styles we applied to our content-div earlier */color:white;min-height:50vh;display:flex;align-items:center;justify-content:center;>
Here’s a CodePen with this implementation as well: This gives you something we can animate as well (notice what happens when you hover the image), which can be a nice UX delight. You don’t have the same control over the gradient, however, so which technique you should choose is depending on the context of your design. It’s also been noted that this technique might not be as good for performance, especially on lower end devices. Remember to consider this as well when deciding on your technique. Thanks for coming to my DEV talk.
5 ways to use background image and color together in css
Have you seen websites using a background image with color, and wonder how they do it?
Well, you are here because you probably want to know how to do it yourself.
If you already know the basic property of CSS background and want to know some advanced methods then I’ll show you 5 different ways to use background with image and color in CSS.
You may also like
Basic background image with color
In this method, you can use a simple transparent image as a background image and a solid background color. What that will do is allow you to show the background color from the transparent sections of the image.
See how the pattern here has mixed with the background color.
Gradient background color
Now we have seen the use of background image with solid color let’s see how to do this with a gradient background color. Again for this method, you have to use a transparent image as the background image.
You can create gradient color manually like this
Now we have the gradient background let’s add an image with this
Multiple background images
Do you know you can use multiple images as background image at the same time?
Yes! you can but you have to be careful with ordering when using multiple images. Place the image that will be at the front first and the second one at second and so on.
Let’s see the basic structure
You can also use multiple images with background color here is how
Multiple images can be used in a very creative way like the demo below or you can check David Walsh’s blog for making an animation with multiple background images.
Background image with color overlay
Have you heard of a background image with color overlay?
It’s not a typical method where you have the background color behind the image it’s actually the opposite, which means you have a color over the background image.
I have been saying you need to use a transparent image but this is one of those methods where you can use images with a solid background.
It’s a very effective way to show some image effects. For this, you have to use some CSS pseudo elements.
Background blend modes
Similar to the overlay method background blend method is not typical background image and color technique but background-blend-mode is an advanced method of blending images and color or blending multiple images. CSS blend effect is more like the Photoshop blend effect.
There is a whole list of blend mode you can use
multiply
screen
overlay
darken
lighten
color-dodge
color-burn
hard-light
soft-light
difference
exclusion
hue
saturation
color
luminosity
Adobe works on these elements and they have created a pen to play with these blend modes.
You can create some really cool image effects without any image editor.
Browser Support
Conclusion
When it comes to using background image and color together it’s a very common web practice but as the web technology is evolving you should know the advance techniques alongside the basic ones. We have discussed most of the techniques here from very basic to advance level.
So it comes down to your preference when to use which technique. But always remember don’t limit yourself with these techniques only keep playing and exploring you will discover your very own technique.
I hope you liked this article and find it useful. Thank you for reading!
Do you know other techniques for using a background with image and color together in CSS? If you do, make sure you share them in the comments below!
Here are some of my favorite website building tools
Thanks for reading the article I hope it was helpful for you. Here are some of my favorite tools that I always use and recommend for website building I hope they will be helpful for you. Please note these are affiliate links, if you do purchase anything using my links I’ll earn a small commission.
Web Hosting: For a new website I like GreenGeeks, I’m using it on this site for over a year now without any problems. They have very affordable plans for beginners and the support is reliable. Their simple setup will get you off and running in no time.
Learn Front End Development: If you want to learn front-end development I recommend Pluralsight, learn from industry professionals. You can try the no-risk 10 days free trial and check the content.
Advertising Network: If you want to increase your ads revenue with Adsense then try using Ezoic, unlike most ad networks it doesn’t need any minimum traffic to get started. It is completely free to use.
Изображения вашего сайта стоят тысячи слов копии, и ваши посетители сайта будут благодарны вам за них. Исследования показали, что пользователи на 94% чаще остаются на сайте с изображениями, чем без них. Где будет темно прозрачный фон на картинке, а по вверх можно написать информацию.
Вы можете легко использовать простой CSS для комбинирования фоновых изображений и изображений переднего плана. Это дает вашим визуальным эффектам более привлекательный дизайн, добавляя такие вещи, как текстовые элементы или наложение градиента, когда это необходимо. Оказывается, что что-то очень похожее можно сделать на стилистике CSS.
Добавляем частично прозрачный фон в поле с CSS
Вот как использовать CSS для создания наложений изображений:
ZorNet.Ru: Портал для Вебмастера
Читать далее »
#without-ntroducing < background-image: url(‘Ссылка на картинкуg’); background-position: center top; background-size: 1380px auto; padding: 65px 85px 136px 85px; >
В дополнение к исходному фоновому слою мы можем применить фоновое изображение к #amultiple, но заставляем ширину фона и вертикальное положение быть такими же, как оригиналы. Они выстраиваются в линию, но только область в поле #amultiple будет видна. Мы размываем этот слой, затем помещаем черный полупрозрачный тон и его содержимое сверху.
Где можно применить этот метод полупрозрачного фона на изображение?
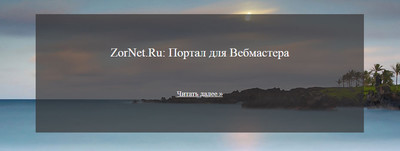
Здесь больше для теорий, чтоб не полагаться, на память, что где то видел похожее, то приведу небольшой вид дизайна с одного интернет ресурса, где как раз этот элемент отлично внедрен. А точнее как написано в описание, что больше идет на информационный поток, где можно разместить как логотип и сделать менее или более прозрачным.
Вот вверх сайта с одного портала:
В этом примере вы увидите, как можно сделать размытие CSS на прозрачном полем с некоторыми HTML и CSS. Что после установки на сайте безусловно будет оригинальный элемент дизайн, что сам ресурс будет обновленный и смотреться красиво. главное по теме поставить, чтоб информация была актуальна, а что привлекать будет, тут бес сомнение, смотря какое изображение будет поставлено для внимание гостей и пользователей.