- CSS float Property
- Browser Support
- CSS Syntax
- Property Values
- More Examples
- Example
- Example
- Example
- Example
- Example
- Example
- Example
- CSS Layout — float and clear
- The float Property
- Example — float: right;
- Example
- Example — float: left;
- Example
- Example — No float
- Example
- Example — Float Next To Each Other
- Example
- Подробно о свойстве float
- Что такое float?
- Странные правила float
- Девять правил float-элементов:
CSS float Property
The float property specifies whether an element should float to the left, right, or not at all.
Note: Absolutely positioned elements ignore the float property!
Note: Elements next to a floating element will flow around it. To avoid this, use the clear property or the clearfix hack (see example at the bottom of this page).
| Default value: | none |
|---|---|
| Inherited: | no |
| Animatable: | no. Read about animatable |
| Version: | CSS1 |
| JavaScript syntax: | object.style.cssFloat=»left» Try it |
Browser Support
The numbers in the table specify the first browser version that fully supports the property.
CSS Syntax
Property Values
| Value | Description | Demo |
|---|---|---|
| none | The element does not float, (will be displayed just where it occurs in the text). This is default | Demo ❯ |
| left | The element floats to the left of its container | Demo ❯ |
| right | The element floats the right of its container | Demo ❯ |
| initial | Sets this property to its default value. Read about initial | |
| inherit | Inherits this property from its parent element. Read about inherit |
More Examples
Example
Let an image float to the left:
Example
Let image be displayed just where it occurs in the text (float: none):
Example
Let the first letter of a paragraph float to the left and style the letter:
Example
Use float with a list of hyperlinks to create a horizontal menu:
.header, .footer <
background-color: grey;
color: white;
padding: 15px;
>
.column float: left;
padding: 15px;
>
.clearfix::after content: «»;
clear: both;
display: table;
>
Example
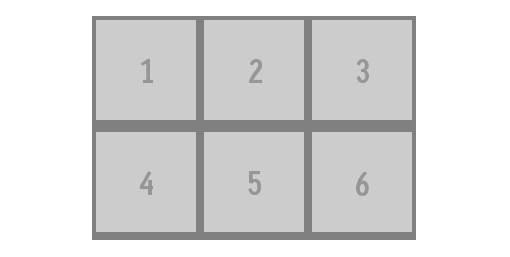
Use float to create a homepage with a header, footer, left content and main content:
.header, .footer <
background-color: grey;
color: white;
padding: 15px;
>
.column float: left;
padding: 15px;
>
.clearfix::after content: «»;
clear: both;
display: table;
>
Example
Do not allow floating elements on the left or the right side of a specified
element:
Example
If a floating element is taller than the containing element, it will overflow outside its container. It is possible to fix this with the «clearfix hack»:
CSS Layout — float and clear
The CSS float property specifies how an element should float.
The CSS clear property specifies what elements can float beside the cleared element and on which side.
The float Property
The float property is used for positioning and formatting content e.g. let an image float left to the text in a container.
The float property can have one of the following values:
- left — The element floats to the left of its container
- right — The element floats to the right of its container
- none — The element does not float (will be displayed just where it occurs in the text). This is default
- inherit — The element inherits the float value of its parent
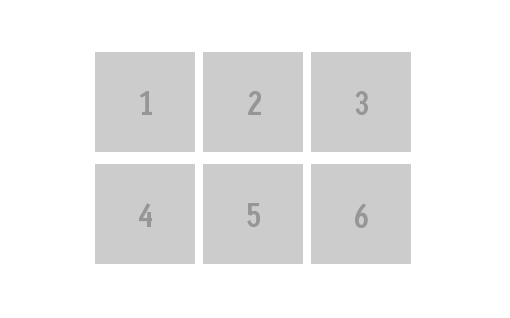
In its simplest use, the float property can be used to wrap text around images.
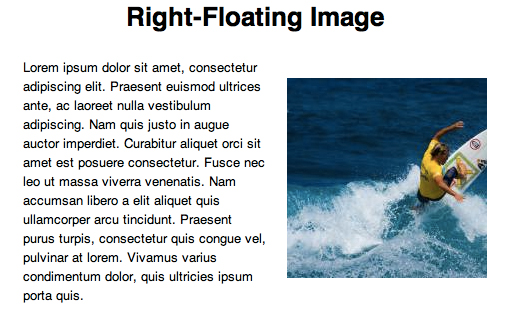
Example — float: right;
The following example specifies that an image should float to the right in a text:

Lorem ipsum dolor sit amet, consectetur adipiscing elit. Phasellus imperdiet, nulla et dictum interdum, nisi lorem egestas odio, vitae scelerisque enim ligula venenatis dolor. Maecenas nisl est, ultrices nec congue eget, auctor vitae massa. Fusce luctus vestibulum augue ut aliquet. Mauris ante ligula, facilisis sed ornare eu, lobortis in odio. Praesent convallis urna a lacus interdum ut hendrerit risus congue. Nunc sagittis dictum nisi, sed ullamcorper ipsum dignissim ac.
Example
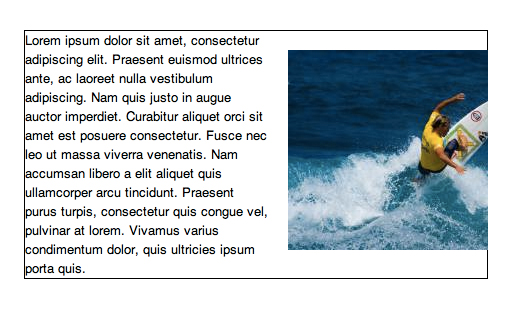
Example — float: left;
The following example specifies that an image should float to the left in a text:
Lorem ipsum dolor sit amet, consectetur adipiscing elit. Phasellus imperdiet, nulla et dictum interdum, nisi lorem egestas odio, vitae scelerisque enim ligula venenatis dolor. Maecenas nisl est, ultrices nec congue eget, auctor vitae massa. Fusce luctus vestibulum augue ut aliquet. Mauris ante ligula, facilisis sed ornare eu, lobortis in odio. Praesent convallis urna a lacus interdum ut hendrerit risus congue. Nunc sagittis dictum nisi, sed ullamcorper ipsum dignissim ac.
Example
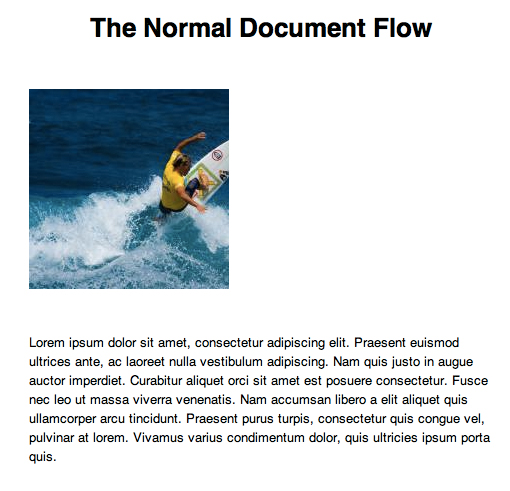
Example — No float
In the following example the image will be displayed just where it occurs in the text (float: none;):
Lorem ipsum dolor sit amet, consectetur adipiscing elit. Phasellus imperdiet, nulla et dictum interdum, nisi lorem egestas odio, vitae scelerisque enim ligula venenatis dolor. Maecenas nisl est, ultrices nec congue eget, auctor vitae massa. Fusce luctus vestibulum augue ut aliquet. Mauris ante ligula, facilisis sed ornare eu, lobortis in odio. Praesent convallis urna a lacus interdum ut hendrerit risus congue. Nunc sagittis dictum nisi, sed ullamcorper ipsum dignissim ac.
Example
Example — Float Next To Each Other
Normally div elements will be displayed on top of each other. However, if we use float: left we can let elements float next to each other:
Example
Подробно о свойстве float

Правильное использование CSS свойства float может стать непростой задачей даже для опытного верстальщика. В этой статье собраны варианты применения float, а также некоторые ошибки, с наглядными примерами.
Что такое float?
Некоторые элементы в CSS являются блочными и поэтому начинаются с новой строки. Например, если расположить два абзаца с тегами P, то они будут находиться друг под другом. Другие же элементы являются «строчными», т.е. отображаются на странице в одну строку.
Один из способов переназначить элементам тип обтекания — это использование свойства float. Классический пример — использование float для выравнивания картинки по левому или правому краю. Вот простой HTML-код картинки и абзаца:

Lorem ipsum.
Они отображаются с новой строки:
Добавляем немного CSS картинке:
Получается выравнивание по правому краю:
Если текста больше, то абзац будет обтекать картинку:

Допустим, нам нужно сделать отступ в 20 пикселей между картинкой и текстом. Вот такая конструкция работать не будет:

Почему же не работает отступ для абзаца? Чтобы разобраться, добавим рамку:
Результат может вас удивить:
Оказывается, картинка находится внутри абзаца! Поэтому и не работает свойство margin в первом случае. Чтобы исправить это, можно применить float:left к абзацу и указываем абсолютную ширину:

Странные правила float
Перейдем к более сложным вариантам использования float: к правилам, регулирующим плавающие объекты. Это бывает необходимо при верстке галереи изображений. Например:
-
-
-
По умолчанию каждый элемент списка появится с новой строки. Если применить к каждому float:left, изображения встанут в один ряд с переносом строки:

Но что, если изображения разной высоты?

Если мы добавим элементам списка отображение в одну строку, получится немного симпатичнее:
А теперь выравниваем по вертикали:
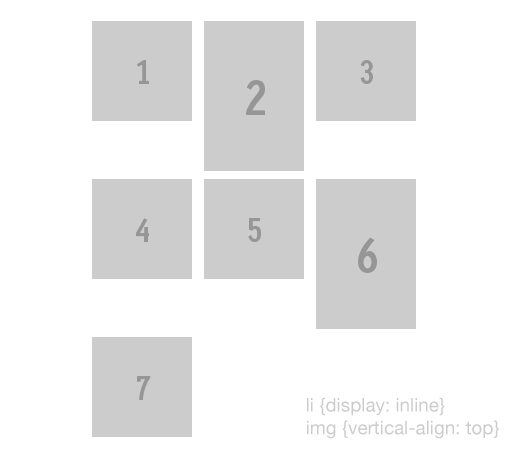
Следует помнить, что в случае большей высоты картинок, остальные изображения обтекают только одно предыдущее, например:
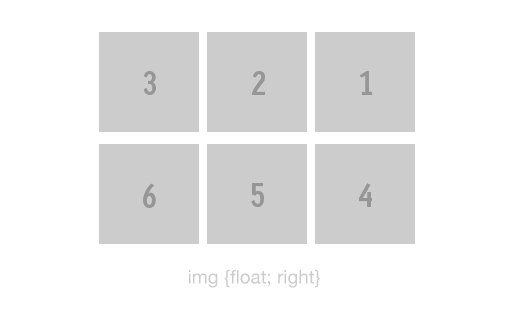
Пример изменения очередности элементов — например, у нас есть список элементов по порядку:
-
-
Если мы хотим расположить их в обратном порядке, просто применяем float:right вместо float:left, и не придется менять порядок в HTML:
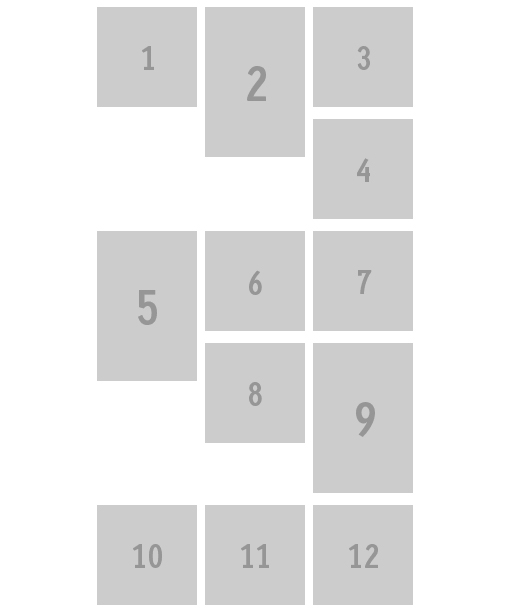
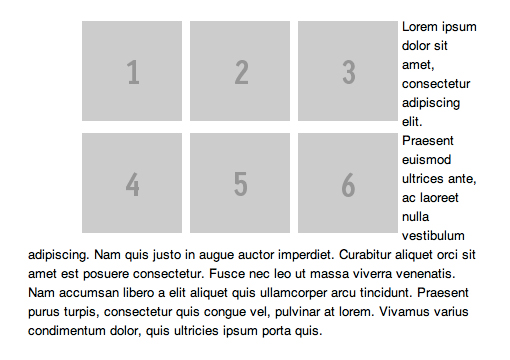
С помощью float удобно группировать элементы на странице, но большой проблемой становится то, что последующие элементы (текст или блок) также получают свойство обтекания. Например, у нас есть блок картинок:
Текст под ним начинает обтекать весь блок:
Чтобы избежать этого, необходимо использовать свойство clear. Если применим его ко второму изображению:
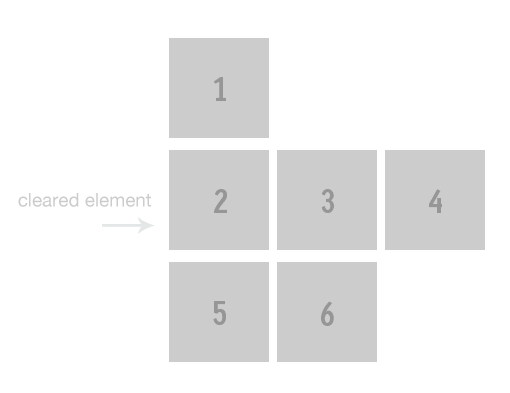
В этом случае остальные изображения продолжают наследовать float:left. Соответсвенно текст будет отображаться коряво:
Нужно применить clear:both к абзацу:
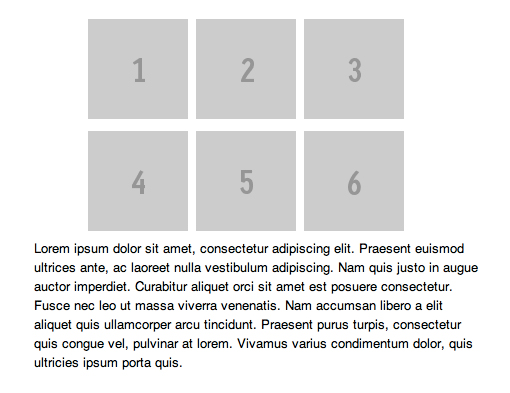
Теперь предположим, что нам необходимо установить фон для галереи из предыдущих примеров. Если бы элементы были не плавающими, то получилось бы вот, что:

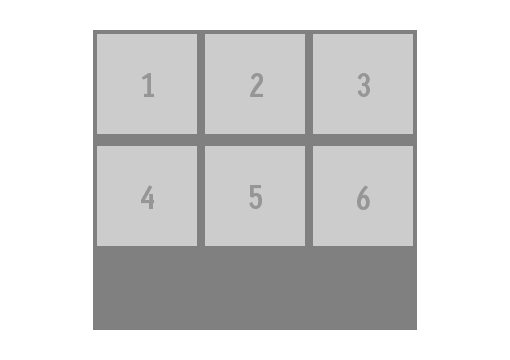
Но если элементам списка применить float:left, фон совсем пропадает:
Если мы сначала устанавливаем высоту для UL:
Это тоже не решает проблему, т.к. размеры фона заданы абсолютно. Нам поможет класс clearfix, который будет применен к div на том же уровне, что и элементы UL.
Существует еще одно решение, с использованием overflow:
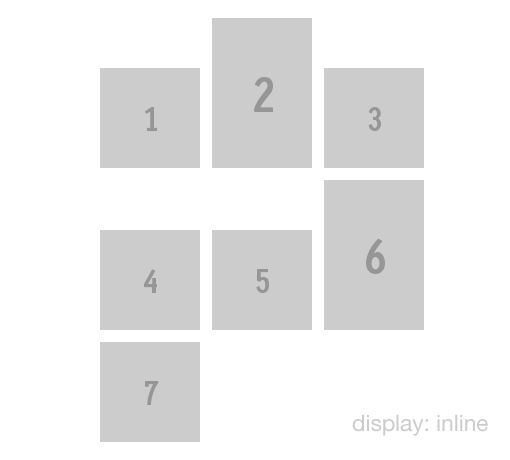
Девять правил float-элементов:
- Плавающие элементы не могут выходить за край своего контейнера-родителя.
- Каждый плавающий элемент будет отображаться справа или ниже от предыдущего при float:left, либо слева и ниже, при float:right.
- Блок с float:left не может быть правее, чем блок с float:right.
- Плавающий элемент не может выходить за пределы верхней границы своего контейнера.
- Плавающий элемент не может располагаться выше, чем родительский блок или предыдущий плавающий элемент.
- Плавающий элемент не может располагаться выше, чем предыдущая строка inline-элементов
- Плавающий блок должен быть расположен как можно выше.
- Один плавающий элемент, следующий за другим, не может выходить за пределы своего контейнера — происходит перенос на следующую строку.
- Блок с float:left должен быть расположен как можно левее, а с float:right — как можно правее.