Extract in Dreamweaver
Learn how to quickly translate your PSDs into HTML-based web designs for mobiles and desktops. Extract CSS, images, measurements, fonts, colors, gradients, and much more from Photoshop directly into Dreamweaver.
Effective July 01, 2022, the features in Extract panel will be discontinued in Dreamweaver 21.2 and earlier versions. You can use Adobe Photoshop to extract style information, assets from PSD components, and reuse them in Dreamweaver.
Extract integration with Dreamweaver lets web designers and developers apply design information and extract web-optimized assets directly within the coding environment. Extract provides a complete, self-contained solution for extracting style information and assets from PSD comps, reducing the need to go back and forth between Photoshop and Dreamweaver.
With the Extract panel in Dreamweaver, you can extract CSS, images, fonts, colors, gradients, and measurements, right into your web page. In addition to these primary Extract features, Dreamweaver also provides the following unique features:
- Direct access to your PSD files on Creative Cloud and to those PSD files that are shared with you in a collaborative folder
- Contextual code hinting to easily define fonts, colors, and gradients in your CSS
- Drag-and-drop support to create image tags from PSD layers
- Paste styles directly into Live View (for example, CSS Designer and Element Display)


Getting started with Extract
Extract in Dreamweaver lets you access your PSD files directly from within the Extract panel in Dreamweaver. Read the following topics to know more about the Extract panel and workspace, and about loading your PSD files in the Extract panel:
Extract panel and workspace
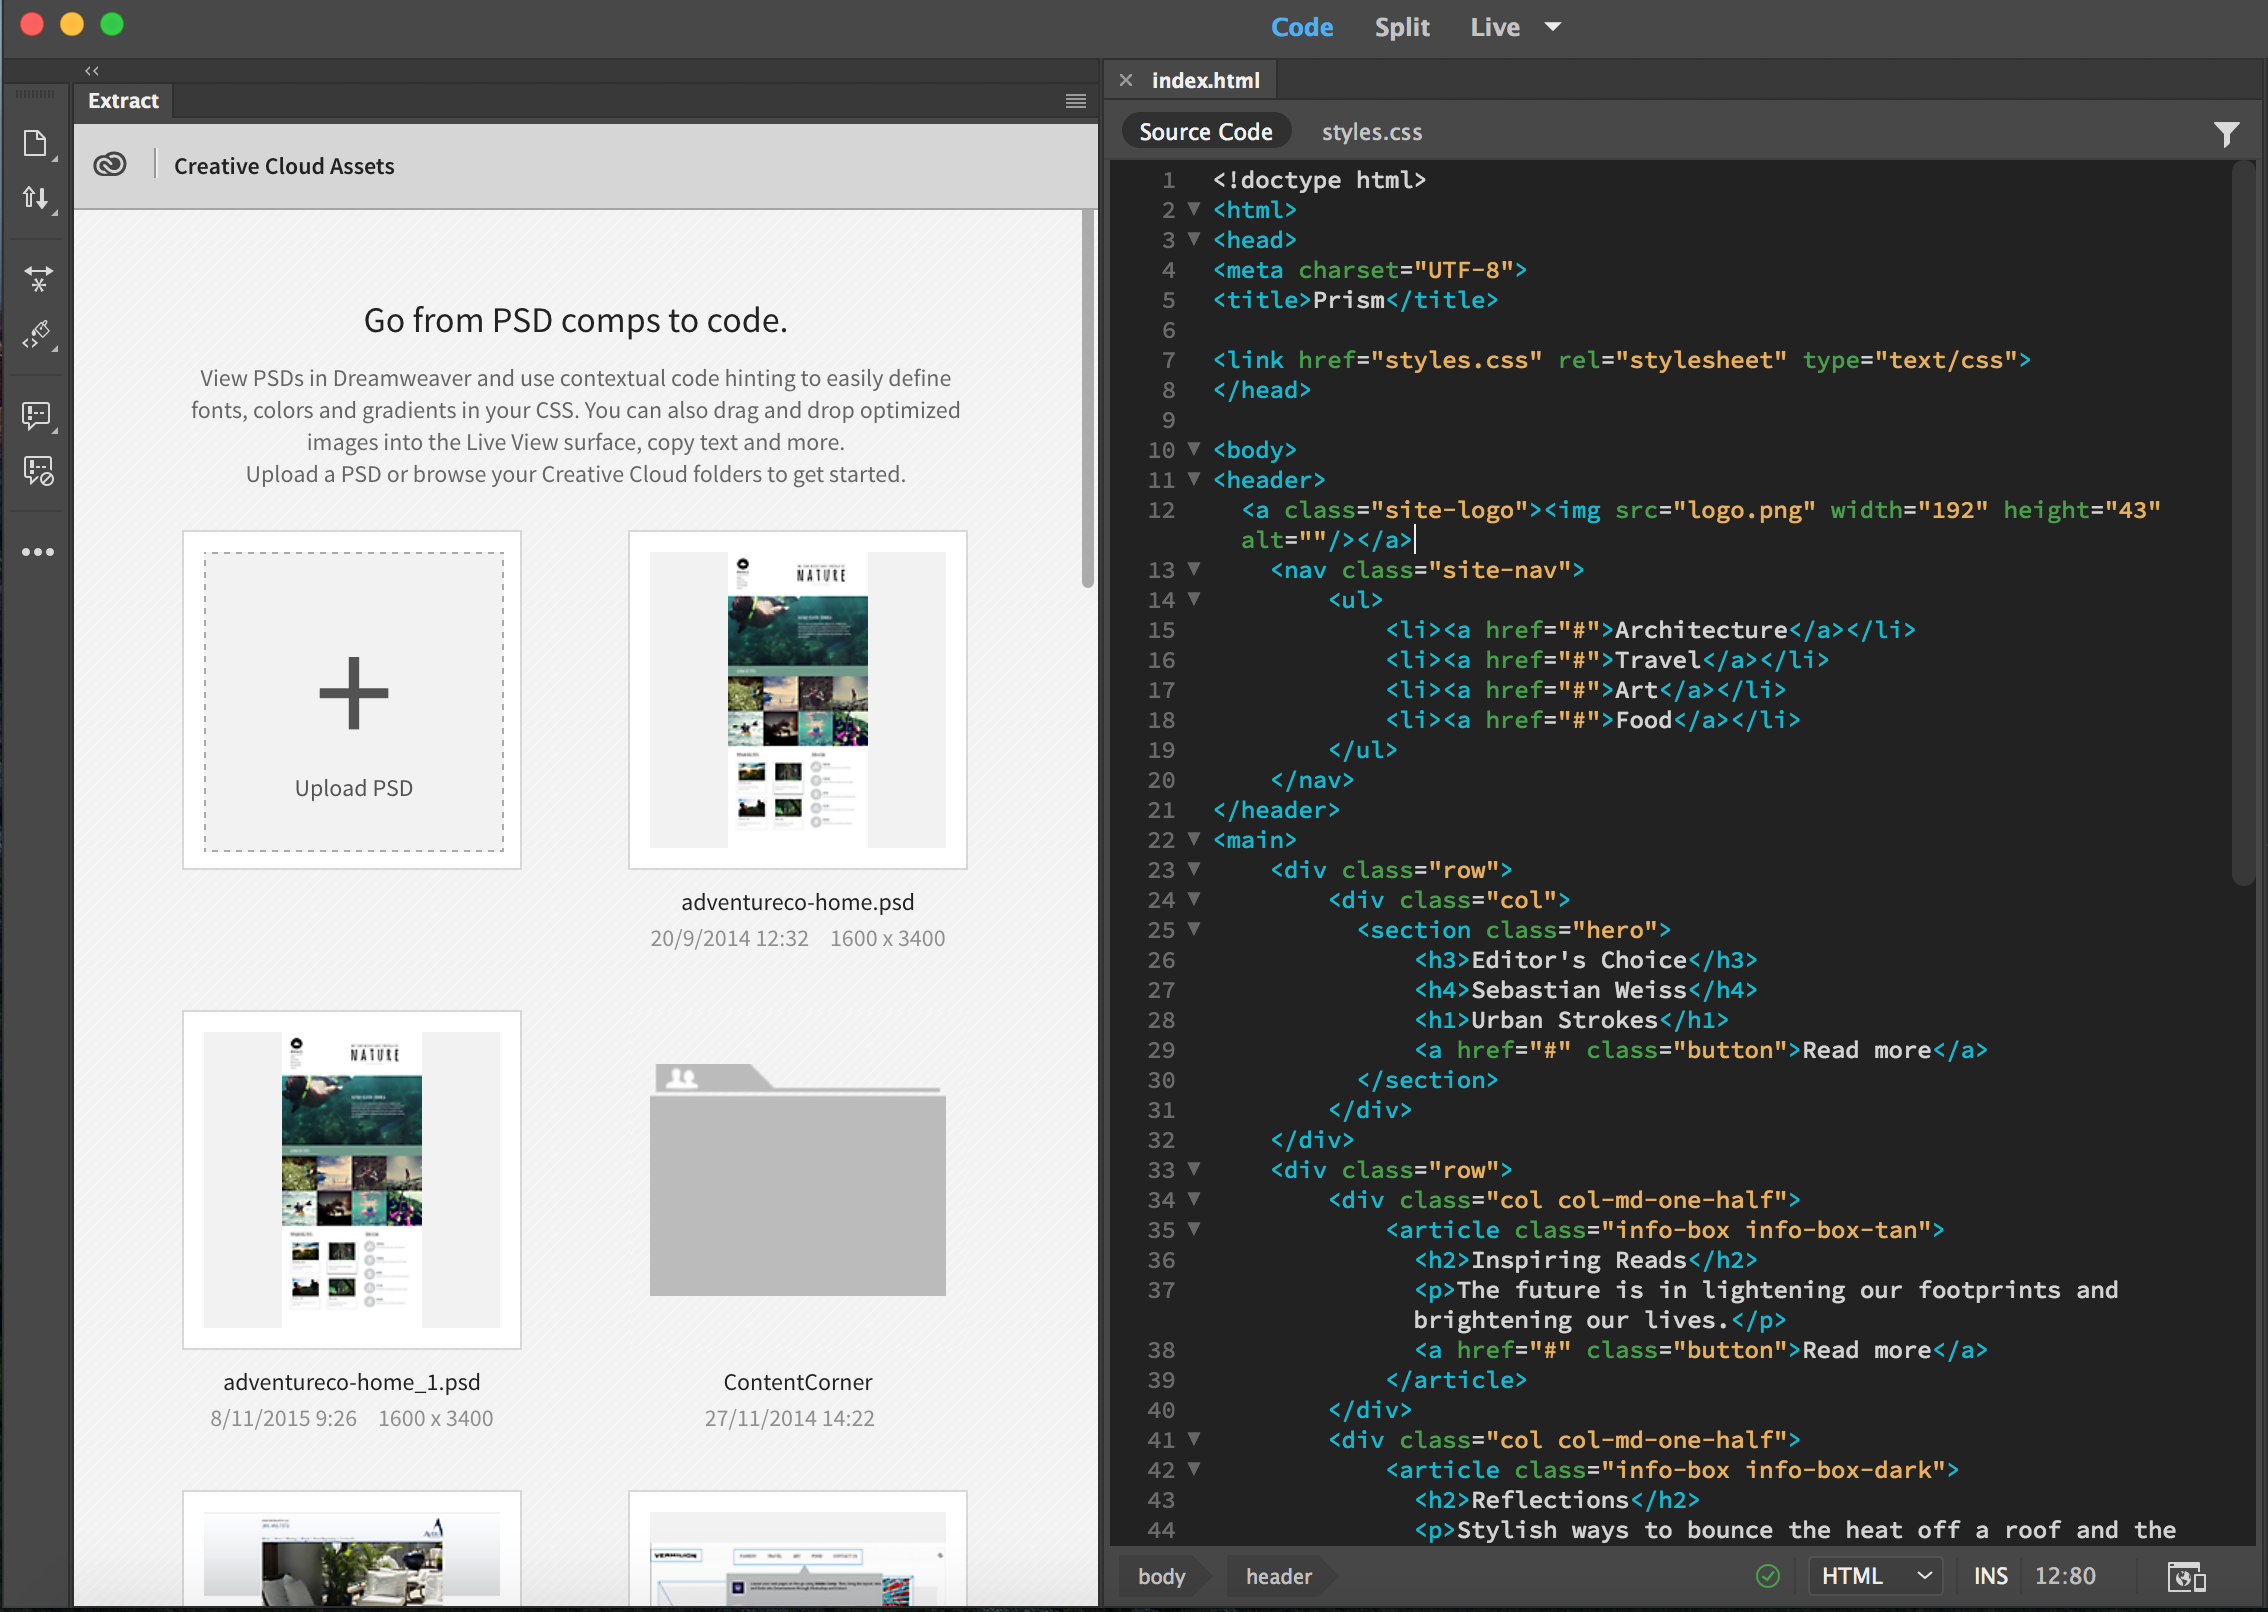
The Extract workspace is designed to help you use Extract with Dreamweaver effectively. In this workspace, the Extract panel appears on the left and your web page appears on the right in split view (Live and Code Views). You can customize the workspace by dragging, docking, collapsing, or expanding panels to suit your needs. You can also save the customized workspace for future use.
If you happen to close the Extract panel, use the keyboard shortcut — Ctrl + K (Win); Cmd + K (Mac), or select Window > Extract to open the panel again.
Upon the first launch of Dreamweaver, the Extract panel displays an interactive tutorial to get you started with the workflows. You can use the drop-down list at the top of the panel to switch between different tutorials.
After you have used the tutorial, you can click Get Started to begin using Extract in Dreamweaver. The Extract panel displays a thumbnail view of folders and PSD files in your Creative Cloud account. These files are those that are either uploaded or synced from your desktop, or those that are shared with you through a collaborative folder on Creative Cloud.
To relaunch the tutorial, click the pop-up menu on the upper right corner of the panel and select Launch Tutorial.
Upload PSD files to Creative Cloud
To upload a PSD file to your Creative Cloud, choose Window > Extract and click Upload PSD. If the PSD comps are developed by another person or team, you can have them shared on Creative Cloud. You can then download the files, and upload them to your account either directly by logging in to Creative Cloud or through the Extract panel in Dreamweaver.
If you are using Dreamweaver 21.2 or later versions on a macOS device, enable the PSD filetype from the Finder window and upload your file.
- Click Upload PSD in the Extract panel.
- In the Finder window, click Options and select *.psd from the drop-down that appears.
- Select the PSD file and click Open to upload the file.
Open PSD files in Extract panel
Click the thumbnail image of the required PSD file in the Extract panel. If an updated version of the PSD file becomes available on Creative Cloud after you open it, reload the PSD file in the Extract panel. To do so, click the name of the PSD file or click Reload PSD in pop-up menu on upper right. To go back to the thumbnail view and select a different file, click the Creative Cloud icon on the upper left of the panel.
To magnify the view and take a closer look at the design, change the zoom level at the top of the Extract panel or use Alt +/-. Use the Layers tab or the Layer Comp drop-down list to show or hide elements in the PSD file.
You are now all set to translate the PSD comp to a website.
Set Extract preferences
Using Extract preferences, you can specify the default file format in which the images must be extracted and also, the default unit for fonts that is to be displayed in the Extract panel.

- To save the versions with suffixes, click the corresponding row under the Suffix column, and type the text.
- To save the multiple resolution versions in separate output folders, click the corresponding row under the Folder column, and specify the relative path.


Extract CSS from PSD files
You can copy all or specific CSS properties of elements in a PSD comp and directly paste the styles into CSS Designer, Element Display in Live View, or into your code (CSS source or HTML document).
Also, code hints are automatically populated with the CSS properties of the element you select in the PSD comp. If you prefer coding, you can use these code hints to extract the CSS properties into the code.
In the Extract panel (Window > Extract), click the required PSD file. The thumbnail view of the PSD expands, allowing you to view the comp clearly.
In the PSD file, click the required elment or asset. A popup with a list of CSS properties of the element appears and provides you the option to select and copy them. You can view the width and height of the selected element in pixels or percentage. Note: If you choose percentage here, the measurements too will be displayed in percentage units.

- To paste the CSS in CSS Designer, right-click the required selector, and click Paste Styles.
- To paste the CSS using Element Display, right-click a selector, and click Paste Styles.
- To paste the CSS in the code, place the insertion point at the required location, right-click, and click Paste.
To use code hints for extracting CSS, perform the following steps:
Start typing the name of a CSS property to see the code hints containing the CSS properties of the selected element in the PSD comp. Click the required CSS property to insert into the code.

To extract multiple CSS properties, select the required properties in the Extract panel popup. Then, in code hints, click Insert Selected.

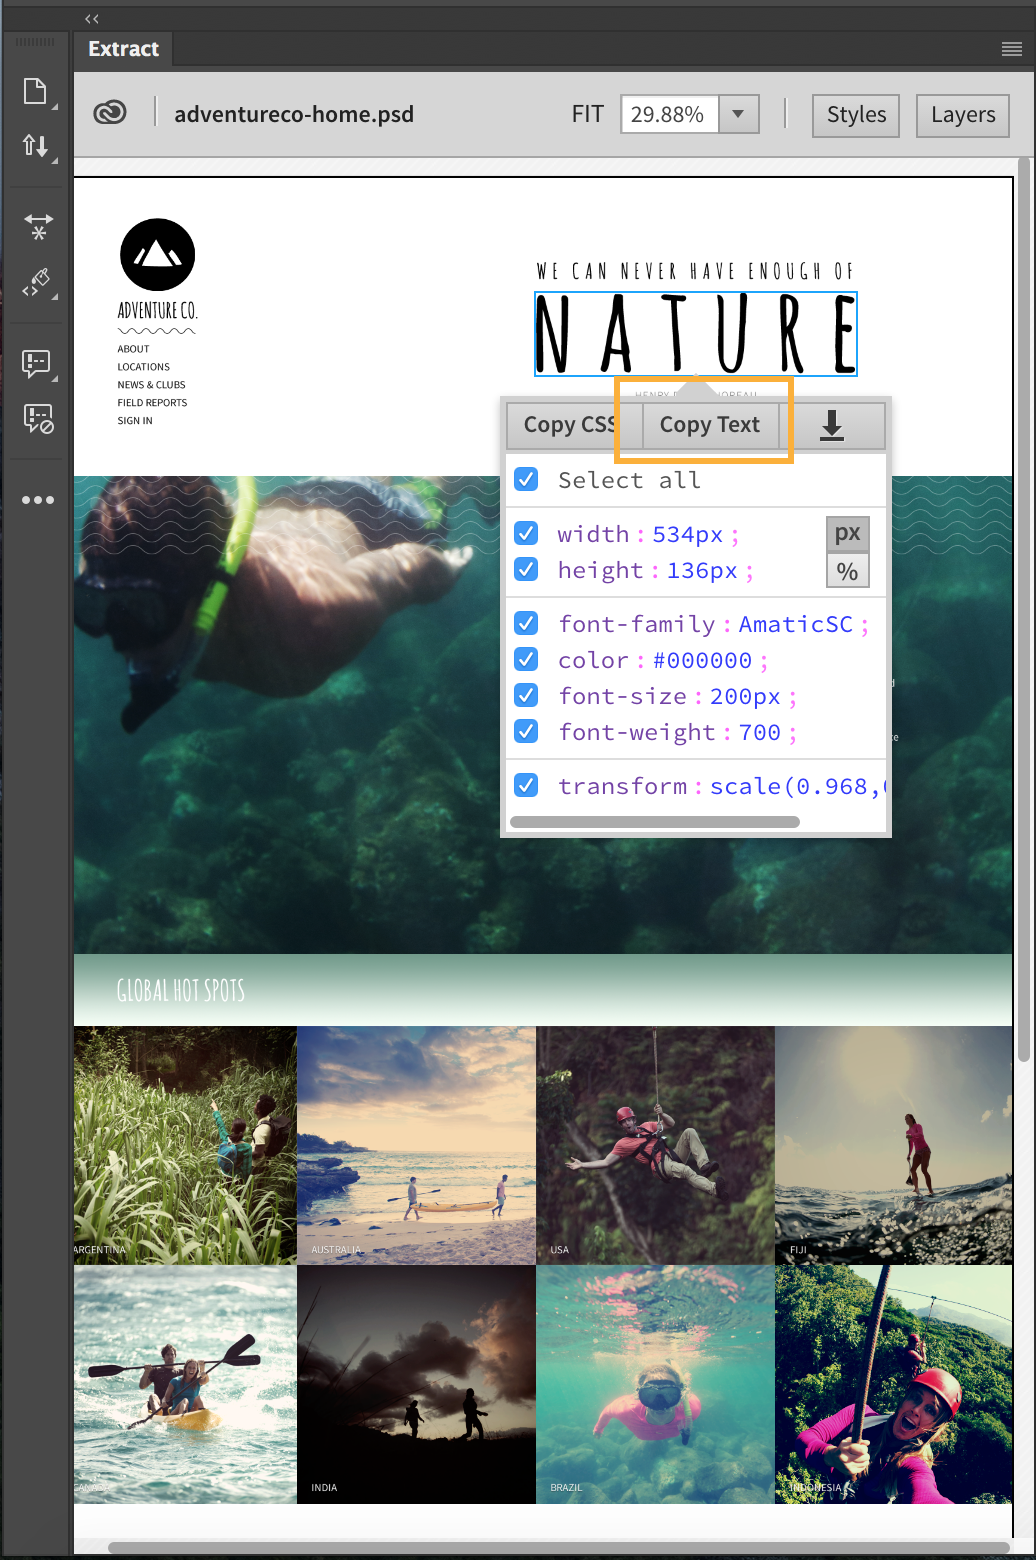
Copy text from PSD files
Text or content in your PSD comps can be inserted into your web page with a single click. To copy text from your PSD comp in the Extract panel, select a text element and click Copy Text. The text is copied to your clipboard. You can then paste the text wherever required.
After you have extracted the text, you can extract properties, such as, font and colors that are associated with the text. For more information, see Extract fonts, colors, and gradients from PSD files.
Extract images from PSD files
You can simply drag any layer in your PSD comps from the Extract panel to a precise location in the Live view of your web page. Visual aids in Live View such as Live Guides and DOM icon help drag and place an element. When you pause for a while before dropping the element, the DOM icon () appears. The DOM structure is displayed when you hover your mouse over the icon and you can drop the element inside the structure. If you prefer coding, you can use the contextual code hinting and extract images. Code hints allow you to extract colors and gradients as images.
If your PSD file contains multiple artboards, each artboard is displayed as a folder in the layers pane. You can expand or collapse the folder to see or hide its contents. To zoom in to a specific artboard, simply click the artboard name. To zoom out, click anywhere outside the artboard and click FIT.
Before inserting the extracted image, Dreamweaver displays the image name, which you can edit. By default, the image is saved in the site root folder. If you want to save the image in a custom location, you can include the complete directory path along with the filename.
Note: If you are extracting an image into a document that does not belong to a defined site, the image is extracted into the directory in which the document exists. For unsaved documents, you are prompted to first save the document.
You can also save the image on your local disk and call it into your web page at a later point in time. Also, if you are designing a responsive website, you can save multiple resolution versions of an image for devices with a single click.
Use the Layers tab and the Layer Comps drop-down list in the Extract panel to show or hide images in the PSD comp. If an image consists of multiple layers, you can select individual layer of the image to extract.
To import multiple images, hold down the Shift or the Command key, and click the required images. The selected images are extracted as a single image.
![]()
- In the popup that appears when you click the image, click . Specify the path, filename, file format, and scaling factor (if required). Then, perform one of the following actions:
- Click Save to save the image at 1x resolution. To scale the image, select Scale At, and specify the scaling factor.
- Click Save Multiple to save multiple resolution versions of the image. The PSD file need not necessarily contain these versions; Dreamweaver can save the image in multiple resolutions during extraction.
You can specify the required resolution versions and the corresponding output folder in Preferences.

- Drag the image into the Live View of your document. Live Guides appear in the Live View to help you position the image.
When you drop the image, Dreamweaver displays the name of the image. You can not only edit the name of the image, but also the extension, and press Enter to save the image. The image is saved in the site root folder by default. To save the image in a custom location, enter the path along with the filename.

- When you click the image, contextual code hints in Dreamweaver are populated. In the Code View of your HTML document or in your CSS document, place the cursor at the insertion point. After you type the background-image property name or the
tag, the name of the selected image appears in the code hints. Select the image, modify the name and extension if required, and press Enter.
By default, the image is saved in the site root folder. To save the image in a custom location, enter the custom file path along with the filename.