- Canvas и JavaScript. Рисование линий
- Рисуем линию
- Свойство lineCap
- Практический пример
- Комментарии ( 0 ):
- CanvasRenderingContext2D: lineTo() method
- Syntax
- Parameters
- Return value
- Examples
- Drawing a straight line
- HTML
- JavaScript
- Result
- Drawing connected lines
- HTML
- JavaScript
- Result
- Specifications
- Browser compatibility
- See also
- Found a content problem with this page?
- MDN
- Support
- Our communities
- Developers
- HTML5 Canvas Line
- Line width
- Color Lines
- Line Cap
- Line Join
Canvas и JavaScript. Рисование линий

На этом уроке мы будем учиться рисовать линии, используя тег canvas и язык JavaScript. На предыдущем уроке мы рисовали геометрические фигуры. Для начала создадим область для рисования на HTML странице.
//CSS код
#draw width: 600px;
height: 300px;
>
Рисуем линию
Получим область для рисования (прямоугольник 600×300) по его ID и укажем контекст рисования 2d.
// JavaScript код
let canvas = document.getElementById(‘drawLine’);
let ctx = canvas.getContext(‘2d’);
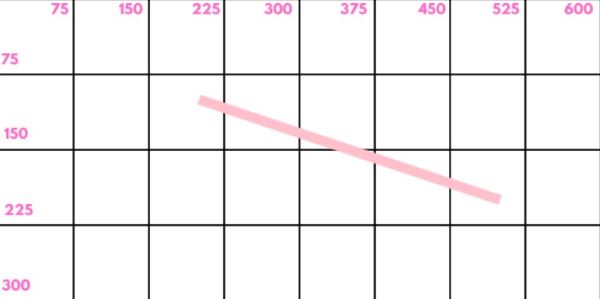
Рисование линии напоминает рисование прямоугольника. Сначала нужно установить начальные координаты, откуда будет прокладываться линия и указать конечные координаты, где эта линия закончится. Затем сделать обводку — соединить начальные и конечные координаты.
// координаты начала линии X,Y
ctx.moveTo(200,100);
// команда рисования линии с координатами конца линии
ctx.lineTo(500,200);
ctx.strokeStyle = «pink»; //цвет линии
ctx.lineWidth = «10»; //толщина линии
ctx.stroke(); // обводка линии
Для того, чтобы продолжить рисование линии, нужно написать еще раз команду lineTo с новыми координатами конца линии.
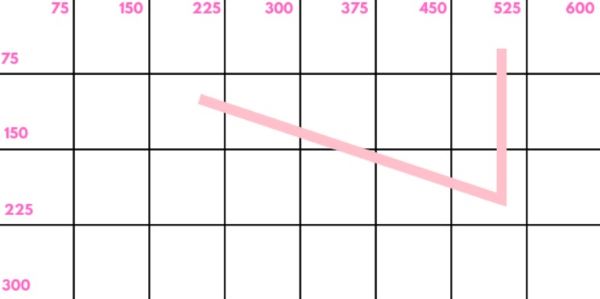
У нас получилась одна непрерывная линия. Как получить две линии, вместо одной? Нужно команду moveTo прописать два раза с разными координатами.
// координаты начала первой линии X,Y
ctx.moveTo(200,100);
// команда рисования линии с координатами конца линии
ctx.lineTo(500,200);
ctx.strokeStyle = «pink»; //цвет линии
ctx.lineWidth = «10»; //толщина линии
ctx.stroke(); // обводка линии
// координаты начала второй линии X,Y
ctx.moveTo(300,100);
ctx.lineTo(500,50);
ctx.stroke();
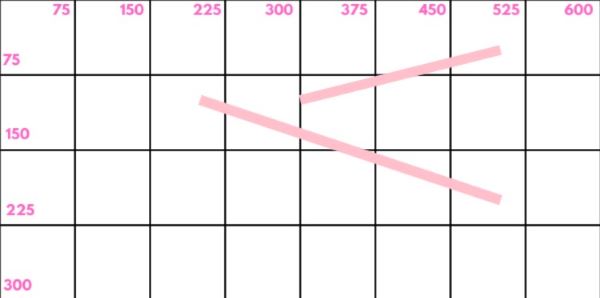
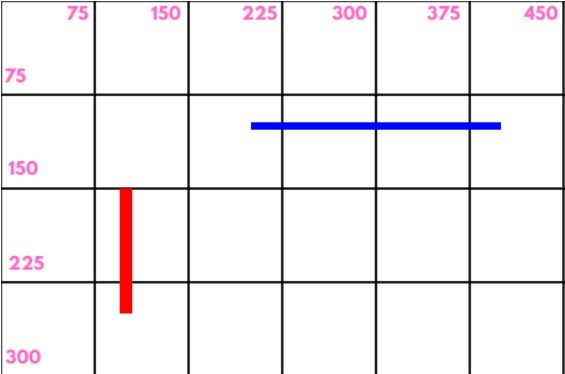
Однако при таком подходе, при рисовании нескольких линий, мы не можем задать им разное оформление (цвет, толщину). Canvas все равно воспринимает их как одну разорванную линию на несколько фрагментов. Чтобы canvas так не считал, укажем для каждой линии отдельный путь через команду beginPath().
ctx.beginPath();
ctx.strokeStyle = «red»;
ctx.lineWidth = «10»;
ctx.moveTo(100,150);
ctx.lineTo(100,250);
ctx.stroke();
ctx.beginPath();
ctx.strokeStyle = «blue»;
ctx.lineWidth = «6»;
ctx.moveTo(200,100);
ctx.lineTo(400,100);
ctx.stroke();
Теперь обе линии независимы друг от друга.
Свойство lineCap
По умолчанию края линий обрезаются под прямым углом, свойство lineCap может изменять края линий.
ctx.beginPath();
ctx.strokeStyle = «red»;
ctx.lineWidth = «20»;
ctx.moveTo(100,150);
ctx.lineTo(150,75);
ctx.lineCap = «round»;
ctx.stroke();
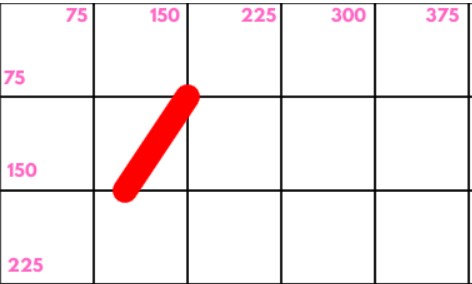
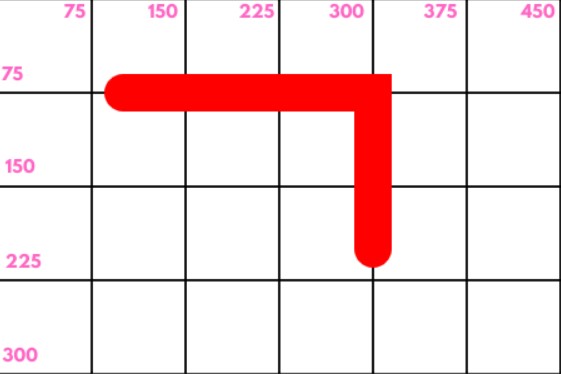
Свойство lineCap позволяет красиво соединять линии между собой.
ctx.beginPath();
ctx.strokeStyle = «red»;
ctx.lineWidth = «30»;
ctx.moveTo(100,75);
ctx.lineTo(300,75);
ctx.lineTo(300,200);
ctx.lineCap = «round»;
ctx.stroke();
Практический пример
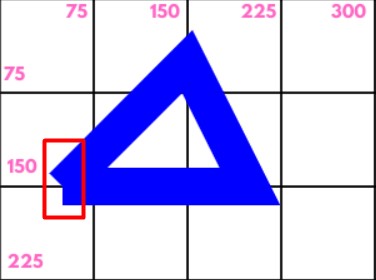
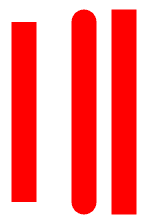
Нарисуем треугольник без свойства lineCap.
ctx.beginPath();
ctx.strokeStyle = «blue»;
ctx.lineWidth = «30»;
ctx.moveTo(50,150);
ctx.lineTo(150,50);
ctx.lineTo(200,150);
ctx.lineTo(50,150);
Получилось некрасивое замыкание линий.
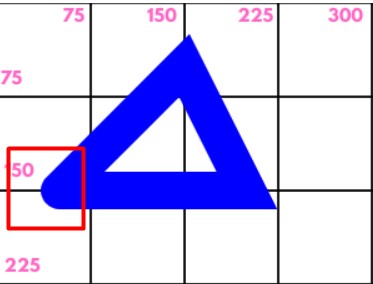
Теперь добавим свойство lineCap и края треугольника красиво соединились.

![]()
Создано 12.05.2021 10:18:45
Копирование материалов разрешается только с указанием автора (Михаил Русаков) и индексируемой прямой ссылкой на сайт (http://myrusakov.ru)!
Добавляйтесь ко мне в друзья ВКонтакте: http://vk.com/myrusakov.
Если Вы хотите дать оценку мне и моей работе, то напишите её в моей группе: http://vk.com/rusakovmy.
Если Вы не хотите пропустить новые материалы на сайте,
то Вы можете подписаться на обновления: Подписаться на обновления
Если у Вас остались какие-либо вопросы, либо у Вас есть желание высказаться по поводу этой статьи, то Вы можете оставить свой комментарий внизу страницы.
Порекомендуйте эту статью друзьям:
Если Вам понравился сайт, то разместите ссылку на него (у себя на сайте, на форуме, в контакте):
- Кнопка:
Она выглядит вот так: - Текстовая ссылка:
Она выглядит вот так: Как создать свой сайт - BB-код ссылки для форумов (например, можете поставить её в подписи):
Комментарии ( 0 ):
Для добавления комментариев надо войти в систему.
Если Вы ещё не зарегистрированы на сайте, то сначала зарегистрируйтесь.
Copyright © 2010-2023 Русаков Михаил Юрьевич. Все права защищены.
CanvasRenderingContext2D: lineTo() method
The CanvasRenderingContext2D method lineTo() , part of the Canvas 2D API, adds a straight line to the current sub-path by connecting the sub-path’s last point to the specified (x, y) coordinates.
Like other methods that modify the current path, this method does not directly render anything. To draw the path onto a canvas, you can use the fill() or stroke() methods.
Syntax
Parameters
The x-axis coordinate of the line’s end point.
The y-axis coordinate of the line’s end point.
Return value
Examples
Drawing a straight line
This example draws a straight line using the lineTo() method.
HTML
JavaScript
The line begins at (30, 50) and ends at (150, 100).
const canvas = document.getElementById("canvas"); const ctx = canvas.getContext("2d"); ctx.beginPath(); // Start a new path ctx.moveTo(30, 50); // Move the pen to (30, 50) ctx.lineTo(150, 100); // Draw a line to (150, 100) ctx.stroke(); // Render the path
Result
Drawing connected lines
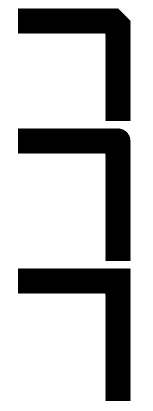
Each call of lineTo() (and similar methods) automatically adds to the current sub-path, which means that all the lines will all be stroked or filled together. This example draws a letter ‘M’ with a single contiguous line.
HTML
JavaScript
const canvas = document.getElementById("canvas"); const ctx = canvas.getContext("2d"); ctx.moveTo(90, 130); ctx.lineTo(95, 25); ctx.lineTo(150, 80); ctx.lineTo(205, 25); ctx.lineTo(210, 130); ctx.lineWidth = 15; ctx.stroke();
Result
Specifications
Browser compatibility
BCD tables only load in the browser
See also
Found a content problem with this page?
This page was last modified on Apr 7, 2023 by MDN contributors.
Your blueprint for a better internet.
MDN
Support
Our communities
Developers
Visit Mozilla Corporation’s not-for-profit parent, the Mozilla Foundation.
Portions of this content are ©1998– 2023 by individual mozilla.org contributors. Content available under a Creative Commons license.
HTML5 Canvas Line
To draw a line using HTML5 Canvas is simple, just like draw a line on a paper, define a path, and then fill the path. See the following steps :
- Resets the current path using beginPath() method.
- Let move the drawing cursor to start point to create a new subpath using moveTo(x,y) method.
- Now use lineTo(x, y) method, which adds a new point and connects this point to the starting point by using a straight line.
- Both the above methods accept x and y parameters which tell it exactly where you want to draw the line.
- Finally use stroke() method to make the line visible.
Pictorial Presentation:
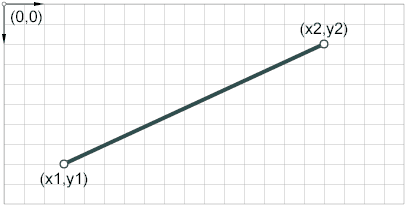
Example : Draw a simple Line
The following code will draw a simple line from (10,45) to (180,40).

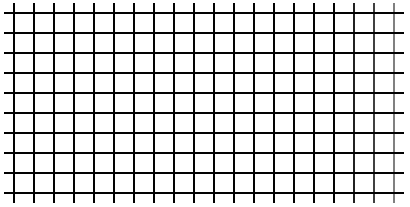
Example : Draw horizontal and vertical lines
The following code example uses the moveTo and lineTo methods to incrementally draw horizontal and vertical lines across the canvas.
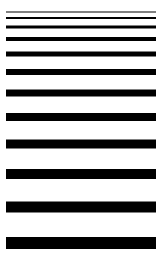
Line width
The lineWidth property gives the width (in pixels) of lines. The property value is a positive number (default value 1). On setting, zero, negative, and NaN values must be ignored, leaving the value unchanged. The following example draws a series of lines by using increasing values (1 to 12) for the lineWidth property.
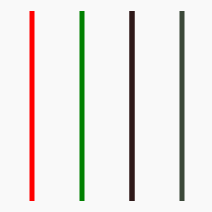
Color Lines
To draw color lines you can use strokeStyle property, the default color is black. Syntax of the property is object.strokeStyle = color. Here is an example :
Line Cap
lineCap property is used to gets or sets the current line cap style. There are three cap styles :
- butt : Default. A flat edge is put perpendicular to each end of the line with no cap added.
- round : A semicircle or rounded end cap is added to each end of the line.
- square : A square end cap is added to each end of the line.
Line Join
lineJoin property is used to get or set the type of corner that is created when two lines join. There are three values :
- bevel : A filled triangle connects the two lines that are joined, creating a beveled corner.
- round : Lines join with a rounded corner.
- square : Default. Lines join with a smoothly mitered corner.
Follow us on Facebook and Twitter for latest update.
- Weekly Trends
- Java Basic Programming Exercises
- SQL Subqueries
- Adventureworks Database Exercises
- C# Sharp Basic Exercises
- SQL COUNT() with distinct
- JavaScript String Exercises
- JavaScript HTML Form Validation
- Java Collection Exercises
- SQL COUNT() function
- SQL Inner Join
- JavaScript functions Exercises
- Python Tutorial
- Python Array Exercises
- SQL Cross Join
- C# Sharp Array Exercises
We are closing our Disqus commenting system for some maintenanace issues. You may write to us at reach[at]yahoo[dot]com or visit us at Facebook