- Saved searches
- Use saved searches to filter your results more quickly
- Tasfers/discord_bot
- Name already in use
- Sign In Required
- Launching GitHub Desktop
- Launching GitHub Desktop
- Launching Xcode
- Launching Visual Studio Code
- Latest commit
- Git stats
- Files
- README.md
- About
- Создание Discord-бота на Python. Часть 1
- Создание бота и получение токена
- Написание кода
- Бонусный туториал!
- Конец
- Quickstart
- A Minimal Bot
Saved searches
Use saved searches to filter your results more quickly
You signed in with another tab or window. Reload to refresh your session. You signed out in another tab or window. Reload to refresh your session. You switched accounts on another tab or window. Reload to refresh your session.
Гайд по написанию Discord бота на языке Python
Tasfers/discord_bot
This commit does not belong to any branch on this repository, and may belong to a fork outside of the repository.
Name already in use
A tag already exists with the provided branch name. Many Git commands accept both tag and branch names, so creating this branch may cause unexpected behavior. Are you sure you want to create this branch?
Sign In Required
Please sign in to use Codespaces.
Launching GitHub Desktop
If nothing happens, download GitHub Desktop and try again.
Launching GitHub Desktop
If nothing happens, download GitHub Desktop and try again.
Launching Xcode
If nothing happens, download Xcode and try again.
Launching Visual Studio Code
Your codespace will open once ready.
There was a problem preparing your codespace, please try again.
Latest commit
Git stats
Files
Failed to load latest commit information.
README.md
Гайд по написанию дискорд бота на языке Python и на библиотеке Disnake
Для корректной работы бота советуем установить Python 3.9 и выше
- Тыкаем сюда и у вас скачивается Python 3.9
- Обязательно включаем галочку рядом с Add Python 3.9 to PATH и проходим дальнейшую установку
После установки Python вы так же можете установить Visual Studio Code для редактирования файлов бота по этой ссылке
- Заходим на сайт и нажимаем на кнопку New Application
- Вводим название приложения и нажимаем Create
- Выбираем вкладку Bot
- Нажимаем Add Bot
- И снова нажимаем Yes, do it!
- Нажимаем Reset Token и сохраняем его где-нибудь (После перезагрузки страницы токен пропадет и его придется пересоздать в случае утери)
Во вкладке Bot включаем следующие галочки
- Public Bot — Означает, что бот является общедоступным и может быть добавлен другими людьми на их сервера в Discord.
- Presence Intent — Позволяет боту отслеживать присутствие пользователей, включая их статус в реальном времени (например, онлайн, отсутствует, занят) и активность (например, играет в игру).
- Server Members Intent — Позволяет боту получать информацию об участниках сервера, такую как имена, никнеймы, роли и т.д.
- Message Content Intent — Позволяет боту получать информацию о содержимом сообщений, включая текст и вложения.
Пишем в cmd вот эту команду pip install disnake
Онлайн status=disnake.Status.online Оффлайн status=disnake.Status.offline Не беспокоить status=disnake.Status.dnd Не активен status=disnake.Status.idle
Играет activity=disnake.Game(name="игру") Смотрит activity=disnake.Activity(type=disnake.ActivityType.watching, name="ютуб") Слушает activity=disnake.Activity(type=disnake.ActivityType.listening, name="музыку") Стримит activity=disnake.Streaming(name="игру", url="https://www.twitch.tv/никнейм") #если убрать аргумент url то кнопки просто не будет, но все будет работать Соревнуется в activity=disnake.Activity(type=disnake.ActivityType.competing, name="создании бота")
Этот параметр обозначает добавление тестового сервера на котором слеш команды будут обновляться сразу При добавлении большого количество идентификаторов то бот будет запускаться медленно, советуем добавлять не более 3х
Что бы добавить туда свой сервер напишите так
test_guilds=[960169222808432660]
Что бы добавить несколько серверов напишите так
test_guilds=[960169222808432660, 941767647790514216]
Важно — Если айди вашего сервера не будет там то слеш команда появится/обновится только через 10-15 минут после её добавления/изменения
Создаем файл .py в папке cogs , пример — moderation.py
Начинка кога (Вместо Fun ставим название своего кога)
import disnake from disnake.ext import commands class Fun(commands.Cog): def __init__(self, bot): self.bot = bot @commands.Cog.listener() async def on_ready(self): #ивент который будет активироваться когда вы включите бота print('Любой текст, к примеру: Cog Fun - Ready') #Тут будут команды и ивенты def setup(bot): bot.add_cog(Fun(bot))
Ког — модуль бота где хранятся команды, можно создавать столько когов, сколько захотите (Модерация, Развлечение и.т.п)
Токен — зашифрованный ключ Discord, с помощью которого бот авторизуется
Импорт — обязательная вещь которая добавляет в код много полезного, пример ниже
import disnake from disnake.ext import commands
Ивент — триггер который активируется при каком либо действии, к примеру on_ready — бот включен(готов)
На этом все, дальше смотрите файлы, там я буду выкладывать примеры
About
Гайд по написанию Discord бота на языке Python
Создание Discord-бота на Python. Часть 1
Приветствую, хабровчане и другие пользователи интернета. Сегодня я начну цикл статей, посвящённых созданию Discord-бота с помощью библиотеки discord.py. Мы рассмотрим создание как и примитивного бота, как и «продвинутого» бота с модулями. В этой статье мы сделаем стандартную команду и ещё одну небольшую команду. Начнём!
Создание бота и получение токена
Для того, чтобы добавить бота на сервер нужно создать свое приложение и во вкладке General Information скопировать Client ID.
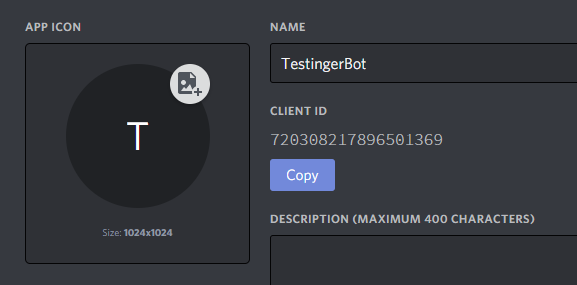
Здесь заменяем CLID на ранее скопированный Client ID.
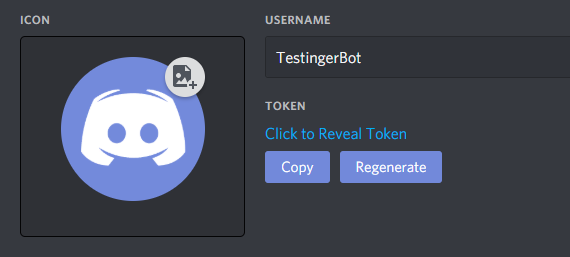
https://discordapp.com/oauth2/authorize?&client_id=CLID&scope=bot&permissions=8Во вкладке Bot создаём бота и копируем токен.
Написание кода
Устанавливаем саму библиотеку.
Создаём файл config.py (так удобнее), и создаём там словарь.
Создаём main-файл, название может быть любое.
Импортируем библиотеки и наш файл конфига:
import discord from discord.ext import commands from config import settingsСоздаём «тело» бота, название может быть любое:
bot = commands.Bot(command_prefix = settings['prefix']) # Так как мы указали префикс в settings, обращаемся к словарю с ключом prefix.Начинаем писать основной код.
@bot.command() # Не передаём аргумент pass_context, так как он был нужен в старых версиях. async def hello(ctx): # Создаём функцию и передаём аргумент ctx. author = ctx.message.author # Объявляем переменную author и записываем туда информацию об авторе. await ctx.send(f'Hello, !') # Выводим сообщение с упоминанием автора, обращаясь к переменной author.В конце запускаем бота с помощью:
bot.run(settings['token']) # Обращаемся к словарю settings с ключом token, для получения токенаimport discord from discord.ext import commands from config import settings bot = commands.Bot(command_prefix = settings['prefix']) @bot.command() # Не передаём аргумент pass_context, так как он был нужен в старых версиях. async def hello(ctx): # Создаём функцию и передаём аргумент ctx. author = ctx.message.author # Объявляем переменную author и записываем туда информацию об авторе. await ctx.send(f'Hello, !') # Выводим сообщение с упоминанием автора, обращаясь к переменной author. bot.run(settings['token']) # Обращаемся к словарю settings с ключом token, для получения токена
Бонусный туториал!
Сделаем вывод случайных картинок с лисами
Для этого импортируем еще пару библиотек:
import json import requestsПриступим к написанию команды.
@bot.command() async def fox(ctx): response = requests.get('https://some-random-api.ml/img/fox') # Get-запрос json_data = json.loads(response.text) # Извлекаем JSON embed = discord.Embed(color = 0xff9900, title = 'Random Fox') # Создание Embed'a embed.set_image(url = json_data['link']) # Устанавливаем картинку Embed'a await ctx.send(embed = embed) # Отправляем Embed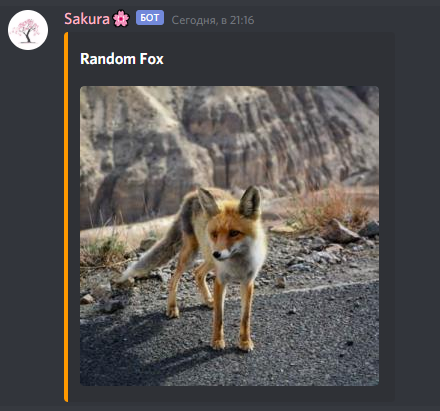
Конец
На этом 1 часть закончена. Скоро будет опубликована 2 часть.
Quickstart
This page gives a brief introduction to the library. It assumes you have the library installed, if you don’t check the Installing portion.
A Minimal Bot
Let’s make a bot that responds to a specific message and walk you through it.
It looks something like this:
# This example requires the 'message_content' intent. import discord intents = discord.Intents.default() intents.message_content = True client = discord.Client(intents=intents) @client.event async def on_ready(): print(f'We have logged in as client.user>') @client.event async def on_message(message): if message.author == client.user: return if message.content.startswith('$hello'): await message.channel.send('Hello!') client.run('your token here')
Let’s name this file example_bot.py . Make sure not to name it discord.py as that’ll conflict with the library.
There’s a lot going on here, so let’s walk you through it step by step.
- The first line just imports the library, if this raises a ModuleNotFoundError or ImportError then head on over to Installing section to properly install.
- Next, we create an instance of a Client . This client is our connection to Discord.
- We then use the Client.event() decorator to register an event. This library has many events. Since this library is asynchronous, we do things in a “callback” style manner. A callback is essentially a function that is called when something happens. In our case, the on_ready() event is called when the bot has finished logging in and setting things up and the on_message() event is called when the bot has received a message.
- Since the on_message() event triggers for every message received, we have to make sure that we ignore messages from ourselves. We do this by checking if the Message.author is the same as the Client.user .
- Afterwards, we check if the Message.content starts with ‘$hello’ . If it does, then we send a message in the channel it was used in with ‘Hello!’ . This is a basic way of handling commands, which can be later automated with the discord.ext.commands – Bot commands framework framework.
- Finally, we run the bot with our login token. If you need help getting your token or creating a bot, look in the Creating a Bot Account section.
Now that we’ve made a bot, we have to run the bot. Luckily, this is simple since this is just a Python script, we can run it directly.
Now you can try playing around with your basic bot.
© Copyright 2015-present, Rapptz. Created using Sphinx 4.4.0.