- Derdevicedx11 cpp 5644 createcomputeshader failed hresult 0x80070057
- Ошибка HRESULT: 0x80070057, параметр задан неверно — как исправить
- Основные причины появления 0x80070057
- Как же можно разобраться с ошибкой 0x80070057?
- Способ N1: Изменение десятичных разделителей
- Способ N2: переименование каталога SoftwareDistribution
- Способ N3: Изменение реестра
- В чем особенность программы Microsoft Fix it
- В заключение
- Derdevicedx11 cpp 5644 createcomputeshader failed hresult 0x80070057
Derdevicedx11 cpp 5644 createcomputeshader failed hresult 0x80070057
«d://reengine//reengine//gitroot//runtime//modules//render//os//renderdevicedx11.cpp» 5627 createComputeShader failed. hresult=0x80070057, paremeter not correct
I had the exact same problem as everyone here (renderdevicedx11.cpp» 5627 createComputeShader failed) and I’ll tell you what finally worked for me after 2 hours of brainstorming. This may look complicated but all we’re doing here is cleanly uninstalling the old driver and cleanly installing the new one, so that the old and new don’t override.
If you just install the latest driver on top of the old one, it messes things up, so what I did was completely uninstall the old driver with DDU uninstaller and then do a proper, clean install of the new one. Before doing this, I suggest downloading the latest GPU driver so that it’s well prepared [for me it was 417.35]
1. Download DDU https://www.guru3d.com/files-details/display-driver-uninstaller-download.html
2. Boot the system in Safe Mode
3. Launch DDU and select your GPU, then click «Clean and Restart».
4. This will fully uninstall the driver without a trace and the computer will restart.
5. Once the computer restarts, launch the latest GPU driver installation.
6. Choose Custom installation and only check Graphics Driver and PHYSX, also make sure that Clean Install is checked. This will clear your previous profiles and settings but if you don’t use them anyway, it’s irrelevant.
7. Install the driver and when asked, restart the computer.
8. Launch the game and hopefully it works like it did for me.
If it still doesn’t work, another thing you could try installing is «Platform Update for Windows 7», found here: https://www.microsoft.com/en-us/download/details.aspx?id=36805 because the error seems to be related with DirectX11 and this file updates it.
I was very sceptical about these working, but now as you can see from my profile I beat the demo! Please let me know if this works for you!

11 янв. 2019 в 14:22
I’m also getting the same error.
I’m also getting the same error.
11 янв. 2019 в 15:16
I’m also getting the same error.
Doesnt work for me unfortunately.
As for me. It saying that i alredy have this update it is sad. In this case, we will wait, because this is the only solution that I found.
![]()
Автор темы посчитал это сообщение ответом на свой вопрос.
11 янв. 2019 в 15:29
I had the exact same problem as everyone here (renderdevicedx11.cpp» 5627 createComputeShader failed) and I’ll tell you what finally worked for me after 2 hours of brainstorming. This may look complicated but all we’re doing here is cleanly uninstalling the old driver and cleanly installing the new one, so that the old and new don’t override.
If you just install the latest driver on top of the old one, it messes things up, so what I did was completely uninstall the old driver with DDU uninstaller and then do a proper, clean install of the new one. Before doing this, I suggest downloading the latest GPU driver so that it’s well prepared [for me it was 417.35]
1. Download DDU https://www.guru3d.com/files-details/display-driver-uninstaller-download.html
2. Boot the system in Safe Mode
3. Launch DDU and select your GPU, then click «Clean and Restart».
4. This will fully uninstall the driver without a trace and the computer will restart.
5. Once the computer restarts, launch the latest GPU driver installation.
6. Choose Custom installation and only check Graphics Driver and PHYSX, also make sure that Clean Install is checked. This will clear your previous profiles and settings but if you don’t use them anyway, it’s irrelevant.
7. Install the driver and when asked, restart the computer.
8. Launch the game and hopefully it works like it did for me.
If it still doesn’t work, another thing you could try installing is «Platform Update for Windows 7», found here: https://www.microsoft.com/en-us/download/details.aspx?id=36805 because the error seems to be related with DirectX11 and this file updates it.
I was very sceptical about these working, but now as you can see from my profile I beat the demo! Please let me know if this works for you!
11 янв. 2019 в 15:33
I had the exact same problem as everyone here (renderdevicedx11.cpp» 5627 createComputeShader failed) and I’ll tell you what finally worked for me after 2 hours of brainstorming. This may look complicated but all we’re doing here is cleanly uninstalling the old driver and cleanly installing the new one, so that the old and new don’t override.
If you just install the latest driver on top of the old one, it messes things up, so what I did was completely uninstall the old driver with DDU uninstaller and then do a proper, clean install of the new one. Before doing this, I suggest downloading the latest GPU driver so that it’s well prepared [for me it was 417.35]
1. Download DDU https://www.guru3d.com/files-details/display-driver-uninstaller-download.html
2. Boot the system in Safe Mode
3. Launch DDU and select your GPU, then click «Clean and Restart».
4. This will fully uninstall the driver without a trace and the computer will restart.
5. Once the computer restarts, launch the latest GPU driver installation.
6. Choose Custom installation and only check Graphics Driver and PHYSX, also make sure that Clean Install is checked. This will clear your previous profiles and settings but if you don’t use them anyway, it’s irrelevant.
7. Install the driver and when asked, restart the computer.
8. Launch the game and hopefully it works like it did for me.
If it still doesn’t work, another thing you could try installing is «Platform Update for Windows 7», found here: https://www.microsoft.com/en-us/download/details.aspx?id=36805 because the error seems to be related with DirectX11 and this file updates it.
I was very sceptical about these working, but now as you can see from my profile I beat the demo! Please let me know if this works for you!
I used the second option, which I found a little earlier in the discussions, with updating the OS and it helped me, but as I have already noticed, having created a topic, it does not work for everyone
Ошибка HRESULT: 0x80070057, параметр задан неверно — как исправить
Служба активации в операционной системе Windows способна сохранить любые данные, однако даже в таком случае перед пользователем может появиться ошибка вида «createComputeShader failed. HRESULT=0x80070057, Параметр задан неверно». Причем появиться она может практически в любой момент.
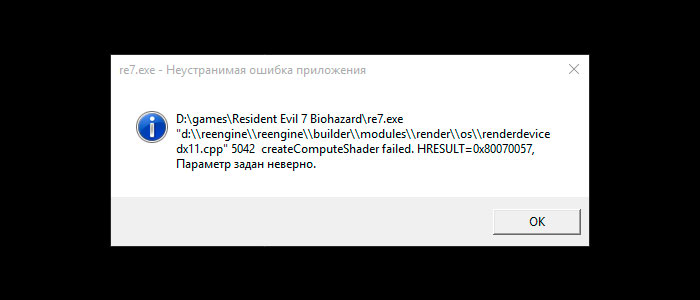
Ошибка при запуске HRESULT: 0x80070057
Однако следует учесть, что такая ошибка 0x80070057 появляется не очень часто, однако у некоторых пользователей она все-таки бывает. Как можно с ней справиться?
Основные причины появления 0x80070057
К основным причинам появления ошибки 0x80070057 можно отнести следующие:
- Нарушения в работе одной или нескольких динамических библиотек. Связано это может как с различными вредоносными и вирусными файлами, так и с некорректным выключением компьютера. Обычно из-за этих причин операционная система не способна найти несколько крайне важных файлов, из-за чего и появляется ошибка с такой кодировкой.
- Разделители представлены теми символами, которые отличаются от точки.
Также проблема может появиться и во время установки ОС Windows. Здесь можно отметить такие причины, как:
Как же можно разобраться с ошибкой 0x80070057?
Способ N1: Изменение десятичных разделителей
Как уже было сказано выше, 0x80070057 может появится из-за незначительного регионального отличия, а именно из-за десятичного разделителя. Все, что нужно сделать пользователю – это лишь изменить десятичный разделитель, после чего проблема архивации ОС будет решена. Для того, чтобы изменить десятичный разделитель, следует сделать следующее:
- Открыть ПУ
- Открыть параметры часов, региона и языка.
- Перейти в «Форматы».
- Нажать на дополнительные параметры.
- Найти «Десятичный разделитель» и поставить значение «.».
- Сохранить изменения и перезагрузить ОС.
После этого пользователю нужно воспользоваться архивацией Windows еще раз и убедиться в разрешении проблемы с 0x80070057. Чаще всего проблема заключается именно в этом.
Способ N2: переименование каталога SoftwareDistribution
Для того, чтобы исправить ошибку таким методом, необходимо зажать те же две кнопки Winr+R, а в открытом после этого окне следует ввести параметр %SystemRoot%, а после этого нажать на кнопку Enter.
После этого необходимо прокрутить страницу до самого низа и нажать выбрать там папку под названием SoftwareDistribution. Ее необходимо переименовать в папку SoftwareDistributon.old и перезагрузить компьютер. Проблема должна будет исчезнуть.
Способ N3: Изменение реестра
Ошибка 0x80070057 также может быть связана с реестром. В таком случае нужно установить в реестр Windows определенный раздел. Для этого нужно:
- Нажат на Win+R.
- Написать regedit.exe.
- Найти раздел System в HKEY_LOCAL_MACHINE (дальше software – Policies – Microsoft).
- Нажать в разделе System ПКМ на любое пустое место и выбрать пункт создать параметр Dword.
- Дать параметру название CopyFileBufferedSynchronousIo.
- Нажать ПКМ и перейти в пункт «изменить».
- Выставить этому параметру значение, равное единице.
- Сохранить все произведенные изменения и перезагрузить компьютер.
После перезагрузки системы можно проверить, была ли исправлена ошибка HRESULT: 0x80070057, и проверить это можно в этот раз при помощи одного из стандартных средств операционной системы. В данном случае это будет такой способ, как архивация файлов Windows.
В том случае, если у пользователя по какой-либо причине не вышло воспользоваться подобным методом по какой-либо причине, пользователь всегда может воспользоваться профессиональным Microsoft средством. Этим средством является Fix it. Программа позволяет без помощи и действий пользователя автоматически исправить любые неполадки с реестром Windows и с процессом архивации.
В чем особенность программы Microsoft Fix it
Программное обеспечение Fix it – это бесплатно распространяющая утилита, необходимая для того, чтобы исправить ошибки в операционной системе. Главная задача этой программы – продиагностировать операционную систему и исправить ошибки. Многие специалисты рекомендуют применять это приложение любому неопытному пользователю, если он только начал изучать компьютер.
Важно учесть, что эта программа подходит лишь для версий XP и 7. Для всех иных операционных систем той же компании рекомендуется использовать более модифицированную и новую версию этого же программного обеспечения.
Приложение автоматически найдет все проблемы, появляющиеся в работе операционной системе, и все, что для этого необходимо сделать – это нажать на соответствующую кнопку и подождать несколько минут.
В заключение
Любой из способов сможет помочь в тех случаях, когда пользователь столкнется с проблемой hresult 0x80070057, однако следует производить все действия осторожно, особенно если дело касается реестра.
Derdevicedx11 cpp 5644 createcomputeshader failed hresult 0x80070057
«d://reengine//reengine//gitroot//runtime//modules//render//os//renderdevicedx11.cpp» 5627 createComputeShader failed. hresult=0x80070057, paremeter not correct
I had the exact same problem as everyone here (renderdevicedx11.cpp» 5627 createComputeShader failed) and I’ll tell you what finally worked for me after 2 hours of brainstorming. This may look complicated but all we’re doing here is cleanly uninstalling the old driver and cleanly installing the new one, so that the old and new don’t override.
If you just install the latest driver on top of the old one, it messes things up, so what I did was completely uninstall the old driver with DDU uninstaller and then do a proper, clean install of the new one. Before doing this, I suggest downloading the latest GPU driver so that it’s well prepared [for me it was 417.35]
1. Download DDU https://www.guru3d.com/files-details/display-driver-uninstaller-download.html
2. Boot the system in Safe Mode
3. Launch DDU and select your GPU, then click «Clean and Restart».
4. This will fully uninstall the driver without a trace and the computer will restart.
5. Once the computer restarts, launch the latest GPU driver installation.
6. Choose Custom installation and only check Graphics Driver and PHYSX, also make sure that Clean Install is checked. This will clear your previous profiles and settings but if you don’t use them anyway, it’s irrelevant.
7. Install the driver and when asked, restart the computer.
8. Launch the game and hopefully it works like it did for me.
If it still doesn’t work, another thing you could try installing is «Platform Update for Windows 7», found here: https://www.microsoft.com/en-us/download/details.aspx?id=36805 because the error seems to be related with DirectX11 and this file updates it.
I was very sceptical about these working, but now as you can see from my profile I beat the demo! Please let me know if this works for you!