- Density Plots in Python – A Comprehensive Overview
- Why understand histograms before learning about density plots?
- Understanding The Density Plot
- Density Plots with Python
- 1. Using Python scipy.stats module
- 2. Using Seaborn kdeplot module
- 3. Using pandas plot function
- 4. Using Seaborn distplot
- Conclusion
- Density Plot with Matplotlib in Python
- Method#1 – Using Seaborn with Matplotlib
- Method#2 – Using SciPy with Matplotlib
- Method# 3 – Using Pandas
- Method# 4 – Seaborn distplot
Density Plots in Python – A Comprehensive Overview
It’s a good practice to know your data well before starting to apply any machine learning techniques to it.
As a good ML practitioner we should be asking some questions like:
- What does our data look like?
- Is it normally distributed or have some different shape?
- The algorithms we are intending to apply to our data, does it has any underlying assumptions about the distribution of data?
Addressing such questions right after we acquire our data can drastically improve the results in later stages and save us a lot of time.
Plots like Histograms and Density plots serve us the ways to answer the questions mentioned above.
Why understand histograms before learning about density plots?
A density plot is very analogous to a histogram. We visualize the shape of the distribution using a histogram. Histograms can be created by binning the data and keeping the count of the number of observations in each bin. In a histogram, the y-axis usually denotes bin counts, but can also be represented in counts per unit also called as densities.

If we increase the number of bins in our histogram, the shape of distribution appears to be smoother.

Now, imagine a smooth continuous line passing through top of each bin, creating an outline of the shape of our distribution. The result we get is what we call as a Density Plot.

Understanding The Density Plot
We can think of density plots as plots of smoothened histograms, which is quite intuitive by now. Density plots mostly use a kernel density estimate. Kernel density estimate allows smoother distributions by smoothing out the noise.
The density plots are not affected by the number of bins which is a major parameter when histograms are to be considered, hence allows us to better visualize the distribution of our data.
So in summary it is just like a histogram but having a smooth curve drawn through the top of each bin.
Several shapes of distributions exist out there in the wild. Some of the most common shapes that we would very likely to encounter are:

Density Plots with Python
We can plot a density plot in many ways using python. Let’s look at a few commonly used methods.
1. Using Python scipy.stats module
scipy.stats module provides us with gaussian_kde class to find out density for a given data.
import numpy as np import matplotlib.pyplot as plt from scipy.stats import gaussian_kde data = np.random.normal(10,3,100) # Generate Data density = gaussian_kde(data) x_vals = np.linspace(0,20,200) # Specifying the limits of our data density.covariance_factor = lambda : .5 #Smoothing parameter density._compute_covariance() plt.plot(x_vals,density(x_vals)) plt.show()

We change the function covariance_factor of the gaussian_kde class and pass on different values to get a smoother plot. Remember to call _compute_covariance after changing the function.
2. Using Seaborn kdeplot module
Seaborn module provides us with an easier way to execute the above task with much more flexibility.
import numpy as np import seaborn as sb import matplotlib.pyplot as plt data = np.random.normal(10,3,300) #Generating data. plt.figure(figsize = (5,5)) sb.kdeplot(data , bw = 0.5 , fill = True) plt.show()

Seaborn kdeplot requires a univariate data array or a pandas series object as an input argument to it. The bw argument is equivalent to covariance_factor of the gaussian_kde class demonstrated above. we can pass on fill = False to not fill the area under the curve with color and will simply plot a curve.
3. Using pandas plot function
Pandas plot method can also be used to plot density plots by providing kind = ‘density’ as an input argument to it.
import numpy as np import pandas as pd import matplotlib.pyplot as plt x_values = np.random.random(10,3,300) #Generating Data df = pd.DataFrame(x_values, columns = ['var_name'] ) #Converting array to pandas DataFrame df.plot(kind = 'density)

4. Using Seaborn distplot
We can also use the seaborn distplot method to visualize the distribution of continuous numerical data. seaborn.distplot( ) method requires a univariate data variable as an input parameter which can be a pandas Series, 1d-array, or a list.
Some important arguments we can pass to seaborn.distplot( ) to tweak the plot according to our needs are:
- hist : (Type – Bool) whether to plot a histogram or not.
- kde : (Type – Bool) whether to plot a gaussian kernel density estimate.
- bins : (Type – Number) specifying the number of bins in the histogram.
- hist_kws :(Type – Dict) dict of Keyword arguments for matplotlib.axes.Axes.hist()
- kde_kws :(Type – Dict) Keyword arguments for kdeplot() passed as a dictionary.
import numpy as np import matplotlib.pyplot as plt import seaborn as sb data = np.random.normal(10, 3, 1000) #Generating data randomly from a normal distribution. sb.set_style("whitegrid") # Setting style(Optional) plt.figure(figsize = (10,5)) #Specify the size of figure we want(Optional) sb.distplot(x = data , bins = 10 , kde = True , color = 'teal'\ , kde_kws=dict(linewidth = 4 , color = 'black')) plt.show() 
To know more about seaborn distplot you can refer to this article on seaborn Distplots.
Conclusion
That brings us to the end of the article! We hope that you’ve learned a lot about different density plots today. You can read these articles to learn more about the Pandas and Matplotlib libraries that we’ve used in this article.
Density Plot with Matplotlib in Python
In this Python tutorial we will explore how to create a Density Plot using the Matplotlib Graphing Library. We will discuss a variety of different methods, each with it’s own unique twist. But before that, what exactly is a Density plot?
A density plot is a representation of the distribution of a numeric variable. We typically use Density plots to observe how a certain variable’s values are distributed in the dataset. Density plots are actually a variation of Histograms, a more smoothed out version that makes it easier to observe the distribution.
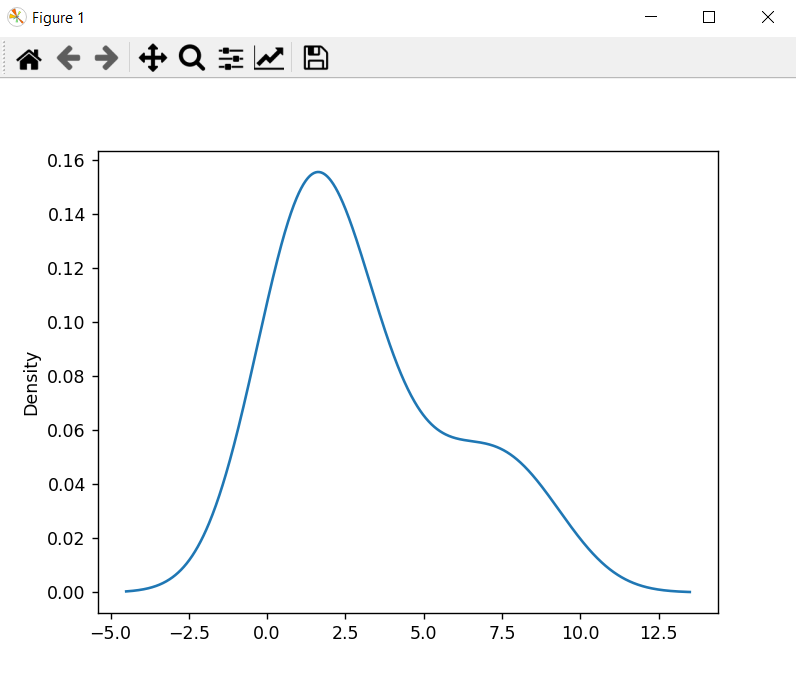
Method#1 – Using Seaborn with Matplotlib
The bw in bw_method stands for “bandwidth”. This is a setting that determines how smooth the resulting density plot will be.
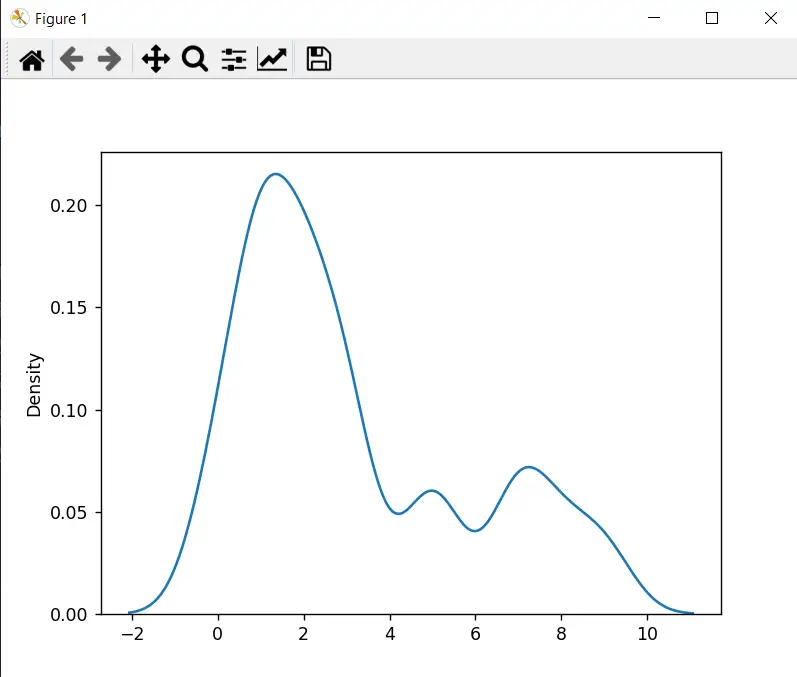
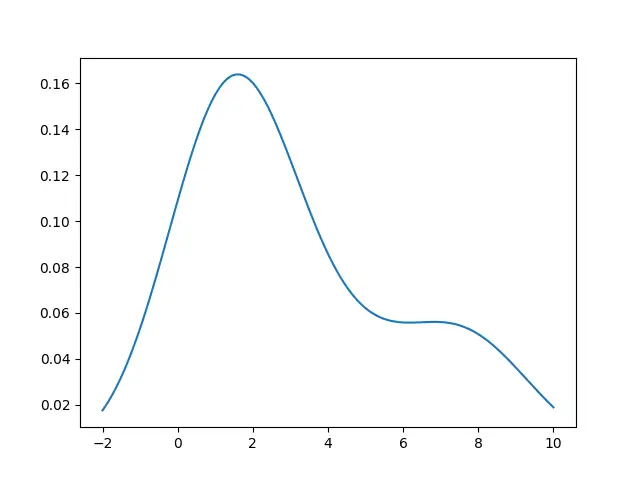
import matplotlib.pyplot as plt import seaborn as sns data = [7,2,3,3,9,0,1,1,2,3,1,2,0,7,1,5,5,2,1,8] sns.kdeplot(data, bw_method=0.25) plt.show()
Older versions of seaborn may use the bw parameter instead of bw_method . This is now deprecated, and may be discontinued in future releases, so switch to using bw_method instead.
bw_method accepts both strings and scalar values. It’s default value is “scott” which makes it use an equation known as Scott’s Rule. You may wish to adjust this value however, or use alternative equations according to your data for an accurate density plot.
Here is the graph when using the default values for bw_method :
Method#2 – Using SciPy with Matplotlib
Another library that we can use to generate our density plot is SciPy. This library is in-fact being used in the background for many other libraries, such as Seaborn for computing distributions.
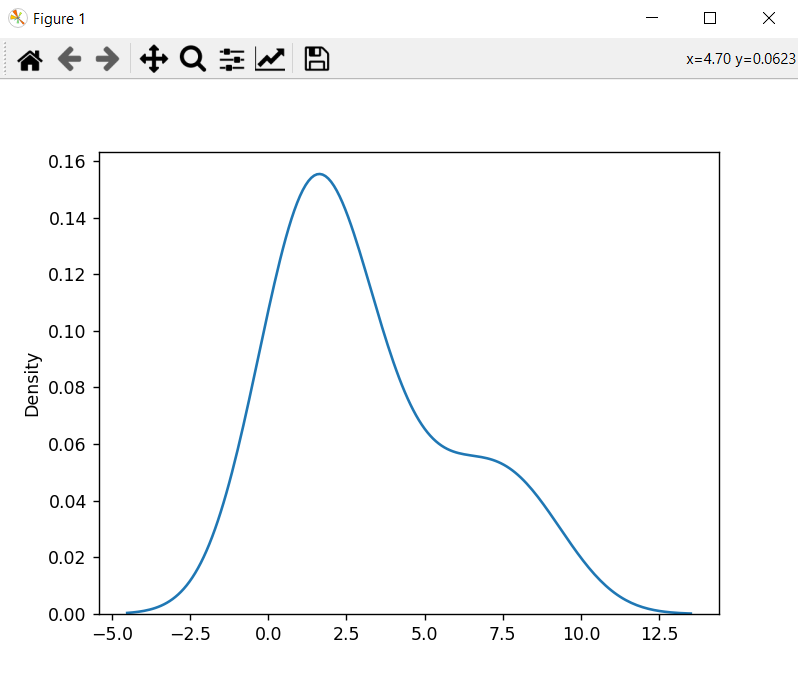
import matplotlib.pyplot as plt import numpy as np from scipy.stats import kde data = [7,2,3,3,9,0,1,1,2,3,1,2,0,7,1,5,5,2,1,8] density_function = kde.gaussian_kde(data, bw_method=0.3) x = np.linspace(-2, 10, 300) plt.plot(x, density_function(x)) plt.show()
The output for the above code:
This may vary from dataset to dataset, but SciPy is generally faster than the other methods mentioned in this tutorial.
Method# 3 – Using Pandas
We can also use the Pandas library with Matplotlib to generate a Density plot.
import matplotlib.pyplot as plt import pandas as pd data = [7,2,3,3,9,0,1,1,2,3,1,2,0,7,1,5,5,2,1,8] pd.Series(data).plot(kind='density') plt.show()
You can also adjust the bandwidth here by passing in the bw_method parameter with an appropriate value.
import matplotlib.pyplot as plt import pandas as pd data = [7,2,3,3,9,0,1,1,2,3,1,2,0,7,1,5,5,2,1,8] pd.Series(data).plot(kind='density', bw_method=0.5) plt.show()
Method# 4 – Seaborn distplot
distplot is a special function inside that can create various types of graphs based off the parameters passed to it.
import matplotlib.pyplot as plt import seaborn as sns import pandas as pd data = [7,2,3,3,9,0,1,1,2,3,1,2,0,7,1,5,5,2,1,8] sns.distplot(data, kde_kws=) plt.show()
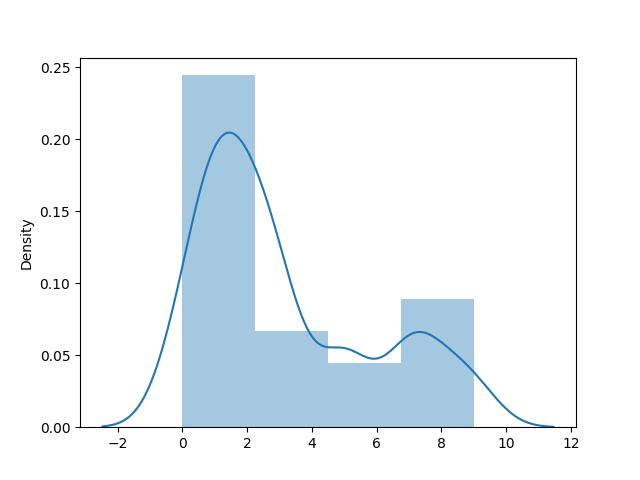
Passing in kde=false will disable the density plot. Likewise, passing in hist=true will disable the histogram. By default both of these true, so we can see both a density plot and histogram in the above output.
This marks the end of the Density Plot with Matplotlib in Python Tutorial. Any suggestions or contributions for CodersLegacy are more than welcome. Questions regarding the tutorial content can be asked in the comments section below.