- Create Custom Captcha in HTML CSS & JavaScript
- Create Custom Captcha in JavaScript [Source Codes]
- Создание простой капчи на PHP
- Исходные коды капчи
- Верстка формы
- Генерация кода капчи и изображения
- Скрипт для обновления капчи на форме
- Написание обработчика формы
- JavaScript для отправки формы на сервер через AJAX
- Установака recaptcha v2 на сайт
- Регистрация сайта в сервисе ReCaptcha
- Вывод на сайте
- Одна капча на странице
- Пример:
- Несколько recaptcha на странице
- Пример:
- Проверка заполнения капчи в PHP
- Вариант на curl (через POST)
- Вариант на file_get_contents
- Проверка reCAPTCHA в JS/jQuery
Create Custom Captcha in HTML CSS & JavaScript
Hey friends, today in this blog, you’ll learn how to create Custom Captcha in HTML CSS & JavaScript. In the earlier blog, I have shared how to Detect User Browser using JavaScript, and it’s time to create a simple captcha program. Mostly, Captcha is used on the comment or contact form of the websites to restrict robots (bot) from commenting on a blog post or sending a message to the admin. There can be random images or codes in the captcha, and the users must have to select correct images or match the codes to complete their task. In this small project [Custom Captcha in JavaScript], there is an image with the random 6 characters and numbers. You can also refresh the captcha code and get a new one using the reload button. In the input field, you have to enter the captcha codes that are shown on the image. If your codes matched with the captcha codes, then there is appears a success message else there appears an error message. If you’ve matched the codes, then after 4 seconds there will be generated a new one captcha code. Recommended Book: Rich Dad Poor Dad Pdf I hope you liked this simple captcha program and want to get source codes but don’t worry I have given codes and source code files at the bottom of this page from where you can copy-paste codes the source code files. But before copying codes, let’s understand the basic codes and concepts of this program. At first, in the JavaScript file, I have stored all characters and numbers in the array, then inside for loop, using Math.random() function I got 6 random characters from the given array. And passed these codes or characters in the captcha by adding space between each character. After this, I got user-entered values, split them, and joined them with space (‘ ‘) so users don’t need to enter spaces to match the codes. Once I joined the user values then I matched this user value with the captcha codes. If the value is not matched I’ve shown an error message, and if the value is matched I’ve shown a success message and generate the new random codes after 4 seconds using the setTimeout() function.
Create Custom Captcha in JavaScript [Source Codes]
To create this program [Custom Captcha in JavaScript]. First, you need to create three Files: HTML, CSS & JavaScript File. After creating these files just paste the following codes into your file. First, create an HTML file with the name of index.html and paste the given codes into your HTML file. You’ve to create a file with .html extension and remember the image that is used on this program will not appear.
Captcha in JavaScript Last, create a JavaScript file with the name of script.js and paste the given codes in your JavaScript file. Remember, you’ve to create a file with .js extension.
const captcha = document.querySelector(".captcha"), reloadBtn = document.querySelector(".reload-btn"), inputField = document.querySelector(".input-area input"), checkBtn = document.querySelector(".check-btn"), statusTxt = document.querySelector(".status-text"); //storing all captcha characters in array let allCharacters = ['A', 'B', 'C', 'D', 'E', 'F', 'G', 'H', 'I', 'J', 'K', 'L', 'M', 'N', 'O', 'P', 'Q', 'R', 'S', 'T', 'U', 'V', 'W', 'X', 'Y', 'Z', 'a', 'b', 'c', 'd', 'e', 'f', 'g', 'h', 'i', 'j', 'k', 'l', 'm', 'n', 'o', 'p', 'q', 'r', 's', 't', 'u', 'v', 'w', 'x', 'y', 'z', 0, 1, 2, 3, 4, 5, 6, 7, 8, 9]; function getCaptcha()< for (let i = 0; i < 6; i++) < //getting 6 random characters from the array let randomCharacter = allCharacters[Math.floor(Math.random() * allCharacters.length)]; captcha.innerText += ` $`; //passing 6 random characters inside captcha innerText > > getCaptcha(); //calling getCaptcha when the page open //calling getCaptcha & removeContent on the reload btn click reloadBtn.addEventListener("click", ()=>< removeContent(); getCaptcha(); >); checkBtn.addEventListener("click", e =>< e.preventDefault(); //preventing button from it's default behaviour statusTxt.style.display = "block"; //adding space after each character of user entered values because I've added spaces while generating captcha let inputVal = inputField.value.split('').join(' '); if(inputVal == captcha.innerText)< //if captcha matched statusTxt.style.color = "#4db2ec"; statusTxt.innerText = "Nice! You don't appear to be a robot."; setTimeout(()=>< //calling removeContent & getCaptcha after 2 seconds removeContent(); getCaptcha(); >, 2000); >else < statusTxt.style.color = "#ff0000"; statusTxt.innerText = "Captcha not matched. Please try again!"; >>); function removeContent() That’s all, now you’ve successfully created a Custom Captcha in HTML CSS & JavaScript. So this is all for today.
Thanks! Also Read
6 Key Lesson’s to Learn From Rich Dad Poor Dad for Programmers. For more details please visit Code With Imam.
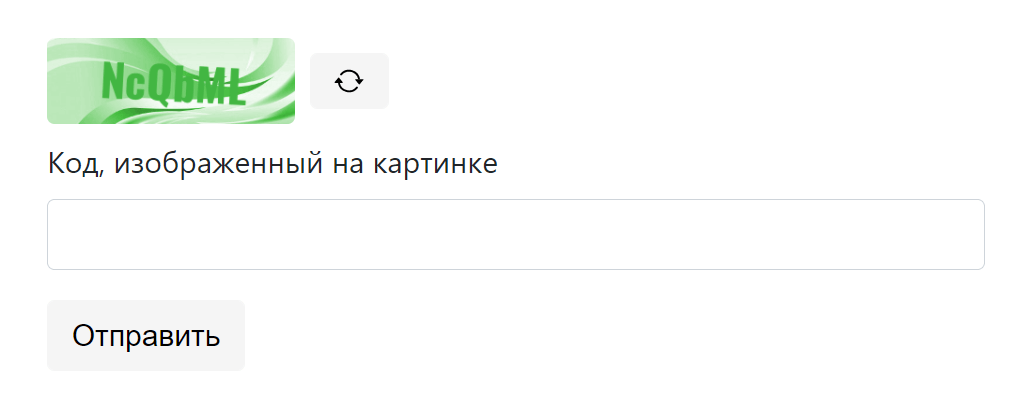
Создание простой капчи на PHP
Captcha (капча) – это некий тест, который человек решает очень легко, а робот – нет (научить компьютер решать его крайне сложно и затруднительно).
Другими словами, основная цель капчи – это определить кем является пользователь: человеком или роботом .
Используется Captcha на сайте для защиты от спама и повышенной нагрузки, которые создают роботы. Капчу можно очень часто встретить в формах регистрации, входа, отправки сообщений, при скачивании файлов и многих других местах.
В большинстве случаев капча отображается как некоторый искаженный или наложенный на фон текст, который посетителю сайта необходимо разобрать и ввести его в некоторое поле. Кроме текста на фоне используется и другие алгоритмы: найти среди множества картинок правильные, собрать пазл, переместить слайдер, нарисовать связь между несколькими картинками и т.д.
Исходные коды капчи
Исходные коды капчи расположены на GitHub: itchief/captcha.

Процесс разработки капчи представлен в виде следующих этапов:
- верстка формы;
- создания файла «captcha.php» для генерация кода капчи и изображения;
- написание обработчика для формы (файл «process-form.php»);
- написание JavaScript для отправки формы на сервер через AJAX и обработки ответа.
Верстка формы
Разработку Captcha начнём с создания формы. Для простоты форма будет состоять из капчи и кнопки отправить:
Форма успешно отправлена!