- How to Add Border to Image in CSS
- Create HTML
- Add CSS
- Example of adding a border to the image:
- Result
- How to Add Styling to the Border Image
- Example of adding a double border to the image:
- Example of styling the double border of the image:
- Example of framing an image with a colored background:
- Example of adding a caption:
- Example of specifying borders separately:
- Example of styling the border image with the border-style property:
- How to Specify Each Corner and Create Circle Borders
- Example of specifying each corner of the image border:
- Example of adding a circle border to the image:
- How to Add a Drop Shadow Under the Image Border
- Example of adding a drop shadow:
- Two different border styles:
- Here’s the result:
- HTML Image Borders
- Variations of Image Borders
- Background Images
- Linked Images
- CSS Styling Images
- Example
- Example
- Thumbnail Images
- Example
- Example
- Responsive Images
- Example
- Center an Image
- Example
- Polaroid Images / Cards
- Example
- Transparent Image
- Example
- Image Text
- Example
- Image Filters
- Example
- Image Hover Overlay
- Example
- Example
- Example
- Example
- Example
- Example
- Flip an Image
- Example
- Responsive Image Gallery
- Example
- Image Modal (Advanced)
- Example
How to Add Border to Image in CSS
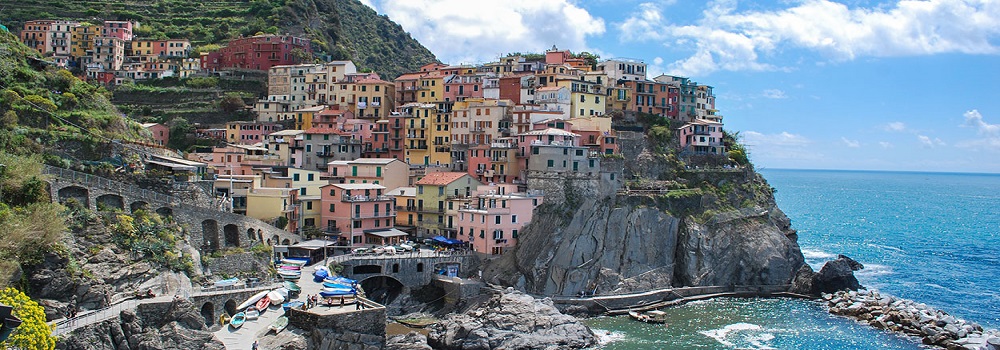
Images with borders or frames make the image look more influential and differ from the other content on the page. In this snippet, we will show how to add a border to the image.
Create HTML
img src="/uploads/media/default/0001/01/b408569013c0bb32b2afb0f0d45e93e982347951.jpeg" alt="Nature">Add CSS
- Add style to your
element.
- Define the width of the image.
- Define the width, style, and color of the border with the help of the border property.
img < width: 270px; border: 1px solid black; >Example of adding a border to the image:
html> html> head> title>Title of the document title> style> img < width: 270px; border: 1px solid black; > style> head> body> img src="/uploads/media/default/0001/01/b408569013c0bb32b2afb0f0d45e93e982347951.jpeg" alt="Nature"> body> html>Result

How to Add Styling to the Border Image
To change the border color, you can add the CSS color property. If you want to create a double border, you need to add the padding property to the style of your image.
Example of adding a double border to the image:
html> html> head> title>Title of the document title> style> img < width: 650px; padding: 1px; border: 1px solid #021a40; > style> head> body> h2>Double Border Example h2> img src="/uploads/media/default/0001/01/b408569013c0bb32b2afb0f0d45e93e982347951.jpeg" alt="Nature"> body> html>It is also possible to have a double border with different inside border color. For that purpose, add the background-color property.
Example of styling the double border of the image:
html> html> head> title>Title of the document title> style> img < width: 650px; padding: 5px; border: 8px solid #999999; background-color: #e6e6e6; > style> head> body> img src="/uploads/media/default/0001/01/b408569013c0bb32b2afb0f0d45e93e982347951.jpeg" alt="Nature"> body> html>In our next example, we add a border to the image and use a colored background. If you want to increase the width of the frame, add more padding.
Example of framing an image with a colored background:
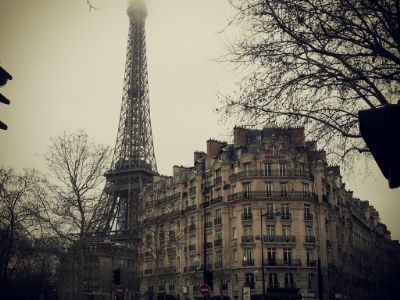
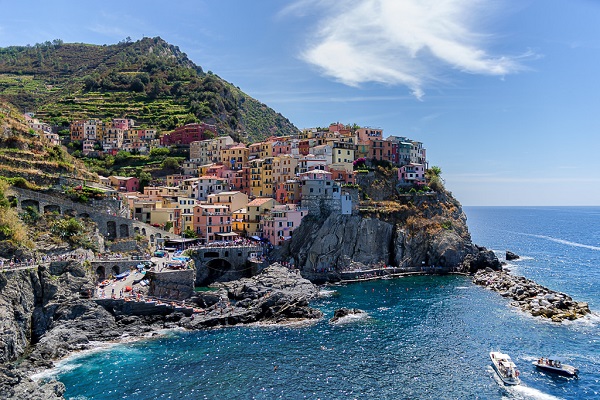
html> html> head> title>Title of the document title> style> .nature < background: #b0afac; padding: 12px; border: 1px solid #999; > style> head> body> img src="/uploads/media/default/0001/02/7f55a71df52da6d26ef4963f78aed38d64a7874c.jpeg" height="256" alt="Nature" class="nature"> body> html>It is also possible to frame an image with a caption.
Example of adding a caption:
html> html> head> title>Title of the document title> style> .img-frame-cap < width: 200px; background: #fff; padding: 18px 18px 2px 18px; border: 1px solid #999; > .caption < text-align: center; margin-top: 4px; font-size: 12px; > style> head> body> div class="img-frame-cap"> img src="/uploads/media/default/0001/02/7f55a71df52da6d26ef4963f78aed38d64a7874c.jpeg" width="200" height="256" alt="Nature"> div class="caption">Nature div> div> body> html>You can also specify borders separately. For that purpose, use CSS border-bottom, border-top, border-left, and border-right properties and set different width values for each. Let’s see an example in which the border-bottom property is set to have an effect like a banner.
Example of specifying borders separately:
html> html> head> title>Title of the document title> style> img < width: 225px; border: 8px solid #ccc; border-bottom: 130px solid #ccc; > style> head> body> img src="/uploads/media/default/0001/02/7f55a71df52da6d26ef4963f78aed38d64a7874c.jpeg" alt="Nature"> body> html>To add styling to your image border, add the border-style property to the element.
Example of styling the border image with the border-style property:
html> html> head> title>Title of the document title> style> img < width: 650px; padding: 5px; border: 12px #1c87c9; border-style: dashed; background-color: #eee; > style> head> body> img src="/uploads/media/default/0001/01/b408569013c0bb32b2afb0f0d45e93e982347951.jpeg" alt="Nature"> body> html>How to Specify Each Corner and Create Circle Borders
To specify each corner of the border, you need to use the CSS border-radius property. The border-radius property can have one to four values. Let’s see an example with four values.
Remember that the first value applies to the top-left corner, the second value applies to the top-right edge, the third value refers to the bottom-right corner, and the fourth value applies to the bottom-left corner.
Example of specifying each corner of the image border:
html> html> head> title>Title of the document title> style> img < width: 650px; padding: 2px; border: 3px solid #1c87c9; border-radius: 15px 50px 800px 5px; > style> head> body> img src="/uploads/media/default/0001/01/b408569013c0bb32b2afb0f0d45e93e982347951.jpeg" alt="Nature"> body> html>Instead of trying to nest the image inside another element, or editing every image in photoshop to achieve a proper look for your image border, you need to set the value of the border-radius property to «50%» or «999em». Set the same width and height values.
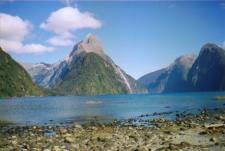
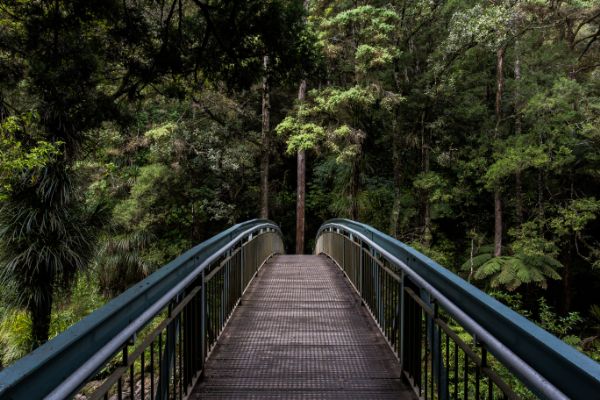
Example of adding a circle border to the image:
html> html> head> title>Title of the document title> style> div.imageborder < border-radius: 999em; width: 350px; height: 350px; padding: 5px; line-height: 0; border: 10px solid #000; background-color: #eee; > img < border-radius: 999em; height: 100%; width: 100%; margin: 0; > style> head> body> h2>Circle Border Example h2> div class="imageborder"> img src="/uploads/media/default/0001/01/4982c4f43023330a662b9baed5a407e391ae6161.jpeg" height="350" width="350" alt="iceland"/> div> body> html>How to Add a Drop Shadow Under the Image Border
To add a drop shadow, we need to use the box-shadow property. Also, set the display property to «block».
Example of adding a drop shadow:
html> html> head> title>Title of the document title> style> .nature < display: block; background: transparent; padding: 8px; border: 1px solid #ccc; box-shadow: 10px 10px 10px #999; > style> head> body> img src="/uploads/media/default/0001/02/7f55a71df52da6d26ef4963f78aed38d64a7874c.jpeg" alt="Nature" class="nature"> body> html>Two different border styles:
Let’s get into another cool example. Here we’ll make two different border styles for our image. To this, we’ll use the box-shadow, border, and outline properties.
html> html lang="en"> head> title>Document title> head> style> .container < padding: 20px; > #nature-image < border: 5px solid violet; /* inner border */ outline: 3px dotted tomato; /* outer border */ outline-offset: 10px; /* gives some space between two borders */ > style> body> div class="container"> img src="https://i.ibb.co/fMTGnRz/pexels-photo-572897.jpg" alt="snow-nature" height="300px" width="300px" id="nature-image" /> div> body> html>Here’s the result:
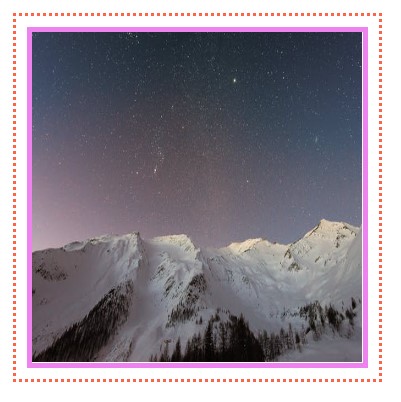
It’s pretty self-explanatory. We used an image tag id and selected it in our CSS. Then we used the border for the inner border and an outline for the outer border around our image. And finally, by using outline-offset , we make room between two borders.
Another way of having two borders around an image is by using the box-shadow property. It’s pretty straightforward, and just one line of code and, in some cases, is so helpful.
html> html lang="en"> head> title>Document title> head> style> .container < padding: 20px; > #nature-image < box-shadow: 0 0 0 5px violet, 0 0 0 10px tomato; /* add this line, values are inset | offset-x | offset-y | color , we just use the color */ > style> body> div class="container"> img src="https://i.ibb.co/fMTGnRz/pexels-photo-572897.jpg" alt="snow-nature" height="300px" width="300px" id="nature-image" /> div> body> html>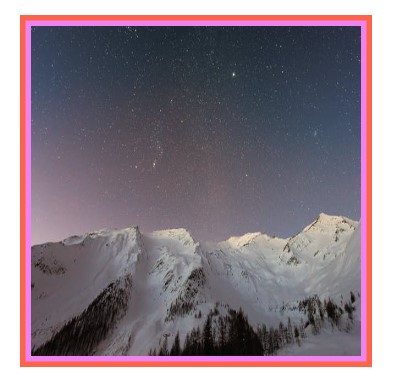
The tip is that the second colour size should be doubled if you want two equal-sized borders. For example, we have the violet-coloured border set to 5px, and then we set the tomato-coloured one to 10 px.
Hope you’ve enjoyed the examples.
HTML Image Borders
This page contains copy/paste HTML image border codes. These are codes that create borders around your HTML images. You can take these codes and modify them for your own use.
You create HTML image borders by using Cascading Style Sheets (CSS). Specifically, you use the CSS border property. You can also use other CSS properties to create HTML borders (such as border-width , border-style and border-color ), but these don’t do anything that border doesn’t do. That’s because border is shorthand for those other properties.
When you use the border property, you need to supply three parameters; Width, Style, and Color. The code looks something like this: border:1px solid black
Below are examples of HTML image borders. The code is provided and you can copy/paste and modify as you wish.
| Source Code | Result |
|---|---|
 |
| Source Code | Result |
|---|---|
| |
| Source Code | Result |
|---|---|
| |
| Source Code | Result |
|---|---|
| |
| Source Code | Result |
|---|---|
| |
| Source Code | Result |
|---|---|
| |
Variations of Image Borders
You can create different variations of your HTML image borders if you like. For example, you could have a different style of border on each side of your image. Or you could have a different width or color on different sides. You could also choose to only have a border on one side. Be creative!
CSS provides four properties for defining border properties for each side of your image. These are border-top , border-right , border-bottom , and border-left .
Below are some examples of these types of variations.
| Source Code | Result |
|---|---|
| Source Code | Result |
|---|---|
You can also combine the border property with the other properties. For example, you can set the border properties of all sides using border property, then override one or more sides using the other, more specific properties.
| Source Code | Result |
|---|---|
| |
Background Images
Another way to add an image to a web page is to add the image as a background image.
Linked Images
You can also have linked images on your web page. These are images that, when clicked on, open another web page or URL. To create a linked image, see our HTML Links page.
CSS Styling Images
Use the border-radius property to create rounded images:
Example
Example
Thumbnail Images
Use the border property to create thumbnail images.
Example
img <
border: 1px solid #ddd;
border-radius: 4px;
padding: 5px;
width: 150px;
>
Example
img <
border: 1px solid #ddd;
border-radius: 4px;
padding: 5px;
width: 150px;
>
img:hover box-shadow: 0 0 2px 1px rgba(0, 140, 186, 0.5);
>
Responsive Images
Responsive images will automatically adjust to fit the size of the screen.
Resize the browser window to see the effect:
If you want an image to scale down if it has to, but never scale up to be larger than its original size, add the following:
Example
Tip: Read more about Responsive Web Design in our CSS RWD Tutorial.
Center an Image
To center an image, set left and right margin to auto and make it into a block element:
Example
Polaroid Images / Cards

Example
div.polaroid <
width: 80%;
background-color: white;
box-shadow: 0 4px 8px 0 rgba(0, 0, 0, 0.2), 0 6px 20px 0 rgba(0, 0, 0, 0.19);
>
div.container text-align: center;
padding: 10px 20px;
>
Transparent Image
The opacity property can take a value from 0.0 — 1.0. The lower value, the more transparent:
Example
Image Text
How to position text in an image:
Example
Image Filters
The CSS filter property adds visual effects (like blur and saturation) to an element.
Note: The filter property is not supported in Internet Explorer or Edge 12.
Example
Change the color of all images to black and white (100% gray):
Tip: Go to our CSS filter Reference to learn more about CSS filters.
Image Hover Overlay
Create an overlay effect on hover:
Example
Example
Example
Example
Example
Example
Flip an Image
Move your mouse over the image:
Example
Responsive Image Gallery
CSS can be used to create image galleries. This example use media queries to re-arrange the images on different screen sizes. Resize the browser window to see the effect:


Example
.responsive <
padding: 0 6px;
float: left;
width: 24.99999%;
>
@media only screen and (max-width: 700px) .responsive width: 49.99999%;
margin: 6px 0;
>
>
@media only screen and (max-width: 500px) .responsive width: 100%;
>
>
Tip: Read more about Responsive Web Design in our CSS RWD Tutorial.
Image Modal (Advanced)
This is an example to demonstrate how CSS and JavaScript can work together.
First, use CSS to create a modal window (dialog box), and hide it by default.
Then, use a JavaScript to show the modal window and to display the image inside the modal, when a user clicks on the image:
Example
// Get the modal
var modal = document.getElementById(‘myModal’);
// Get the image and insert it inside the modal — use its «alt» text as a caption
var img = document.getElementById(‘myImg’);
var modalImg = document.getElementById(«img01»);
var captionText = document.getElementById(«caption»);
img.onclick = function() modal.style.display = «block»;
modalImg.src = this.src;
captionText.innerHTML = this.alt;
>
// Get the element that closes the modal
var span = document.getElementsByClassName(«close»)[0];
// When the user clicks on (x), close the modal
span.onclick = function() <
modal.style.display = «none»;
>