- Стилизация Input File
- 1. Стилизация input type file
- 1.1 Кнопка «Прикрепить файл» — HTML, CSS
- 1.2 Кнопка «Прикрепить файл» — JavaScript
- 2. Drag-and-drop загрузка файлов
- 2.1 Drag-and-drop — HTML, CSS
- 2.2 Drag-and-drop загрузка файлов — JavaScript
- 3. Совместное использование кнопки «Прикрепить файл» и Drag-and-drop
- 4. Отправка множества input file multiple
- Статьи из данной категории:
- Custom styled input type file upload button with pure CSS
- Markup
- Styling
- Styling the upload file block
- Styling the upload file button
- Styling the the click/drop zone
- Handling drag and drop events
- Demo
- 20 Best CSS & Javascript File Upload Examples
- Drag & Drop
- File Upload & Image Preview
- Upload CSS Animation Ui
- File Upload Plugin
- File Upload With Style And Pure CSS
- Drag And Drop Upload Form Stylized (Html & CSS Only)
- Image Upload With Preview
- Nice Upload Form)
- Custom Animated Input File
- Bootstrapped Styled File Browse Button
- Pure CSS File Upload Field
- File Upload Dialog
- Image Uploader
- Dropzone Upload
- File Upload – Day 031
- A Simple Upload Form
- Box Content Uploader
- Bootstrap Multi Step Form With Progress Bar
- Attach Or Upload Files Modal
- Mock-up: Photos Using React, Fluxify And Bootstrap
- Related Posts :
Стилизация Input File
Сегодня будем стилизовать input type file. Т.к. стилизация тесно связана с обработкой input file на фронтенде, мы так же рассмотрим, как обработать выбранный файл и отправить на сервер. Скрипт будет работать для множества форм с возможностью не только загрузить файл при клике на кнопку, но так же перетаскиванием файла (drag-and-drop) в область загрузки. Если вам не нужен тот или иной функционал, вы легко сможете удалить часть кода.
1. Стилизация input type file
1.1 Кнопка «Прикрепить файл» — HTML, CSS
Сначала нам необходимо создать html-разметку.
- multiple — данный атрибут необходим, если вы хотите разрешить отправку более одного файла;
- accept — в данный атрибут запишите типы файлов (MIME-типы), которые разрешены для выбора.
Скроем input и стилизуем кнопку для загрузки файла.
.upload-file__input < opacity: 0; position: absolute; z-index: -1; overflow: hidden; width: 0.4px; height: 0.4px; >.upload-file__label < display: flex; justify-content: center; align-items: center; max-width: 240px; border: 2px dashed #150B22; padding: 9px 49px; border-radius: 6px; cursor: pointer; >.upload-file__icon < width: 30px; height: auto; margin-right: 11px; >.upload-file__label .upload-file__text, .upload-file__label .upload-file__icon path < transition: .25s ease; >.upload-file__label:hover .upload-file__text < color: #58862D; >.upload-file__label:hover .upload-file__icon path < fill: #58862D; >.upload-file__label:hover
1.2 Кнопка «Прикрепить файл» — JavaScript
document.addEventListener("DOMContentLoaded", () => < const forms = document.querySelectorAll("form"); const inputFile = document.querySelectorAll(".upload-file__input"); /////////// Кнопка «Прикрепить файл» /////////// inputFile.forEach(function(el) < let textSelector = document.querySelector(".upload-file__text"); let fileList; // Событие выбора файла(ов) el.addEventListener("change", function (e) < // создаём массив файлов fileList = []; for (let i = 0; i < el.files.length; i++) < fileList.push(el.files[i]); >// вызов функции для каждого файла fileList.forEach(file => < uploadFile(file); >); >); // Проверяем размер файлов и выводим название const uploadFile = (file) => < // файла 5 * 1024 * 1024) < alert("Файл должен быть не более 5 МБ."); return; >// Показ загружаемых файлов if (file && file.length > 1) < if ( file.length файла`; > if ( file.length > 4 ) < textSelector.textContent = `Выбрано $файлов`; > > else < textSelector.textContent = file.name; >> >); // Отправка формы на сервер const postData = async (url, fData) => < // имеет асинхронные операции // начало отправки // здесь можно оповестить пользователя о начале отправки // ждём ответ, только тогда наш код пойдёт дальше let fetchResponse = await fetch(url, < method: "POST", body: fData >); // ждём окончания операции return await fetchResponse.text(); >; if (forms) < forms.forEach(el => < el.addEventListener("submit", function (e) < e.preventDefault(); // создание объекта FormData let fData = new FormData(this); // Добавление файлов input type file let file = el.querySelector(".upload-file__input"); for (let i = 0; i < (file.files.length); i++) < fData.append("files[]", file.files[i]); // добавляем файлы в объект FormData() >// Отправка на сервер postData("./mail.php", fData) .then(fetchResponse => < console.log("Данные успешно отправлены!"); console.log(fetchResponse); >) .catch(function (error) < console.log("Ошибка!"); console.log(error); >); >); >); >; >);2. Drag-and-drop загрузка файлов
Структура останется прежней, т.к. наша первоначальная разметка вполне подойдёт для создания drag-and-drop области.
2.1 Drag-and-drop — HTML, CSS
Улучшим юсабилити путём добавления стилей для drag-and-drop .
/* drag and drop - "hover" */ .upload-file__label.hover .upload-file__text < color: #ffb300; >.upload-file__label.hover .upload-file__icon path < fill: #ffb300; >.upload-file__label.hover < border: 2px dashed #ffb300; >/* drag and drop - ошибка */ .upload-file__label.error .upload-file__text < color: #d32f2f; >.upload-file__label.error .upload-file__icon path < fill: #d32f2f; >.upload-file__label.error < border: 2px dashed #d32f2f; >/* drag and drop - файл(ы) успешно перетянут(ы) */ .upload-file__label.drop .upload-file__text < color: #388e3c; >.upload-file__label.drop .upload-file__icon path < fill: #388e3c; >.upload-file__label.drop
2.2 Drag-and-drop загрузка файлов — JavaScript
Теперь напишем JavaScript для обработки событий перетаскивания файлов на веб-страницу. А уже в следующем пункте рассмотрим, как использовать кнопку добавления файла и область Drag-and-drop одновременно.
document.addEventListener("DOMContentLoaded", () => < const forms = document.querySelectorAll("form"); /////////// Загрузка файлов при помощи «Drag-and-drop» /////////// const dropZone = document.querySelector(".upload-file__label"); const dropZoneText = document.querySelector(".upload-file__text"); const maxFileSize = 5000000; // максимальный размер файла - 5 мб. let uploadDragFile = ""; // Проверка поддержки «Drag-and-drop» if (typeof (window.FileReader) == "undefined") < dropZone.textContent = "Drag&Drop Не поддерживается браузером!"; dropZone.classList.add("error"); >// Событие - перетаскивания файла dropZone.ondragover = function () < this.classList.add("hover"); return false; >; dropZone.ondragleave = function () < this.classList.remove("hover"); return false; >; let uploadDragFiles = ""; dropZone.ondrop = function (e) < // Событие - файл перетащили e.preventDefault(); this.classList.remove("hover"); this.classList.add("drop"); uploadDragFiles = e.dataTransfer.files; // Проверка размера файла if (uploadDragFiles[0].size >maxFileSize) < dropZoneText.textContent = "Размер превышает допустимое значение!"; this.addClass("error"); return false; >// Показ загружаемых файлов if (uploadDragFiles.length > 1) < if (uploadDragFiles.length файла`; > else < dropZoneText.textContent = `Выбрано $файлов`; > > else < dropZoneText.textContent = e.dataTransfer.files[0].name; >> // Отправка формы на сервер const postData = async (url, fData) => < // имеет асинхронные операции // начало отправки // здесь можно оповестить пользователя о начале отправки // ждём ответ, только тогда наш код пойдёт дальше let fetchResponse = await fetch(url, < method: "POST", body: fData >); // ждём окончания операции return await fetchResponse.text(); >; if (forms) < forms.forEach(el => < el.addEventListener("submit", function (e) < e.preventDefault(); // создание объекта FormData let fData = new FormData(this); // Добавление файлов input type file let file = el.querySelector(".upload-file__input"); for (let i = 0; i < (file.files.length); i++) < fData.append("files[]", file.files[i]); // добавляем файлы в объект FormData() >// Отправка на сервер postData("./mail.php", fData) .then(fetchResponse => < console.log("Данные успешно отправлены!"); console.log(fetchResponse); >) .catch(function (error) < console.log("Ошибка!"); console.log(error); >); >); >); >; >);3. Совместное использование кнопки «Прикрепить файл» и Drag-and-drop
Теперь рассмотрим случай, когда нам необходимо чтобы пользователь имел возможность прикрепить файл любым из этих способов.
HTML-структура и CSS останутся без изменений. Объеденим JavaScript код.
document.addEventListener("DOMContentLoaded", () => < const forms = document.querySelectorAll("form"); for (let i = 1; i document.querySelectorAll(".upload-file__wrapper").forEach(function (current_item, index) < const inputFile = current_item.querySelector(".upload-file__input"); // создаём массив файлов let fileList = []; /////////// Кнопка «Прикрепить файл» /////////// let textSelector = current_item.querySelector(".upload-file__text"); // Событие выбора файла(ов) inputFile.addEventListener("change", function () < fileList.push(. inputFile.files); // console.log(inputFile.files); // вызов функции для каждого файла fileList.forEach(file =>< uploadFile(file); >); >); // Проверяем размер файлов и выводим название const uploadFile = (file) => < // размер файла 5 * 1024 * 1024) < alert("Файл должен быть не более 5 МБ."); return; >// Показ загружаемых файлов if (file && fileList.length > 1) < if (fileList.length файла`; > else < textSelector.textContent = `Выбрано $файлов`; > > else < textSelector.textContent = file.name; >fileList = []; > /////////// Загрузка файлов при помощи «Drag-and-drop» /////////// // const dropZones = document.querySelectorAll(".upload-file__label"); const dropZone = current_item.querySelector(".upload-file__label"); const dropZoneText = current_item.querySelector(".upload-file__text"); const maxFileSize = 5000000; // максимальный размер файла - 5 мб. // Проверка поддержки «Drag-and-drop» if (typeof (window.FileReader) == "undefined") < dropZone.textContent = "Drag&Drop Не поддерживается браузером!"; dropZone.classList.add("error"); >// Событие - перетаскивания файла dropZone.ondragover = function () < this.classList.add("hover"); return false; >; // Событие - отмена перетаскивания файла dropZone.ondragleave = function () < this.classList.remove("hover"); return false; >; // Событие - файл перетащили dropZone.addEventListener("drop", function (e) < e.preventDefault(); this.classList.remove("hover"); this.classList.add("drop"); uploadDragFiles = e.dataTransfer.files[0]; // один файл // Проверка размера файла if (uploadDragFiles.size >maxFileSize) < dropZoneText.textContent = "Размер превышает допустимое значение!"; this.addClass("error"); return false; >// Показ загружаемых файлов if (uploadDragFiles.length > 1) < if (uploadDragFiles.length файла`; > else < dropZoneText.textContent = `Выбрано $файлов`; > > else < dropZoneText.textContent = e.dataTransfer.files[0].name; >// добавляем файл в объект "uploadDragFiles_i" window["uploadDragFiles_"+index] = uploadDragFiles; >); >); // Отправка формы на сервер const postData = async (url, fData) => < // имеет асинхронные операции // начало отправки // здесь можно сообщить пользователю о начале отправки // ждём ответ, только тогда наш код пойдёт дальше let fetchResponse = await fetch(url, < method: "POST", body: fData >); // ждём окончания операции return await fetchResponse.text(); >; if (forms) < forms.forEach(el => < el.addEventListener("submit", function (e) < e.preventDefault(); // создание объекта FormData let fData = new FormData(this); // Добавление файлов input type file el.querySelectorAll(".upload-file__input").forEach((one_file, index) => < for (let i = 0; i < (one_file.files.length); i++) < fData.append("files[]", one_file.files[i]); // добавляем файлы, добавленные кнопкой >fData.append("files[]", window["uploadDragFiles_"+index]); // добавляем drug-&-drop файлы >); // Отправка на сервер postData("./mail-files.php", fData) .then(fetchResponse => < swal(< title: "Спасибо!", text: "Данные отправлены.", icon: "success", button: "Ok" >); // console.table("Данные успешно отправлены!", fetchResponse); el.reset(); // Очистка полей формы document.querySelectorAll(".upload-file__text").forEach(this_text => < this_text.textContent = "Выберите файл или перетащите в поле"; >); >) .catch(function (error) < swal(< title: error, icon: "error", button: "Ok" >); // console.table("Ошибка!", error); >); >); >); >; >);4. Отправка множества input file multiple
Ранее мы успешно отправили все даннные формы (текстовые поля и файлы) на сервер.
Рассмотрим пример отправки multiple формы с множеством input file на почту.
$file) < $path = __DIR__ . "/upload-files/" . $file; // путь загрузки файла if (copy($_FILES["files"]["tmp_name"][$key], $path)) < $file_attach[] = $path; >> > $c = true; foreach ($_POST as $key => $value) < if (is_array($value)) < $value = implode(", ", $value); >if ( $value != "" && $key != "project_name" && $key != "admin_email" && $key != "form_subject" && $key != "file_attach" ) < $message .= (($c = !$c) ? "" : " ") . " $key $value "; > > $message = ' $project_name. $form_subject ' . $message . '
'; // Отправляем сообщение if (empty($file_attach)) < $headers = "MIME-Version: 1.0" . PHP_EOL . "Content-Type: text/html; charset=utf-8" . PHP_EOL . "From: " . $project_name . " " . PHP_EOL . "Reply-To: " . $admin_email . "" . PHP_EOL; mail($admin_email, $form_subject, $message, $headers); # отправка текста > else < send_mail($admin_email, $form_subject, $message, $file_attach); # отправка файлов >// Функция для отправки сообщения с вложением function send_mail($to, $form_subject, $html, $paths) < $boundary = "--" . md5(uniqid(time())); // генерируем разделитель $headers = "MIME-Version: 1.0\n"; $headers .= "Content-Type: multipart/mixed; boundary=\"$boundary\"\n"; $multipart = "--$boundary\n"; $multipart .= "Content-Type: text/html; charset='utf-8'\n"; $multipart .= "Content-Transfer-Encoding: Quot-Printed\n\n"; $multipart .= "$html\n\n"; $message_part = ""; foreach ($paths as $path) < $fp = fopen($path, "r"); if (!$fp) < echo "Файл $path не может быть прочитан"; exit(); >$file = fread($fp, filesize($path)); fclose($fp); $message_part .= "--$boundary\n"; $message_part .= "Content-Type: application/octet-stream\n"; $message_part .= "Content-Transfer-Encoding: base64\n"; $message_part .= "Content-Disposition: attachment; filename = \"" . $path . "\"\n\n"; $message_part .= chunk_split(base64_encode($file)) . "\n"; > $multipart .= $message_part . "--$boundary--\n"; if (!mail($to, $form_subject, $multipart, $headers)) < echo "К сожалению, письмо не отправлено"; exit(); >>Надеюсь, вам понравилась данная информация. Если вам интересна тема web-разработки, то можете следить за выходом новых статей в Telegram.
Статьи из данной категории:
Custom styled input type file upload button with pure CSS
In this guide I’ll show you how to create a stylish and user friendly file upload button with pure CSS and HTML.
Markup
To upload files you’ll need to use the input tag with type=»file» attribute. Additionally you can specify which file types you’re allowing to upload via accept attribute.
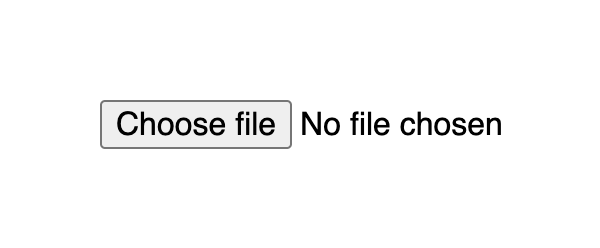
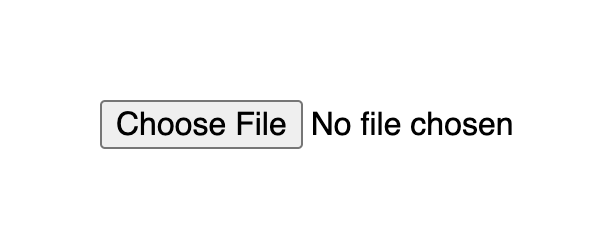
This markup produces a button with a Choose file title followed by a text which indicates the file name when selected. By default it is No file chosen.
Input with type file default look differs on different browsers:


Styling
The upload file widget structure consists of a block that displays a button and a file name. A user can click anywhere inside the block or drag a file from the desktop and it will open up the upload window.
Styling the upload file block
If you apply styles for the input[type=file] selector it will set them for the whole widget block, that is the button and text.
input[type=file] width: 350px; max-width: 100%; color: #444; padding: 5px; background: #fff; border-radius: 10px; border: 1px solid #555; > The result already looks much better as it indicates the zone where user is able to click or drag the file.
Styling the upload file button
By default, the Choose file button has a plain user-agent style. To style the button with CSS you should use the ::file-selector-button pseudo-element to select it. It is supported in all modern browsers.
input[type=file]::file-selector-button margin-right: 20px; border: none; background: #084cdf; padding: 10px 20px; border-radius: 10px; color: #fff; cursor: pointer; transition: background .2s ease-in-out; > input[type=file]::file-selector-button:hover background: #0d45a5; > Styling the the click/drop zone
If you wich to go a bit further, you can create a large zone where user can click and drag files. This large zone will make it easier for people to use the widget, as it don’t require to be that precise when dragging a file, especially on smaller screens.
To implement a large drop zone, you’ll need to wrap your file upload input into a label tag and specify a description text that will let users know how to use the widget.
for="images" class="drop-container" id="dropcontainer"> class="drop-title">Drop files here or type="file" id="images" accept="image/*" required> For the layout, we need to set display to flex with flex related properties for positioning. The height and padding properties for proportion. And finally add some fancy styles like border and hover effects to highlight the file upload zone and you’re ready to go.
.drop-container position: relative; display: flex; gap: 10px; flex-direction: column; justify-content: center; align-items: center; height: 200px; padding: 20px; border-radius: 10px; border: 2px dashed #555; color: #444; cursor: pointer; transition: background .2s ease-in-out, border .2s ease-in-out; > .drop-container:hover background: #eee; border-color: #111; > .drop-container:hover .drop-title color: #222; > .drop-title color: #444; font-size: 20px; font-weight: bold; text-align: center; transition: color .2s ease-in-out; > Handling drag and drop events
Additionally, you can handle cases when the user will try to drag the file over the drop area. CSS alone cannot handle such cases, so we can add a little bit of JavaScript.
There are two points to consider to improve UX for the drop field:
- Indicate the drop area when the user is dragging a file over it
- Make it possible to drop a file inside the drop area, and not just the input element
To indicate drop area when user is dragging a file over it, we’ll need to use the dragenter and dragleave events. Both on the label tag, since it represents the drop area. For each event we add or remove a CSS class accordingly.
Since user will be dropping to the label tag we also need to set the input value with the file. To do that we need to do 2 things:
- Set dragover event for the label tag, set e.preventDefault() and pass false as the third parameter for the addEventListener method
- On drop event, we need to set the input’s files property to the file via fileInput.files = e.dataTransfer.files
const dropContainer = document.getElementById("dropcontainer") const fileInput = document.getElementById("images") dropContainer.addEventListener("dragover", (e) => // prevent default to allow drop e.preventDefault() >, false) dropContainer.addEventListener("dragenter", () => dropContainer.classList.add("drag-active") >) dropContainer.addEventListener("dragleave", () => dropContainer.classList.remove("drag-active") >) dropContainer.addEventListener("drop", (e) => e.preventDefault() dropContainer.classList.remove("drag-active") fileInput.files = e.dataTransfer.files >) As for styles, we can use similar styles to :hover state, but this time with a designated class:
.drop-container.drag-active background: #eee; border-color: #111; > .drop-container.drag-active .drop-title color: #222; > Demo
See the full example on CodePen:
See the Pen Untitled by Nikita Hlopov (@nikitahl) on CodePen.
20 Best CSS & Javascript File Upload Examples
File upload is a common feature in mobile and web development that almost every app needs. File upload capability enables your users to place their files on your site. These files might be images, videos, PDFs, or files of any other type. Collecting files directly through a form on your site is great for acquiring documents such as resume, portfolios or images and videos such as screenshots and screen-captures through customer support forms. So in this post I’ve gathered 20 best CSS & Javascript File Upload Examples for inspiration to improve file upload UI and UX design.
Drag & Drop

File Upload & Image Preview

Upload CSS Animation Ui

File Upload Plugin

File Upload With Style And Pure CSS

Drag And Drop Upload Form Stylized (Html & CSS Only)

Image Upload With Preview

Nice Upload Form)

Custom Animated Input File

Bootstrapped Styled File Browse Button

Pure CSS File Upload Field

File Upload Dialog

Image Uploader

Dropzone Upload

File Upload – Day 031

A Simple Upload Form

Box Content Uploader

Bootstrap Multi Step Form With Progress Bar

Attach Or Upload Files Modal

Mock-up: Photos Using React, Fluxify And Bootstrap
