- CSS Styling Images
- Example
- Example
- Thumbnail Images
- Example
- Example
- Responsive Images
- Example
- Center an Image
- Example
- Polaroid Images / Cards
- Example
- Transparent Image
- Example
- Image Text
- Example
- Image Filters
- Example
- Image Hover Overlay
- Example
- Example
- Example
- Example
- Example
- Example
- Flip an Image
- Example
- Responsive Image Gallery
- Example
- Image Modal (Advanced)
- Example
- CSS Image: How To Style Images Using CSS In 2022
- What Styling Effects Can You Create Using CSS?
- How To Position Images By Using CSS?
- Static CSS Image
- Relative
- Absolute CSS Image
- Fixed
- Sticky CSS Image position
- How To Create Background Images Using CSS?
- Is It Possible To Create a Border Of An Image File Using CSS?
- How To Resize Images With The Help Of CSS?
- Absolute Resize
- Proportional Resizing
- CSS Image Relative Resizing
- What Filters Can You Apply To Images Using CSS?
- What Effects Are Available For Images In CSS?
- Thumbnail image
- Responsive Resizing Of Images
- CSS Image Transformations
- FAQs
- What Is A CSS Image?
- How Can You Insert An Image Into CSS?
- Can You Use JPEG In CSS?
- Why is my picture not showing in CSS?
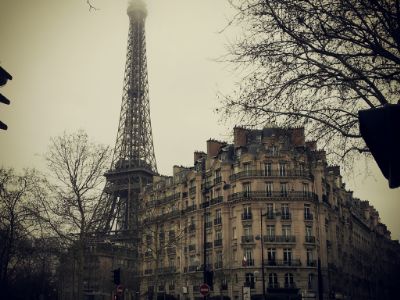
CSS Styling Images
Use the border-radius property to create rounded images:
Example
Example
Thumbnail Images
Use the border property to create thumbnail images.
Example
img <
border: 1px solid #ddd;
border-radius: 4px;
padding: 5px;
width: 150px;
>
Example
img <
border: 1px solid #ddd;
border-radius: 4px;
padding: 5px;
width: 150px;
>
img:hover box-shadow: 0 0 2px 1px rgba(0, 140, 186, 0.5);
>
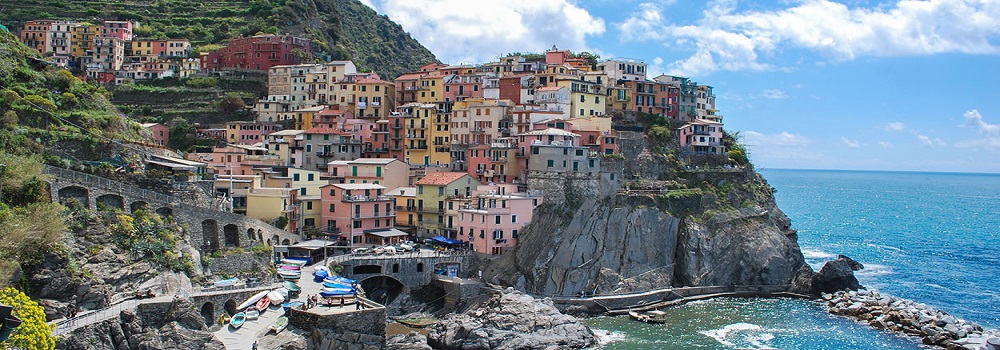
Responsive Images
Responsive images will automatically adjust to fit the size of the screen.
Resize the browser window to see the effect:
If you want an image to scale down if it has to, but never scale up to be larger than its original size, add the following:
Example
Tip: Read more about Responsive Web Design in our CSS RWD Tutorial.
Center an Image
To center an image, set left and right margin to auto and make it into a block element:
Example
Polaroid Images / Cards

Example
div.polaroid <
width: 80%;
background-color: white;
box-shadow: 0 4px 8px 0 rgba(0, 0, 0, 0.2), 0 6px 20px 0 rgba(0, 0, 0, 0.19);
>
div.container text-align: center;
padding: 10px 20px;
>
Transparent Image
The opacity property can take a value from 0.0 — 1.0. The lower value, the more transparent:
Example
Image Text
How to position text in an image:
Example
Image Filters
The CSS filter property adds visual effects (like blur and saturation) to an element.
Note: The filter property is not supported in Internet Explorer or Edge 12.
Example
Change the color of all images to black and white (100% gray):
Tip: Go to our CSS filter Reference to learn more about CSS filters.
Image Hover Overlay
Create an overlay effect on hover:
Example
Example
Example
Example
Example
Example
Flip an Image
Move your mouse over the image:
Example
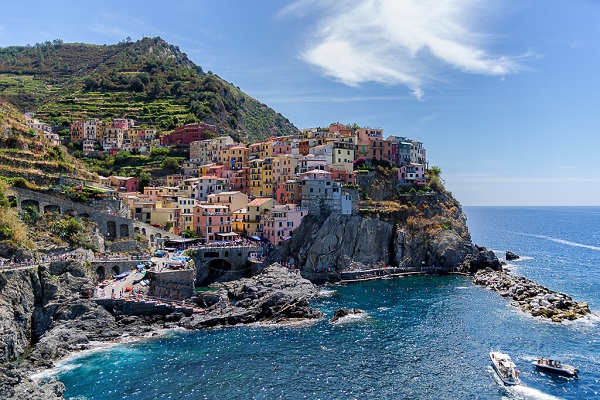
Responsive Image Gallery
CSS can be used to create image galleries. This example use media queries to re-arrange the images on different screen sizes. Resize the browser window to see the effect:

Example
.responsive <
padding: 0 6px;
float: left;
width: 24.99999%;
>
@media only screen and (max-width: 700px) .responsive width: 49.99999%;
margin: 6px 0;
>
>
@media only screen and (max-width: 500px) .responsive width: 100%;
>
>
Tip: Read more about Responsive Web Design in our CSS RWD Tutorial.
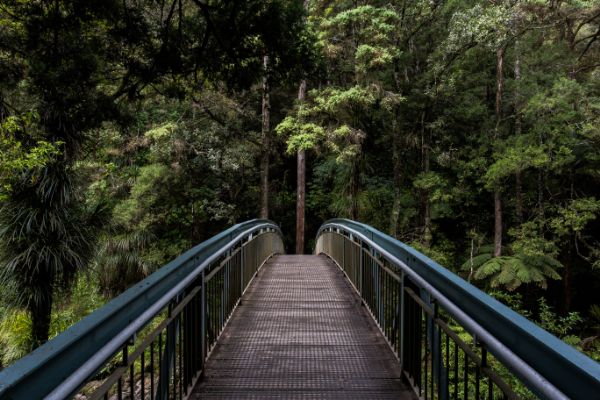
Image Modal (Advanced)
This is an example to demonstrate how CSS and JavaScript can work together.
First, use CSS to create a modal window (dialog box), and hide it by default.
Then, use a JavaScript to show the modal window and to display the image inside the modal, when a user clicks on the image:
Example
// Get the modal
var modal = document.getElementById(‘myModal’);
// Get the image and insert it inside the modal — use its «alt» text as a caption
var img = document.getElementById(‘myImg’);
var modalImg = document.getElementById(«img01»);
var captionText = document.getElementById(«caption»);
img.onclick = function() modal.style.display = «block»;
modalImg.src = this.src;
captionText.innerHTML = this.alt;
>
// Get the element that closes the modal
var span = document.getElementsByClassName(«close»)[0];
// When the user clicks on (x), close the modal
span.onclick = function() <
modal.style.display = «none»;
>
CSS Image: How To Style Images Using CSS In 2022

CSS stands for cascading style sheets that suggest the styling properties of CSS. We can transform the images and style our web page accordingly. For example, if we want to create a sticky and static position for our graphics, we can also use CSS image styling. And for this purpose, we can use JavaScript file upload API. Or we can also use an image quality enhancer.
CSS allows us to create cool filters, define borders and backgrounds, and resize images. The best part is that we can have numerous options for these kinds of tasks. For example, CSS supports different image file formats like ICO, SVG, and JPEG. But knowing the functioning of the JavaScript file Upload API can make the work easier. Let’s dig into it.

What Styling Effects Can You Create Using CSS?
The data type defines the different image transformations in CSS.
HTML elements can become the best form for it. Moreover, we can also take , CSS data types.
Or we can also take functions such as image-set(), cross-fade(), image(), or element() functions to upscale images.
Once we define an image, we can use CSS properties to transform the image file.
Some unique styles that we can apply to images in CSS are listed below:
- Positioning of Images
- Adjusting or applying the background image
- Borders
- Resizing Images
- Filters
- Effects
- Transformations
- And much more

How To Position Images By Using CSS?
We can render web page elements using the position property.
It also includes rendering images. We can define the position of our image as fixed, relative, static, sticky, or absolute.
Moreover, we need to set the property as top, bottom, left, or right to set the position of our image file.
All these properties can support values like inherit, initial, %, length, and auto. These values define the effect of property on position.

Static CSS Image
It is important to note that the static property is set by default for HTML elements.
We may be unable to configure the placement properties, such as left or right, for the static position.
What’s more, that static image stays in line with the content of our web page when the user scrolls it down.
To make an image file static, we can use the following code:
Relative
If we want to move elements away from their relative position without letting any other element fill the gap, the relative property is used. It helps the image file stay aligned with the web page’s content as we scroll down the page. Here is an example snippet:

Absolute CSS Image
If we want to place our image relative to its nearest positioned parent, we use the absolute property. We have to position wrapping elements, otherwise the image will be placed relative to our document body. Furthermore, it will move the content as our user scrolls down. We can add the following code:
Fixed
If we want to place an image relative to the viewport of our user, we need to assign a fixed position. Doing so will fix the image and not move along with the page content. The code below can position the image to the bottom right corner, hence, it will overlap the image with other content.

Sticky CSS Image position
Sticking property helps us position the image according to the scrolling behaviours of our users. It can keep an image visible even if the user has scrolled the part where it was visible first. In addition to this, it doesn’t work with Internet Explorer.

How To Create Background Images Using CSS?
We can set one or more background images using the background image property. It also includes the child element of our page, or element.
The background images are placed in the top left corner by default.
We can change the background default using the background-repeat, background-attachment, and background-position properties.

We can also set a fall-back as background-color property if our image fails to render. For example:
Is It Possible To Create a Border Of An Image File Using CSS?
Yes. We can create borders, such as rounded corners, for our image using CSS. When creating a border for an image, we use border property with options for width, color, and style. Border style property helps to set different styles for images.
To achieve rounded images, we can use the following code:
To achieve a circle-shaped image, we can use the following code:
If we want to define the gridlines of our image by stretching or repeating the image segments, this example code can help:

How To Resize Images With The Help Of CSS?
We need to modify an image’s height and width property to resize it. Some amazing ways to resize images using CSS are listed below:
Absolute Resize
We need to specify the dimensions of an image as static measurements to resize our image. The dimensions can be ems or pixels, regardless of the original dimensions.
The specified dimensional values should be proportional to the original image. Otherwise, our image can appear warped.
Proportional Resizing
We need to statically modify the width or height property to modify an image proportionally. Besides, we need to set the other to auto. For instance:
CSS Image Relative Resizing
We can also resize the image according to the viewport or its parent element. In such a case, we set the object-fit property. It defines whether our image should stretch or not.
What Filters Can You Apply To Images Using CSS?
We can modify an image’s opacity, clarity, and profile using CSS image filters. The standard syntax is:
filter-me < filter: []* | none > .filter-me
Some filters that we can apply using CSS are listed below:
- sepia()
- saturate()
- opacity()
- Invert()
- hue-rotate()
- grayscale()
- drop-shadow()
- contrast()
The following code changes the color of our image to white and black:
What Effects Are Available For Images In CSS?
We can create amazing compound changes for an image using CSS image effects. For example, thumbnail images, placeholders, rounded images, skewing, responsive sizing, etc.
Thumbnail image
We can set the placeholders or previews of our elements as a thumbnail images. Image thumbnails are set apart with text, borders, or other effects. The code below creates an image with rounded corners with a grey border that denotes interactivity.

Responsive Resizing Of Images
We can resize the images according to the viewport size of our user. Therefore, we need to define the width of these images according to the viewport.
Developers can also use CSS queries to create image galleries. For example:
There is also an advanced tool, Image Modal, in which we can use JavaScript and CSS together. The example code is:
// Get the modal var modal = document.getElementById('myModal'); // Get the image - insert it inside the modal - use its "alt" text as a caption var img = document.getElementById('myImg'); var modalImg = document.getElementById("img01"); var captionText = document.getElementById("caption"); img.onclick = function() < modal.style.display = "block"; modalImg.src = this.src; captionText.innerHTML = this.alt; >// Get the element that closes the modal var span = document.getElementsByClassName("close")[0]; // When the user clicks on (x), close the modal span.onclick = function() 
CSS Image Transformations
We can set the perspective, rotate, skew, or scale parameters to transform our images. In such a case, we have to use the transform property. We need to use prefixes to make this property compatible. An example is:
We can use the following code to make it compatible with Internet Explorer:

FAQs
What Is A CSS Image?
We can use CSS to display our images in our web applications. The styling of images is more similar to styling the elements. Finally, we can use different properties to style an image in CSS.
How Can You Insert An Image Into CSS?
The inline element helps insert an image into CSS.
Can You Use JPEG In CSS?
Yes. It is possible that we use different image formats or image file extensions in CSS.
Why is my picture not showing in CSS?
The image path may not be set correctly. That’s why your image is not showing.
Ayesha Zahra is a Geo Informatics Engineer with hands-on experience in web development (both frontend & backend). Also, she is a technical writer, a passionate programmer, and a video editor. She is always looking for opportunities to excel in her skills & build a strong career.