- Как сделать тень картинки в CSS?
- Навигация по статье:
- Как применить тень для картинки?
- Inner Shadows in CSS: Images, Text and Beyond
- The Ultimate Designer Toolkit: 2 Million+ Assets
- Presentation Templates
- Graphic Templates
- Web Templates
- Shadow Syntax
- Box-Shadow
- Text Shadow
- Inset Box-Shadows
- With Images
- CSS — два способа создания тени для картинки
- Красивая функция trackBy
Как сделать тень картинки в CSS?

В данной статье я покажу вам, как можно создать красивые и интересные тени для картинок и блоков на вашем сайте, а так же, как их можно использовать для создания интересных эффектов при наведении.
Навигация по статье:

Для создания тени картинки в CSS существует специальное свойство, которое называется box-shadow. Данное свойство имеет следующий набор параметров:
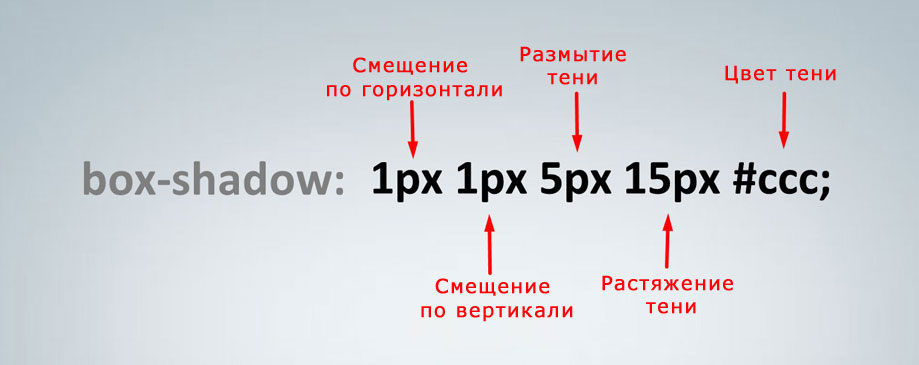
- Смещение тени по горизонтали. Здесь может стоять как положительное, так и отрицательное значение. Если мы задаем положительное значение, то тень смещается вправо. Если отрицательно, то тень смещается влево.
- Смещение тени по вертикали. Если мы задаем отрицательное значение, тень смещается вверх, а если положительное – тень смещается вниз.
- Размытие тени. Чем больше здесь значение, тем более размытая получается тень.
- Растяжение тени. Чем это значение больше, тем на большее расстояние от картинки или блока будет расходиться тень.
- Цвет. Можно задавать как в шестнадцатеричной системе, так при помощи кодовых слов или в формате RGB.
Не смотря на то, что данное CSS-свойство не является новым, и на сегодняшний день поддерживается большинством современных браузеров, тем не менее, в более старых версиях данное CSS-свойство может не поддерживаться. Поэтому для перестраховки, пока что еще используют коссбраузерные префиксы для этого CSS-свойства.
- -moz-box-shadow — для Mozilla Firefox
- -webkit-box-shadow — для браузеров, работающих на Webkit-платформе, таких как Opera, Google Chrome, Яндекс.Браузер и др.
Как применить тень для картинки?
Чтобы добавить тень картинке присваиваем ей какой нибудь класс или обращаемся к уже существующему классу и в CSS файле темы или сайт дописываем нужные стили.
Inner Shadows in CSS: Images, Text and Beyond
Shadows in CSS are quick and easy, whether you’re slapping on a box-shadow or a text-shadow. But how comfortable are you with inner shadows? Can you pull off an inset box-shadow? How do you do the same thing on some text?
Today we’re going to learn some really simple inset shadow techniques that you can pull off with just a few lines of code. I’ll walk you through both the box-shadow and text-shadow syntax and how to change them to pull off an inset shadows.
The Ultimate Designer Toolkit: 2 Million+ Assets
Envato Elements gives you unlimited access to 2 million+ pro design resources, themes, templates, photos, graphics and more. Everything you’ll ever need in your design resource toolkit.

Presentation Templates
PowerPoint & Keynote

Graphic Templates
Logos, Print & Mockups

Web Templates
Landing Pages & Email
Shadow Syntax
Before we jump into inset shadows, let’s look at the basic syntax for building the two different types of CSS shadows. Even if you’ve coded these before, it’s worth a quick review just so we’re all on the same page.
Box-Shadow
Box-shadows are probably the most common type of CSS shadows. The potential uses here are incredibly diverse and developers have come up with all kinds of crazy awesome applications. The box-shadow syntax is actually fairly complex and includes six separate values. We’ll start off by taking a look at five of the most common of these.
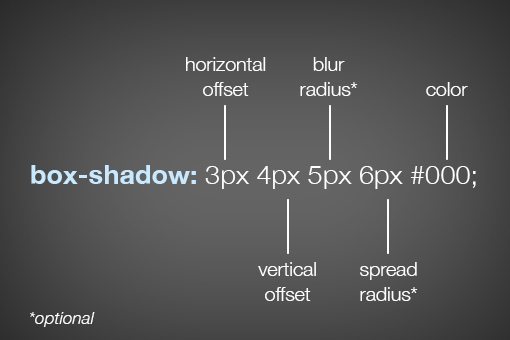
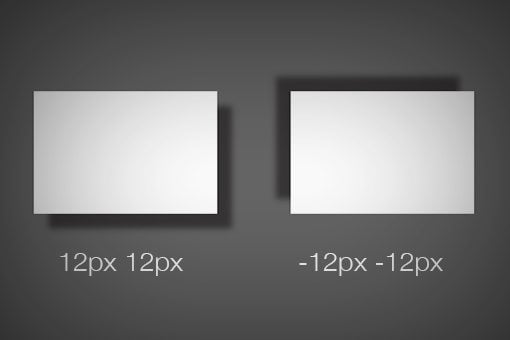
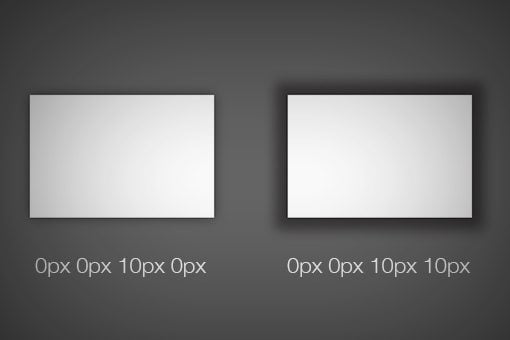
As you can see, listed above in order, the order of values is horizontal offset, vertical offset, blur radius, spread radius and color. The first two values, horizontal and vertical offset, are fairly straightforward. Positive values will push the shadow right and downward respectively and negative values will push the shadow left and upwards. Here’s an example of both:
The latter two values, blur radius and spread radius are a bit more complicated. The biggest question that you might have is, what’s the difference? To answer this, let’s first look at the one that you’re probably the most familiar with: blur radius.
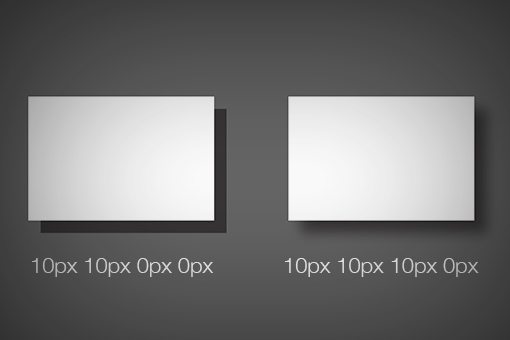
As you can see, no blur radius produces a shadow with a hard edge and a high blur radius produces a blurry edge. Pretty simple right? So what about the spread radius then? How does that differ? A picture is worth a thousand words so here’s an example:
As you can see, without affecting how blurry the shadow is, the spread of the shadow essentially grows and shrinks the surface area occupied by the shadow. If you thought of it as the size of the shadow, you wouldn’t be too far off.
If you leave off either the blur or spread radius, their values will default to zero. Looking around the web, you’re likely to see that most demos that you come across, including those on Design Shack, have no spread radius defined.
Text Shadow
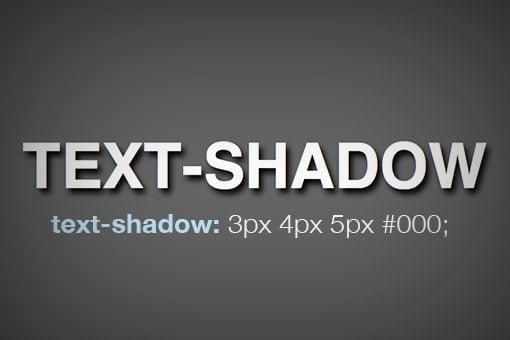
Now that we have a solid understanding of how the box-shadow syntax works, we can take a look at the syntax for the other type of CSS shadow: the text-shadow. Fortunately, this syntax is even simpler than that for box-shadow.
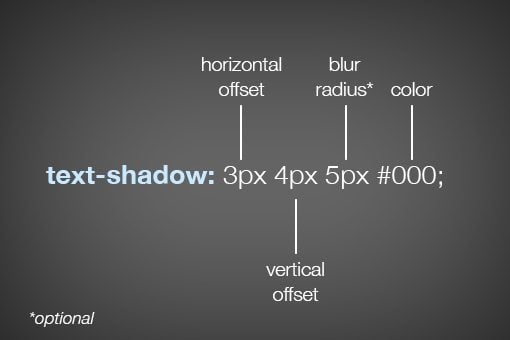
As you can see, most of the values are the same here, so if you understand one, you understand the other. Interestingly enough though, you don’t have access to a shadow’s spread with text-shadow. It would be great if you did, but unfortunately the feature simply isn’t there.
Inset Box-Shadows
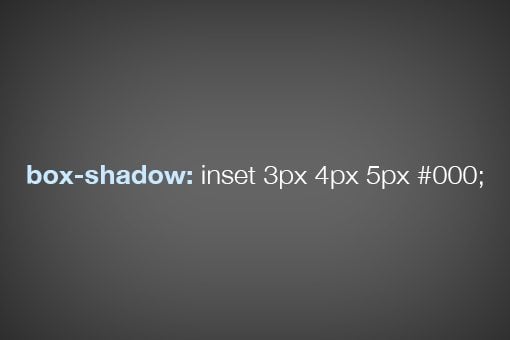
All righty, now that we’ve laid a basic foundation and you completely understand CSS shadow syntax, it’s time to jump into creating “inner” or “inset” shadows. To shift a shadow to an inset shadow, all we really need to do is add a single word, “inset.”
This is why we started with the basic syntax. As a whole, the box-shadow chunk of code can look pretty intimidating, but if you break it down as we have done, it’s actually really simple.
All of the values here essentially perform the same way, only the shadow is placed inside of the box. Here we can see how the spread of a shadow can still have a big impact on how the shadow looks:
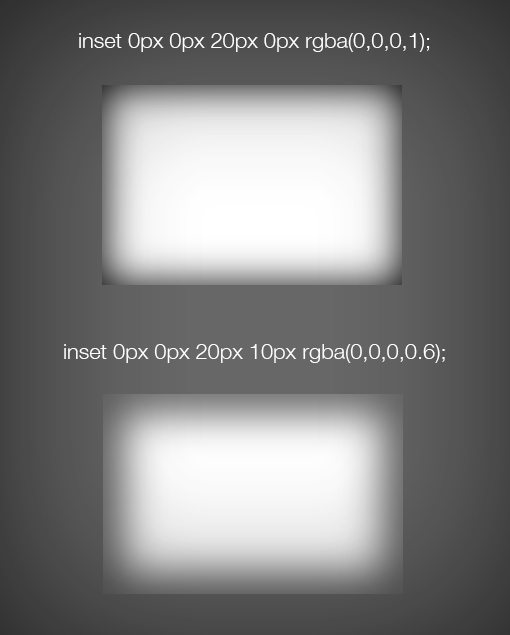
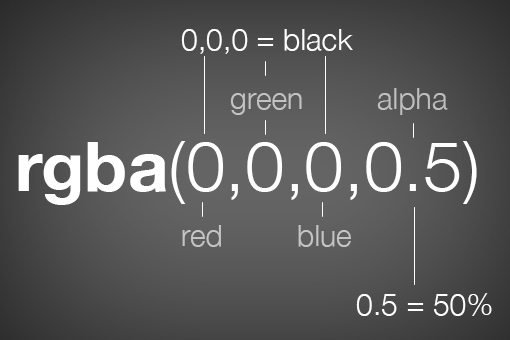
Notice that this time I actually used RGBa color instead of a hex value. This is great for shadows because the alpha value provides a quick and easy way to lighten or darken the shadow.
With Images
It’s easy enough to throw a box-shadow onto an empty div, but what if you want to place one on an image. It sounds simple, but the reality is a little tricky. Let’s look at some code and its ultimate effect. We’ll begin with an plain old image tag.

Now we’ll target this in our CSS and add an inset box-shadow. You’d think that something like this would work:
Unfortunately, this gives us the following result. The picture is working fine, but the shadow isn’t visible!
So how do we pull off an inner shadow on an image? There are quite a few different ways to do it, all of which have their pros and cons. Let’s take a look at two popular solutions.
The first solution is to wrap the image in a div that’s constrained to the same size as the image, then set the shadow to that div while using some relative positioning and z-index voodoo on the image itself. Here’s what that looks like in code:
CSS — два способа создания тени для картинки
Столкнулся с интересным примером или задачей — не знаю, как сказать.
Но не все так просто. В Интернете есть хорошие статьи на эту тему, в частности, на Хабре имеет очень детальный обзор данного способа.
Но пример так мне понравился, что решил его описать у себя — повторение мать учения, как говорится.
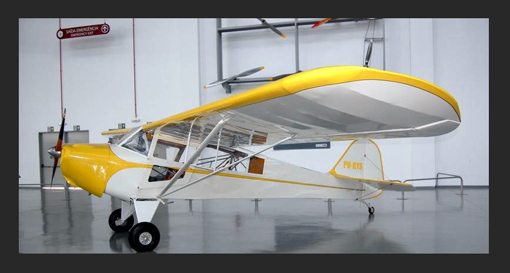
Данную задачу можно решить двумя способами. Ни один из них не является достаточно универсальным, это всего лишь выход из положения. Итак, имеется изображение, для которого нужно создать внутреннюю тень.
Первый способ — это “обернуть” ее в дополнительный блок, которому прописать внутреннюю тень. Главное тут — не забыть “опустить” изображение внутри блока, чтобы тень “легла” на нее.
Код такого способа представлен ниже:
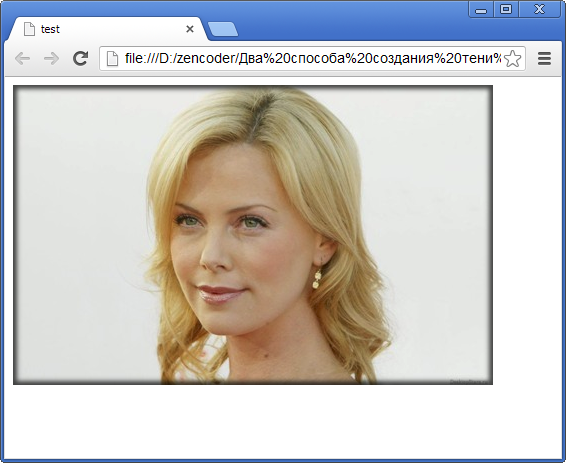
.block2 box-shadow: inset 0 0 12px 8px rgba(0,0,0,.6); width: 481px; height: 361px; background: url(images/charlize_theron_2.jpg) 0 0 no-repeat; >Картинка — результат работы этого кода:
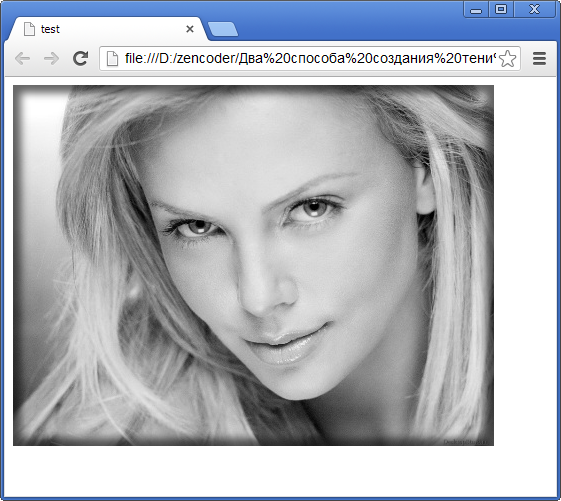
Код более краткий. Единственный минус — изображение должно быть только в качестве фона для блока.
Красивая функция trackBy
Пример красивой функции trackBy для Angular. Функция понравилась своей лаконичностью:public trackByNumber = (_. … Continue reading