- Styling range input with CSS and JavaScript for better UX
- Accent color
- CSS selectors for the range input
- Improving usability
- Specify the output element to display the selected value
- Specify the number input that is synced to the range input
- A sprinkle of JavaScript
- Range input for RTL direction
- Custom range input Demo
- Styling Cross-Browser Compatible Range Inputs with CSS
- Оформление кроссбраузерных элементов input с типом range с помощью CSS
- Применение базовых CSS стилей
Styling range input with CSS and JavaScript for better UX
To style the range input with CSS you’ll need to apply styles to two pseudo-elements: ::-webkit-slider-thumb and ::-webkit-slider-runnable-track . Find out how you can apply custom styling and make the range input more functional and appealing.
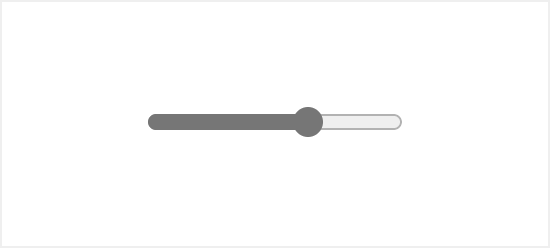
The input element with a type of range is a native HTML form UI element that allows users to select a value by dragging a slider over a range field.
The default browser styling for this element is very basic and doesn’t provide enough information to the user which might confuse one. Also, the appearance of the range input element is different across browsers.
Range input HTML:
Range input appearance on different browsers:

Luckily there are ways you can improve that using nothing but native CSS and JavaScript.
Accent color
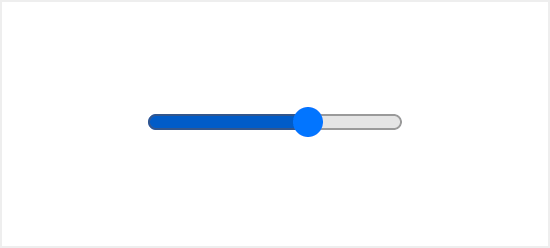
One simple way to customize the appearance of the range input without any specific selectors or additional HTML is to change the color of the range.
To do so you can define the accent-color property for the input[type=»range»] selector which will update the color of the track and thumb.
input[type="range"] accent-color: coral; > CSS selectors for the range input
The range input widget consists of two parts the thumb and the track. Each one of these parts has its own pseudo-class selector for styling with a vendor suffix for cross-browser support.
input[type="range"] -webkit-appearance: none; margin-right: 15px; width: 200px; height: 7px; background: rgba(255, 255, 255, 0.6); border-radius: 5px; background-image: linear-gradient(#ff4500, #ff4500); background-size: 70% 100%; background-repeat: no-repeat; > input[type="range"]::-webkit-slider-thumb -webkit-appearance: none; height: 20px; width: 20px; border-radius: 50%; background: #ff4500; cursor: ew-resize; box-shadow: 0 0 2px 0 #555; transition: background .3s ease-in-out; > input[type=range]::-webkit-slider-runnable-track -webkit-appearance: none; box-shadow: none; border: none; background: transparent; > To indicate the selected value, we can add a color from the start of the track up until the thumb. To do that we can use the background-image property with the linear-gradient() value. The background-size property will be used to set the size, which can later be updated with JavaScript.
Improving usability
The default range input doesn’t specify any values selected. Which makes it hard for users to understand what value is currently selected.
While the hash marks and labels on the range input are a great way to aid users visually, this feature is yet to become available.
However, there are a few ways you can improve that with some additional HTML and JavaScript:
- Specify the output element to display the selected value
- Specify the number input that is synced to the range input
Specify the output element to display the selected value
The output element on the side of the range input will display the selected value. You’ll have to add an id attribute for the output element, and an oninput attribute for the range input with a short function as a value, that will update the output element contents.
type="range" min="0" max="100" oninput="rangevalue.value=value"/> id="rangevalue">50 Specify the number input that is synced to the range input
To take it a step further you can add a number input next to the range element.
That way the user will see the selected value and will have an option to modify it via the number input, which can be a better experience especially for mobile users.
type="range" value="50" min="0" max="100" id="range" oninput="rangevalue.value=value"/> type="number" id="rangevalue" value="50" oninput="range.value=value"> A sprinkle of JavaScript
To finalize we’ll need some JavaScript code to make it all work. The oninput attribute is already updating value based on a target element.
But to update the selected area of the range input we need to calculate the ratio and apply that value to the input background-size property.
💡 NOTE: the value property of the range input is a string type, if you want to use is as a numeric value you should use valueAsNumber property.
const rangeInputs = document.querySelectorAll('input[type="range"]') const numberInput = document.querySelector('input[type="number"]') function handleInputChange(e) let target = e.target if (e.target.type !== 'range') target = document.getElementById('range') > const min = target.min const max = target.max const val = target.value target.style.backgroundSize = (val - min) * 100 / (max - min) + '% 100%' > rangeInputs.forEach(input => input.addEventListener('input', handleInputChange) >) numberInput.addEventListener('input', handleInputChange) Range input for RTL direction
To make the above solution of custom range input work for RTL (right to left) web pages, you must make some adjustments for both CSS and JavaScript.
The recommended way to set the text direction of a block or a whole page is to use the dir attribute.
Once the dir attribute is set, we can specify the following selector for the range input [dir=»rtl»] input[type=»range»] .
Now to set the same value for the RTL direction, we must revet the background colors and the value. So for the 70% range, it will look as follows:
[dir="rtl"] input[type="range"] /* Used to be gradient color, the current progress */ background: #ff4500; /* Used to be background color, the track */ background-image: linear-gradient(#fff, #fff); /* 30% is the difference between the max and the current value (100 - 70) */ background-size: 30% 100%; background-repeat: no-repeat; > As for the JavaScript, we need to add a condition for the change handler function, to calculate the correct value: max — current.
function handleInputChange(e) let target = e.target if (e.target.type !== 'range') target = document.getElementById('range') > const min = target.min const max = target.max const val = target.value let percentage = (val - min) * 100 / (max - min) // condition to check whether the document has RTL direction // you can move it to a variable, if document direction is dynamic if (document.documentElement.dir === 'rtl') percentage = (max - val) > target.style.backgroundSize = percentage + '% 100%' > Custom range input Demo
You can find a full demo with a complete code examples on CodePen:
Styling Cross-Browser Compatible Range Inputs with CSS
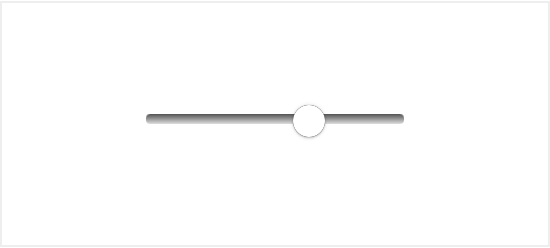
Styling for range inputs has improved dramatically since the release of IE 10. It is now possible to generate cross-browser compatible range inputs (sliders) using only CSS. In this tutorial, we will take a basic range input ( ):  And turn it into this:
  In order to simplify the process of generating cross-compatible styles, LESS style sheets have been included. CSS is also available.
Several styles need to be applied to range inputs in all browsers to override their basic appearance.
input[type=range] < -webkit-appearance: none; /* Hides the slider so that custom slider can be made */ width: 100%; /* Specific width is required for Firefox. */ background: transparent; /* Otherwise white in Chrome */ >input[type=range]::-webkit-slider-thumb < -webkit-appearance: none; >input[type=range]:focus < outline: none; /* Removes the blue border. You should probably do some kind of focus styling for accessibility reasons though. */ >input[type=range]::-ms-track < width: 100%; cursor: pointer; /* Hides the slider so custom styles can be added */ background: transparent; border-color: transparent; color: transparent; >This gives us invisible or unstyled range inputs in all browsers. Now we can apply our custom styles.
The widget that you click or drag along the track is called the thumb. It can be styled just like a regular HTML element.
/* Special styling for WebKit/Blink */ input[type=range]::-webkit-slider-thumb < -webkit-appearance: none; border: 1px solid #000000; height: 36px; width: 16px; border-radius: 3px; background: #ffffff; cursor: pointer; margin-top: -14px; /* You need to specify a margin in Chrome, but in Firefox and IE it is automatic */ box-shadow: 1px 1px 1px #000000, 0px 0px 1px #0d0d0d; /* Add cool effects to your sliders! */ >/* All the same stuff for Firefox */ input[type=range]::-moz-range-thumb < box-shadow: 1px 1px 1px #000000, 0px 0px 1px #0d0d0d; border: 1px solid #000000; height: 36px; width: 16px; border-radius: 3px; background: #ffffff; cursor: pointer; >/* All the same stuff for IE */ input[type=range]::-ms-thumb

Note that while we’re repeating code here, that’s necessary as you can’t comma-separate these type of selectors. Browsers will drop the entire selector if it doesn’t understand a part of it. This gives us the following:
The line that the thumb moves across is called the track. It is also styled just like a regular HTML element. A note on IE: Internet Explorer 10+ has a slightly different approach to range inputs. In IE, you are allowed to specify completely different styles for the upper (right of the thumb) and lower (left of the thumb) areas of the track. Another thing to note is that you can apply focus effects to the track which change the styling when the user is interacting with the range.
input[type=range]::-webkit-slider-runnable-track < width: 100%; height: 8.4px; cursor: pointer; box-shadow: 1px 1px 1px #000000, 0px 0px 1px #0d0d0d; background: #3071a9; border-radius: 1.3px; border: 0.2px solid #010101; >input[type=range]:focus::-webkit-slider-runnable-track < background: #367ebd; >input[type=range]::-moz-range-track < width: 100%; height: 8.4px; cursor: pointer; box-shadow: 1px 1px 1px #000000, 0px 0px 1px #0d0d0d; background: #3071a9; border-radius: 1.3px; border: 0.2px solid #010101; >input[type=range]::-ms-track < width: 100%; height: 8.4px; cursor: pointer; background: transparent; border-color: transparent; border-width: 16px 0; color: transparent; >input[type=range]::-ms-fill-lower < background: #2a6495; border: 0.2px solid #010101; border-radius: 2.6px; box-shadow: 1px 1px 1px #000000, 0px 0px 1px #0d0d0d; >input[type=range]:focus::-ms-fill-lower < background: #3071a9; >input[type=range]::-ms-fill-upper < background: #3071a9; border: 0.2px solid #010101; border-radius: 2.6px; box-shadow: 1px 1px 1px #000000, 0px 0px 1px #0d0d0d; >input[type=range]:focus::-ms-fill-upper

The code above gives us:
Building a Complete Range Input
Now that we’ve built a thumb and a track, we can combine the CSS together and make the completed range input.
Full CSS to Style Range Inputs in All Browsers
input[type=range] < -webkit-appearance: none; margin: 18px 0; width: 100%; >input[type=range]:focus < outline: none; >input[type=range]::-webkit-slider-runnable-track < width: 100%; height: 8.4px; cursor: pointer; box-shadow: 1px 1px 1px #000000, 0px 0px 1px #0d0d0d; background: #3071a9; border-radius: 1.3px; border: 0.2px solid #010101; >input[type=range]::-webkit-slider-thumb < box-shadow: 1px 1px 1px #000000, 0px 0px 1px #0d0d0d; border: 1px solid #000000; height: 36px; width: 16px; border-radius: 3px; background: #ffffff; cursor: pointer; -webkit-appearance: none; margin-top: -14px; >input[type=range]:focus::-webkit-slider-runnable-track < background: #367ebd; >input[type=range]::-moz-range-track < width: 100%; height: 8.4px; cursor: pointer; box-shadow: 1px 1px 1px #000000, 0px 0px 1px #0d0d0d; background: #3071a9; border-radius: 1.3px; border: 0.2px solid #010101; >input[type=range]::-moz-range-thumb < box-shadow: 1px 1px 1px #000000, 0px 0px 1px #0d0d0d; border: 1px solid #000000; height: 36px; width: 16px; border-radius: 3px; background: #ffffff; cursor: pointer; >input[type=range]::-ms-track < width: 100%; height: 8.4px; cursor: pointer; background: transparent; border-color: transparent; border-width: 16px 0; color: transparent; >input[type=range]::-ms-fill-lower < background: #2a6495; border: 0.2px solid #010101; border-radius: 2.6px; box-shadow: 1px 1px 1px #000000, 0px 0px 1px #0d0d0d; >input[type=range]::-ms-fill-upper < background: #3071a9; border: 0.2px solid #010101; border-radius: 2.6px; box-shadow: 1px 1px 1px #000000, 0px 0px 1px #0d0d0d; >input[type=range]::-ms-thumb < box-shadow: 1px 1px 1px #000000, 0px 0px 1px #0d0d0d; border: 1px solid #000000; height: 36px; width: 16px; border-radius: 3px; background: #ffffff; cursor: pointer; >input[type=range]:focus::-ms-fill-lower < background: #3071a9; >input[type=range]:focus::-ms-fill-upper
These styles make the following input:
Bonus: Full Less to Style Range Inputs in All Browsers
There is a lot of CSS required to make identical range inputs for each browser. Using a preprocessor, you can achieve much more efficient results. Included below is the .less file used to generate the CSS above.
@track-color: #424242; @thumb-color: #555bc8; @thumb-radius: 8px; @thumb-height: 30px; @thumb-width: 30px; @thumb-shadow-size: 1px; @thumb-shadow-blur: 1px; @thumb-shadow-color: #111; @thumb-border-width: 1px; @thumb-border-color: white; @track-width: 100%; @track-height: 10px; @track-shadow-size: 2px; @track-shadow-blur: 2px; @track-shadow-color: #222; @track-border-width: 1px; @track-border-color: black; @track-radius: 5px; @contrast: 5%; .shadow(@shadow-size,@shadow-blur,@shadow-color) < box-shadow: @shadow-size @shadow-size @shadow-blur @shadow-color, 0px 0px @shadow-size lighten(@shadow-color,5%); >.track() < width: @track-width; height: @track-height; cursor: pointer; >.thumb() < .shadow(@thumb-shadow-size,@thumb-shadow-blur,@thumb-shadow-color); border: @thumb-border-width solid @thumb-border-color; height: @thumb-height; width: @thumb-width; border-radius: @thumb-radius; background: @thumb-color; cursor: pointer; >input[type=range] < -webkit-appearance: none; margin: @thumb-height/2 0; width: @track-width; &:focus < outline: none; >&::-webkit-slider-runnable-track < .track(); .shadow(@track-shadow-size,@track-shadow-blur,@track-shadow-color); background: @track-color; border-radius: @track-radius; border: @track-border-width solid @track-border-color; >&::-webkit-slider-thumb < .thumb(); -webkit-appearance: none; margin-top: (([email protected] * 2 + @track-height) / 2) - (@thumb-height / 2); > &:focus::-webkit-slider-runnable-track < background: lighten(@track-color, @contrast); >&::-moz-range-track < .track(); .shadow(@track-shadow-size,@track-shadow-blur,@track-shadow-color); background: @track-color; border-radius: @track-radius; border: @track-border-width solid @track-border-color; >&::-moz-range-thumb < .thumb(); >&::-ms-track < .track(); background: transparent; border-color: transparent; border-width: @thumb-width 0; color: transparent; >&::-ms-fill-lower < background: darken(@track-color, @contrast); border: @track-border-width solid @track-border-color; border-radius: @track-radius*2; .shadow(@track-shadow-size,@track-shadow-blur,@track-shadow-color); >&::-ms-fill-upper < background: @track-color; border: @track-border-width solid @track-border-color; border-radius: @track-radius*2; .shadow(@track-shadow-size,@track-shadow-blur,@track-shadow-color); >&::-ms-thumb < .thumb(); >&:focus::-ms-fill-lower < background: @track-color; >&:focus::-ms-fill-upper < background: lighten(@track-color, @contrast); >>
The range input itself has browser support about like: Firefox 23+, Safari 4+, iOS 5+, Chrome 6+, Opera 11+, IE 10+, Android 4.2+. So pretty good. This custom styling stuff should largely match that if you follow the code in this article. Here’s a screenshot from a demo in lots of current versions of browsers:
If a browser doesn’t support range inputs, you’ll just get a text input, which is still functional and valid.
As cross-browser range input styles only became viable in 2014, there are not many tools yet to generate modern styles. range.css is a useful tool for generating CSS styles for range inputs that I created.
Оформление кроссбраузерных элементов input с типом range с помощью CSS
От автора: В этой статье мы познакомимся с инструментом range.css, предназначенным для оформления элемента . Данный тип элемента input является непростым в плане оформления, потому что требует непривычного сочетания стандартных селекторов и свойств с нестандартными селекторами, свойствами и вендорными префиксами.
Возможности для стилизации элемента значительно улучшились с момента выхода версии браузера IE10. Теперь стало возможным создавать кроссбраузерные ползунки выбора диапазона (слайдеры), используя для этого только CSS. В этой обучающей статье мы возьмем стандартный элемент input типа range (Скриншот элемента input с типом range в Mac Chrome 38):

И превратим его вот в такой элемент (Оформление элемента input с типом range с помощью собственных стилей):


Онлайн курс по JavaScript
Научитесь создавать приложения со сложными интерфейсами
Это основной язык для современной веб-разработки — почти 100% сайтов работает на JavaScript. Освойте его с нуля всего за 4 месяца, и вы сможете зарабатывать от 70 000 рублей.
Для того чтобы упростить процесс написания кроссбраузерных стилей, мы воспользуемся помощью препроцессора LESS. CSS стили также будут доступны.
Применение базовых CSS стилей
Необходимо применить несколько CSS правил, чтобы изменить отображение элемента input с типом range во всех браузерах.