- How to Add an Onclick Effect with HTML and CSS
- Example of adding an onclick event by using the checkbox hack:
- Result
- Example of adding an onclick event for resizing the image:
- Example of adding an onclick effect on the tag:
- CSS Button Clicked
- Example 01: Using CSS to make a button produce a bounce effect in an HTML file
- Example 02: Using CSS to make a button bounce in an HTML file
- Example 03: Using CSS to transform the button’s color after clicking on it
- Example 04: Using CSS to change the shape of a button after clicking on it
- Conclusion
- About the author
- Aqsa Yasin
- How to Style a Clicked Button in CSS
- How to Create/Make a Button in HTML?
- Step 1: Make a “div” Container
- Step 2: Insert a Heading
- Step 3: Create a Button
- How to Style a Clicked Button in CSS?
- Step 1: Style “div” Container
- Output
- Step 2: Style Button Element
- Output
- Step 3: Style With “:hover” Selector
- Output
- Step 4: Style With “:focus” Selector
- Conclusion
How to Add an Onclick Effect with HTML and CSS
The most common way of creating a click event with CSS is using the checkbox hack. This method has broad browser support. You need to add a for attribute to the element and an id attribute to the element.
Example of adding an onclick event by using the checkbox hack:
html> html> head> style> label < display: block; background: #dbdbd9; width: 80px; height: 80px; > #box:checked + label < background: #fffc47; color: #666666; > style> head> body> form action="/form/submit" method="post"> input type="checkbox" id="box" /> label for="box">Click here label> form> body> html>Result
In the example above, we applied the same value both to the id attribute of the tag and for attribute of the tag. The label onclick is restyled with the :checked pseudo-class.
Example of adding an onclick event for resizing the image:
html> html> head> style> #btnControl < display: none; > #btnControl:checked + label > img < width: 150px; height: 170px; > style> head> body> input type="checkbox" id="btnControl" /> label class="btn" for="btnControl"> img src="https://images.unsplash.com/photo-1565520651265-1148c3b277f4?ixlib=rb-1.2.1&ixid=eyJhcHBfaWQiOjEyMDd9&auto=format&fit=crop&w=500&q=60" id="btnLeft" /> label> body> html>Since a element can be associated only with one form control, you cannot just place a button inside the tag. But you can add some CSS to change the appearance and behavior of the button.
Example of adding an onclick effect on the tag:
html> html> head> style> #btnControl < display: none; > .btn < width: 80px; height: 30px; background: #ffffff; border-radius: 7px; padding: 1px 3px; box-shadow: 1px 1px 1px #000000; display: block; text-align: center; background-image: linear-gradient(to bottom, #e8e8e8, #a1a1a1); font-family: arial; font-size: 14px; line-height: 30px; > .btn:hover < background-image: linear-gradient(to bottom, #97e8ae, #3be36b); > .btn:active < margin-left: 1px 1px 0; box-shadow: -1px -1px 1px #000; outline: 1px solid #000000; -moz-outline-radius: 7px; background-image: linear-gradient(to top, #97e8ae, #3be36b); > #btnControl:checked + label < width: 70px; height: 74px; line-height: 74px; > style> head> body> input type="checkbox" id="btnControl" /> label class="btn" for="btnControl">Click here label> body> html>CSS Button Clicked
![]()
In this article, we will be discussing different examples of CSS styling to transform a button’s appearance or properties in an HTML file. CSS allows us to style all the elements in an HTML file and there are several different approaches to implement CSS. However, in this article, we will focus on the Style tag method in the header of the HTML file.
Example 01: Using CSS to make a button produce a bounce effect in an HTML file
In this example, we will be using Style tag CSS to make a button transform into a click effect. We will focus on the aftereffect of a click on the button and animate the button to produce a clicking effect.
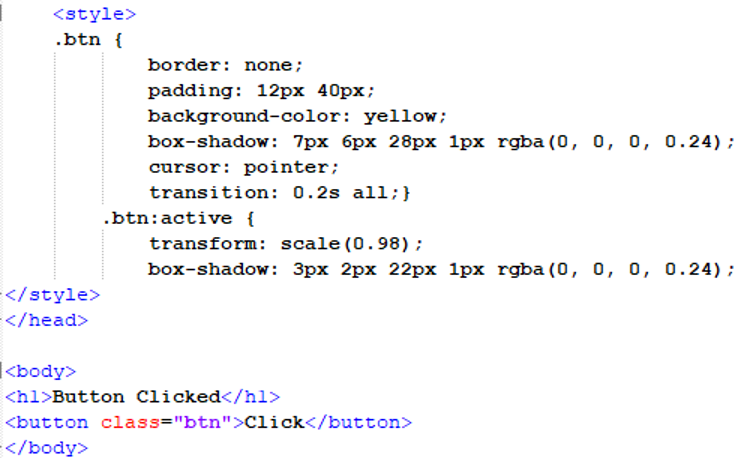
We have opened a style tag in the header of the file in which we will define the styling of the button in a separate class which can be called in any button tag throughout the file. We will open the parenthesis after giving the class a name. Then, we will start by giving it padding (in pixels) to adjust the button on the page. Then we will give the button background color. After this, the box-shadow property will be used. The value would comprise of pixel format for the shadow and the rgba format for the shadow’s color. Then, we will give the button a pointer cursor. When the button will be clicked, the cursor will be transformed due to this property. The last property will be the transition property which will specify the reaction time of the button animation.
After closing the parenthesis, we will classify another function for this class separately. In this function, we will specify the transform scale and the change in the border’s shadow using the same format we used earlier. After this, we will open the body tag and give it a heading and a button. In the button tag, we will mention the name of the class that we just created in the style tag present in the header of the file.
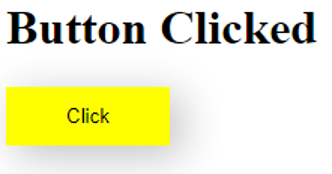
We can see that the button in the above output has a shadow and the padding is visible. Although, the animation would be more visible in the browser, but the styling is more visible in the above snippet.
Example 02: Using CSS to make a button bounce in an HTML file
In this example, we will use CSS Style tags to make a button bounce when clicked. We will concentrate on the outcome of a button click and animate the button to produce a bouncing effect.
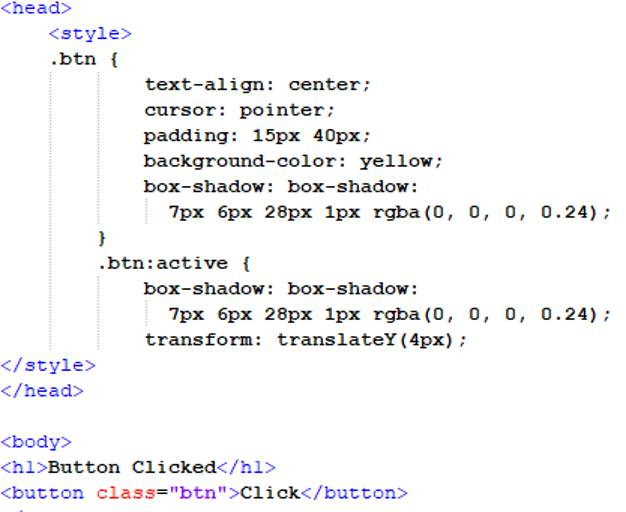
In the above script, we have opened a style tag in the file’s header to specify the button’s styling. The style of the button is stored in a separate class that may be used in any button tag throughout the project. After we have given the class a name, we will open the parentheses of the class. First, we will give the button a pointer cursor so that when it’s clicked, the cursor changes. Then, we will add some padding (in pixels) to change the button’s position on the page. Lastly, we will set the button’s background color. Following that, the box-shadow property will be utilized with the value consisting of pixel format for the shadow and rgba format for the shadow’s color. We will also center align it.
After closing the parentheses of the class, we will categorize another function for this class.We will specify the transform scale and the changes in the border’s shadow in the same format we used in the previous property. After that, we will open the body tag and add a heading and a button to it. in our button tag, we will declare the name of the class that we just built in the style tag in our file’s header.
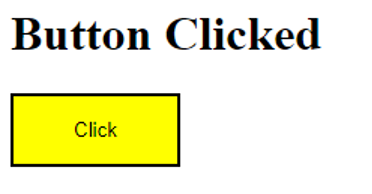
We can see that the button in the above screenshot has all the styling that we specified in the style and the animation of clicking the button would be noticeable in the browser.
Example 03: Using CSS to transform the button’s color after clicking on it
In this example, we will change the color of a button when it will be clicked. We will use CSS in this example and all the styling will be defined in the style tag for the button element.
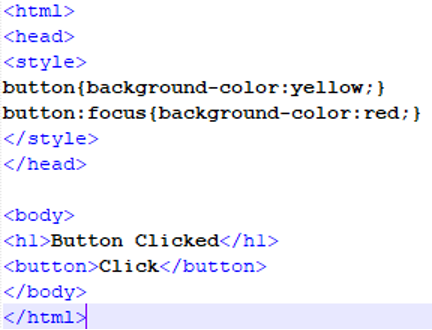
In the above script, we will open a style tag in the header of the file. Then, we will define the styling properties for the default button that the HyperText Markup Language provides. In the style tag, we will start by giving the button yellow background color. After this, we will call the button class with the focus transition property and in its parenthesis. We will define the background color that will be different from the previously defined background color. This will result in a change of color when the button will be clicked.
Now we will open this HTML file on our browser and observe the transformation of the button.
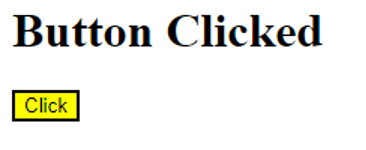
In this snippet, we can see that the button has the styling defined in the first property of the style tag, and when we click on it, we get the following output:
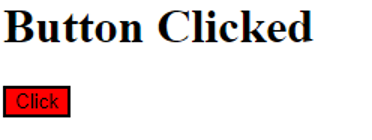
The button has transformed after the click and the color is now red as defined in the button focus parenthesis.
Example 04: Using CSS to change the shape of a button after clicking on it
When a button is clicked, we shall modify its shape in this example. In this example, we will apply CSS. All styling will be defined in the style tag for the button element. The button focus property that will result in changing the shape and color of the button.
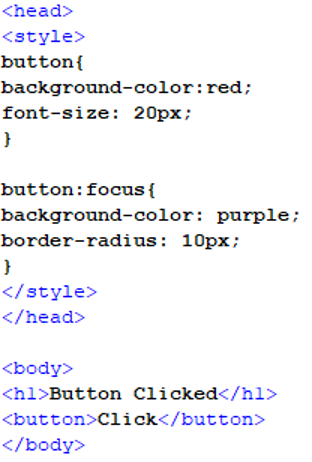
We will open a style tag in the file’s header and provide the styling properties for the default button provided by the HyperText Markup Language in the above script. In the style tag, we will begin by making the button’s background red and assigning a size to the text by the font-size property. Following that, we will call the button class with the focus transition property and define the background color. It will be different from the previously stated background color, which is purple. Then, we will add the border-radius property and assign it a value in pixels. So, when the button is clicked, the shape and the color will change.
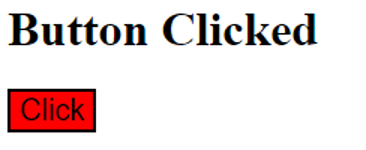
The above output shows the state of the button before it is clicked. The button has a rectangular border with a red background and if we click on the button, we will get the below output:
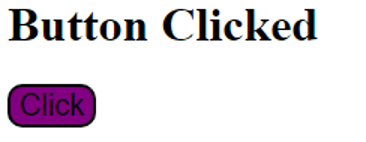
We can now see the transformation of the button’s color and shape as the border has rounded edges and purple background.
Conclusion
In this article, we looked into different examples that CSS allows us to create an effect on a button element of the Hypertext Markup Language when it is clicked. We used the style tag approach to add CSS to the button element in this article. We focused on the transformation of color, shape, and shadow of the button and even added some animations to the button when it will be clicked. We used the Notepad++ IDE to implement these examples in this article.
About the author
Aqsa Yasin
I am a self-motivated information technology professional with a passion for writing. I am a technical writer and love to write for all Linux flavors and Windows.
How to Style a Clicked Button in CSS
![]()
In web development, buttons are the key components that enable user interaction with the website. The buttons can enhance the developer experience and bring more income to the business. Furthermore, buttons help the developers navigate the product because they require the users to convert the desired outcomes.
In this write-up, we will demonstrate:
How to Create/Make a Button in HTML?
To create/make a button in HTM, the HTML “ ” element is utilized. For practical demonstration, you must check out the given instructions.
Step 1: Make a “div” Container
Initially, make a “div” container by inserting a “ ” element. Then, assign a class attribute and allocate a name for further use.
Step 2: Insert a Heading
Next, utilize the HTML heading tag to insert a heading. Users can use any heading tag from the “” to the “ ” tag. In this scenario, the “ ” is used.
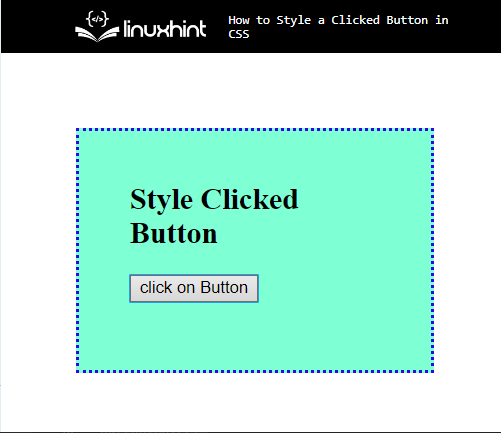
Step 3: Create a Button
After that, create a button element with the help of the “ ” element. Then, specify the button “type” as “submit” and embed some text in between the button tag to display on the button:
It can be observed that the button has been created successfully:
Move toward the next section to learn about styling the clicked button.
How to Style a Clicked Button in CSS?
There are different pseudo-classes, including “:hover” and “:focus” utilized with button elements. Furthermore, the user can also apply the various CSS properties on a button for styling.
To style a clicked button in CSS, try out the following procedure.
Step 1: Style “div” Container
Access the “div” container by using the attribute selector and the attribute. To do so, the “.btn-container” is used for this purpose:
.btn-container {
margin : 60px ;
padding : 20px 40px ;
border : 3px dotted rgb ( 47 , 7 , 224 ) ;
height : 150px ;
width : 200px ;
align-items : center ;
}
According to the given code snippet:
- “margin” property helps to add the blank space around the element’s boundary.
- “padding” is used for specifying the space inside the element.
- “height” and “width” properties allocate the size for a defined element.
- “align-items” is utilized for setting the item’s alignment inside the element.
Output
Step 2: Style Button Element
Access the button element with the help of “button” and apply the below-stated properties in the code snippet:
button {
filter : drop-shadow ( 5px 8px 9px rgb ( 42 , 116 , 126 ) ) ;
height : 50px ;
width : 100px ;
background-color : yellow ;
}
- “filter” property is used for applying the visual effect on the defined element. To do so, the value of this property is set as “drop-shadow”, which is utilized for specifying the shadow on the element.
- “background-color” is utilized to allocate the color at the element’s backside. For instance, the value of this is specified as “yellow”.
Output
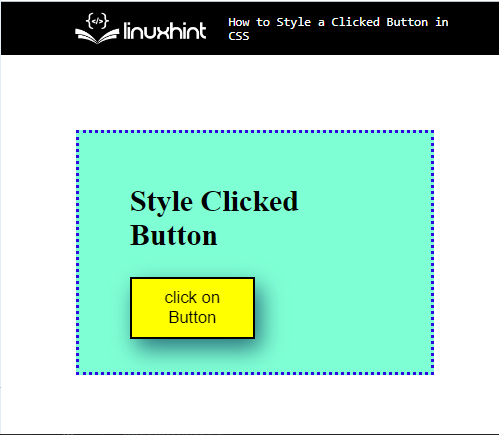
Step 3: Style With “:hover” Selector
Now, access the button element along the pseudo selector, which is used for selecting elements when the user mouse over them:
To do so, the “background-color” property is used with the value “rgb(238, 7, 7)”. This color will only display when the user hovers over the button.
Output
Step 4: Style With “:focus” Selector
Now, utilize the “:focus” pseudo selector along the button element, which is used for applying style on the selected element when the user is targeted by the keyboard or focused on by the mouse:
In this scenario, the “background-color” is used with the values set as “blue”.
You have learned the method for styling the clicked button in CSS.
Conclusion
To style the clicked button in CSS, first, create a button in HTML with the help of the “ ” element. Then, access the button pseudo selectors, such as “:hover” and “:focus” and apply CSS properties, including “height”, “width”, “filter”, “background-color”, and many more. This post was all about styling the clicked button in CSS.