- 10+ Hamburger Menu Examples [CSS Only]
- What Is A Hamburger Menu?
- Different Types Of CSS Hamburger Menu Icons
- 10 Amazing Hamburger Menu CSS Designs
- 1 Responsive CSS Hamburger Menu — CSS only
- 2. Simple Centred Hamburger Menu
- 3. Left Sliding Responsive Hamburger Menu
- 4. Full-screen Hamburger Menu
- 5. Hamburger menu animations
- 6. Snappy Sliding Hamburger Menu
- 7. Top Left Animated Hamburger Menu
- 8. Simple Left-Sliding Hamburger Menu Overlay
- 9. Animated Full Screen Hamburger Menu
- 10. Full Screen Morphing Hamburger Menu
- 11. Multi-Depth Hamburger Menu
- Takeaway
- Related articles
- Бургер кнопка для меню
- Анимируем кнопку
- Анимируем без использования js
- Как сделать гамбургер (бургер) меню — готовый код и подробное объяснение
10+ Hamburger Menu Examples [CSS Only]
On today’s menu are CSS hamburgers. A responsive way to display an off-canvas menu, using only HTML and CSS.
Every website needs to be responsive if it wants to be successful. Having a mobile-supported menu is vital to appeal to all audiences and devices. This is something which we will learn about in this article with how CSS responsive hamburger menus can help.
What Is A Hamburger Menu?
A Hamburger Menu is a way to display navigation links on a website, usually for mobile devices and smaller screens. However, CSS hamburger menus can be used for desktop websites as well. Once you click the “hamburger” icon, a sliding menu will appear, displaying on top of the main content.
They are also used when you have too many buttons and links on your header navigation bar. A responsive hamburger menu allows you to shrink all this into a more scalable menu design, creating a compact menu. Ideal for sticky navbars and one page websites.
As you might have guessed, it is called a hamburger menu because the icon looks like a stacked burger 😋

Different Types Of CSS Hamburger Menu Icons
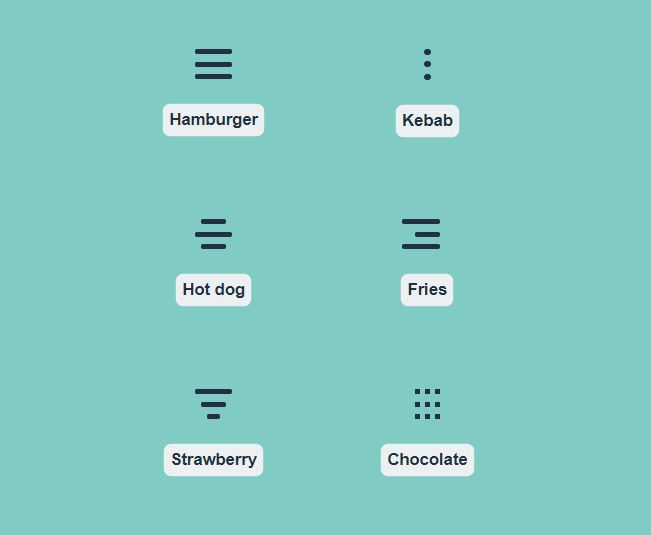
We know where the hamburger menu gets its name from but not all menu icons have to be the same. There are lots of different designs and icon animations to choose from, some of which you will see in our examples.
Consider the different icons above, not all will work for every website design but as you can see, these menu icons can be quite creative. The same goes for their animations.
10 Amazing Hamburger Menu CSS Designs
Now that we understand what a CSS hamburger menu is and its main purpose, let’s go through some examples and you can use yourself and get inspiration from them.
If you are looking to create a responsive design, mobile or just to fit more content in your navigation elements, a CSS responsive hamburger menu is one of the best solutions to go with.
1 Responsive CSS Hamburger Menu — CSS only
It’s quite common to have burger menus to replace standard horizontal menus on small viewports. This way, the menu becomes completely responsive and provides the best experience depending on the viewport size.
If that’s what you are looking for, this example will do exactly that, and with only CSS. To test it out open the codepen in a new window and resize the result panel.
On responsive mode, the hamburger menu will open the list of items one after the other in a vertical column coming from the top. Quite a standard behavior for mobile devices.
2. Simple Centred Hamburger Menu
This one is very simple but effective, it only uses HTML and CSS to pull off a hamburger menu with some cool animations.
The hamburger icon itself, when clicked transforms into a cross and works as the close button. The menu slides into view and displays in the centre with its navigation links.
If you like sliding menu designs and cool animations with many options, you may be interested in fullPage.js — A library that allows you to build full-width, full-screen web pages that are scrollable. It is even available for WordPress with Elementor and Gutenberg plugins and a WordPress theme.
3. Left Sliding Responsive Hamburger Menu
If you are looking for a more complete example of how a CSS hamburger menu can be useful, this CodePen renders an example website to showcase the use of the CSS hamburger menu.
It only uses pure HTML and CSS, so it is easy to learn from and understand what is happening. The menu icon is animated and transforms into a cross when the menu is open.
The menu itself slides out from the slide and overlays the main website. As this design is responsive, it will automatically hide the header menu and make the burger menu available once the screen width decreases.
If you are also interested in menus and not only on the hamburger elemenet, check out these examples of great side menus for your webpage!
4. Full-screen Hamburger Menu
Considering opening the menu element in full-screen? Then you’ll love this example. A CSS-only solution to display a burger menu and open it on a full-screen layer.
This kind of full-screen menus can come on handy when our menu has many items, sub-menus, or extra information.
5. Hamburger menu animations
If you are looking for different animations for your hamburger menu icon, you have to take a look at these ones.
It’s using a single line of JavaScript (or jQuery) to set the state of the burger. The rest is all pure CSS.
6. Snappy Sliding Hamburger Menu
A very snappy and slick CSS hamburger menu that only uses HTML and CSS to pull this off.
The menu itself quickly slides out from the left and does not take up the whole screen, just the left side. The menu items have a nice hover effect as well. And if this effect is not fancy enough for you, you can create a better hover effect by getting inspiration from these CSS Button hover effects.
Good to work from if you are looking to add this to an existing website or you only want the basic structure.
7. Top Left Animated Hamburger Menu
Most CSS hamburger menus either slide out from the left and right or take up the whole screen. But this one is a bit different because it only uses the top left corner inside a bubble-shaped menu.
Very unique compared to the traditional hamburger menu design, this example could easily be changed to edit the colours or add an effective shadow on the background.
This one does use JavaScript but it is only very minimal: basically just to toggle the CSS classes to change the menu status, open or closed. Nothing complicated. No libraries or dependencies to rely on, just pure JavaScript that is very basic.
8. Simple Left-Sliding Hamburger Menu Overlay
The animation is smooth and doesn’t feel tacky. The menu slides out from the left and sits on top of any main content behind.
Doesn’t require any JavaScript, just works purely based on HTML and CSS, easy to work from or adapt to your liking.
The menu itself will be easy to edit and add your own content, simply write your own HTML elements inside and the menu will slide out.
The hamburger menu icon also has a smooth open and close animation that only uses CSS.
9. Animated Full Screen Hamburger Menu
Featuring a floating CSS hamburger menu icon inside a circular background, once clicked the menu uses a curricular opening animation.
The animation is very smooth and opens from the point of the menu icon itself.
Taking up the full screen, would be great for busy navigation menus that require a lot of space with images, icons, and text.
Only uses pure HTML and CSS to pull this off.
10. Full Screen Morphing Hamburger Menu
A fun animated CSS hamburger menu that morphs outwards from the top right corner of the screen into a full-screen menu.
Only using HTML and CSS, the structure is simple to follow and make edits to add your own content and navigation links/style.
11. Multi-Depth Hamburger Menu
Sliding out from the left side of the screen, this menu design is more suited for complex navigation.
It has a lovely sliding animation but the menu itself uses a very well-structured item list that can go multiple depths, useful for inner categories.
It uses HTML and CSS which are generated from SCSS.
Takeaway
We’ve seen a lot of different designs for CSS hamburger menus, some traditional, some a little different. Hopefully, you have found something you like from our examples and found inspiration to use one on your next website.
Find the perfect combination for your hamburger menu by using one of these amazing JavaScript menus.
The CSS hamburger menu has a wide range of uses: from responsive design, interactive experiences with floating menu icons, and providing you with more space with an off-canvas menu.
Overall, CSS responsive hamburger menus are a great way to make your website layout responsive and scale down to smaller screens on mobile devices. It is an easy way to make your header navigation section responsive and adaptable to different screen sizes.
Related articles
More articles which you may find interesting.
Luke Embrey is a full-stack developer, BSc in Computer Science and based in the UK.
You can find out more about him at https://lukeembrey.com/
Join 2,000+ readers and learn something new every month!
Бургер кнопка для меню
В сети часто встречается различные вариации верстки гамбургер кнопки с вложенными пустыми элементами. Например, самый часто встречаемый такой вариант:
Сейчас, мы покажем как сделать бургер кнопку c чистым html кодом без вложенных элементов, используя только css и один тег. Создаем тег button с классом burger
Далее идем в css, задаем размер нашей кнопке и сбрасываем стандартные стили фона и границ. Верхнюю и нижнюю линии мы создадим с помощью псевдоэлементов ::after и ::before , задав им ширину 100%, высоту 4px и расположив их абсолютно относительно кнопки снизу и сверху, а третью зададим как тень от одной из линий и отпустим на середину кнопки.
.burger < position: relative; border: none; background: transparent; width: 40px; height: 26px; >.burger::before, .burger::after < content: ''; left: 0; position: absolute; display: block; width: 100%; height: 4px; border-radius: 10px; background: #000; >.burger::before < top: 0; box-shadow: 0 11px 0 #000; >.burger::after
В итоге мы получаем такую бургер кнопку
Анимируем кнопку
Добавим кнопке анимацию при клике, кнопка будет превращаться в крестик и обратно. Для этого нам понадобится использовать немного javaScript. Получим кнопку и при клике на нее будем добавлять и удалять ей класс active.
const burger = document.querySelector('.burger'); burger.addEventListener('click', () => < burger.classList.toggle('active'); >);А в сss мы добавим стили для активной кнопки, развернем линии на 45 градусов и скроем среднюю линию, чтобы получится крест. Для плавной анимации добавим свойство transition и пропишем в нем свойства которые мы анимируем. Первым значением в transition идет анимируемое свойство, вторым время за которое происходит изменение и третьим задержка. Чтобы анимировать несколько свойств, все необходимые свойства и насторойки к ним, добавляются через запятую.
.burger::before < transition: box-shadow .3s .15s, top .3s .15s, transform .3s; >.burger::after < transition: bottom .3s .15s, transform .3s; >.burger.active::before < top: 11px; transform: rotate(45deg); box-shadow: 0 6px 0 rgba(0,0,0,0); transition: box-shadow .15s, top .3s, transform .3s .15s; >.burger.active::after
И получаем готовую бургер кнопку
Анимируем без использования js
Анимировать можно и без javaScript. Для этого заменим button на label и добавим ему атрибут for со значением burger-checkbox . Также перед label добавим input с типом checkbox , индинтификатором и классом burger-checkbox . Теперь при нажатии на label будет срабатывать чекбокс. Сам чекбокс мы скроем и при помощи псевдокласса :checked и комбинатора + будем изменять стиль активной кнопки, когда чекбокс выбран. Следовательно, в css заменяем селектор .burger.active на .burger-checkbox:checked + .burger .
Как сделать открывающееся меню без javaScript, с использованием данной кнопки читайте в нашей статье – Бургер меню на HTML и CSS
Как сделать гамбургер (бургер) меню — готовый код и подробное объяснение
Достаточно популярный запрос, как сделать гамбургер меню. Я покажу вам вариант с использованием html, css и js. Это адаптивный вариант, то есть он будет работать и на мобильных устройствах.
Начнем с того, что создадим html разметку. Пропишем header и внутрь добавим нашу «иконку» гамбургера (это просто три элемента span):
А теперь добавим наше меню, которое будет появляться, когда пользователь нажмет на гамбургер:
Добавим стили для header и для кнопки:
header < display: flex; justify-content: flex-end; >.menu-btn < width: 30px; height: 30px; position: relative; z-index:2; overflow: hidden; >.menu-btn span < width: 30px; height: 2px; position: absolute; top: 50%; left: 50%; transform: translate(-50%, -50%); background-color: #222222; transition: all 0.5s; >.menu-btn span:nth-of-type(2) < top: calc(50% - 5px); >.menu-btn span:nth-of-type(3)
Сейчас у нас все это выглядит вот так:

Меню выглядит не очень. Давайте это исправим, добавив стили:
/* Меню, которое будет появляться */ .menu < position: fixed; top: 0; left: 0; width: 100%; height: 100%; padding: 15px; background: #FFEFBA; transform: translateX(-100%); transition: transform 0.5s; >.menu.active < transform: translateX(0); >.menu li
Логика в следующем: сейчас мы скрыли меню за пределы экрана с помощью свойства transform и значения translateX(-100%);
Но при клике на гамбургер мы будем добавлять меню класс .active — и он будем возвращать меню в видимую область экрана с помощью transform: translateX(0);
Давайте реализуем на JS добавление класса к меню (.menu) по клику на гамбургер (.menu-btn):
let menuBtn = document.querySelector('.menu-btn'); let menu = document.querySelector('.menu'); menuBtn.addEventListener('click', function()< menu.classList.toggle('active'); >)Мы используем toggle — чтобы удалять класс по клику, если он есть у элемента. Таким образом при клике на гамбургер у нас появляется и исчезает меню.
Если хотите, чтобы меню появлялось справа, то у класса menu измените следующее свойство:
transform: translateX(100%);
По сути, у нас готово гамбургер меню. Но давайте еще сделаем так, чтобы при клике на гамбургер, наша «иконка» превращалась в крестик.
Для этого мы будем использовать тот же фокус с добавлением класса. Для начала добавим css:
/* Меняем гамбургер иконку, когда меню открыто */ .menu-btn.active span:nth-of-type(1) < display: none; >.menu-btn.active span:nth-of-type(2) < top: 50%; transform: translate(-50%, 0%) rotate(45deg); >.menu-btn.active span:nth-of-type(3)
А теперь в js коде сделаем переключатель, как мы ранее делали для меню. Только теперь сделаем для «иконки». Получится вот так:
let menuBtn = document.querySelector('.menu-btn'); let menu = document.querySelector('.menu'); menuBtn.addEventListener('click', function()< menuBtn.classList.toggle('active'); menu.classList.toggle('active'); >)Вот вы и поняли принцип, по которому можно сделать гамбургер меню. Вариантов реализации множество, присылайте в комментариях свои решения.
Прикрепляю видео с нашего YouTube канала, можете посмотреть это все в видеоформате: