- Background Color Animation With CSS (Simple Examples)
- TLDR – QUICK SLIDES
- TABLE OF CONTENTS
- DOWNLOAD & NOTES
- QUICK NOTES
- EXAMPLE CODE DOWNLOAD
- CSS BACKGROUND COLOR ANIMATION
- 1) BACKGROUND COLOR TRANSITION
- 2) BACKGROUND COLOR KEYFRAME SEQUENCE
- 3) BACKGROUND COLOR ANIMATION LOOP
- 4) BACKGROUND COLOR ANIMATION WITH OPACITY
- EXTRA BITS & LINKS
- COMPATIBILITY CHECKS
- LINKS & REFERENCES
- YOUTUBE TUTORIAL
- INFOGRAPHIC CHEAT SHEET
- THE END
- Плавное изменение background
- Transition background
- Transition background-size
- Комментарии
- Другие публикации
- Сборник анимированных градиентов
- Плавная смена цветов по горизонтали
- Результат:
- Плавная смена цветов по вертикали
- Результат:
- Плавная смена цветов по диагонали
- Результат:
- Бегущие полоски
- Результат:
- Бегущие полоски 2
- Результат:
- Комментарии
- Другие публикации
- CSS ANIMATIONS (Changing background colors and positions)
- CSS ANIMATIONS
- CONCLUSION
Background Color Animation With CSS (Simple Examples)
Welcome to a tutorial on how to do background color animation with pure CSS. Once upon a time in the Stone Age of the Internet, doing color animations involves crazy scripts and fighting with digital monsters. But thankfully, it is a breeze with modern CSS.
- Use CSS transition to progressively change the background color.
- Demo
- #demo < transition: background-color 1s >
- document.getElementById(«demo»).style.backgroundColor = «red»;
-
- Use CSS keyframes to specify a sequence of background colors.
- @keyframes col < 0% 50% 100% >
- #demo
That covers the basics, but let us walk through more examples in this guide – Read on!
ⓘ I have included a zip file with all the example code at the start of this tutorial, so you don’t have to copy-paste everything… Or if you just want to dive straight in.
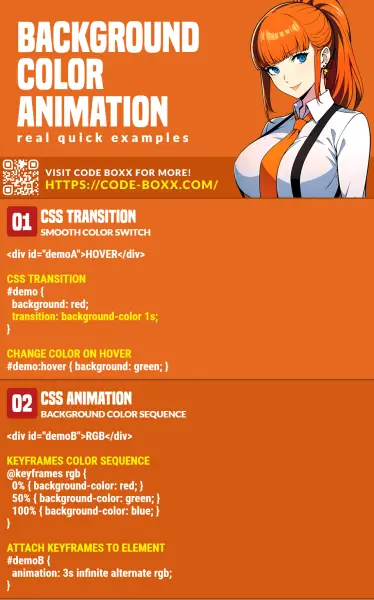
TLDR – QUICK SLIDES
TABLE OF CONTENTS
DOWNLOAD & NOTES
Firstly, here is the download link to the example code as promised.
QUICK NOTES
If you spot a bug, feel free to comment below. I try to answer short questions too, but it is one person versus the entire world… If you need answers urgently, please check out my list of websites to get help with programming.
EXAMPLE CODE DOWNLOAD
Click here to download the source code, I have released it under the MIT license, so feel free to build on top of it or use it in your own project.
CSS BACKGROUND COLOR ANIMATION
All right, let us now get started with the examples of background color animation with CSS.
1) BACKGROUND COLOR TRANSITION
#demo < /* (A1) ALL WE NEED : CSS TRANSITION */ transition: background-color 1s; /* (A2) COSMETICS */ width: 100%; height: 100px; background-color: #eee; >/* (A3) BACKGROUND COLOR CHANGE */ #demo.swap
- (B1) We have a that defaults to background-color: #eee .
- (B2) Clicking on the button will toggle the .swap CSS class on #demo , effectively changing it to background-color: #e00 .
- (A1) Normally, the background color change will be instantaneous. But that single line of transition: background-color 1s is all it takes to do animation magic.
2) BACKGROUND COLOR KEYFRAME SEQUENCE
/* (A1) ANIMATION KEYFRAMES — BACKGROUND COLOR SEQUENCE */ @keyframes morph < 0% < background-color: red; >50% < background-color: green; >100% < background-color: blue; >> /* (A2) COSMETICS */ #demo < width: 100%; height: 100px; background-color: #eee; >/* (A3) BACKGROUND COLOR ANIMATION WITH KEYFRAMES */ #demo.swap
- (A1) Start by creating a set of @keyframes to define the sequence of background colors.
- (A3) Then, attach the keyframe sequence to a CSS class.
- (B) This is the same mechanism as the previous example. We only need to attach .swap to #demo , and this will effectively trigger the animation sequence.
3) BACKGROUND COLOR ANIMATION LOOP
/* (A1) BACKGROUND COLOR SEQUENCE */ @keyframes morph < 0% < background-color: red; >33% < background-color: green; >66% < background-color: blue; >100% < background-color: red; >> /* (A2) ATTACH SEQUENCE */ #demo By now, this should be pretty self-explanatory. As above, all we need is to create a set of @keyframes and attach it to an element/class. But in this example, we set the animation to loop infinitely, no Javascript is required to run.
4) BACKGROUND COLOR ANIMATION WITH OPACITY
/* (A1) BACKGROUND COLOR SEQUENCE */ @keyframes morph < 0% < background-color: rgba(0, 0, 0, 0); >50% < background-color: rgba(255, 0, 0, 0.5); >100% < background-color: rgba(0, 255, 0, 1); >> /* (A2) ATTACH SEQUENCE */ #demo Finally, this is for you guys who are wondering how to add opacity to the equation – Simply use rgba() instead of the “usual” hex or color name.
EXTRA BITS & LINKS
That’s all for the main tutorial, and here is a small section on some extras and links that may be useful to you.
COMPATIBILITY CHECKS
CSS animation and transitions are generally well-supported on all modern browsers.
LINKS & REFERENCES
YOUTUBE TUTORIAL
INFOGRAPHIC CHEAT SHEET
THE END
Thank you for reading, and we have come to the end of this short tutorial. I hope that it has helped you to better understand CSS animations on the background color. If you have anything to add to this guide, please feel free to comment below. Good luck and happy coding!
Плавное изменение background
Анимацию можно легко сделать через CSS свойство transition например для кнопок, меню и т.д. Подробнее на htmlbook.ru.
Transition background
Например, изображение меняются при наведении на него курсора мыши ( :hover ).
Transition background-size
Также transition можно применить к размеру изображения ( background-size ).
Как дополнение, можно добаввить смену background-image :
Комментарии
Другие публикации
Такой эффект можно сделать с помощью :before у родительского элемента. Поверх изображения помещается абсолютный блок с.
Если добавить атрибут contenteditable к элементу, его содержимое становится доступно для редактирования пользователю, а.

Вопрос генерации QR-кодов в PHP достаточно освещён, есть много библиотек, одной из них является «PHP QR Code» – быстрый и легкий класс, рассмотрим его применение совместно с графической библиотекой.

Градиент в цвет шрифта можно добавить с помощью CSS свойства background-clip: text, которое окрашивает текст в цвет или изображение указанного в background-image.
В CSS3 появилась возможность указать в свойстве background несколько изображений (Multiple Backgrounds), при этом они.
Сборник анимированных градиентов
Сборник анимированных градиентов c использованием CSS keyframes.
Плавная смена цветов по горизонтали
body < background: linear-gradient(90deg, #ee7752, #e73c7e, #23a6d5, #23d5ab); background-size: 400% 400%; animation: gradient 10s ease infinite; transform: translate3d(0, 0, 0); >@keyframes gradient < 0% < background-position: 0% 50%; >50% < background-position: 100% 50%; >100% < background-position: 0% 50%; >>Результат:
Плавная смена цветов по вертикали
body < background: linear-gradient(180deg, #641e39, #98749b, #ddf810, #8f4ff4); background-size: 400% 400%; animation: gradient 10s ease infinite; >@keyframes gradient < 0% < background-position: 50% 0%; >50% < background-position: 50% 100%; >100% < background-position: 50% 0%; >>Результат:
Плавная смена цветов по диагонали
body < background: linear-gradient(-45deg, #ed193b, #a98055, #f286e2, #681d7a); background-size: 400% 400%; animation: gradient 10s ease infinite; >@keyframes gradient < 0% < background-position: 0% 50%; >50% < background-position: 100% 50%; >100% < background-position: 0% 50%; >>Результат:
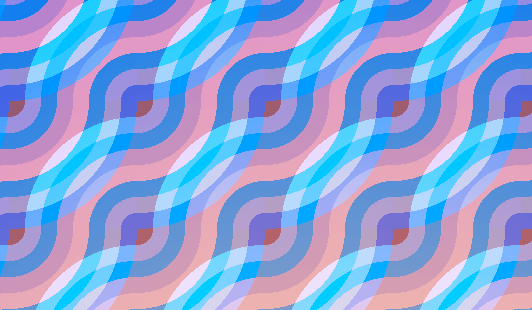
Бегущие полоски
Результат:
Бегущие полоски 2
Результат:
Комментарии
Другие публикации

Такой эффект можно сделать с помощью :before у родительского элемента. Поверх изображения помещается абсолютный блок с.

CSS ANIMATIONS (Changing background colors and positions)
I have been learning about CSS basics for sometime now and today, I decided to share what I learnt. I mostly decide to post a blog on the ones I find confusing (sort of helps me to understand better, almost like teaching myself). We are going to be discussing about CSS animations, focusing mainly on background colors and positions.
CSS ANIMATIONS
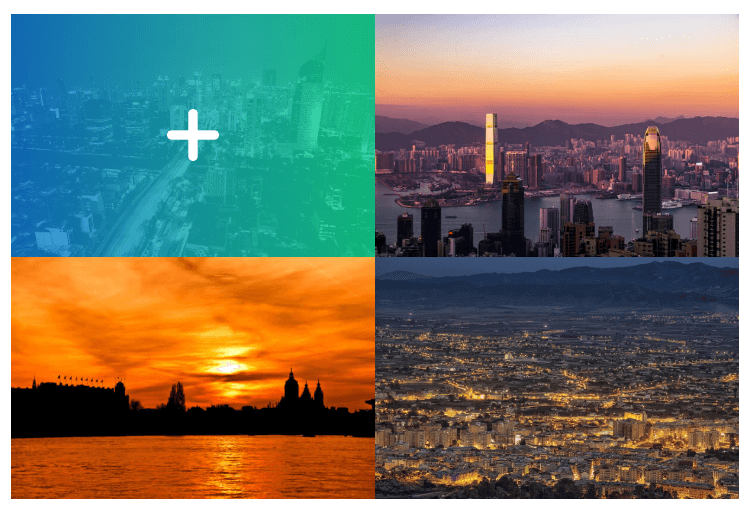
📌 CSS animations help create moving elements and ‘animations’ in your webpage without the use of JavaScript but mainly CSS. To make a div element (container) move to different places on a webpage and change colors, we have to use something called a keyframe . CSS styles specified inside the keyframe rule would allow the animation to gradually change from a current style, to a new style at a certain time. Lets say we have a scenario where we want to move a box from one point to another of the screen. Whiles the box moves, we want the color to change at a specified time. The timing the box would have to be specified in the keyframe by percentages (this could be explained further in the post). This is when the animation-duration property how long an animation would take to complete. Understanding the animation-duration property and the keyframe would allow you to change colors of an element and also, change their positioning. To make it simpler to understand, just take the animation-duration to be the time your animation would last (could be 10s, 20s or even less depending on your preference). And the keyframe to be a property that tells the box to change a color at a specified time. (If you are lost, don’t be. I am going to give a demonstrative explanation)
Looking at the block of code above, you would realize a ‘webkit. ‘ thingy over there. It is basically the code for safari because, some of the standard CSS properties do not work with the safari (ios) browser. It is advisable to always include it alongside with the standard properties just incase. I stated the animation duration to be 4s (seconds). And the keyframe has some percentages aligned to each background color. This means that, your animation has 4 seconds to run. Within 4 seconds; 📌At 0% (of the 4s, which is the going to be the default color when you run the code), the background color would be red and be at the left side of the screen (because left is set to 0px). 📌At 25%, the background color would then change to the color yellow and put 200px on the left side of the box (this would move the box to the right). 📌At 50%, the background color would change to blue and move downwards to the right because there is 200px for both left and top. 📌At 75%, the background color would change to green and move back to the left downwards because the left is now 0px and top is 200px. Lastly at 100%, it would go back to its original position and color. This block of code above would make the box move in four corners. The importance of the keyframe is to specify the styles you would want to add to your animations.
CONCLUSION
One thing you should always specify is the number of the seconds the animation duration would take. And the percentages is well (in the keyframe). This is because, the default value is always zero (0) so if you forget to indicate the exact time the animation should last, it would not take any effects. Thanks for reading!