- :active
- Синтаксис
- Спецификации
- Описание и примеры
- См. также
- Ссылки
- How to Keep :active CSS Style After Click a Button
- Prerequisite: Create an HTML File
- What is :active in CSS?
- Style “nav-btn” Class
- How to Keep CSS :active Style After clicking a Button?
- jQuery Code
- Conclusion
- About the author
- Nadia Bano
- How to get css button to stay active after it has been clicked?
- Answer by Kelly Avalos
- Answer by Maximiliano Barry
- Answer by Zavier Johnston
- Answer by Kallie Carr
- Answer by Elijah Knox
- Definition and Usage
- Answer by August Chase
- Answer by Mohammed Owens
- Answer by Raegan Gardner
:active
Псевдокласс :active соответствует элементу в момент, когда он активируется пользователем.
Он позволяет странице среагировать, когда элемент активируется. Взаимодействие элемента с мышью — это, как правило, время между нажатием и отпусканием пользователем кнопки мыши. Также псевдокласс :active срабатывает при использовании клавишы TAB на клавиатуре. Обычно это используется для HTML-элементов и , но может применяться и к другим элементам.
Это свойство может быть переопределено любыми другими псевдоклассами, относящимся к ссылке, такими как :link , :hover и :visited , описанными в последующих правилах. Чтобы стилизировать нужные ссылки, вам нужно ставить правило :active после всех других правил, относящихся к ссылке, как определено правилом LVHA-порядком: :link — :visited — :hover — :active .
Примечание: В системах с много-кнопочными мышами, CSS3 указывает, что псевдокласс :active должен применяться только к первой кнопке; для праворуких мышей — это обычно самая левая кнопка.
Синтаксис
Спецификации
Описание и примеры
a href="#">This link will turn lime while you click on it.a> 1 2 3 4 5 6 7 8 9 10 11 12 13 14 15 16
/* Unvisited links */ a:link color: blue; > /* Visited links */ a:visited color: purple; > /* User hovers */ a:hover background: yellow; > /* Active links */ a:active color: lime; > См. также
Ссылки
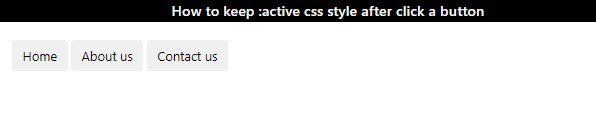
How to Keep :active CSS Style After Click a Button
![]()
In CSS, the pseudo-class specifies the specific state of the selected elements. With the help of these classes, several styling properties are added to style the specific part of the elements. However, jQuery is a specific JavaScript library that provides methods that help with CSS functionalities, such as keeping the button active after clicking on it.
This write-up will discuss:
Prerequisite: Create an HTML File
In HTML, add three “ ” elements and assign each the “btn” and “nav-btn” classes:
Now, let’s refers to the main subject of our post.
What is :active in CSS?
The “:active” pseudo-class indicates the element that is in an active state. In CSS, this class is specified with the elements to be styled as active, such as buttons, links, or more.
Style “nav-btn” Class
The “.nav-btn:active” is used to access the class “nav-btn”. This class is set with the “:active” pseudo-class and applied the following properties to show the button’s active state when clicked by the user:
- “background-color” changes the element’s background color.
- “color” specifies the font color.
- “font-weight” defines the font’s thickness.
The above output verifies that the buttons’ styling changes when clicked by the users. However, they are not keeping their active state and fade away after the click.
How to Keep CSS :active Style After clicking a Button?
jQuery can be used to keep the active state of the buttons. For this purpose, add the styles within the class “nav-btn” and append the class “.active” with it:
jQuery Code
In the “ ” tag add the following code:
$ ( «.nav-btn» ) . on ( «click» , function ( ) {
$ ( «.nav-btn» ) . removeClass ( «active» ) ;
Here is the description of the above code:
- The “$()” is the shortcut function of the “getElementById”.
- The “.nav-btn” is the class accessed through this function.
- The “.on(click, function()” denotes the function which will be triggered on the button click.
- The “$(“.nav-btn”).removeClass(“active”);” remove the styles from each button and implement the styles when the button is clicked.
- “$(this).addClass(“active”);” signifies that the styles must only be applied to that button that is currently clicked.
That’s it! You have successfully learned how to maintain CSS “:active” style after a button click.
Conclusion
To keep the active state of a button, jQuery methods are used. For this purpose, first, access the button by using the “$()” method. Then, define the function to apply the active state styles on mouse click. Implement the event handler and the function. The function will first remove the styles from each button. Then, “$(this)” is used with the “:addClass()” to keep the active state of the button. This article has demonstrated the procedure for keeping CSS :active style after clicking a button.
About the author
Nadia Bano
I am an enthusiastic and forward-looking software engineer with an aim to explore the global software industry. I love to write articles on advanced-level designing, coding, and testing.
How to get css button to stay active after it has been clicked?
:active denotes the interaction state (so for a button will be applied during press), :focus may be a better choice here. However, the styling will be lost once another element gains focus.,Once the button is clicked I want it to stay with the active style instead of going back to normal style. Can this be done with CSS please? Im using blurb button from DIVI Theme (WordPress). Please help me!,The final potential alternative using CSS would be to use :target, assuming the items being clicked are setting routes (e.g. anchors) within the page- however this can be interrupted if you are using routing (e.g. Angular), however this doesnt seem the case here.,As such, there is no way in CSS to absolutely toggle a styled state- if none of the above work for you, you will either need to combine with a change in your HTML (e.g. based on a checkbox) or programatically apply/remove a class using e.g. jQuery
.active:active < color: red; >.focus:focus < color: red; >:target
.active:active < color: red; >.focus:focus < color: red; >:target
Answer by Kelly Avalos
How do I make the button stay a certain color after they click on it? (It is to emphasize the tab/page unity.),:active pseudo class refers to when it is in the active state, e.g. when a user clicks on the link. You can use :target?,I got them to style by enlarging when clicked. I’d like to make then change color, though.,This topic was automatically closed 91 days after the last reply. New replies are no longer allowed.
I have a row of buttons in my nav bar, all like this one:
… but that doesn’t change anything on button click. As part of the onclick innerHTML in the JavaScript, I added:
Answer by Maximiliano Barry
Once the button is clicked I want it to stay with the active style instead of going back to normal style. Can this be done with CSS please? Im using blurb button from DIVI Theme (WordPress). Please help me. active denotes the interaction state (so for a button will be applied during press), :focus may be a better choice here. However, the styling will be lost once another element gains focus.,As such, there is no way in CSS to absolutely toggle a styled state- if none of the above work for you, you will either need to combine with a change in your HTML (e.g. based on a checkbox) or programatically apply/remove a class using e.g. jQuery,We’re going to to be using a hidden checkbox. This example includes one «on click — off click ‘hover / active’ state»
#blurb-hover.et_pb_blurb .et_pb_blurb_content .et_pb_main_blurb_image .et-pb-icon:hover < color: red !important; >#blurb-hover.et_pb_blurb .et_pb_blurb_content .et_pb_main_blurb_image .et-pb-icon:selected < background-color: #ff4b46; color: #fff; >#blurb-hover.et_pb_blurb .et_pb_blurb_content .et_pb_main_blurb_image .et-pb-icon:active
Answer by Zavier Johnston
Answer by Kallie Carr
Answer by Elijah Knox
The :active selector is used to select and style the active link.,A link becomes active when you click on it.,Tip: The :active selector can be used on all elements, not only links.,Select and style the active link:
Definition and Usage
The :active selector is used to select and style the active link.
Answer by August Chase
Im trying to make a nav bar where once the user clicks on the image, the image stays active. In the following example the leaf would stay green after is is clicked. Here is a bit of code of what Im talking about:,Get answers to millions of questions and give back by sharing your knowledge with others.,If you find copyright violations, you can contact us at info-generacodice.com to request the removal of the content.,The Contents are licensed under creative commons.
Im trying to make a nav bar where once the user clicks on the image, the image stays active. In the following example the leaf would stay green after is is clicked. Here is a bit of code of what Im talking about:
Leaf .myButtonLink < display: block; width: 100px; height: 100px; background: url('http://kyleschaeffer.com/wordpress/wp-content/uploads/2009/01/buttonleafhover.png') bottom; text-indent: -99999px; >.myButtonLink:hover Answer by Mohammed Owens
Now refresh your page in your browser. What happened? If everything worked properly, your clock should no longer be visible. This is one of several ways to hide content using CSS. To make the element visible again, you will change this property to:,you will be able to use CSS to hide and display content.,It’s common practice on today’s web to hide content from users until it’s needed. In this lesson, you will hide your clock, then add a link that if clicked, will display the clock.,First, add the element that you want the user to click:
Now that you have a button that, when clicked, calls the toggleClock() function, you need to create a toggleClock() function. Here’s that function — just add it to the existing script section in the head of your web page:
function toggleClock() < // get the clock var myClock = document.getElementById('clock'); // get the current value of the clock's display property var displaySetting = myClock.style.display; // also get the clock button, so we can change what it says var clockButton = document.getElementById('clockButton'); // now toggle the clock and the button text, depending on current state if (displaySetting == 'block') < // clock is visible. hide it myClock.style.display = 'none'; // change button text clockButton.innerHTML = 'Show clock'; >else < // clock is hidden. show it myClock.style.display = 'block'; // change button text clockButton.innerHTML = 'Hide clock'; >> Answer by Raegan Gardner
One simple way to know a keyboard versus mouse click event is leveraging the keyup and mouseup events, taking the click event out of the equation.,Again, same code attached to a similar container div to prevent having to do a number of event listeners for every related element.,The click event is quite simple and easy to use; you listen for the event and run code when the event is fired. It works on just about every HTML element there is, a core feature of the DOM API.,These are all things to consider when trying to mimic the behavior of the previous examples with the button element. Thankfully, there’s not too much to it. Here’s an example of seeing what type of interaction was done with a checkbox form element:
The code for the event listener is quite simple:
const button = document.querySelector('#button'); button.addEventListener('click', () => < button.innerText = 'Button Clicked!'; window.setTimeout(() =>< button.innerText = '"click" me'; >, 2000); >);const button = document.querySelector('#button'); function reset () < window.setTimeout(() =>< button.innerText = '"click" me'; >, 2000); > button.addEventListener('mouseup', (e) => < if (e.button === 0) < button.innerText = 'MouseUp Event!'; reset(); >>); button.addEventListener('keyup', (e) => < if (e.code === 'Space' || e.code === 'Enter') < button.innerText = `KeyUp Event: $`; reset(); > >);const button = document.querySelector('#button'); button.addEventListener('click', (e) => < button.innerText = e.detail === 0 ? 'Keyboard Click Event!' : 'Mouse Click Event!'; window.setTimeout(() =>< button.innerText = '"click" me'; >, 2000); >);Clicking on the button will now tell you the pointer that was used. The code for this is quite simple:
const button = document.querySelector('#button'); button.addEventListener('pointerup', (e) => < button.innerText = `Pointer Event: $`; window.setTimeout(() => < button.innerText = '"click" me'; >, 2000); >);The code for this is similar to the “Which Is Which” example up above. The difference being we use pointerup instead of mouseup :
const button = document.querySelector('#button'); function reset () < window.setTimeout(() =>< button.innerText = '"click" me'; >, 2000); > button.addEventListener('pointerup', (e) => < button.innerText = `Pointer Event: $`; reset(); >); button.addEventListener('click', (e) => < if (e.detail === 0) < button.innerText = 'Keyboard ||Click Event!'; reset(); >>);