- Cropping Images in Python With Pillow and OpenCV
- How to Crop Images in Python With Pillow
- Crop an Image in Python With OpenCV
- Resizing and Cropping Python Images Through Automation With Cloudinary
- How to Crop Images with OpenCV and Python
- Crop an Image Using OpenCV
- Summary
- Recent Posts
- How to Crop an image in python using OpenCV : 5 Steps Only
- Steps to Crop an image in python
- Step 1: Import all the required libraries
- Step 2: Read the image
- Step 3: Define the dimensions
- Step 4: Crop the image
- Step 5: Show the image
- Conclusion
- Join our list
Cropping Images in Python With Pillow and OpenCV
Image cropping is a way of photo editing that involves removing a portion of an image to emphasize a subject, change the aspect ratio, or improve the framing. You can then reframe a subject or direct the viewer’s attention to a certain part of the photo. Automated image cropping performs the same task on a large number of images.
Here are the key terms that relate to image cropping:
- Crop rectangle — The region, defined by four coordinates, to which to crop the image. The cropping operation removes all the details outside the crop rectangle, delivering a modified image of the crop rectangle’s size.
- Aspect ratio — The ratio of the image’s width to its height. This ratio is denoted by two numbers separated by a colon, for example, 4:3 or four-to-three.
- Pixels — The grid of vertical and horizontal pixels of which digital photos are composed. Cropping cuts out certain sections of the image, reducing the number of pixels and shrinking the image size.
This article covers the following topics:
How to Crop Images in Python With Pillow
A fork of the Python Image Library (PIL), the Pillow library offers an easy way through the crop() function for cropping images in Python. Here’s syntax:
The box parameter accepts a tuple with four values of the four coordinates for the crop rectangle: left, upper, right, and lower. The crop rectangle is drawn within the image, which depicts the part of the image you want to crop. Image.crop returns an image object.
To crop an image with Pillow:
- Import Pillow’s Image class:
img = Image.open('./myimage.png') img.show() box = (250, 250, 750, 750) img2 = img.crop(box)
img2.save('myimage_cropped.jpg') img2.show() Note the following issues vis-à-vis cropping images with Pillow:
- Content-aware cropping. Most cropping operations depend on the context. For example, you don’t want to remove important parts of the image, but that’s difficult to ensure programmatically because the crop() function is not sensitive to the image content.
- Cropping and resizing. Oftentimes, you must resize and crop an image at the same time. Even though you can resize images in Python with a similar technique, combining cropping and resizing can get tricky, let alone that it’s challenging to generate the exact image you need for your design.
- Image management. A large number of crop operations might lead to multiple versions for each image, all to be stored on the server. Besides procuring extra storage space, you must also put in place a clear, consistent convention to facilitate locating the right version of the image. A much more efficient approach is to simply dynamically generate the required version of the image without saving all its versions to the file system.

Crop an Image in Python With OpenCV
Python OpenCV is a library with advanced computer-vision capabilities, in particular a set of functions for handling processing and transforming images. To import the OpenCV library into your program, type:
Here’s the syntax for image cropping:
image[start_x:end_x, start_y:end_y]
Interestingly, this syntax slices the image[] in the form of an array by passing the start and end index x and y coordinates for each segment. The portion of the image between the start and end coordinates is returned as a truncated array object.
import cv2 image = cv2.imread(r"C:\file\path\imagename.png") y=0 x=0 h=300 w=510 crop_image = image[x:w, y:h] cv2.imshow("Cropped", crop_image) cv2.waitKey(0) The statement cv2.imread(r»image path») opens the image in read-only mode. The cv2.imshow() function near the bottom displays the cropped image.
Resizing and Cropping Python Images Through Automation With Cloudinary
A cloud-based service for managing images and videos, Cloudinary offers a generous free-forever subscription plan. While on that platform, you can upload your images, apply built-in effects, filters, and modifications.
You can also resize images through automation, focusing on the most important elements with AI, or adapt them to your website design by, for example, specifying the width, height, and aspect ratio as qualifiers for the new image instances. Cloudinary then automatically performs the resizing and cropping tasks to meet the criteria. No manual efforts are required.

Take this 1,200×1,200-pixel image:
Resizing it to 200×200 pixels with crop, scale, fill, and pad results in the following images:
How to Crop Images with OpenCV and Python

In OpenCV, images are simply Numpy arrays. So we can use Numpy array slicing for image cropping and remove the part we are not interested in.
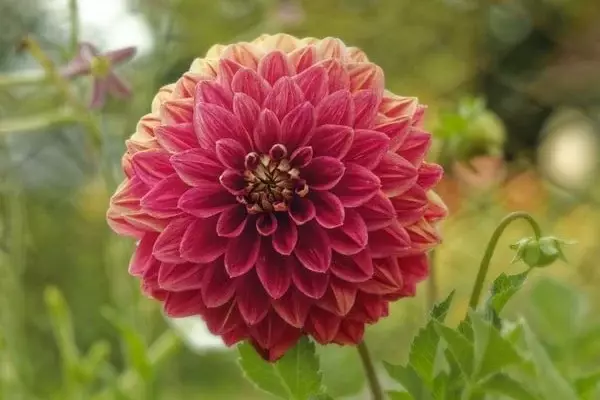
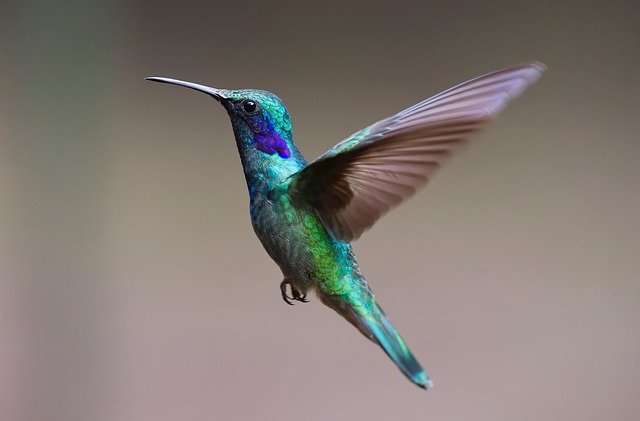
The image below will be used as an example throughout this tutorial.
This article is part 4 of the tutorial series on computer vision and image processing with OpenCV:
- How to Read, Write, and Save Images with OpenCV and Python
- How to Read and Write Videos with OpenCV and Python
- How to Resize Images with OpenCV and Python
- How to Crop Images with OpenCV and Python (this article)
- How to Rotate Images with OpenCV and Python
- How to Annotate Images with OpenCV and Python (coming soon)
- Bitwise Operations and Image Masking with OpenCV and Python
- Image Filtering and Blurring with OpenCV and Python
- Image Thresholding with OpenCV and Python
- Morphological Operations with OpenCV and Python
- Edge and Contour Detection with OpenCV and Python
Crop an Image Using OpenCV
The first dimension of a Numpy array represents the rows of the array (which is the height of the image or the y-coordinates) and the second dimension represents the columns of the array (which is the width of the image or the x-coordinates).
So to crop an image, we can use the following syntax:
cropped_img = img[y_start:y_end, x_start:x_end]Let’s jump straight to an example so you don’t get lost.
import cv2 # read the image image = cv2.imread("image.jpg") cropped_img = image[50:200, 100:400] cv2.imshow("Original image", image) cv2.imshow("Cropped image", cropped_img) cv2.waitKey(0) cv2.destroyAllWindows()When slicing a Numpy array we start with the height (the rows of the array) and then the width (the columns of the array).
Take a look at the image below to see the region we’ll keep after cropping. The image also shows us the coordinates that will be used for cropping:
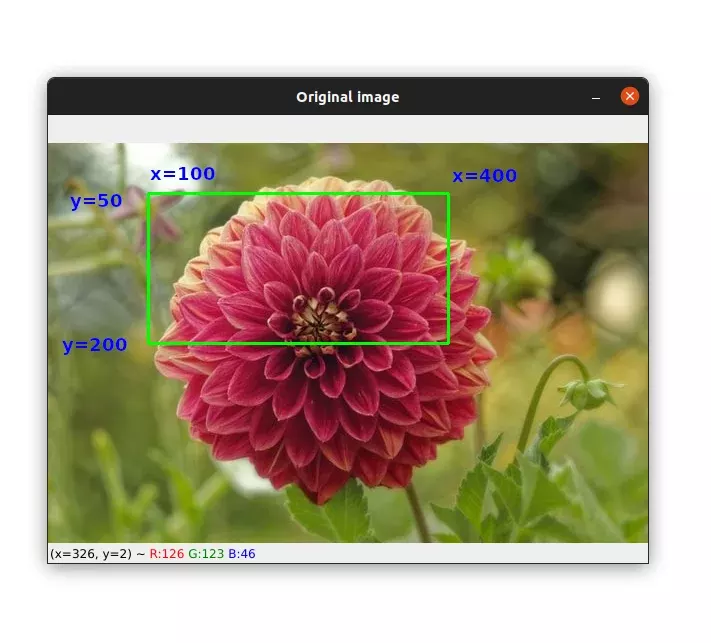
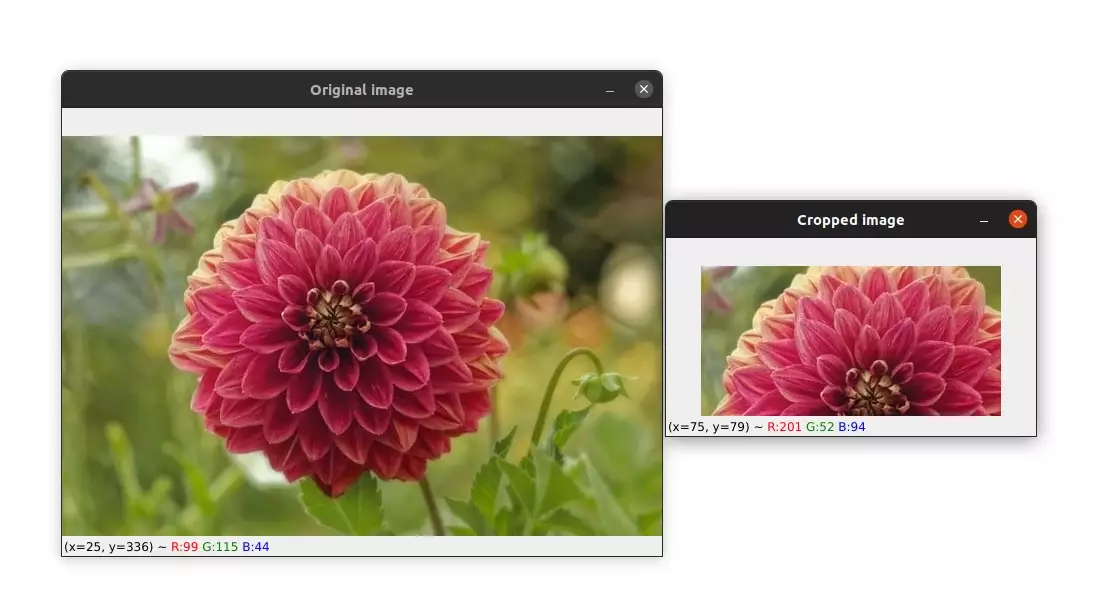
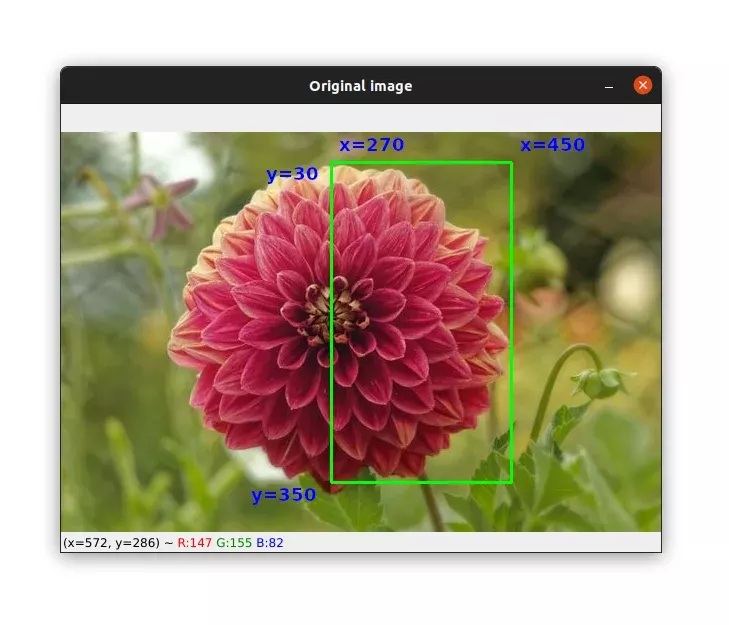
image = cv2.imread("image.jpg") cropped_img = image[30:350, 270:450] cv2.imshow("Original image", image) cv2.imshow("Cropped image", cropped_img) cv2.waitKey(0) cv2.destroyAllWindows()Again, here are the coordinates and the region that we will keep after cropping :
and here is the cropped image:

Here is a last example of cropping which will keep only the region of the flower:
image = cv2.imread("image.jpg") cropped_img = image[30:365, 104:450] cv2.imshow("Original image", image) cv2.imshow("Cropped image", cropped_img) cv2.waitKey(0) cv2.destroyAllWindows()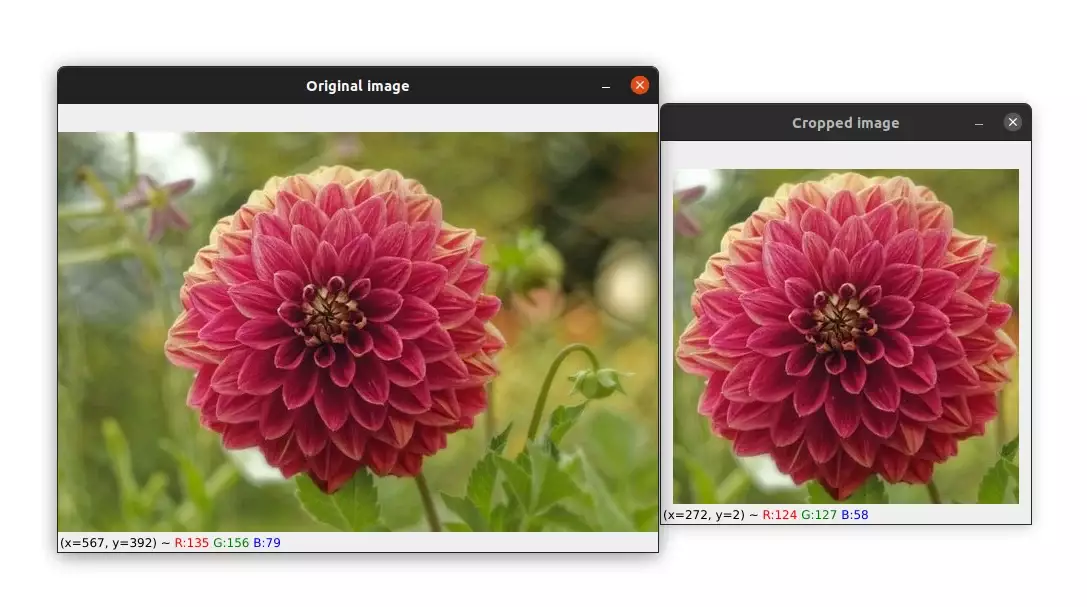
I think I’ve included enough examples so that you don’t get lost. Hopefully, with these examples, you will get a better understanding of how cropping works.
Summary
Cropping is an important image processing operation and is also very simple to use. Maybe you can get confused with the starting and ending points of the slicing or you can reverse the x and y-coordinates but with some practice, this will become natural.
If you want to learn more about computer vision and image processing then check out my course Computer Vision and Image Processing with OpenCV and Python.
If you need help don’t hesitate to ask in the comment section.
Search
Recent Posts

Hi, I’m Yacine Rouizi — a self-taught developer passionate about machine learning, deep learning, and computer vision. My mission is to make these complex topics accessible to everyone through hands-on tutorials and clear explanations.

In this comprehensive guide, you’ll learn everything you need to know to master YOLO. With detailed explanations, practical examples, and step-by-step tutorials, this book will help you build your understanding of YOLO from the ground up.
Discover how to train the YOLO model to accurately detect and recognize license plates in images and real-time videos.
How to Crop an image in python using OpenCV : 5 Steps Only

Do you want to crop an image in python? If yes then this tutorial is for you. You will know how to crop an image in python using the OpenCV packages. OpenCV is the best library for image processing and transformation. There are many inbuilt functions in it and using one of the functions you will crop an image in python.
Steps to Crop an image in python
In this section, you will know all the steps to crop an image in python. You have to just follow the steps for deep understanding.
Step 1: Import all the required libraries
The first step is to import all the necessary libraries required for this tutorial. In our example, We are using OpenCV only so let’s import it with the import statement.
Step 2: Read the image
The second step is to read the image for cropping. In OpenCV, you can read the image using the cv2.imread() method. It will read the image as an array. Let’s read it using the following line of code.
I am reading the following image. An image of a bird.
Step 3: Define the dimensions
After reading the image, let’s define from where you want to crop the image and for how much height and width. It will be used to crop the image to the defined dimensions.
Here x and y are the starting point for cropping and h and w is the height and width for the image.
Step 4: Crop the image
To crop the image you have to just pass the dimensions inside the img[] array. Use the following lines of code to crop the image.
Step 5: Show the image
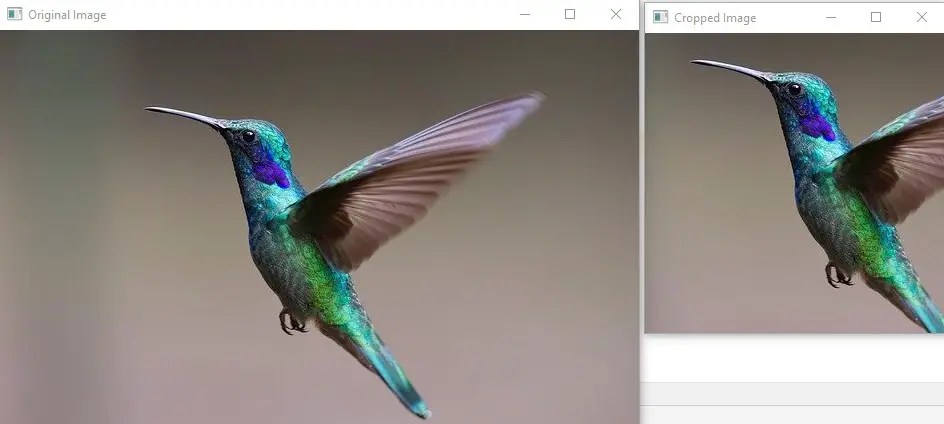
Now after cropping let’s compare the original image and the cropped image. In OpenCV, you can show the image using the cv2.imshow() function. Add the following lines of code.
If you want to save the cropped image to your disk then you can use the cv2.imwrite() function.
Conclusion
OpenCV is a great library for manipulating images. You can do most of the complex work on images using it. These are the steps to crop an image in python using OpenCV. I hope you have liked this tutorial. If you have any doubt then you can contact us for more help.
Join our list
Subscribe to our mailing list and get interesting stuff and updates to your email inbox.
We respect your privacy and take protecting it seriously
Thank you for signup. A Confirmation Email has been sent to your Email Address.