- Простой чат на AJAX
- update 5.10.16
- Simple Live Chat With PHP Websockets (Free Download)
- TABLE OF CONTENTS
- PHP LIVE CHAT
- DOWNLOAD RATCHET WEBSOCKET LIBRARY
- PART 1) PHP WEBSOCKET LIVE CHAT
- PART 2) LIVE CHAT PAGE
- 2A) THE HTML
- 2B) LIVE CHAT JAVASCRIPT
- DOWNLOAD & NOTES
- SUPPORT
- EXAMPLE CODE DOWNLOAD
- EXTRA BITS & LINKS
- IMPROVEMENT IDEAS
- DYNAMIC PROPERTIES
- COMPATIBILITY CHECKS
- LINKS & REFERENCES
- YOUTUBE TUTORIAL
- THE END
- Как сделать чат на PHP
- Back-end:
Простой чат на AJAX

Начал замечать на многих сайтах наличие, либо окошка чата или окошка онлайн консультанта. Не секрет что яндекс относит наличие на сайте чата или консультанта к положительным коммерческим факторам. Всвязи с этим я попытался наваять ajax чат для сайта.
И так поехали писать чат на ajax php. Создаём файл chat.js , а так же сразу создадим файлы add.php и get_json.php , но о них позже . Создаём файл chat.php . Подключаем к нему jquery и chat.js . Создаём в файле chat.php поле с именем участника чата и поле с сообщением в чат, а так же кнопку с id btnSend для отправки сообщения. На кнопку с id btnSend в файле chat.js повешен обработчик событий клик. В див с id chat будут выводиться наши чат сообщения. Ниже показан листинг куска кода из файла chat.php . Не обращайте внимания на непонятные css классы, это классы из bootstrap.
В chat.js обрабатывем данные из полей ввода и методом post в формате json отправляем данные в add.php . Кусок кода из chat.js ниже.
$('#btnSend').click(function(elem)< //при клике получаем сообщения из полей с ид name и text var name = $('#name').val(); var text = $('#text').val(); //и методом POST в формате json отправляем их в add.php $.post('add.php', , function()< //поле text стираем(тоесть делаем пустым '') $('#text').attr('value', ''); >); >); В файле add.php мы получаем данные. Конечно их надо бы проверить после получения но это мы пока опустим. Добавляем к данным дату и записываем их в файл messages.txt в одну строчку с уникальным разделителем «_». Так же для того что бы файл не разросся до больших размеров, сделана защита от переполнения. При достижении в файле messages.txt строк сообщений более 100, все строки стираются кроме последних пяти. Они зписываются заново. Ниже листинг add.php .
100 if(count($strings)>100) < //получаем все строки из файла в виде нумерованного массива $textarr=file('messages.txt'); $arr=array_slice($textarr, -5); //переписываем данные в файл записываем только //последние 5 строк массива $f = fopen('messages.txt', 'w+'); //в цикле записываем данные в файл, //каждое значение массива на новой строке в файле foreach($arr as $ar)< $f = fopen('messages.txt', 'a+');//открыли файл fwrite($f, $ar);//запись fclose($f);//закрыли файл >> $f = fopen('messages.txt', 'a+');//открыли файл fwrite($f, date('Y-m-d H:i:s') . "___");//запись fwrite($f, $name . "___");//запись в файл fwrite($f, $text . "\n");//запись и добавили конец строки fclose($f);//закрыли файл > ?> Всё, наши все сообщения пишутся в файл. Теперь нам нужно сделать так, что бы эти сообщения выводились на экран. Для этого напишем в файле chat.js функцию chatRequest() . Эта функция обращается к файлу get_json.php и передаёт ему параметр __maxId . Параметр _maxId указывает сколько сообщений у нас есть на данный момент. По умолчанию в начале стоит 0. Соответственно для начала __maxId определяем как глобальную переменную.
function chatRequest()< // Отправка запроса методом POST. $.post('get_json.php', , chatResult, 'json'); > Так же в функции chatRequest() определено, что при удачном выполнении запроса данные ответа возвращаются в формате json и вызывается функция chatResult из файла chat.js . Но давайте сначала разберём файл get_json.php .
Файл get_json.php принимает данные, вычисляет строку, которая была не отображена на экране, делает из неё массив, упаковывает в формат json и отправляет в функцию chatResult(msgs) .
//переводим массив в json и отправляем echo json_encode($messages); ?>
ChatResult дописывает данные полученой строки в массив _messages . Мы его объявили в самом начале файла и сделали его массивом. И потом функция заново выводит все написанные сообщения в цикле из массива _messages в див с id #chat . Сделал так, что бы выводилось только пять последних сообщений. Для чётного и нечётного сообщения выводится своя вёрстка. Для вёрстки я опять же использую бутстрап. Листинг функции ChatResult .
function chatResult(msgs) < // Добавление новых сообщений в массив. for(var i = 0; i < msgs.length; i++) < var m = new Object(); m.dt = msgs[i]['date']; m.name = msgs[i]['name']; m.text = msgs[i]['text']; _messages.push(m); _maxId++; >// Вывод массива сообщений. var html = ''; //пока сообщений в фаиле меньше 5 if(_messages.length<=5)< for (var i = _messages.length - 1; i >=0; i--) < var m = _messages[i]; //проверка что сообщение чётное if (i%2==1)< //вёрстка html +=''; >else< //вёрстка html +=''; html +=''+m.name+'
'; html +=''+m.text+''+m.dt+'
'; > > //сообщений в фаиле больше 5 >else< for (var i = _messages.length - 1; i >= _messages.length-5; i--)< var m = _messages[i]; //проверка что сообщение чётное if (i%2==1)< //вёрстка html +=''; html +=''+m.name+'
'; html +=''+m.text+''+m.dt+'
'; >else< //вёрстка html +=''; html +=''+m.name+'
'; html +=''+m.text+''+m.dt+'
'; > > > //выводим все сообщения $('#chat').html(html); >'; html +=''+m.name+'
'; html +=''+m.text+''+m.dt+'

Для того что бы у нас чат постоянно обновлялся мы делаем постоянные запросы к функции chatRequest() с периодичностью 2 сек.
// Запрашиваем сообщения каждые 2 секунды setInterval(chatRequest, 2000);
Ну вот мы и написали простой чат на ajax php для сайта. Для полноты картины покажем полный листинг файла chat.js
var _maxId; var _messages; $(document).ready(function()< // Инициализация. _maxId = 0; _messages = []; chatRequest(); // Запрашиваем сообщения каждые 2 секунды setInterval(chatRequest, 2000); $('#btnSend').click(function(elem)< //при клике получаем сообщения из полей с ид name и text var name = $('#name').val(); var text = $('#text').val(); //и методом POST в формате json отправляем их в add.php $.post('add.php', , function()< //поле text стираем(тоесть делаем пустым '') $('#text').attr('value', ''); >); >); >); function chatRequest() < // Отправка запроса методом POST. $.post('get_json.php', , chatResult, 'json'); > function chatResult(msgs) < // Добавление новых сообщений в массив. for(var i = 0; i < msgs.length; i++) < var m = new Object(); m.dt = msgs[i]['date']; m.name = msgs[i]['name']; m.text = msgs[i]['text']; _messages.push(m); _maxId++; >// Вывод массива сообщений. var html = ''; //пока сообщений в фаиле меньше 5 if(_messages.length<=5)< for (var i = _messages.length - 1; i >=0; i--) < var m = _messages[i]; //проверка что сообщение чётное if (i%2==1)< //вёрстка html +=''+m.name+'
'; html +='  '; html +='
'+m.text+''+m.dt+'
'; >else< //вёрстка html +=''+m.name+'
'; html +=' '; html +=''+m.text+''+m.dt+'
'; > > //сообщений в фаиле больше 5 >else< for (var i = _messages.length - 1; i >= _messages.length-5; i--)< var m = _messages[i]; //проверка что сообщение чётное if (i%2==1)< //вёрстка html +=''+m.name+'
'; html +=' '; html +=''+m.text+''+m.dt+'
'; >else< //вёрстка html +=''+m.name+'
'; html +=' '; html +=''+m.text+''+m.dt+'
'; > > > //выводим все сообщения $('#chat').html(html); > update 5.10.16
Заткнул простейшую дыру от простейшей XSS атаки. Все просто задолбали ломать чат)). Было лень фильтровать входящие данные, но пришлось переделать. Функция для фильтрации.
/*ф-я фильтрации*/ function myclear($dt)
теперь файл add.php выглядит так
/*ф-я фильтрации*/ function myclear($dt) < $dt=stripslashes($dt); $dt=strip_tags($dt); $dt=trim($dt); return $dt; >$name = myclear($_POST['name']);//фильтруем $text = myclear($_POST['text']); //было раньше //$name = $_POST['name']; //$text = $_POST['text']; if(($name != '') && ($text != ''))< $strings = file('messages.txt'); if(count($strings)>100) < //получаем все строки из файла в виде нумерованного массива $textarr=file('messages.txt'); $arr=array_slice($textarr, -5); //переписываем данные в файл записываем только последние 3 строки массива $f = fopen('messages.txt', 'w+'); //в цикле записываем данные в файл, каждое значение массива на новой строке в файле foreach($arr as $ar)< $f = fopen('messages.txt', 'a+');//открыли файл fwrite($f, $ar);//запись fclose($f);//закрыли файл >> $f = fopen('messages.txt', 'a+');//открыли файл fwrite($f, date('Y-m-d H:i:s') . "___");//запись fwrite($f, $name . "___");//запись в файл fwrite($f, $text . "\n");//запись и добавили конец строки fclose($f);//закрыли файл > Simple Live Chat With PHP Websockets (Free Download)
Welcome to a tutorial on how to create a simple live chat application with PHP and WebSockets. Looking to add live chat features to your website or portal? Let us walk through an example in this guide – Read on!
TABLE OF CONTENTS
PHP LIVE CHAT
All right, let us now get into more details on the PHP live chat.
DOWNLOAD RATCHET WEBSOCKET LIBRARY
- As above, a copy of Ratchet is required.
- An easy way is to use Composer to fetch the latest version.
- Open the command line, navigate to your HTTP folder – cd YOUR-HTTP-FOLDER .
- Run composer require cboden/ratchet . This will automatically download the latest version into the vendor/ folder.
PART 1) PHP WEBSOCKET LIVE CHAT
if (defined("STDIN")) < return true; >if (array_key_exists("SHELL", $_ENV)) < return true; >if (!array_key_exists("REQUEST_METHOD", $_SERVER)) < return true; >if (empty($_SERVER["REMOTE_ADDR"]) && !isset($_SERVER["HTTP_USER_AGENT"]) && count($_SERVER["argv"])>0) < return true; >return false; > if (!is_cli()) < exit("Please run this in the command line."); >// (B) LOAD RATCHET // https://github.com/ratchetphp/Ratchet // composer require cboden/ratchet require "vendor/autoload.php"; use Ratchet\MessageComponentInterface; use Ratchet\ConnectionInterface; use Ratchet\Server\IoServer; use Ratchet\Http\HttpServer; use Ratchet\WebSocket\WsServer; // (C) CHAT CLASS class Chat implements MessageComponentInterface < // (C1) PROPERTIES private $debug = true; // debug mode protected $clients; // connected clients // (C2) CONSTRUCTOR - INIT CLIENTS LIST public function __construct () < $this->clients = new \SplObjectStorage; if ($this->debug) < echo "Chat server started.\r\n"; >> // (C3) ON CLIENT CONNECT - STORE INTO $THIS->CLIENTS public function onOpen (ConnectionInterface $conn) < $this->clients->attach($conn); if ($this->debug) < echo "Client connected: resourceId>\r\n"; > > // (C4) ON CLIENT DISCONNECT - REMOVE FROM $THIS->CLIENTS public function onClose (ConnectionInterface $conn) < $this->clients->detach($conn); if ($this->debug) < echo "Client disconnected: resourceId>\r\n"; > > // (C5) ON ERROR public function onError (ConnectionInterface $conn, \Exception $e) < $conn->close(); if ($this->debug) < echo "Client error: resourceId> | getMessage()>\r\n"; > > // (C6) ON RECEIVING MESSAGE - SEND TO EVERYONE public function onMessage (ConnectionInterface $from, $msg) < $msg = strip_tags($msg); if ($this->debug) < echo "Received message from resourceId>: \r\n"; > foreach ($this->clients as $client) < $client->send($msg); > > > // (D) START! $server = IoServer::factory(new HttpServer(new WsServer(new Chat())), 8080); // @CHANGE if not port 8080 $server->run();Not going to explain this line-by-line, but in summary:
- A “safety check” to make sure the script is run from the command line.
- Load and use the Ratchet library.
- The mechanics of the chat application:
- (C3) We store all clients into $this->clients when they connect to the WebSocket server.
- (C4) Remove the clients from $this->clients when they disconnect.
- (C6) On receiving a message from any client, we loop through $this->clients and forward the message to everyone.
- Start the live chat server.
Yep. That’s all for the “complicated chat server”.
PART 2) LIVE CHAT PAGE
2A) THE HTML
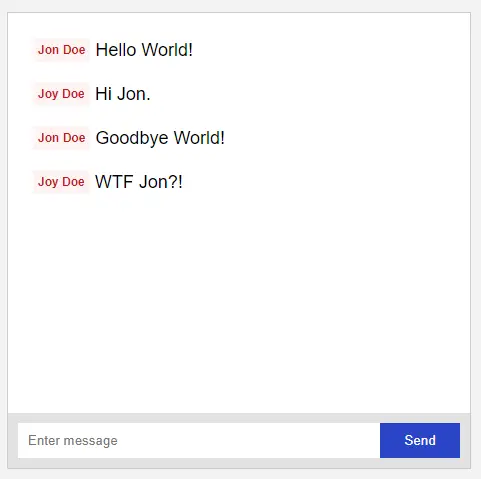
- is where we show all the chat messages.
- is where we ask the user for a name before launching the chat.
- is the “send message” box. This is hidden at first, will only show after the user enters a name and successfully connects to the WebSocket server.
2B) LIVE CHAT JAVASCRIPT
var chat = < // (A) INIT - GET HTML ELEMENTS host : "ws://localhost:8080/", // @CHANGE to your own! name : "", // current user name socket : null, // websocket object hMsg : null, // html chat messages hName : null, // html set name form hNameSet : null, // html set name field hNameGo : null, // html set name submit hSend : null, // html send message form hSendTxt : null, // html send message field hSendGo : null, // html send message submit init : () =>< chat.hMsg = document.getElementById("chat-messages"); chat.hName = document.getElementById("chat-name"); chat.hNameSet = document.getElementById("chat-name-set"); chat.hNameGo = document.getElementById("chat-name-go"); chat.hSend = document.getElementById("chat-send"); chat.hSendTxt = document.getElementById("chat-send-text"); chat.hSendGo = document.getElementById("chat-send-go"); chat.hNameGo.disabled = false; >, // (B) SWAP BETWEEN SET NAME/SEND MESSAGE FORM swap : direction => < if (direction) < chat.hName.classList.add("hide"); chat.hSend.classList.remove("hide"); >else < chat.hSend.classList.add("hide"); chat.hName.classList.remove("hide"); >>, // (C) START CHAT start : () => < // (C1) SET NAME + SWAP HTML FORM chat.name = chat.hNameSet.value; chat.swap(1); chat.hSendGo.disabled = true; // (C2) CREATE WEB SOCKET chat.socket = new WebSocket(chat.host); // (C3) ON OPEN - ENABLE CHAT chat.socket.onopen = e =>chat.hSendGo.disabled = false; // (C4) ON CLOSE - SWAP BACK TO "SET NAME" chat.socket.onclose = e => chat.swap(0); // (C5) ON RECEIVING DATA - UPDATE HTML CHAT chat.socket.onmessage = e => < let msg = JSON.parse(e.data), row = document.createElement("div"); row.className = "chat-row"; row.innerHTML = `; // (C6) ON ERROR chat.socket.onerror = e => < chat.swap(0); console.error(e); alert(`Failed to connect to $`); >; return false; >, // (D) SEND MESSAGE send : () => < chat.socket.send(JSON.stringify(< n: chat.name, m: chat.hSendTxt.value >)); chat.hSendTxt.value = ""; return false; > >; window.onload = chat.init;- init() Runs on window load. All it does is literally get all the HTML elements.
- swap() Swap the HTML interface between “set name” and “send message”.
- start() When the user enters the name and clicks on “start”. Long story short, create a WebSocket object, connect to the server, and update the HTML chat on receiving messages.
- send() Self-explanatory. Send a chat message to the server.
DOWNLOAD & NOTES
Here is the download link to the example code, so you don’t have to copy-paste everything.
SUPPORT
600+ free tutorials & projects on Code Boxx and still growing. I insist on not turning Code Boxx into a «paid scripts and courses» business, so every little bit of support helps.
EXAMPLE CODE DOWNLOAD
Click here for the source code on GitHub gist, just click on “download zip” or do a git clone. I have released it under the MIT license, so feel free to build on top of it or use it in your own project.
EXTRA BITS & LINKS
That’s all for this guide, and here is a small section on some extras that may be useful to you.
IMPROVEMENT IDEAS
- Do a “unique name check” after connecting to the server to make sure that there are no clashes.
- Announce when users connect/disconnect from the chat.
- Save the messages to the database, or store them in the browser.
- If you want to create “chat rooms”, a possibility is to:
- Turn $clients into a nested array in 1-chat-server.php . For example, $clients[«PUBLIC»] = [] , $clients[«TECH»] = [] , $clients[«LIFE»] = [] .
- On connect, the client needs to provide the group name, or we will put them into PUBLIC by default.
- When the client sends a message, forward it to everyone in the group only.
Yep, the possibilities are endless – It is up to you to complete your own system now.
DYNAMIC PROPERTIES
- At the time of writing, PHP 8.2+ throw a lot of “creation of dynamic property is deprecated” for the PHP Ratchet library. If you do not know what that means, follow up with this.
- The script has set error_reporting(E_ALL & ~E_DEPRECATED) to mute the deprecation notices.
- Not sure if PHP Ratchet will be updated, will keep a look out and change to another sockets library if required.
- Other possible “fixes”:
- Edit the Ratchet library files, add #[\AllowDynamicProperties] before the class definitions.
- Or set class XYZ extends stdClass
COMPATIBILITY CHECKS
Works across all modern browsers.
LINKS & REFERENCES
YOUTUBE TUTORIAL
THE END
Thank you for reading, and we have come to the end of this guide. That took quite a lot of research, work, and I can easily see why some people are charging money for it… But I hope that this has helped you in your project, and if you want to share anything, please feel free to comment below. Good luck and happy coding!
Как сделать чат на PHP

В этой статье мы разберём как сделать простой чат на языке программирования PHP для вашего сайта.
Ещё стоит сказать, что наш чет использует WebSocket на PHP, для этого мы будем использовать библиотеку Ratchet, но мы не будем подробно про неё рассказывать, для этого посмотрите статью: «Основы PHP библиотеки Ratchet», в ней вы узнает всё самое важное, что стоит знать.
Back-end:
Так как мы делаем чат на языке PHP, начнём со серверной части, сперва нужно установить библиотеку Ratchet, для этого используйте эту команду:
После того как всё установили, создадим файл «chat.php», где создадим класс для работы с нашем чатом, вот что в нём будет.
В начале мы создаём пространство имён для этого скрипта, потом подключаем все нужные зависимости.
Потом создаём класс Chat и наследуем его от класса MessageComponentInterface , создаём защищенное свойство для хранения всех подключённых клиентов, и в конструкторе ему даём значение объекта класса SplObjectStorage .
Потом создаём несколько методов, первый onOpen() , следит за подключением новых пользователей и добавляем их в clients .
Второй метод onMessage() нужен для обработки полученных сообщений и отправки их остальным клиентам, в нём для отправки проходимся по всем пользователям и отправляем каждому.
Следующий метод проверяем отключение клиента от сервера и убирает его, последний нужен для вывода ошибок, если есть, то закрывает сервер.
Теперь создадим файл «index.php», в котором запустим WS сервер.
