- Android Chat Tutorial: Building A Realtime Messaging App
- This tutorial will teach you:
- Setting up the project
- Import the Scaledrone module
- Defining the UI layout
- Next up, chat bubbles!
- Chat bubble sent by us
- Chat bubble sent by others
- Hooking up the realtime messaging logic
- Connecting to Scaledrone
- Sending messages
- Displaying messages
- Receiving messages
- And we’re done!
- Scaledrone
- Пишем чат под Android на Websocket’ах
- Что такое WebSocket
- На чем пишем?
- Сервер
- Клиент
Android Chat Tutorial: Building A Realtime Messaging App
In this tutorial, we’ll create a real-time group chat for Android using the Scaledrone Java API Client. The functionality will closely resemble that of popular messaging apps like WhatsApp, Facebook Messenger, and Signal.
You can find the complete source code on GitHub.
This tutorial will teach you:
- How to build a fully functional group chat.
- Designing the UI elements such as chat bubbles and text inputs.
- How to use Scaledrone as the realtime backend of your app.
The project might seem daunting at first, but the messaging code outside of the layout files is pretty short.
Setting up the project
Start by creating a new Android project. We are using Android Studio, but this tutorial will work with any IDE of choice.
Import the Scaledrone module
To add the Scaledrone dependency to your app, you need to add it to your build.gradle file.
For Android to allow us to connect to the internet, we need to add the internet permission to the manifests/AndroidManifest.xml file:
tag and before the starting tag --> Defining the UI layout
To start with the UI layout let’s build the empty state. It consists of:
An empty ListView into where the messages will go
An EditText where the user can type their message
And finally, an ImageButton as a button to send the message
![]()
The base layout is defined in /res/layout/activity_main.xml :
String constants are defined in /res/layout/activity_main.xml :
Scaledrone chat Write a message The icon for the send button is defined in /res/drawable/ic_send_black_24dp.xml :
Next up, chat bubbles!
Our chat app is going to have two type of chat bubbles: a bubble for messages sent by us and bubbles for messages sent by others.
Chat bubble sent by us
The messages sent by us will look dark and be aligned to the right. We’re using a drawable to get the border radius effect.
The message itself is just a simple TextView aligned to the right.

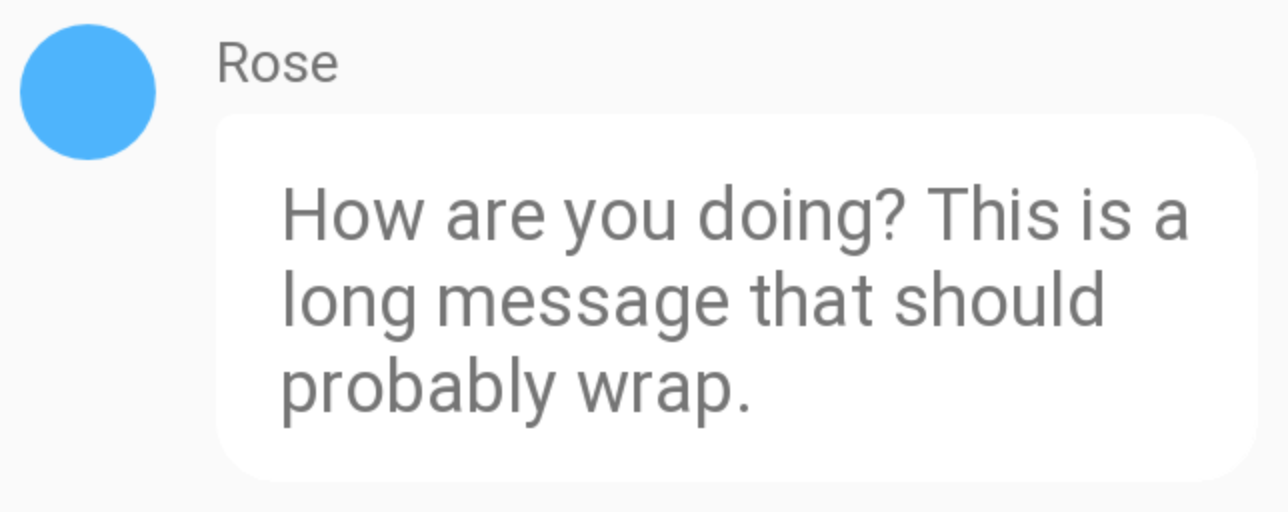
Chat bubble sent by others
The chat bubble sent by others within the group chat will be light and aligned to the left. In addition to the bubble itself, we will show an avatar (as a simple full-color circle) and the name of the user.
For the avatar let’s define a circle shape under /res/drawable/circle.xml :
And for the bubble let’s create a shape with curved corners and the sharp corner on the left. This goes in /res/drawable/their_message.xml :
Putting it together their message bubble layout under /res/layout/their_message.xml will look like this:
Hooking up the realtime messaging logic
We’re finally done with the layout and can get to the interesting part!
Let’s find the EditText view from our layout and extend Scaledrone’s RoomListener so we could receive messages. Most of the methods will have minimal code in them, and we’ll fill them up as the tutorial goes along.
public class MainActivity extends AppCompatActivity implements RoomListener < private String channelID = "CHANNEL_ID_FROM_YOUR_SCALEDRONE_DASHBOARD"; private String roomName = "observable-room"; private EditText editText; private Scaledrone scaledrone; @Override protected void onCreate(Bundle savedInstanceState) < super.onCreate(savedInstanceState); setContentView(R.layout.activity_main); // This is where we write the mesage editText = (EditText) findViewById(R.id.editText); >// Successfully connected to Scaledrone room @Override public void onOpen(Room room) < System.out.println("Conneted to room"); >// Connecting to Scaledrone room failed @Override public void onOpenFailure(Room room, Exception ex) < System.err.println(ex); >// Received a message from Scaledrone room @Override public void onMessage(Room room, com.scaledrone.lib.Message receivedMessage) < // TODO >> Connecting to Scaledrone
If you don’t have a Scaledrone account yet, open up Scaledrone.com and create a new free account. To successfully connect to Scaledrone you need to get your own channel ID from the Scaledrone’s dashboard. To do that go to the dashboard and click the big green +Create Channel button to get started. You can choose Never require authentication for now. Copy the channel ID from the just created channel and replace CHANNEL_ID_FROM_YOUR_SCALEDRONE_DASHBOARD with it.
Connecting to Scaledrone can happen within the onCreate() method, right after we have set up the UI. Scaledrone gives us the ability to attach arbitrary data to a user (users are called members in Scaledrone lingo), we’re going to be adding a random name and color.
MemberData data = new MemberData(getRandomName(), getRandomColor()); scaledrone = new Scaledrone(channelID, data); scaledrone.connect(new Listener() < @Override public void onOpen() < System.out.println("Scaledrone connection open"); // Since the MainActivity itself already implement RoomListener we can pass it as a target scaledrone.subscribe(roomName, MainActivity.this); >@Override public void onOpenFailure(Exception ex) < System.err.println(ex); >@Override public void onFailure(Exception ex) < System.err.println(ex); >@Override public void onClosed(String reason) < System.err.println(reason); >>); You might have noticed that we named our name Scaledrone room observable-room. You can name the room anything you want, a single user can actually connect to an infinite amount of rooms to provider for all sorts of application scenarios. However in order for messages to contain the info of the sender the room name needs to be prefixed with observable-. Read more..
To create the MemberData let’s implement the getRandomName() and getRandomColor() functions as well as the MemberData class itself.
For the sake of keeping this tutorial simple, we’ll define a random username on the client side of the application. Later you can add fancy login functionality to your app. To create a random name, we pre-define two lists of random adjectives and nouns, then combine them randomly.
The random color function will be generating a random seven-character color hex such as #FF0000 .
public class MainActivity extends AppCompatActivity implements RoomListener < /* . more code . */ private String getRandomName() < String[] adjs = ; String[] nouns = ; return ( adjs[(int) Math.floor(Math.random() * adjs.length)] + "_" + nouns[(int) Math.floor(Math.random() * nouns.length)] ); > private String getRandomColor() < Random r = new Random(); StringBuffer sb = new StringBuffer("#"); while(sb.length() < 7)< sb.append(Integer.toHexString(r.nextInt())); >return sb.toString().substring(0, 7); > > The MemberData class is super minimal and will later be serialized into JSON and sent to users by Scaledrone.
class MemberData < private String name; private String color; public MemberData(String name, String color) < this.name = name; this.color = color; >// Add an empty constructor so we can later parse JSON into MemberData using Jackson public MemberData() < >public String getName() < return name; >public String getColor() < return color; >> Sending messages
To send (or publish) the message to the Scaledrone room we need to add a onClick() handler to the ImageButton in the activity_main.xml file.
Let’s add the sendMessage() function to the MainActivity . If the user has input something we send the message to the same observable-room as we subscribed to above. After the message has been sent we can clear the EditText view for convenience.
Scaledrone will take care of the message and deliver it to everyone that has subscribed to the observable-room room in your channel.
public void sendMessage(View view) < String message = editText.getText().toString(); if (message.length() >0) < scaledrone.publish("observable-room", message); editText.getText().clear(); >> Displaying messages
As seen in the layout file the messages are going to be displayed via ListView . To use a ListView you need to create a class that extends android.widget.BaseAdapter . This class is then used as the state of the ListView .
Let’s define our MessageAdapter as well as the Message class itself. The Message class will hold all the needed info to render a single message.
// Message.java public class Message < private String text; // message body private MemberData memberData; // data of the user that sent this message private boolean belongsToCurrentUser; // is this message sent by us? public Message(String text, MemberData memberData, boolean belongsToCurrentUser) < this.text = text; this.memberData = memberData; this.belongsToCurrentUser = belongsToCurrentUser; >public String getText() < return text; >public MemberData getMemberData() < return memberData; >public boolean isBelongsToCurrentUser() < return belongsToCurrentUser; >> The MessageAdapter defines how we render our rows within the ListView .
// MessageAdapter.java public class MessageAdapter extends BaseAdapter < Listmessages = new ArrayList(); Context context; public MessageAdapter(Context context) < this.context = context; >public void add(Message message) < this.messages.add(message); notifyDataSetChanged(); // to render the list we need to notify >@Override public int getCount() < return messages.size(); >@Override public Object getItem(int i) < return messages.get(i); >@Override public long getItemId(int i) < return i; >// This is the backbone of the class, it handles the creation of single ListView row (chat bubble) @Override public View getView(int i, View convertView, ViewGroup viewGroup) < MessageViewHolder holder = new MessageViewHolder(); LayoutInflater messageInflater = (LayoutInflater) context.getSystemService(Activity.LAYOUT_INFLATER_SERVICE); Message message = messages.get(i); if (message.isBelongsToCurrentUser()) < // this message was sent by us so let's create a basic chat bubble on the right convertView = messageInflater.inflate(R.layout.my_message, null); holder.messageBody = (TextView) convertView.findViewById(R.id.message_body); convertView.setTag(holder); holder.messageBody.setText(message.getText()); >else < // this message was sent by someone else so let's create an advanced chat bubble on the left convertView = messageInflater.inflate(R.layout.their_message, null); holder.avatar = (View) convertView.findViewById(R.id.avatar); holder.name = (TextView) convertView.findViewById(R.id.name); holder.messageBody = (TextView) convertView.findViewById(R.id.message_body); convertView.setTag(holder); holder.name.setText(message.getMemberData().getName()); holder.messageBody.setText(message.getText()); GradientDrawable drawable = (GradientDrawable) holder.avatar.getBackground(); drawable.setColor(Color.parseColor(message.getMemberData().getColor())); >return convertView; > > class MessageViewHolder
Receiving messages
Now that we can display and render our chat bubbles we need to hook up the incoming messages with the MessageAdapter that we just created. We can do that by going back to the MainActivity class and finishing the onMessage() method.
Scaledrone uses the popular Jackson JSON library for serializing and parsing the messages, and it comes bundled with the Scaledrone API client. Please see the Jackson docs for best practices on how to parse the incoming Scaledrone messages and users data.
@Override public void onMessage(Room room, final JsonNode json, final Member member) < // To transform the raw JsonNode into a POJO we can use an ObjectMapper final ObjectMapper mapper = new ObjectMapper(); try < // member.clientData is a MemberData object, let's parse it as such final MemberData data = mapper.treeToValue(receivedMessage.getMember().getClientData(), MemberData.class); // if the clientID of the message sender is the same as our's it was sent by us boolean belongsToCurrentUser = receivedMessage.getClientID().equals(scaledrone.getClientID()); // since the message body is a simple string in our case we can use json.asText() to parse it as such // if it was instead an object we could use a similar pattern to data parsing final Message message = new Message(receivedMessage.getData().asText(), data, belongsToCurrentUser); runOnUiThread(new Runnable() < @Override public void run() < messageAdapter.add(message); // scroll the ListView to the last added element messagesView.setSelection(messagesView.getCount() - 1); >>); > catch (JsonProcessingException e) < e.printStackTrace(); >> And we’re done!
Hopefully, this tutorial helped you build your very own chat app. You can find the full source code or run the working prototype on GitHub. If you have any questions or feedback feel free to contact us.
This tutorial only scratched what Scaledrone can do for you and is the ideal basis for any of your future realtime needs.
Looking to build the same app for iOS using Swift? Check out our iOS chat tutorial.
Last updated July 1st 2023
Scaledrone
Пишем чат под Android на Websocket’ах
Во время локдауна я решил поупражняться в разработке под Android. Начать решил с простой гиперказуальной игры с элементами дуэли. Взаимодействие игроков решил реализовать через отдельный сервер и websocket’ы, но пока читал про все это дело, понял, что простого туториала на русско-язычных ресурсах почему-то нет. Поэтому, решил восполнить этот пробел.
В этой статье я постараюсь описать как настроить WebSocket’ы на примере чата с сервером на SpringBoot и клиенте под Android.
Что такое WebSocket
В клиент-серверной архитектуре все взаимодействие происходит как правило через запросы от клиента к серверу в синхронном режиме. Но что делать, если запрашиваемое действие необходимо выполнить асинхронно? Или пользователь должен получить оповещение об обновлении данных, которые зависят от других пользователей или быстро теряют актуальность? Примеры таких приложений: мессенджеры, многопользовательские игры и т.д. В этом случае возникает потребность в отправке данных от сервера клиенту. Такое взаимодействие можно реализовать через polling или long-polling, что подразумевает периодический опрос сервера «не появилось ли для меня чего-то нового». Или же воспользоваться WebSocket’ами, которые позволяют реализовать двустороннюю связь в режиме реального времени.

На чем пишем?
Все будет написано на Kotlin. Сервер поднимать буду на SpringBoot. Клиент будет под Android, основные зависимости: Hilt, converter-gson, okhttp3, StompProtocolAndroid (библиотека для поддержки STOMP-клиента через websocket)
Сервер
Итак, начнем с написания сервера. Я пропущу этап инициализации SpringBoot приложения и перейдем сразу к описанию ресурсов и конфигурации сокетов. Для обмена сообщениями заведем ресурс, описывающий структуру сообщения и добавим jackson аннотаций для корректной сериализации/десериализации LocalDateTime:
@JsonInclude(JsonInclude.Include.NON_NULL) data class ChatSocketMessage( val text: String, var author: String, @JsonDeserialize(using = LocalDateTimeDeserializer::class) @JsonSerialize(using = LocalDateTimeSerializer::class) var datetime: LocalDateTime, var receiver: String? = null )Создадим REST-контроллер для обработки сообщений
@RestController @RequestMapping(LINK_CHAT) class ChatController( private val simpleMessageTemplate: SimpMessagingTemplate ) < @MessageMapping("/sock") fun chatSocket(res: ChatSocketMessage) < sendMessageToUsers(res) //отправим сообщения другим пользователям >private fun sendMessageToUsers(message: ChatSocketMessage) < if(message.receiver != null) < //если сообщение отправляется в приватный чат simpleMessageTemplate.convertAndSendToUser(message.receiver. CHAT_TOPIC, message) >else < //если сообщение отправляется в общий чат simpleMessageTemplate.convertAndSend(CHAT_TOPIC, message) >> >Ну и в конце настроим WebSocket’ы на сервере
@Configuration @EnableWebSocketMessageBroker open class WebSocketConfig: WebSocketMessageBrokerConfigurer < override fun configureMessageBroker(config: MessageBrokerRegistry) < /* запускаем simple broker с перечислением топиков, на которые будем подписываться При необходимости можно настраивать сторонние брокеры, такой как RabbitMQ */ config.enableSimpleBroker(TOPIC) /* задаем префиксы для приложения и пользователя */ config.setApplicationDestinationPrefixes(LINK_CHAT) config.setUserDestinationPrefix("/user") >override fun registerStompEndpoints(registry: StompEndpointRegistry) < /* указываем endpoint, который будет использоваться для подключения сокетов. Не забываем включить SockJS. При этом надо будет при подключении добавить к адресу /websocket */ registry.addEndpoint(LINK_CHAT) .setAllowedOrigins("*") .withSockJS() >>Клиент
Помечаем наш MainActivity анотацией AndroidEntryPoint и инджектим ViewModel, которая будет отвечать за взаимодействие с сервером.
@AndroidEntryPoint class MainActivity : AppCompatActivity() < @Inject lateinit var mainViewModel: MainViewModel override fun onCreate(savedInstanceState: Bundle?) < super.onCreate(savedInstanceState) //описываем инициализацию >//. >Переходим к описанию MainViewModel:
class MainViewModel @Inject constructor( var db: AppDb // имплементация RoomDatabase ) : ViewModel() < companion object< //указываем endpoint, на который регистрировали сокет, не забываем добавить /websocket const val SOCKET_URL = "ws://10.0.2.2:8080/api/v1/chat/websocket" // заводим название топика const val CHAT_TOPIC = "/topic/chat" //указываем endpoint метода, на который будем слать сообщения const val CHAT_LINK_SOCKET = "/api/v1/chat/sock" >/* инициализируем Gson для сериализации/десериализации и регистрируем дополнительный TypeAdapter для LocalDateTime */ private val gson: Gson = GsonBuilder().registerTypeAdapter(LocalDateTime::class.java, GsonLocalDateTimeAdapter() ).create() private var mStompClient: StompClient? = null private var compositeDisposable: CompositeDisposable = CompositeDisposable() private val _chatState = MutableLiveData() val liveChatState: LiveData = _chatState init < //инициализация WebSocket клиента mStompClient = Stomp.over(Stomp.ConnectionProvider.OKHTTP, SOCKET_URL) .withServerHeartbeat(30000) initChat() //инициализация подписок >private fun initChat() < //опишем ниже >/* отправляем сообщение в общий чат */ fun sendMessage(text: String) < val chatSocketMessage = ChatSocketMessage(text = text, author = "Me") sendCompletable(mStompClient. send(CHAT_LINK_SOCKET, gson.toJson(chatSocketMessage))) >private fun sendCompletable(request: Completable) < compositeDisposable?.add( request.subscribeOn(Schedulers.io()) .observeOn(AndroidSchedulers.mainThread()) .subscribe( < Log.d(TAG, "Stomp sended") >, < Log.e(TAG, "Stomp error", it) >) ) > override fun onCleared() < super.onCleared() mStompClient?.disconnect() compositeDisposable?.dispose() >>В конце настраиваем подписки на наш топик и состояние соединения
private fun initChat() < if (mStompClient != null) < //настраиваем подписку на топик val topicSubscribe = mStompClient. topic(CHAT_TOPIC) .subscribeOn(Schedulers.io(), false) .observeOn(AndroidSchedulers.mainThread()) .subscribe(< topicMessage: StompMessage ->Log.d(TAG, topicMessage.payload) //десериализуем сообщение val message: ChatSocketMessage = gson.fromJson(topicMessage.payload, ChatSocketMessage::class.java) addMessage(message) //пишем сообщение в БД и в LiveData >, < Log.e(TAG, "Error!", it) //обработка ошибок >) //подписываемся на состояние WebSocket'a val lifecycleSubscribe = mStompClient. lifecycle() .subscribeOn(Schedulers.io(), false) .observeOn(AndroidSchedulers.mainThread()) .subscribe < lifecycleEvent: LifecycleEvent ->when (lifecycleEvent.type!!) < LifecycleEvent.Type.OPENED ->Log.d(TAG, "Stomp connection opened") LifecycleEvent.Type.ERROR -> Log.e(TAG, "Error", lifecycleEvent.exception) LifecycleEvent.Type.FAILED_SERVER_HEARTBEAT, LifecycleEvent.Type.CLOSED -> < Log.d(TAG, "Stomp connection closed") >> > compositeDisposable. add(lifecycleSubscribe) compositeDisposable. add(topicSubscribe) //открываем соединение if (!mStompClient. isConnected) < mStompClient. connect() >> else < Log.e(TAG, "mStompClient is null!") >>На этом все, полный код работающего чата можно найти на GitHub. Надеюсь это будет полезно тем, кто сталкивается с настройкой WebSocket’ов впервые, как и я.