- 3 Ways to Configure Multiple Cache Managers in Spring Boot
- Multiple Cache Managers in Spring Boot
- 1. Application Setup
- 2. Spring Caching
- 3. Multiple Cache Managers via CacheConfigurerSupport
- 4. Multiple Cache Managers Using @Primary
- 5. Using CacheResolver
- Кеширование данных — Java Spring
- Кеш в Spring
- Кеш в Oracle PL-SQL функции
3 Ways to Configure Multiple Cache Managers in Spring Boot
In this Spring Boot article, we will look at how to configure multiple cache managers in Spring Boot application.
Multiple Cache Managers in Spring Boot
In standard Spring Boot application, we may need only one caching provider, however there are many use cases where you want to configure multiple cache providers and like to use those based on your requirements. This article, we will look at Spring Boot caching API and ability to configure multiple cache managers in Spring Boot. There are several ways to do this and the right approach dependents on how you are planning to use cache. This article works as a guide and choose the approach best suitable for your requirement. In this article, we will use the following 2 cache API for the configuration.
This article assumes that you have working knowledge of Spring Boot and Spring caching API.
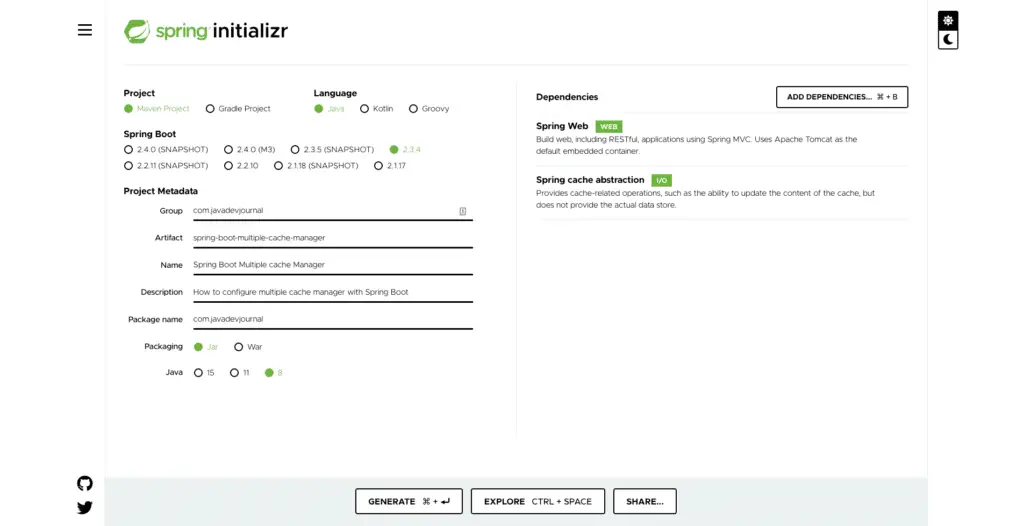
1. Application Setup
Let’s start by setting up the application. We are going to use Spring auto configuration to perform heavy lifting for us. You can generate the application structure by using Spring Initializr or can use IDE to generate the application structure.
Here is how our pom.xml looks like
4.0.0 org.springframework.boot spring-boot-starter-parent 2.3.4.RELEASE com.javadevjournal multiple-cache-manager 0.0.1-SNAPSHOT multiple-cache-manager Multiple Cache manager with spring boot 11 3.9.0 2.8.6 org.springframework.boot spring-boot-starter-cache org.springframework.boot spring-boot-starter-web com.github.ben-manes.caffeine caffeine $ org.ehcache ehcache $ org.springframework.boot spring-boot-starter-test test org.junit.vintage junit-vintage-engine org.springframework.boot spring-boot-maven-plugin We are using the Caffeine cache and default ConcurrentHashMap caching for this example.
2. Spring Caching
Spring provides a powerful and flexible caching abstraction. The caching abstraction makes it easy to implement caching in Spring application. We can enable the caching API using @EnableCachingAnnotation . Spring will fall back to the ConcurrentHashMap as the underlying cache if we’ve not specified any other explicitly.
@Configuration @EnableCaching public class MultiCacheManagerConfig< //to enable caching for our application >As said earlier, there are many ways to enable and configure multiple cache managers in Spring Boot. Let’s see these options.
3. Multiple Cache Managers via CacheConfigurerSupport
In case you application use one cache provider for most of the use cases and only want to use the other caching manager for specific use, configuring multiple cache managers using CacheConfigurerSupport will provide your more flexibility.
- We can define a default cache manager using this approach.
- You can continue using the caching annotation with no change.
- For specific use case, we can pass the cacheManager with @CacheConfig or @Cacheable annotations.
Let’s see how to configure it.
package com.javadevjournal.config; import com.github.benmanes.caffeine.cache.Caffeine; import org.springframework.cache.CacheManager; import org.springframework.cache.annotation.CachingConfigurerSupport; import org.springframework.cache.annotation.EnableCaching; import org.springframework.cache.caffeine.CaffeineCacheManager; import org.springframework.cache.concurrent.ConcurrentMapCacheManager; import org.springframework.context.annotation.Bean; import org.springframework.context.annotation.Configuration; import java.util.Arrays; import java.util.concurrent.TimeUnit; @Configuration @EnableCaching public class MultiCacheManagerConfig extends CachingConfigurerSupport < public String[] cacheNames = < "products" >; /** * We are using CachingConfigurerSupport to define out main caching * provider. In our case it's Caffeine cache. This will be the default cache provider * for our application. If we don't provide explicit cache manager, Spring Boot * will pick this as default cache provider. * @return */ @Override @Bean // good to have but not strictly necessary public CacheManager cacheManager() < CaffeineCacheManager cacheManager = new CaffeineCacheManager(); cacheManager.setCacheNames(Arrays.asList( "customers", "products" )); cacheManager.setCaffeine(caffeineCacheBuilder()); return cacheManager; >Caffeine < Object, Object >caffeineCacheBuilder() < return Caffeine.newBuilder() .initialCapacity(100) .maximumSize(500) .expireAfterAccess(10, TimeUnit.MINUTES) .weakKeys() .recordStats(); >/** * Second cache provider which can work as fallback or will be used when invoked explicitly in the * code base. */ @Bean CacheManager alternateCacheManager() < return new ConcurrentMapCacheManager(cacheNames); >>With Caffeine cache, we are configuring 2 caches (customers and products) while with default cache; we are setting up our product cache.Here is how you can use these cache managers in your application
//Class levels @CacheConfig(cacheManager = "alternateCacheManager") public class DefaultProductService < >//method levels @Cacheable(cacheNames = "products", cacheManager = "alternateCacheManager") @Override public Product getProductByCode(String code) < >@Cacheable(cacheNames = "products") @Override public Product getProductByBrand(String brand)
4. Multiple Cache Managers Using @Primary
If we don’t want to use CacheConfigurerSupport , we can use the @Primary annotation mark one bean as primary. Spring will pick the primary bean automatically if we don’t specify the cacheManager with @CacheConfig or @Cacheable annotations.
@Configuration @EnableCaching public class MultiCacheManagerConfig < public String[] cacheNames = < "products" >; @Bean @Primary public CacheManager cacheManager() < CaffeineCacheManager cacheManager = new CaffeineCacheManager(); cacheManager.setCacheNames(Arrays.asList( "customers", "products" )); cacheManager.setCaffeine(caffeineCacheBuilder()); return cacheManager; >Caffeine < Object, Object >caffeineCacheBuilder() < return Caffeine.newBuilder() .initialCapacity(100) .maximumSize(500) .expireAfterAccess(10, TimeUnit.MINUTES) .weakKeys() .recordStats(); >@Bean CacheManager alternateCacheManager() < return new ConcurrentMapCacheManager(cacheNames); >>5. Using CacheResolver
The CacheResolver provides more fine grained control. You should thin of using the CacheResolver:
Кеширование данных — Java Spring
Многократно вычитывая одни и те же данные, встает вопрос оптимизации, данные не меняются или редко меняются, это различные справочники и др. информация, т.е. функция получения данных по ключу — детерминирована. Тут наверно все понимают — нужен Кеш! Зачем всякий раз повторно выполнять поиск данных или вычисление?
Так вот здесь я покажу как делать кеш в Java Spring и поскольку это тесно связанно скорее всего с Базой данных, то и как сделать это в СУБД на примере одной конкретной.
Кеш в Spring
Далее все поступают примерно одинаково, в Java используют различные HasMap, ConcurrentMap и др. В Spring тоже для это есть решение, простое, удобное, эффективное. Я думаю что в большинстве случаев это поможет в решении задачи. И так, все что нужно, это включить кеш и аннотировать функцию.
@SpringBootApplication @EnableCaching public class DemoCacheAbleApplication < public static void main(String[] args) < SpringApplication.run(DemoCacheAbleApplication.class, args); >> Кешируем данные поиска функции
@Cacheable(cacheNames="person") public Person findCacheByName(String name) < //. > В аннотации указывается название кеша и есть еще другие параметры. Работает как и ожидается так, первый раз код выполняется, результат поиска помещается в кеш по ключу (в данном случае name) и последующие вызовы код уже не выполняется, а данные извлекаются из кеша.
Пример реализации репозитория «Person» с использованием кеша
@Component public class PersonRepository < private static final Logger logger = LoggerFactory.getLogger(PersonRepository.class); private Listpersons = new ArrayList<>(); public void initPersons(List persons) < this.persons.addAll(persons); >private Person findByName(String name) < Person person = persons.stream() .filter(p ->p.getName().equals(name)) .findFirst() .orElse(null); return person; > @Cacheable(cacheNames="person") public Person findCacheByName(String name) < logger.info("find person . " + name); final Person person = findByName(name); return person; >> @RunWith(SpringRunner.class) @SpringBootTest public class DemoCacheAbleApplicationTests < private static final Logger logger = LoggerFactory.getLogger(DemoCacheAbleApplicationTests.class); @Autowired private PersonRepository personRepository; @Before public void before() < personRepository.initPersons(Arrays.asList(new Person("Иван", 22), new Person("Сергей", 34), new Person("Игорь", 41))); >private Person findCacheByName(String name) < logger.info("begin find " + name); final Person person = personRepository.findCacheByName(name); logger.info("find result = " + person.toString()); return person; >@Test public void findByName() < findCacheByName("Иван"); findCacheByName("Иван"); >> @Test public void findByName()
, первый раз происходит вызов, поиск, в второй раз результат берется уже из кеша. Это видно в консоли

Удобно, можно точечно оптимизировать существующий функционал. Если в функции более одного аргумента, то можно указать имя параметра, какой использовать в качестве ключа.
@Cacheable(cacheNames="person", key="#name") public Person findByKeyField(String name, Integer age) Есть и более сложные схемы получения ключа, это в документации.
Но конечно встанет вопрос, как обновить данные в кеше? Для этой цели есть две аннотации.
Функция с этой аннотацией будет всегда вызывать код, а результат помещать в кеш, таким образом она сможет обновить кеш.
Добавлю в репозиторий два метода: удаления и добавления Person
public boolean delete(String name) < final Person person = findByName(name); return persons.remove(person); >public boolean add(Person person)
Выполню поиск Person, удалю, добавлю, опять поиск, но по прежнему буду получать одно и тоже лицо из кеша, пока не вызову «findByNameAndPut»
@CachePut(cacheNames="person") public Person findByNameAndPut(String name)
@Test public void findCacheByNameAndPut()

Другая аннотация это @CacheEvict
Позволяет не просто посещать хранилище кеша, но и выселять. Этот процесс полезен для удаления устаревших или неиспользуемых данных из кеша.
По умолчанию Spring для кеша использует — ConcurrentMapCache, если есть свой отличный класс для организации кеша, то это возможно указать в CacheManager
@SpringBootApplication @EnableCaching public class DemoCacheAbleApplication < public static void main(String[] args) < SpringApplication.run(DemoCacheAbleApplication.class, args); >@Bean public CacheManager cacheManager() < SimpleCacheManager cacheManager = new SimpleCacheManager(); cacheManager.setCaches(Arrays.asList( new ConcurrentMapCache("person"), new ConcurrentMapCache("addresses"))); return cacheManager; >> Там же указываются имена кешей, их может быть несколько. В xml конфигурации это указывается так:
public class Person < private String name; private Integer age; public Person(String name, Integer age) < this.name = name; this.age = age; >public String getName() < return name; >public Integer getAge() < return age; >@Override public String toString()

4.0.0 com.example demoCacheAble 0.0.1-SNAPSHOT jar DemoCacheAble Demo project for Spring Boot org.springframework.boot spring-boot-starter-parent 2.0.6.RELEASE UTF-8 UTF-8 1.8 org.springframework.boot spring-boot-starter-cache org.springframework.boot spring-boot-starter-test test org.springframework.boot spring-boot-maven-plugin Кеш в Oracle PL-SQL функции
Ну и в конце, тем кто не пренебрегает мощностью СУБД, а использует ее, могут использовать кеширование на уровне БД, в дополнение или как альтернативу. Так например в Oracle не менее элегантно можно превратить обычную функцию, в функцию с кешированием результата, добавив к ней
CREATE OR REPLACE FUNCTION GET_COUNTRY_NAME(P_CODE IN VARCHAR2) RETURN VARCHAR2 RESULT_CACHE IS CODE_RESULT VARCHAR2(50); BEGIN SELECT COUNTRY_NAME INTO CODE_RESULT FROM COUNTRIES WHERE COUNTRY_ID = P_CODE; -- имитация долгой работы dbms_lock.sleep (1); RETURN(CODE_RESULT); END;