- How do I read MySQL data from Android using JDBC?
- Как работать с MySQL в Android? Часть 2
- Шаг 1. Создание Android приложение
- Шаг 2. Настраиваем Manifest
- Шаг 3. Создание layout
- Шаг 4. Пишем Activity
- Шаг 5. Добавим название некоторых кнопок
- Шаг 6. Добавим нужные библиотеки
- Шаг 7. Запускаем.
- Android Connect MySQL Database Programmatically
- Download Source code.
- Download Source code.
How do I read MySQL data from Android using JDBC?
This example show you how to connect and read data from MySQL database directly from Android. The following steps and code snippet will show you how to do it.
Add the MySQL JDBC driver into your project dependencies. Open the app/build.gradle file and add the dependency.
If you want to connect to MariaDB you can change the JDBC driver dependency using ‘org.mariadb.jdbc:mariadb-java-client:1.8.0’ , also update the JDBC url in the code snippet by replacing mysql with mariadb .
Next, add internet permission to our application in AndroidManifest.xml file.
Let’s connect, read data from the database and display the information on the screen. In the code snippet we create an AsyncTask to read the information from the database. In the doInBackground() method we open a connection to the database, create a PreparedStatement , execute a query, get a ResultSet and read the information from it. We pack the data into a Map and return it.
After the doInBackground() method finish its execution the onPostExecute() method will be called. In this method we take the result, the Map returned by the doInBackground() method, and set the values into the TextView components for display.
package org.kodejava.android; import android.annotation.SuppressLint; import android.os.AsyncTask; import android.util.Log; import android.widget.TextView; import androidx.appcompat.app.AppCompatActivity; import android.os.Bundle; import java.sql.Connection; import java.sql.DriverManager; import java.sql.PreparedStatement; import java.sql.ResultSet; import java.util.HashMap; import java.util.Map; public class MainActivity extends AppCompatActivity < private static final String URL = "jdbc:mysql://192.168.0.107:3306/kodejava"; private static final String USER = "kodejava"; private static final String PASSWORD = "kodejava"; @Override protected void onCreate(Bundle savedInstanceState) < super.onCreate(savedInstanceState); setContentView(R.layout.activity_main); new InfoAsyncTask().execute(); >@SuppressLint("StaticFieldLeak") public class InfoAsyncTask extends AsyncTask> < @Override protected MapdoInBackground(Void. voids) < Mapinfo = new HashMap<>(); try (Connection connection = DriverManager.getConnection(URL, USER, PASSWORD)) < String sql = "SELECT name, address, phone_number FROM school_info LIMIT 1"; PreparedStatement statement = connection.prepareStatement(sql); ResultSet resultSet = statement.executeQuery(); if (resultSet.next()) < info.put("name", resultSet.getString("name")); info.put("address", resultSet.getString("address")); info.put("phone_number", resultSet.getString("phone_number")); >> catch (Exception e) < Log.e("InfoAsyncTask", "Error reading school information", e); >return info; > @Override protected void onPostExecute(Map result) < if (!result.isEmpty()) < TextView textViewName = findViewById(R.id.textViewName); TextView textViewAddress = findViewById(R.id.textViewAddress); TextView textViewPhoneNumber = findViewById(R.id.textViewPhone); textViewName.setText(result.get("name")); textViewAddress.setText(result.get("address")); textViewPhoneNumber.setText(result.get("phone_number")); >> > > The complete source code can be accesses in our GitHub repository here: android-mysql-example.
Как работать с MySQL в Android? Часть 2
В данном уроке я покажу как можно на Android работать с MySQL базой данных на основе JSON формата.
В этой части данного урока мы перейдем не посредственно к созданию самого Android приложения, так как backend мы написали в прошлом уроке ‘Как работать с MySQL в Android? Часть 1‘, где мы сделали серверную часть на PHP которая получает данные с БД и формирует ответ в качестве JSON формата.
Шаг 1. Создание Android приложение
Создаем Androi приложение File->New Project :

После создания проекта создайте следующий список классов:

Шаг 2. Настраиваем Manifest
Теперь заходим в AndroidManifest.xml и прописываем там все наши только что созданные классы, все кроме класса JSONPaser, так как все эти классы будут Activity.
Шаг 3. Создание layout
Теперь для каждого класса Activity создадим layout.
Первый будет main_screen.xml для Activity MainScreenActivity:

Теперь создадим layout all_products.xml для AllProductsActivity:
и вторая дополнительная list_item.xml:

Следующая add_product.xml для NewProductActivity:

И последний это edit_product.xml для EditProductActivity:

Шаг 4. Пишем Activity
Начнем с самого главного MainScreenActivity:
package com.devcolibri.androidandmysql; import android.app.Activity; import android.content.Intent; import android.os.Bundle; import android.view.View; import android.widget.Button; public class MainScreenActivity extends Activity < Button btnViewProducts; Button btnNewProduct; @Override public void onCreate(Bundle savedInstanceState) < super.onCreate(savedInstanceState); setContentView(R.layout.main_screen); btnViewProducts = (Button) findViewById(R.id.btnViewProducts); btnNewProduct = (Button) findViewById(R.id.btnCreateProduct); // обработчик на нажатиЯ кнопки View Products btnViewProducts.setOnClickListener(new View.OnClickListener() < @Override public void onClick(View view) < // Запускаем Activity вывода всех продуктов Intent i = new Intent(getApplicationContext(), AllProductsActivity.class); startActivity(i); >>); // обработчик на нажатия кнопки Add New Products btnNewProduct.setOnClickListener(new View.OnClickListener() < @Override public void onClick(View view) < // Запускаем Activity создания нового продукта Intent i = new Intent(getApplicationContext(), NewProductActivity.class); startActivity(i); >>); > >
В комментариях к коду я старался объяснить код, что будет не понятно в комментарии к этому уроку задавайте ваши вопросы.
Следующий это AllProductsActivity:
package com.devcolibri.androidandmysql; import java.util.ArrayList; import java.util.HashMap; import java.util.List; import com.devcolibri.parser.JSONParser; import org.apache.http.NameValuePair; import org.json.JSONArray; import org.json.JSONException; import org.json.JSONObject; import android.app.ListActivity; import android.app.ProgressDialog; import android.content.Intent; import android.os.AsyncTask; import android.os.Bundle; import android.util.Log; import android.view.View; import android.widget.AdapterView; import android.widget.AdapterView.OnItemClickListener; import android.widget.ListAdapter; import android.widget.ListView; import android.widget.SimpleAdapter; import android.widget.TextView; public class AllProductsActivity extends ListActivity < private ProgressDialog pDialog; // Создаем JSON парсер JSONParser jParser = new JSONParser(); ArrayList> productsList; // url получения списка всех продуктов private static String url_all_products = "http://test.devcolibri.com/get_all_products.php"; // JSON Node names private static final String TAG_SUCCESS = "success"; private static final String TAG_PRODUCTS = "products"; private static final String TAG_PID = "pid"; private static final String TAG_NAME = "name"; // тут будет хранится список продуктов JSONArray products = null; @Override public void onCreate(Bundle savedInstanceState) < super.onCreate(savedInstanceState); setContentView(R.layout.all_products); // Hashmap for ListView productsList = new ArrayList>(); // Загружаем продукты в фоновом потоке new LoadAllProducts().execute(); // получаем ListView ListView lv = getListView(); // на выбор одного продукта // запускается Edit Product Screen lv.setOnItemClickListener(new OnItemClickListener() < @Override public void onItemClick(AdapterViewparent, View view, int position, long id) < // getting values from selected ListItem String pid = ((TextView) view.findViewById(R.id.pid)).getText() .toString(); // Запускаем новый intent который покажет нам Activity Intent in = new Intent(getApplicationContext(), EditProductActivity.class); // отправляем pid в следующий activity in.putExtra(TAG_PID, pid); // запуская новый Activity ожидаем ответ обратно startActivityForResult(in, 100); >>); > // Ответ из Edit Product Activity @Override protected void onActivityResult(int requestCode, int resultCode, Intent data) < super.onActivityResult(requestCode, resultCode, data); // если результующий код равен 100 if (resultCode == 100) < // если полученный код результата равен 100 // значит пользователь редактирует или удалил продукт // тогда мы перезагружаем этот экран Intent intent = getIntent(); finish(); startActivity(intent); >> /** * Фоновый Async Task для загрузки всех продуктов по HTTP запросу * */ class LoadAllProducts extends AsyncTask < /** * Перед началом фонового потока Show Progress Dialog * */ @Override protected void onPreExecute() < super.onPreExecute(); pDialog = new ProgressDialog(AllProductsActivity.this); pDialog.setMessage("Загрузка продуктов. Подождите. "); pDialog.setIndeterminate(false); pDialog.setCancelable(false); pDialog.show(); >/** * Получаем все продукт из url * */ protected String doInBackground(String. args) < // Будет хранить параметры Listparams = new ArrayList(); // получаем JSON строк с URL JSONObject json = jParser.makeHttpRequest(url_all_products, "GET", params); Log.d("All Products: ", json.toString()); try < // Получаем SUCCESS тег для проверки статуса ответа сервера int success = json.getInt(TAG_SUCCESS); if (success == 1) < // продукт найден // Получаем масив из Продуктов products = json.getJSONArray(TAG_PRODUCTS); // перебор всех продуктов for (int i = 0; i < products.length(); i++) < JSONObject c = products.getJSONObject(i); // Сохраняем каждый json елемент в переменную String String name = c.getString(TAG_NAME); // Создаем новый HashMap HashMapmap = new HashMap(); // добавляем каждый елемент в HashMap ключ => значение map.put(TAG_PID, id); map.put(TAG_NAME, name); // добавляем HashList в ArrayList productsList.add(map); > > else < // продукт не найден // Запускаем Add New Product Activity Intent i = new Intent(getApplicationContext(), NewProductActivity.class); // Закрытие всех предыдущие activities i.addFlags(Intent.FLAG_ACTIVITY_CLEAR_TOP); startActivity(i); >> catch (JSONException e) < e.printStackTrace(); >return null; > /** * После завершения фоновой задачи закрываем прогрес диалог * **/ protected void onPostExecute(String file_url) < // закрываем прогресс диалог после получение все продуктов pDialog.dismiss(); // обновляем UI форму в фоновом потоке runOnUiThread(new Runnable() < public void run() < /** * Обновляем распарсенные JSON данные в ListView * */ ListAdapter adapter = new SimpleAdapter( AllProductsActivity.this, productsList, R.layout.list_item, new String[] < TAG_PID, TAG_NAME>, new int[] < R.id.pid, R.id.name >); // обновляем listview setListAdapter(adapter); > >); > > > После идет activity NewProductActivity:
package com.devcolibri.androidandmysql; import android.app.Activity; import android.app.ProgressDialog; import android.content.Intent; import android.os.AsyncTask; import android.os.Bundle; import android.util.Log; import android.view.View; import android.widget.Button; import android.widget.EditText; import com.devcolibri.parser.JSONParser; import org.apache.http.NameValuePair; import org.apache.http.message.BasicNameValuePair; import org.json.JSONException; import org.json.JSONObject; import java.util.ArrayList; import java.util.List; public class NewProductActivity extends Activity < private ProgressDialog pDialog; JSONParser jsonParser = new JSONParser(); EditText inputName; EditText inputPrice; EditText inputDesc; private static String url_create_product = "http://test.devcolibri.com/create_product.php"; private static final String TAG_SUCCESS = "success"; @Override public void onCreate(Bundle savedInstanceState) < super.onCreate(savedInstanceState); setContentView(R.layout.add_product); inputName = (EditText) findViewById(R.id.inputName); inputPrice = (EditText) findViewById(R.id.inputPrice); inputDesc = (EditText) findViewById(R.id.inputDesc); Button btnCreateProduct = (Button) findViewById(R.id.btnCreateProduct); btnCreateProduct.setOnClickListener(new View.OnClickListener() < @Override public void onClick(View view) < new CreateNewProduct().execute(); >>); > /** * Фоновый Async Task создания нового продукта **/ class CreateNewProduct extends AsyncTask < /** * Перед согданием в фоновом потоке показываем прогресс диалог **/ @Override protected void onPreExecute() < super.onPreExecute(); pDialog = new ProgressDialog(NewProductActivity.this); pDialog.setMessage("Создание продукта. "); pDialog.setIndeterminate(false); pDialog.setCancelable(true); pDialog.show(); >/** * Создание продукта **/ protected String doInBackground(String[] args) < String name = inputName.getText().toString(); String price = inputPrice.getText().toString(); String description = inputDesc.getText().toString(); // Заполняем параметры Listparams = new ArrayList(); params.add(new BasicNameValuePair("name", name)); params.add(new BasicNameValuePair("price", price)); params.add(new BasicNameValuePair("description", description)); // получаем JSON объект JSONObject json = jsonParser.makeHttpRequest(url_create_product, "POST", params); Log.d("Create Response", json.toString()); try < int success = json.getInt(TAG_SUCCESS); if (success == 1) < // продукт удачно создан Intent i = new Intent(getApplicationContext(), AllProductsActivity.class); startActivity(i); // закрываем это окно finish(); >> catch (JSONException e) < e.printStackTrace(); >return null; > /** * После оконачния скрываем прогресс диалог **/ protected void onPostExecute(String file_url) < pDialog.dismiss(); >> > Последний EditProductActivity:
package com.devcolibri.androidandmysql; import java.util.ArrayList; import java.util.List; import com.devcolibri.parser.JSONParser; import org.apache.http.NameValuePair; import org.apache.http.message.BasicNameValuePair; import org.json.JSONArray; import org.json.JSONException; import org.json.JSONObject; import android.app.Activity; import android.app.ProgressDialog; import android.content.Intent; import android.os.AsyncTask; import android.os.Bundle; import android.util.Log; import android.view.View; import android.widget.Button; import android.widget.EditText; public class EditProductActivity extends Activity < EditText txtName; EditText txtPrice; EditText txtDesc; Button btnSave; Button btnDelete; String pid; private ProgressDialog pDialog; JSONParser jsonParser = new JSONParser(); // url для получения одного продукта private static final String url_product_detials = "http://test.devcolibri.com/get_product_details.php"; // url для обновления продукта private static final String url_update_product = "http://test.devcolibri.com/update_product.php"; // url для удаления продукта private static final String url_delete_product = "http://test.devcolibri.com/delete_product.php"; // JSON параметры private static final String TAG_SUCCESS = "success"; private static final String TAG_PRODUCT = "product"; private static final String TAG_PID = "pid"; private static final String TAG_NAME = "name"; private static final String TAG_PRICE = "price"; private static final String TAG_DESCRIPTION = "description"; @Override public void onCreate(Bundle savedInstanceState) < super.onCreate(savedInstanceState); setContentView(R.layout.edit_product); btnSave = (Button) findViewById(R.id.btnSave); btnDelete = (Button) findViewById(R.id.btnDelete); // показываем форму про детальную информацию о продукте Intent i = getIntent(); // получаем id продукта (pid) с формы pid = i.getStringExtra(TAG_PID); // Получение полной информации о продукте в фоновом потоке new GetProductDetails().execute(); // обрабочик на кнопку сохранение продукта btnSave.setOnClickListener(new View.OnClickListener() < @Override public void onClick(View arg0) < // запускаем выполнение задачи на обновление продукта new SaveProductDetails().execute(); >>); // обработчик на кнопку удаление продукта btnDelete.setOnClickListener(new View.OnClickListener() < @Override public void onClick(View arg0) < // удалем продукт в фоновом потоке new DeleteProduct().execute(); >>); > /** * Фоновая асинхронная задача для получения полной информации о продукте **/ class GetProductDetails extends AsyncTask < /** * Перед началом показать в фоновом потоке прогресс диалог **/ @Override protected void onPreExecute() < super.onPreExecute(); pDialog = new ProgressDialog(EditProductActivity.this); pDialog.setMessage("Loading product details. Please wait. "); pDialog.setIndeterminate(false); pDialog.setCancelable(true); pDialog.show(); >/** * Получение детальной информации о продукте в фоновом режиме **/ protected String doInBackground(String[] params) < // обновляем UI форму runOnUiThread(new Runnable() < public void run() < // проверяем статус success тега int success; try < // Список параметров Listparams = new ArrayList(); params.add(new BasicNameValuePair("pid", pid)); // получаем продукт по HTTP запросу JSONObject json = jsonParser.makeHttpRequest(url_product_detials, "GET", params); Log.d("Single Product Details", json.toString()); success = json.getInt(TAG_SUCCESS); if (success == 1) < // Успешно получинна детальная информация о продукте JSONArray productObj = json.getJSONArray(TAG_PRODUCT); // получаем первый обьект с JSON Array JSONObject product = productObj.getJSONObject(0); // продукт с pid найден // Edit Text txtName = (EditText) findViewById(R.id.inputName); txtPrice = (EditText) findViewById(R.id.inputPrice); txtDesc = (EditText) findViewById(R.id.inputDesc); // покаываем данные о продукте в EditText txtName.setText(product.getString(TAG_NAME)); txtPrice.setText(product.getString(TAG_PRICE)); txtDesc.setText(product.getString(TAG_DESCRIPTION)); >else < // продукт с pid не найден >> catch (JSONException e) < e.printStackTrace(); >> >); return null; > /** * После завершения фоновой задачи закрываем диалог прогресс **/ protected void onPostExecute(String file_url) < // закрываем диалог прогресс pDialog.dismiss(); >> /** * В фоновом режиме выполняем асинхроную задачу на сохранение продукта **/ class SaveProductDetails extends AsyncTask < /** * Перед началом показываем в фоновом потоке прогрксс диалог **/ @Override protected void onPreExecute() < super.onPreExecute(); pDialog = new ProgressDialog(EditProductActivity.this); pDialog.setMessage("Saving product . "); pDialog.setIndeterminate(false); pDialog.setCancelable(true); pDialog.show(); >/** * Сохраняем продукт **/ protected String doInBackground(String[] args) < // получаем обновленные данные с EditTexts String name = txtName.getText().toString(); String price = txtPrice.getText().toString(); String description = txtDesc.getText().toString(); // формируем параметры Listparams = new ArrayList(); params.add(new BasicNameValuePair(TAG_PID, pid)); params.add(new BasicNameValuePair(TAG_NAME, name)); params.add(new BasicNameValuePair(TAG_PRICE, price)); params.add(new BasicNameValuePair(TAG_DESCRIPTION, description)); // отправляем измененные данные через http запрос JSONObject json = jsonParser.makeHttpRequest(url_update_product, "POST", params); // проверяем json success тег try < int success = json.getInt(TAG_SUCCESS); if (success == 1) < // продукт удачно обнавлён Intent i = getIntent(); // отправляем результирующий код 100 чтобы сообщить об обновлении продукта setResult(100, i); finish(); >else < // продукт не обновлен >> catch (JSONException e) < e.printStackTrace(); >return null; > /** * После окончания закрываем прогресс диалог **/ protected void onPostExecute(String file_url) < // закрываем прогресс диалог pDialog.dismiss(); >> /** * Фоновая асинхронная задача на удаление продукта **/ class DeleteProduct extends AsyncTask < /** * На начале показываем прогресс диалог **/ @Override protected void onPreExecute() < super.onPreExecute(); pDialog = new ProgressDialog(EditProductActivity.this); pDialog.setMessage("уДАЛЕМ ПРОДУКТ. "); pDialog.setIndeterminate(false); pDialog.setCancelable(true); pDialog.show(); >/** * Удаление продукта **/ protected String doInBackground(String[] args) < int success; try < Listparams = new ArrayList(); params.add(new BasicNameValuePair("pid", pid)); // получение продукта используя HTTP запрос JSONObject json = jsonParser.makeHttpRequest(url_delete_product, "POST", params); Log.d("Delete Product", json.toString()); success = json.getInt(TAG_SUCCESS); if (success == 1) < // Продукт удачно удален Intent i = getIntent(); // отправляем результирующий код 100 для уведомления об удалении продукта setResult(100, i); finish(); >> catch (JSONException e) < e.printStackTrace(); >return null; > /** * После оконачния скрываем прогресс диалог **/ protected void onPostExecute(String file_url) < pDialog.dismiss(); >> > Шаг 5. Добавим название некоторых кнопок
Давайте теперь добавим название кнопок главного Activity в string.xml:
AndroidAndMySQL View Products Add New Products
Шаг 6. Добавим нужные библиотеки
После того как вы сделаете все что описано выше вы увидите, что фрагменты кода которые работают с JSON не определяются, правильно ведь мы еще не добавили нужную библиотеку json.jar его вы найдете вы прикрепленном исходнике к этому посту.
Давайте добавим эту библиотеку к нашему проекту.
Для начало скиньте её в корень проекта папку libs/json-20090211.jar.
После в Intellij IDEA зайдите в Project Structure:

После того как вы добавите библиотеку нажмите Ok.
Шаг 7. Запускаем.
Теперь смотри, что же получилось.
Android Connect MySQL Database Programmatically
You can always name your Package and Application name according to your requirements.
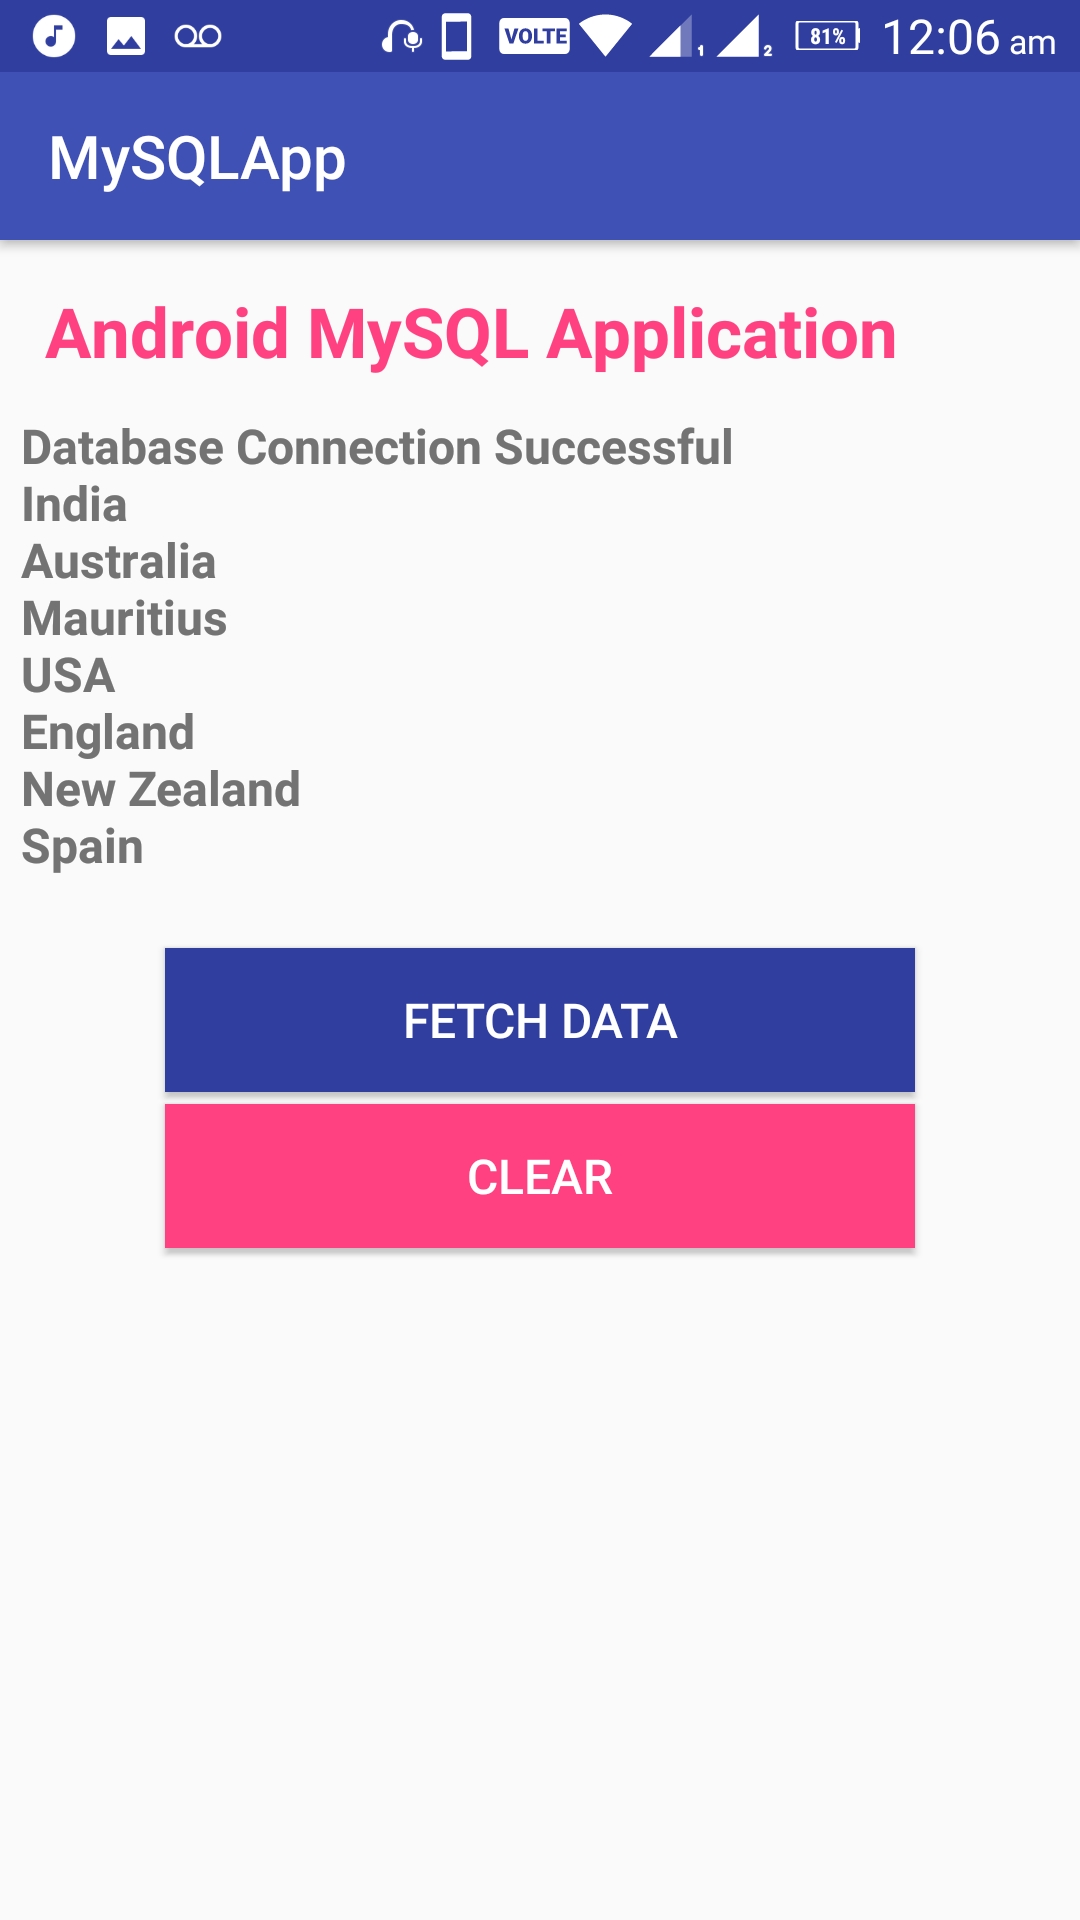
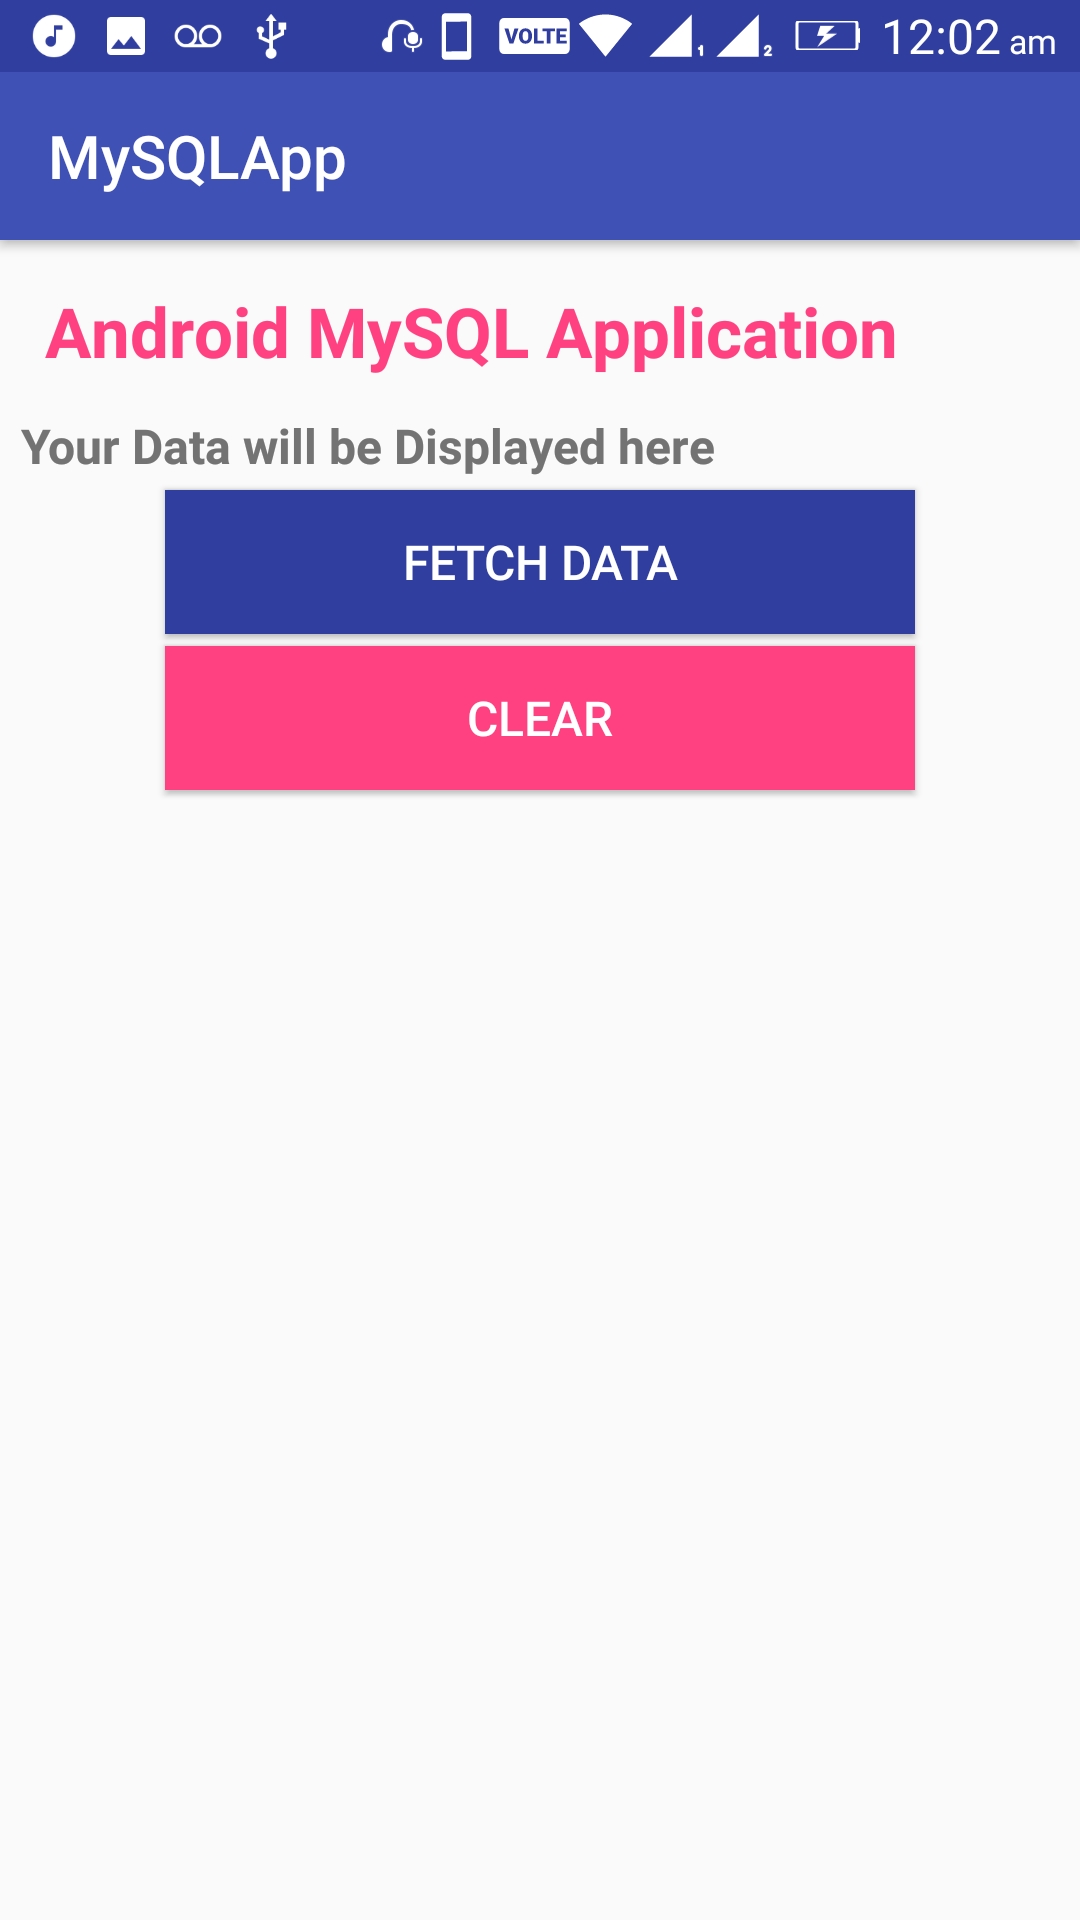
Application Working :
Application will first try to connect with the MySQL Database and on successful Database connection, android application will display data from a table on a Android TextView. It will connect via IP address of the Database with a correct Database Credentials.
Download Source code.
MySQL Database Script :
create schema myDB use myDB create table tblCountries ( ID int NOT NULL AUTO_INCREMENT primary key, Country varchar(255) NOT NULL ) Insert into tblCountries (Country) values ('India') Insert into tblCountries (Country) values ('Australia') Insert into tblCountries (Country) values ('Mauritius') Insert into tblCountries (Country) values ('USA') Insert into tblCountries (Country) values ('England') Insert into tblCountries (Country) values ('New Zealand') Insert into tblCountries (Country) values ('Spain') Select * from tblCountries select distinct Country from tblCountries Now, open your activity_main.xml file and edit it as below :
activity_main.xml:
The layout contains a Android TextView to show our Table data from MySQL Database and two buttons, one for connecting to Database and other for clearing the TextView content.
MainActivity.java:
Declare this variables in your Java class
private static final String url = "jdbc:mysql://192.168.0.192:3306/myDB"; private static final String user = "hitesh"; private static final String pass = "1234"; Button btnFetch,btnClear; TextView txtData;
And initialize them onCreate method :
txtData = (TextView) this.findViewById(R.id.txtData); btnFetch = (Button) findViewById(R.id.btnFetch); btnClear = (Button) findViewById(R.id.btnClear);
url,user,pass must be valid and correct credentials of your mySql database for a successful Android-MySQL Connection.
192.168.0.192 is my Laptop’s IP Address and 3306 is my Port number to connect on.
Make an Android ASyncTask. This will accept the command and try to connect with your Database and on successful connection with MySQL assign a String variable with the table data.
private class ConnectMySql extends AsyncTask < String res = ""; @Override protected void onPreExecute() < super.onPreExecute(); Toast.makeText(MainActivity.this, "Please wait. ", Toast.LENGTH_SHORT) .show(); >@Override protected String doInBackground(String. params) < try < Class.forName("com.mysql.jdbc.Driver"); Connection con = DriverManager.getConnection(url, user, pass); System.out.println("Databaseection success"); String result = "Database Connection Successful\n"; Statement st = con.createStatement(); ResultSet rs = st.executeQuery("select distinct Country from tblCountries"); ResultSetMetaData rsmd = rs.getMetaData(); while (rs.next()) < result += rs.getString(1).toString() + "\n"; >res = result; > catch (Exception e) < e.printStackTrace(); res = e.toString(); >return res; > @Override protected void onPostExecute(String result) < txtData.setText(result); >> Full Code of MainActivity.java file
MainActivity.java:
package parallelcodes.mysqlapp; import android.os.AsyncTask; import android.os.Bundle; import android.support.v7.app.AppCompatActivity; import android.view.View; import android.widget.Button; import android.widget.TextView; import android.widget.Toast; import java.sql.Connection; import java.sql.DriverManager; import java.sql.ResultSet; import java.sql.ResultSetMetaData; import java.sql.Statement; public class MainActivity extends AppCompatActivity < private static final String url = "jdbc:mysql://192.168.0.192:3306/myDB"; private static final String user = "hitesh"; private static final String pass = "1234"; Button btnFetch,btnClear; TextView txtData; @Override protected void onCreate(Bundle savedInstanceState) < super.onCreate(savedInstanceState); setContentView(R.layout.activity_main); txtData = (TextView) this.findViewById(R.id.txtData); btnFetch = (Button) findViewById(R.id.btnFetch); btnClear = (Button) findViewById(R.id.btnClear); btnFetch.setOnClickListener(new View.OnClickListener() < @Override public void onClick(View v) < // TODO Auto-generated method stub ConnectMySql connectMySql = new ConnectMySql(); connectMySql.execute(""); >>); btnClear.setOnClickListener(new View.OnClickListener() < @Override public void onClick(View view) < txtData.setText(""); >>); > private class ConnectMySql extends AsyncTask < String res = ""; @Override protected void onPreExecute() < super.onPreExecute(); Toast.makeText(MainActivity.this, "Please wait. ", Toast.LENGTH_SHORT) .show(); >@Override protected String doInBackground(String. params) < try < Class.forName("com.mysql.jdbc.Driver"); Connection con = DriverManager.getConnection(url, user, pass); System.out.println("Databaseection success"); String result = "Database Connection Successful\n"; Statement st = con.createStatement(); ResultSet rs = st.executeQuery("select distinct Country from tblCountries"); ResultSetMetaData rsmd = rs.getMetaData(); while (rs.next()) < result += rs.getString(1).toString() + "\n"; >res = result; > catch (Exception e) < e.printStackTrace(); res = e.toString(); >return res; > @Override protected void onPostExecute(String result) < txtData.setText(result); >> > And now run your application. On Pressing on the “Fetch Data” button it will fetch Data from MySQL Database table.

Note : If you are on personal Laptop or PC with WiFi router connected to it and your Android Device connected to the same router, it will work, i.e. It must be same network to work in. If your Database is out your Device’s network, it will not work. Also, if you are using Cellular Data network, your Database must be on Internet and it should be able to be connected remotely.