Create a Database Android Application in Android Studio 3.0
Join the DZone community and get the full member experience.
Background
SQLite
SQLite is a relational database management system (RDBMS). If most RDBMSs such as MySQL, Oracle, etc. are standalone server processes, then SQLite is embedded because it is provided in the form of a library that is linked in applications.
Like other RDBMSs, data is accessed in a SQLite database by using Structured Query Language (SQL).
Android SQLite Java Classes
Cursor: a class provides access to the results of a database query. Its methods include:
- close(): release all resources used by cursor and close it.
- getCount(): returns the number of rows contained within the result set.
- moveToFirst(): moves to the first row in the result set.
- moveToLast(): moves to the last row in the result set.
- moveToNext(): moves to the next row in the result set.
- move(): moves by a specified offset from the current position in the result set.
- get() (such as getInt(), getDouble(), so on): returns the value of the specified contained at the specified column index of the row at the current cursor position.
SQLiteDatabase provides the primary interface between the application code and underlying SQLite database. Its methods include:
- insert(): inserts a new row into a database table.
- delete(): deletes rows from a database table
- query(): performs a specified database query and returns matching results via a Cursor object.
- execSQL(): executes a single SQL Statement that does not return result data.
- rawQuery(): executes an SQL query statement and returns matching results in the form of a Cursor object.
SQLiteOpenHelper is designed to make it easier to create and update databases. Its methods include:
- onCreate(): called when the database is created for the first time.
- onUpgrade(): called in the event that the application code contains a more recent database version number reference.
- onOpen(): called when the database is opened.
- getWritableDatabase(): opens or creates a database for reading and writing.
- getReadableDatabase(): creates or opens a database for reading only.
- close(): closes the database.
ContentValues allows key/value pairs to be declared consisting of table column identifiers and the values to be stored in each column. Its methods include:
Create a Database Android Application
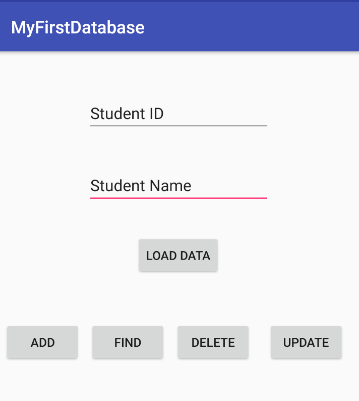
We will create a database Android application that has a UI as follows:


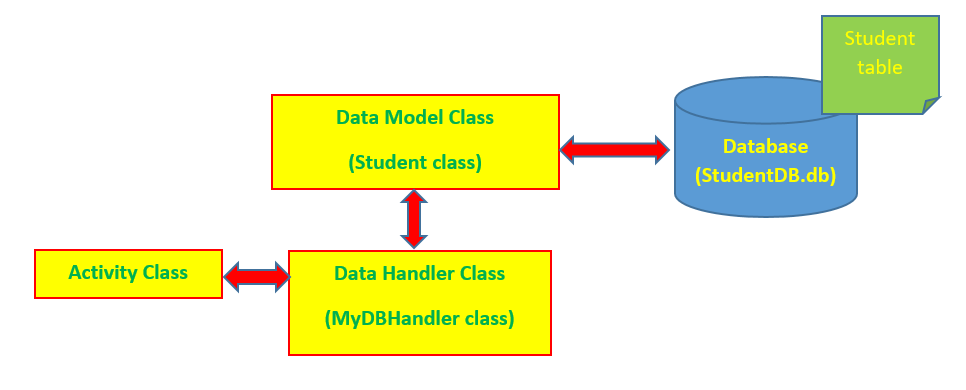
The application will consist of an activity and a database handler class (MyDBHandler class). The database handler will be a subclass of SQLiteOpenHelper and will provide an abstract layer between the underlying SQLite database and the activity class. A third class (Student class) will need to be implemented to hold the database entry data as it is passed between the activity and the handler. My application model can be shown in the following figure:
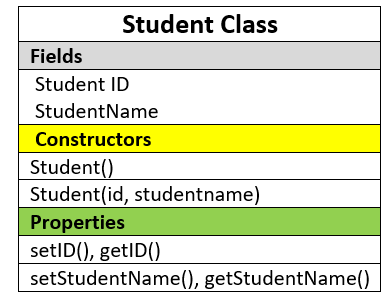
Data Model Class
The Student class contains fields, constructors, and properties as follows:
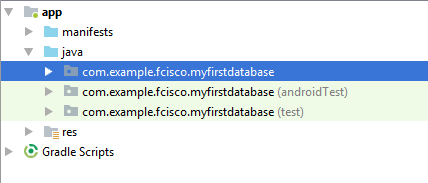
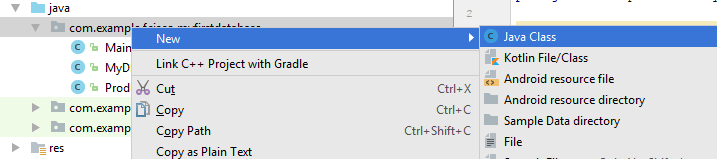
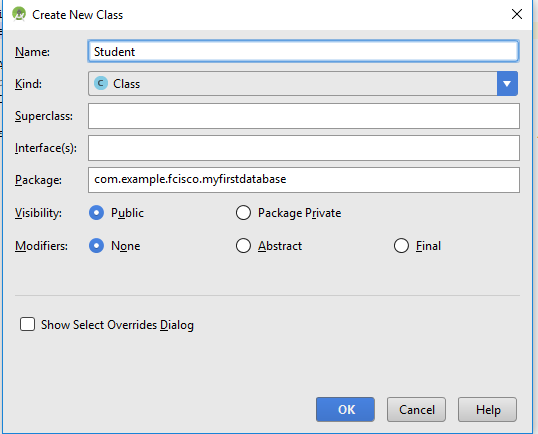
Right-click the myfirstdatabase package and selecting New > Java Class.
Type Student in the Name item, maintain the default options, and click the OK button:
Adding the following lines of code for the Student class:
public class Student < // fields private int studentID; private String studentName; // constructors public Student() <>public Student(int id, String studentname) < this.studentID = id; this.studentName = studentname; >// properties public void setID(int id) < this.studentID = id; >public int getID() < return this.studentID; >public void setStudentName(String studentname) < this.studentName = studentname; >public String getStudentName() < return this.studentName; >>Data Handler Class
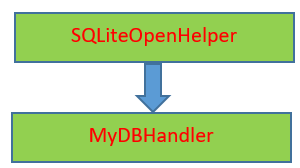
The database handler class is a subclass of SQLiteOpenHelper class, named MyDBHandler, as in the following figure:
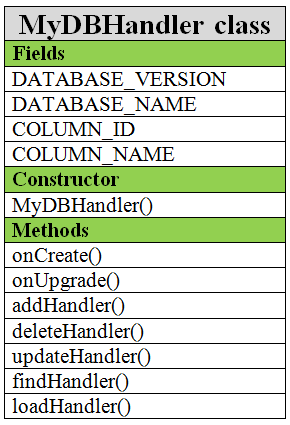
Steps for creating the MyDBHandler class like the Student class and its code can look like this:
public class MyDBHandler extends SQLiteOpenHelper < //information of database private static final int DATABASE_VERSION = 1; private static final String DATABASE_NAME = "studentDB.db"; public static final String TABLE_NAME = "Student"; public static final String COLUMN_ID = "StudentID"; public static final String COLUMN_NAME = "StudentName"; //initialize the database public MyDBHandler(Context context, Stringname, SQLiteDatabase.CursorFactoryfactory, intversion) < super(context, DATABASE_NAME, factory, DATABASE_VERSION); >@Override public void onCreate(SQLiteDatabase db) <> @Override public void onUpgrade(SQLiteDatabase db, int i, int i1) <> public String loadHandler() <> public void addHandler(Student student) <> public Student findHandler(String studentname) <> public boolean deleteHandler(int ID) <> public boolean updateHandler(int ID, String name) <> >We must also use import statements, as follows:
import android.database.sqlite.SQLiteDatabase; import android.database.sqlite.SQLiteOpenHelper; import android.content.Context; import android.content.ContentValues; import android.database.Cursor;Initialize the Database
The database can be initialized in the constructor of the MyDBHandler class. The code of this constructor looks like this:
public MyDBHandler(Context context, Stringname, SQLiteDatabase.CursorFactoryfactory, intversion)
Create the Student Table
The SQL statement creates a table:
CREATE TABLE table_name( column1 datatype, column2 datatype, column3 datatype, . );We need to convert the SQL statement to a string and implement it by using the execSQL() method of a SQLiteDatabase object. All of these statements will be put inside the onCreate method of the handler class, as follows:
public void onCreate(SQLiteDatabase db)
Our application can load all of the students from the database, add a new student to the database, remove a student from the database, find a student from the database and modify the information of a student from the database. Therefore, we need to add corresponding methods to the handler class.
To load data, we use a SQL query statement:
The result of above SQL statement is a table. We use the rawQuery() method of a SQLiteDatabase object to implement SQL statement and display result via a Cursor object. The following code will demonstrate the loadHandler method:
public String loadHandler() < String result = ""; String query = "Select*FROM" + TABLE_NAME; SQLiteDatabase db = this.getWritableDatabase(); Cursor cursor = db.rawQuery(query, null); while (cursor.moveToNext()) < int result_0 = cursor.getInt(0); String result_1 = cursor.getString(1); result += String.valueOf(result_0) + " " + result_1 + System.getProperty("line.separator"); >cursor.close(); db.close(); return result; >Add a New Record
To add a new record to the database, we must use the ContentValues object with the put() method that is used to assign data to ContentsValues object and then use insert() method of SQLiteDatabase object to insert data to the database. The addHandler method can look like this:
public void addHandler(Student student)
Find Information by Condition
To find information in the database by condition, we must use the SQL query statement as follows:
SELECT * FROM table_name WHERE column_name;In the next step, we save the result that is returned from implementation of the rawQuery() method of the SQLiteDatabase object into a Cursor object and find the matching result in this object. The code of the findHandler method looks like this:
public Student findHandler(Stringstudentname) < Stringquery = "Select * FROM " + TABLE_NAME + "WHERE" + COLUMN_NAME + " = " + "'" + studentname + "'"; SQLiteDatabase db = this.getWritableDatabase(); Cursor cursor = db.rawQuery(query, null); Student student = new Student(); if (cursor.moveToFirst()) < cursor.moveToFirst(); student.setID(Integer.parseInt(cursor.getString(0))); student.setStudentName(cursor.getString(1)); cursor.close(); >else < student = null; >db.close(); return student; >Delete a Record by Condition
To delete a record by condition, we must use a SQL query statement, as follows:
SELECT * FROM table_name WHERE column_name;We will save the result that is returned from the implementation of the rawQuery() method of the SQLiteDatabase object into a Cursor object and find the matching result in this object. In the final step, we use the delete() method of the SQLiteDatabase object to delete the record. The code of the deleteHandler method looks like:
public boolean deleteHandler(int ID) < booleanresult = false; Stringquery = "Select*FROM" + TABLE_NAME + "WHERE" + COLUMN_ID + "= '" + String.valueOf(ID) + "'"; SQLiteDatabase db = this.getWritableDatabase(); Cursor cursor = db.rawQuery(query, null); Student student = new Student(); if (cursor.moveToFirst()) < student.setID(Integer.parseInt(cursor.getString(0))); db.delete(TABLE_NAME, COLUMN_ID + "=?", newString[] < String.valueOf(student.getID()) >); cursor.close(); result = true; > db.close(); return result; >Update Information of a Record
To update the information of a record, we can use the ContentValues object and the update() method of the SQLiteDatabase object. Use the updateHandler() method as follows:
public boolean updateHandler(int ID, String name) < SQLiteDatabase db = this.getWritableDatabase(); ContentValues args = new ContentValues(); args.put(COLUMN_ID, ID); args.put(COLUMN_NAME, name); return db.update(TABLE_NAME, args, COLUMN_ID + " Image title" width="606" data-src="https://dz2cdn1.dzone.com/storage/temp/7408380-10.png">
Controls used in above UI include:
Controls
text atrribute
id attribute
EditText
Student ID
studentid
EditText
Student Name
studentname
Button
LOAD DATA
btnload
Button
ADD
btnadd
Button
FIND
btnfind
Button
DELETE
btndelete
Button
UPDATE
btnupdate
TextView
lst
The code for the click event of the buttons and results is as follows:
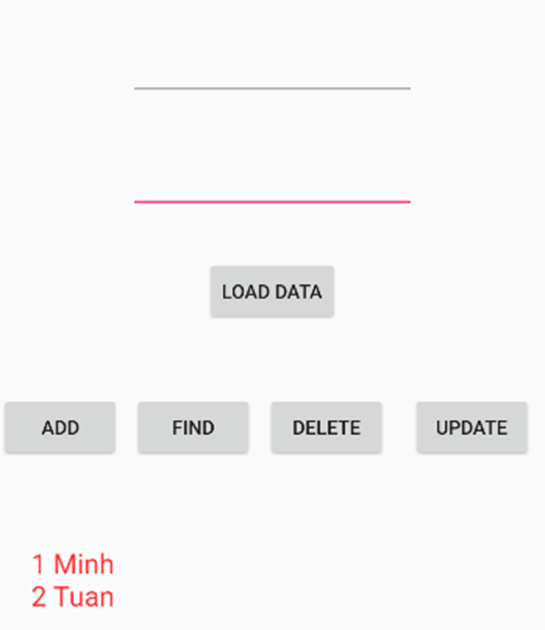
Code for the LOAD DATA button:
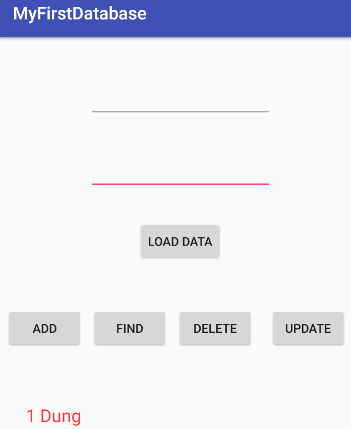
public void loadStudents(View view)The result looks like this:
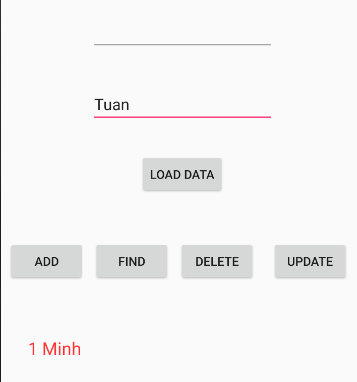
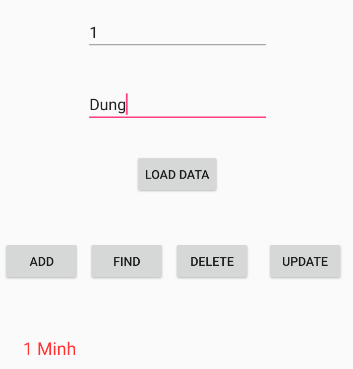
public void addStudent(View view)public void findStudent(View view) < MyDBHandler dbHandler = new MyDBHandler(this, null, null, 1); Studentstudent = dbHandler.findHandler(studentname.getText().toString()); if (student != null) < lst.setText(String.valueOf(student.getID()) + " " + student.getStudentName() + System.getProperty("line.separator")); studentid.setText(""); studentname.setText(""); >else < lst.setText("No Match Found"); studentid.setText(""); studentname.setText(""); >>The result looks like this:
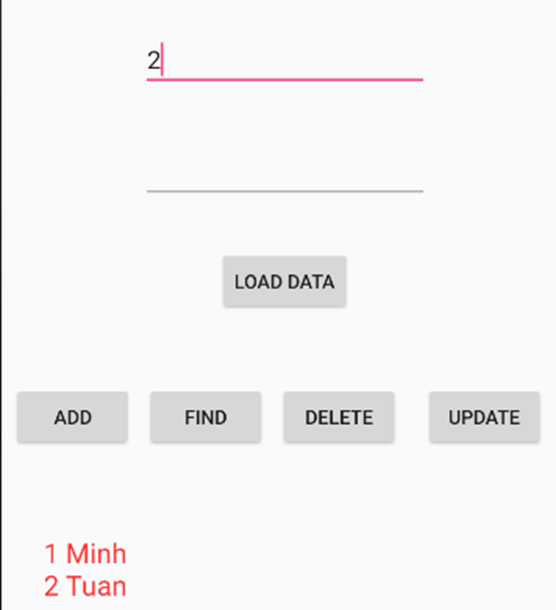
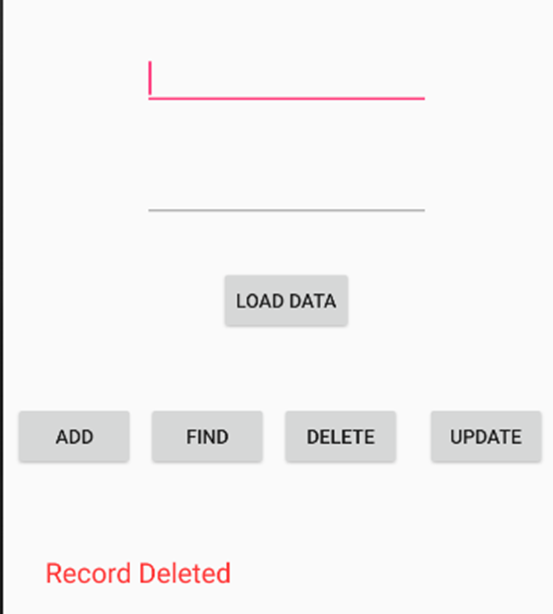
public void removeStudent(View view) < MyDBHandler dbHandler = new MyDBHandler(this, null, null, 1); boolean result = dbHandler.deleteHandler(Integer.parseInt( studentid.getText().toString())); if (result) < studentid.setText(""); studentname.setText(""); lst.setText("Record Deleted"); >else studentid.setText("No Match Found"); >The result looks like this:
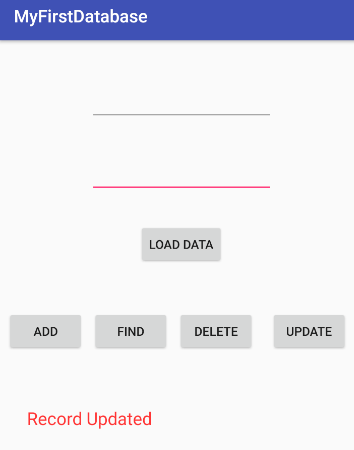
public void updateStudent(View view) < MyDBHandler dbHandler = new MyDBHandler(this, null, null, 1); boolean result = dbHandler.updateHandler(Integer.parseInt( studentid.getText().toString()), studentname.getText().toString()); if (result) < studentid.setText(""); studentname.setText(""); lst.setText("Record Updated"); >else studentid.setText("No Match Found"); >The result looks like this:
In this article, I have introduced how to create a simple database Android application in Android Studio 3.0. I hope that this article is useful for beginners who are learning Android programming.
Opinions expressed by DZone contributors are their own.